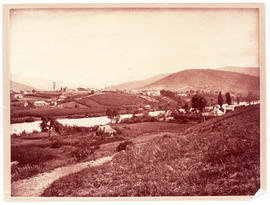
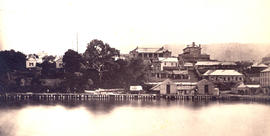
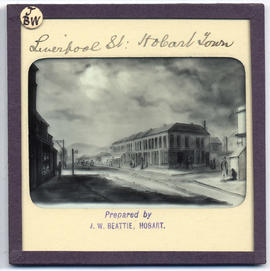
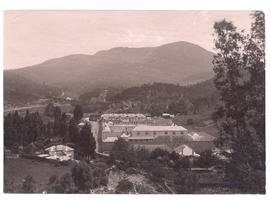
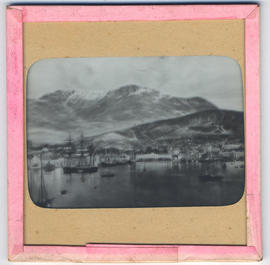
Photograph of New Norfolk, Tasmania, c. 1880 from the opposite side of the River Derwent. The photographer was Alfred Winter who had studios in Bathurst, Elizabeth and Liverpool Streets from 1869 until 1891.
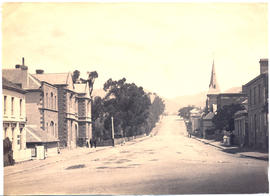
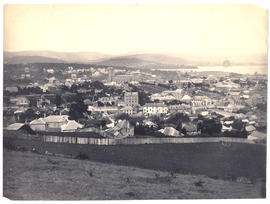
Photograph of Hobart Town, Tasmania, from the Queen's Domain, looking down Macquarie Street in the 1850s. This photograph appears on page 27 of Allan Sierp's 'Colonial Life in Tasmania: Fifty Years of Photography 1855-1905' (Rigby, 1976)
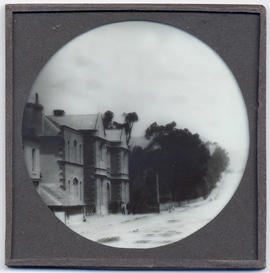
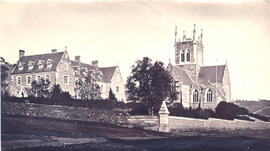
Photograph from New Town Invalid Asylum, Tasmania in about 1882. The photographer was Henry Hall Baily who had studios in Elizabeth and Liverpool Streets, Hobart from 1865 until 1918.
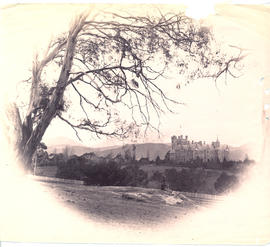
Photograph from the collection of James Backhouse Walker of a view of Mt. Wellington from the foot of St. George's Hill in about 1870. The view is from the corner of Albeura St and Sandy Bay Rd. The photographer's name, Woolley, is recorded in a note on the reverse and presumably refers to Charles Alfred.
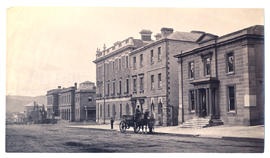
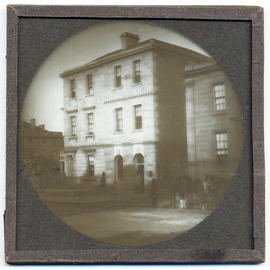
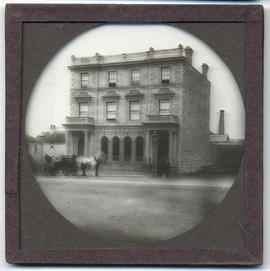
Photograph of the Tasmanian Club formally the Derwent Bank, and Walch's building with a landau outside. The Tasmanian Club is a Georgian style building designed by architect James Alexander Thomson and built in 1846 for banker and merchant Captain Charles Swanston as the Derwent Bank. After the depression of the 1840's the Bank went into liquidation and the building was bought by the Tasmania Club in April 1873 and is still their residence today. The Tasmanian Club was established in 1861 in Hobart by seventy gentlemen. It was founded on the 'London pattern', that is, election or exclusion of candidates by ballot. The photographers are Anson Brothers whose firm was located in Liverpool, Collins and Elizabeth Streets between 1878 and 1891.
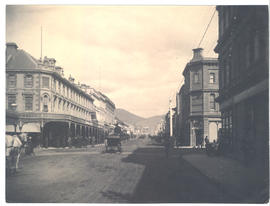
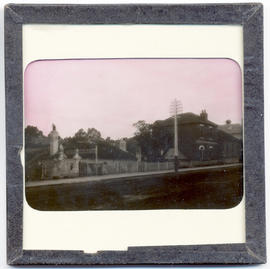
Photograph of Liverpool Street Hobart taken from just before the Elizabeth Street intersection around the turn of the century with horse drawn carriages in the foreground. The date is assumed from the presence of electric power poles which were introduced in 1898.
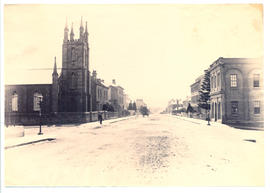
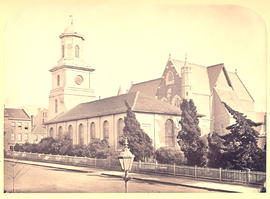
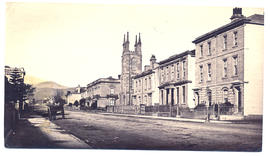
Photograph of St. John's Street, Launceston with St. John's Anglican Church and Chalmers Free Presbyterian Church on opposite sides of the street. The photographer was William Cawston who had studios in Paterson and St. John Streets, Launceston from 1863-1891.
Lantern slide of funeral notice of Lieutenant Governor David Collins, 1810. From The Derwent Star, and Van Diemen’s Land Intelligencer no. 7, Tuesday April 3rd 1810. Prepared by J.W. Beattie (1859-1930) whose studio locations were Elizabeth Street, Hobart from 1891-1920, Murray Street from 1921-40 and Cat and Fiddle until 1994.
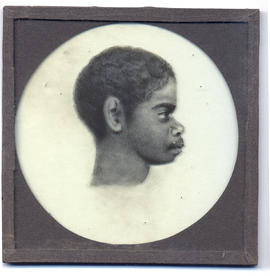
Lantern slide of Tasmanian aboriginal profile. Prepared by J.W. Beattie (1859-1930) whose studio locations were Elizabeth Street, Hobart from 1891-1920, Murray Street from 1921-40 and Cat and Fiddle until 1994.
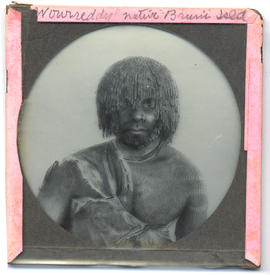
Lantern slide of Tasmanian aboriginal man Woureddy, native of Bruni[Bruny]Island. Prepared by J.W. Beattie (1859-1930) whose studio locations were Elizabeth Street, Hobart from 1891-1920, Murray Street from 1921-40 and Cat and Fiddle until 1994.
Lantern slide of Tasmanian aboriginal man Timmy, native of the East Coast. Prepared by J.W. Beattie (1859-1930) whose studio locations were Elizabeth Street, Hobart from 1891-1920, Murray Street from 1921-40 and Cat and Fiddle until 1994.
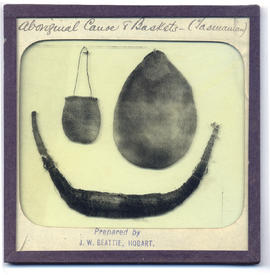
Lantern slide of Tasmanian aboriginal canoe and baskets. Prepared by J.W. Beattie (1859-1930) whose studio locations were Elizabeth Street, Hobart from 1891-1920, Murray Street from 1921-40 and Cat and Fiddle until 1994.
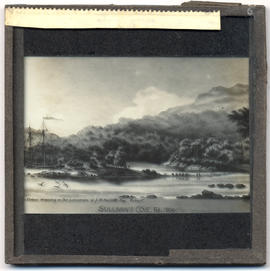
Lantern slide of Sullivans Cove, Hobart Town, Van Diemen's Land, in February, 1804. Inscribed with the words 'Water colour drawing in the possession of J. B. Walker Esq., Hobart, 1891'.
Lantern slide from the collection of James Backhouse Walker of Stonemason's house, Hobart, Tasmania. Thought to have been prepared by J.W. Beattie (1859-1930) whose studio locations were in Elizabeth Street, Hobart from 1891-1920, Murray Street from 1921-40 and Cat and Fiddle Arcade, Hobart, until 1994.
Lantern slide from the collection of James Backhouse Walker of St. David's Park, Davey Street, Hobart, Tasmania. Thought to have been prepared by J.W. Beattie (1859-1930) whose studio locations were in Elizabeth Street, Hobart from 1891-1920, Murray Street from 1921-40 and Cat and Fiddle Arcade, Hobart, until 1994. Quaker Collection.
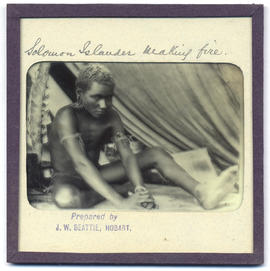
Lantern slide of Solomon Islander making fire. Prepared by J.W. Beattie (1859-1930) whose studio locations were Elizabeth Street, Hobart from 1891-1920, Murray Street from 1921-40 and Cat and Fiddle until 1994.
Lantern slide from the collection of James Backhouse Walker of Salamanca from the Wharf, Hobart Town, Van Diemen's Land 1847. Prepared by J.W. Beattie (1859-1930) whose studio locations were in Elizabeth Street, Hobart from 1891-1920, Murray Street from 1921-40 and Cat and Fiddle Arcade, Hobart, until 1994. Quaker Collection.
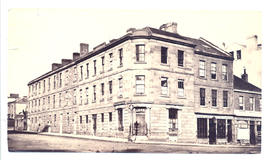
Photograph of Waterloo House on the corner of Murray and Davey Streets, Hobart, Tasmania in 1880. The photographers were Anson Brothers whose firm was located in Liverpool, Collins and Elizabeth Streets between 1878 and 1891.
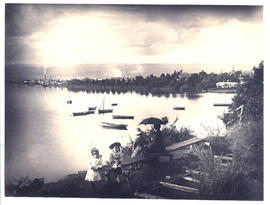
Photograph of a family on the banks of the Tamar River, Launceston. The photographer was William Cawston who had studios in Paterson and St. John Streets, Launceston from 1863-1891.
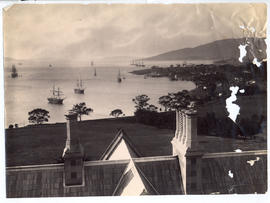
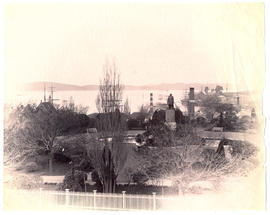
Photograph of ships on the Derwent River taken from the roof of Government House, Hobart, Tasmania in 1882. The photographer was Henry Hall Baily who had studios in Elizabeth and Liverpool Streets, Hobart from 1865 until 1918.
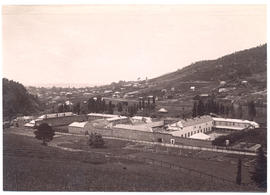
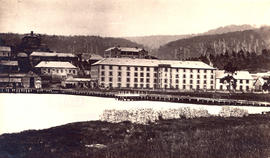
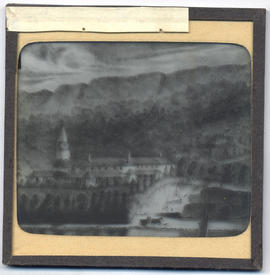
Photograph of the Cascades' Female Factory looking down the South Hobart Valley toward the Derwent River. Showing yards and gardens. In 1828 a Female Factory opened on the outskirts of Hobart at Cascades. It became the colony's largest Factory, expanding by 1853 into five major courtyards accommodating 1000 women and 175 children. The photographer was J.W. Beattie (1859-1930) whose studios were in Elizabeth and Murray Streets between 1891 and 1940
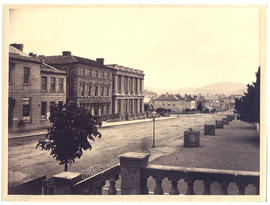
Photograph of Macquarie Street, Hobart looking east towards Elizabeth Street from the Civil Court in about 1880. The photographer was Alfred Winter who had studios in Bathurst, Elizabeth and Liverpool Streets from 1869 until 1880.
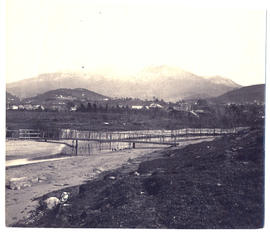
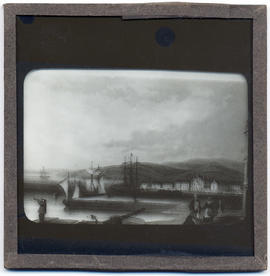
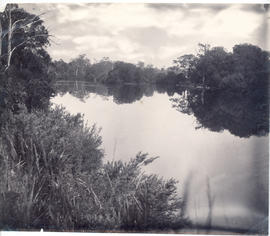
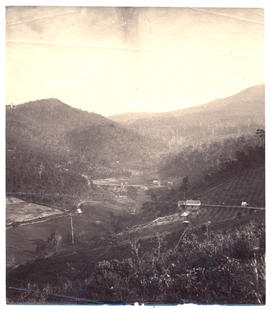
Photograph of the Derwent River above New Norfolk, Tasmania, 1882. The photographer was Henry Hall Baily who had studios in Elizabeth and Liverpool Streets, Hobart from 1865 until 1918.
Photograph of the commandant's house and jetties, Port Arthur c. 1880. The photographers are Anson Brothers., Portrait and Landscape Photographers, Hobart Town whose firm was located in Liverpool, Collins and Elizabeth Streets between 1878 and 1891.
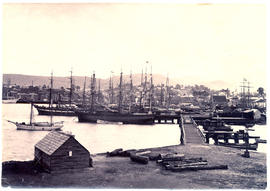
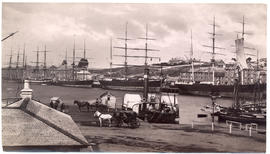
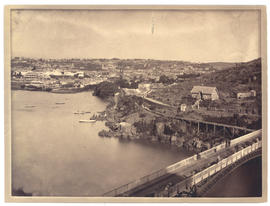
Photograph from the collection of James Backhouse Walker of the Hobart waterfront taken in about 1870 with a view of ships moored next to the Salamanca warehouses. The photographer is Henry Hall Baily who had studios in Elizabeth and Liverpool Streets, Hobart, from 1865 until 1918.
Photograph of Pressland House, formerly J.P. Cowle's School, in 1881. (from notes by J. B. Walker on back of photograph) The building has a sign on the front which reads 'These premises for sale'. (see detail). During the 1840s Pressland House was the home of Mr Cowle's 'Hobart Town Classical and Commercial Academy'. (Craig, Clifford 'More old Tasmanian Prints', Launceston, Foot and Playsted, 1984 p.312). Photographer: A. Winter, Hobart Town - embossed on bottom left corner of photograph - (Alfred Winter had a photographic studio in Bathurst Street, Hobart from 1869-1891).
Photograph of Liverpool Street Hobart at the intersection of Elizabeth Street. Show gas lighting taken about 1870. The photographer is Alfred Winter who had studios in Bathurst, Elizabeth and Liverpool Streets from 1869 until 1891.
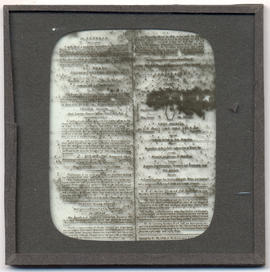
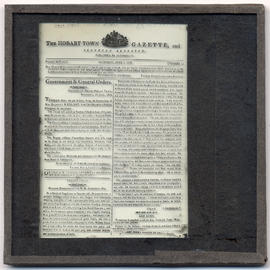
Lantern slide of front page of the Hobart Town Gazette, June 1816. Prepared by J.W. Beattie (1859-1930) whose studio locations were Elizabeth Street, Hobart from 1891-1920, Murray Street from 1921-40 and Cat and Fiddle until 1994.
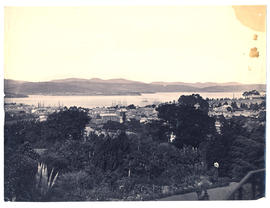
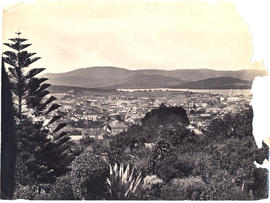
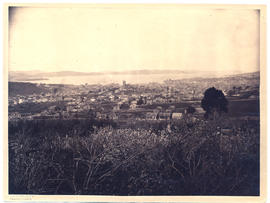
Photograph from the collection of James Backhouse Walker of a view of Hobart looking towards the Eastern Shore. The panorama has been taken from Mr. Roberts' garden with various shrubs and a Norfolk Island pine in the foreground. Henry Hall Baily is the photographer. He had studios in Elizabeth and Liverpool Streets Hobart from 1865 until 1918.
Photograph from the collection of James Backhouse Walker of a view of Hobart looking towards the Eastern Shore. The panorama has been taken from Mr. Roberts' garden with various shrubs and a Norfolk Island pine in the foreground. Henry Hall Baily is the photographer. He had studios in Elizabeth and Liverpool Streets Hobart from 1865 until 1918.
Lantern slide of Parliament House, Hobart. Prepared by J.W. Beattie (1859-1930) whose studio locations were Elizabeth Street, Hobart from 1891-1920, Murray Street from 1921-40 and Cat and Fiddle until 1994.
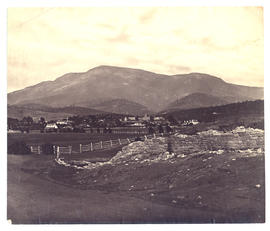
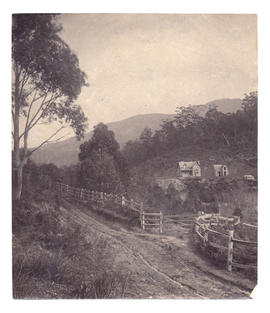
Photograph of Stony Steps or Waterworks Valley, Hobart, Tasmania with Livingstone's house Marydale in the foreground and the Waterworks dam in the background, c.1870.
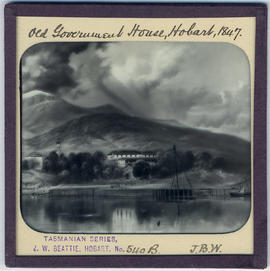
Lantern slide of early print of Old Government House, Hobart Town, Van Diemen's Land in 1847. From the collection of James Backhouse Walker. Prepared by J.W. Beattie (1859-1930) whose studio locations were in Elizabeth Street, Hobart from 1891-1920, Murray Street from 1921-40 and Cat and Fiddle Arcade, Hobart, until 1994.
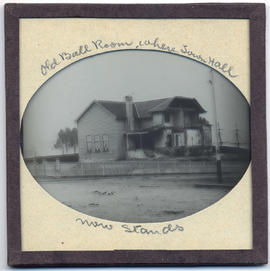
Lantern slide from the collection of James Backhouse Walker of the demolition of the old ball room where the Town Hall now stands, Hobart, Tasmania. Thought to have been prepared by J.W. Beattie (1859-1930) whose studio locations were in Elizabeth Street, Hobart from 1891-1920, Murray Street from 1921-40 and Cat and Fiddle Arcade, Hobart, until 1994.
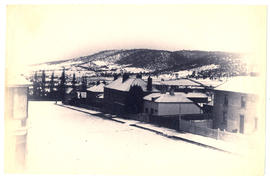
Lantern slide of Liverpool Street, Hobart. Prepared by J.W. Beattie (1859-1930) whose studio locations were Elizabeth Street, Hobart from 1891-1920, Murray Street from 1921-40 and Cat and Fiddle until 1994.
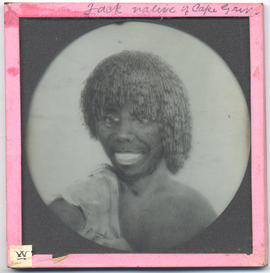
Lantern slide of Jack, native of Cape Grim. Prepared by J.W. Beattie (1859-1930) whose studio locations were Elizabeth Street, Hobart from 1891-1920, Murray Street from 1921-40 and Cat and Fiddle until 1994.
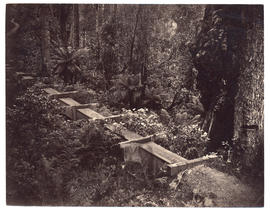
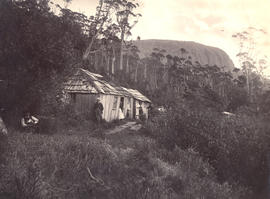
Photographs of Cook's Monument, Fern Tree Bower, Mount Wellington. Memorial stones commemorate Mayor Henry Cook and the Hobart Town Corporation Waterworks erected in 1861.
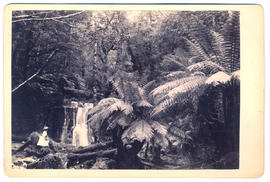
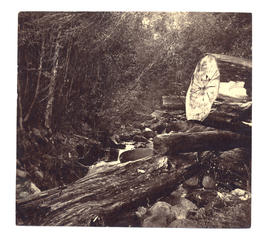
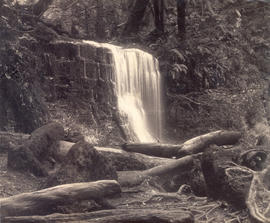
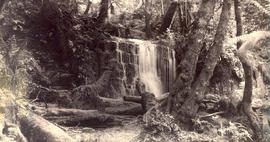
Photographs of Silver Falls, Fern Tree Bower, Mount Wellington c.1880 taken by Anson Brothers who had studios in Liverpool, Collins, and Elizabeth Streets between 1878 and 1891.
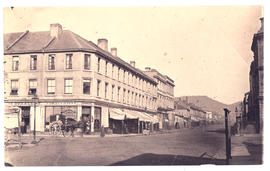
Lantern slide of J. Walch and Sons, Macquarie Street, Hobart c1880. Prepared by J.W. Beattie (1859-1930) whose studio locations were Elizabeth Street, Hobart from 1891-1920, Murray Street from 1921-40 and Cat and Fiddle until 1994.
Lantern slide of Hobart Town, Van Diemen's Land, from Old Wharf in 1839. From the collection of James Backhouse Walker. Prepared by J.W. Beattie (1859-1930) whose studio locations were in Elizabeth Street, Hobart from 1891-1920, Murray Street from 1921-40 and Cat and Fiddle Arcade, Hobart, until 1994.
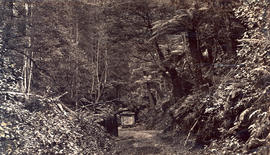
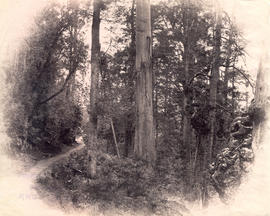
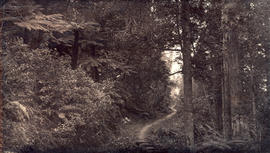
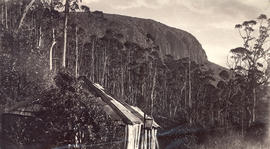
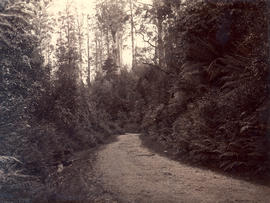
Photograph of the track to Fern Tree Bower, Mount Wellington before taken prior to 1879 by Anson Brothers who had studios in Liverpool, Collins, and Elizabeth Streets between 1878 and 1891.
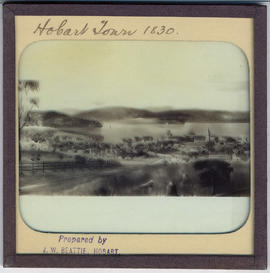
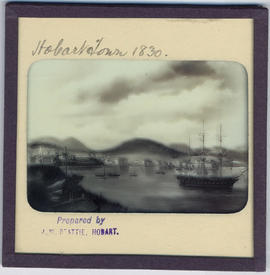
Lantern slide of early print of Hobart Town, Van Diemen's Land in 1830. From the collection of James Backhouse Walker. Prepared by J.W. Beattie (1859-1930) whose studio locations were in Elizabeth Street, Hobart from 1891-1920, Murray Street from 1921-40 and Cat and Fiddle Arcade, Hobart, until 1994.
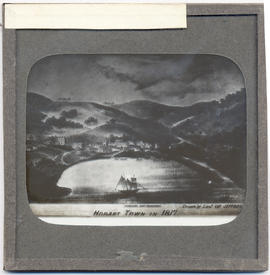
Lantern slide of Hobart Town, Van Diemen's Land, in February, 1817. Inscribed with the words 'Hobart Town in 1817. Drawn by Lieut. Charles Jeffreys' - also shows the Government schooner the Kangaroo , church, Government House and Fort.
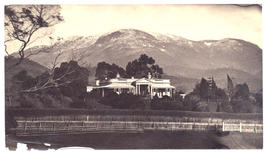
Two photographs of Sunnyside, New Town, Tasmania, home of Thomas Daniel Chapman 1815-1884, Politician. Mt Wellington in distance. The photographer was Henry Hall Baily who had studios in Elizabeth and Liverpool Streets, Hobart from 1865 until 1918.
Photograph of Launceston, Tasmania, from beyond the Cataract Bridge in about 1881. The photographer was Alfred Winter who had studios in Bathurst, Elizabeth and Liverpool Streets, Hobart, from 1869 until 1891.
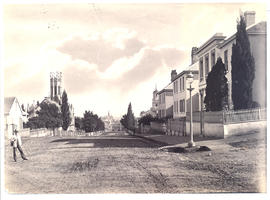
Photograph of Davey Street, Hobart, looking east, showing the Oddfellows hall and the Congregational church. Photograph taken from the Harrington Street intersection.
Photograph from the collection of James Backhouse Walker of Franklin Square and the Hobart waterfront taken in about 1870 possibly from St. David's Cathedral according to a note on the reverse. The photographer is Henry Hall Baily who had studios in Elizabeth and Liverpool Streets Hobart from 1865 until 1918.
Photograph of the Cascades' Female Factory looking toward Mt Wellington with the Cascade Brewery in the distance. In 1828 a Female Factory opened on the outskirts of Hobart at Cascades. It became the colony's largest Factory, expanding by 1853 into five major courtyards accommodating 1000 women and 175 children. The photographer was J.W. Beattie (1859-1930) whose studios were in Elizabeth and Murray Streets between 1891 and 1940
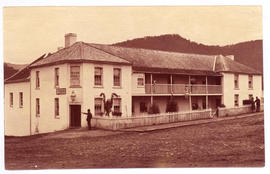
Photograph of the Bush Hotel, New Norfolk, Tasmania, 1881. Proprietor at the time was Captain Blockey. The photographer was Alfred Winter who had studios in Bathurst, Elizabeth and Liverpool Streets from 1869 until 1891.
Photograph of Port Arthur Penitentiary c. 1880. The photographers are Anson Brothers., Portrait and Landscape Photographers, Hobart Town whose firm was located in Liverpool, Collins and Elizabeth Streets between 1878 and 1891
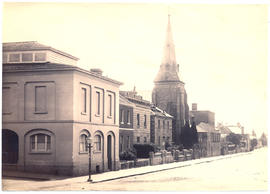
Photograph of St. Mary's Cathedral in Harrington Street in about 1870. Henry Hall Baily is the photographer. He had studios in Elizabeth and Liverpool Streets Hobart from 1865 until 1918.
Photograph of Macquarie Street Hobart including St. Joseph's Catholic Church c. 1870. The view is looking west. The photographer was Henry Hall Baily who had studios in Elizabeth and Liverpool Streets Hobart from 1865 until 1918.
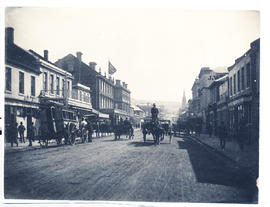
Photograph of Liverpool Street Hobart at the intersection of Argyle Street looking towards West Hobart, taken around the turn of the century showing Cherry's Carlton Club Hotel in the foreground. Also J. Whiteside & Son Furnishing Warehouse and Canes Iron mongers. The date is assumed from the presence of electric power poles which were introduced in 1898.
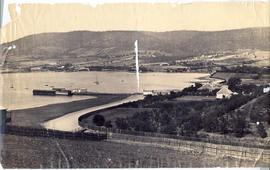
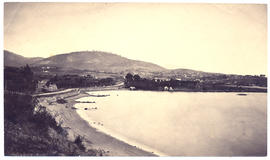
Photograph of Kangaroo Point (Bellerive) Beach on Hobart's Eastern Shore looking toward settlement c. 1882. The photographer was Henry Hall Baily who had studios in Elizabeth and Liverpool Streets, Hobart from 1865 until 1918.
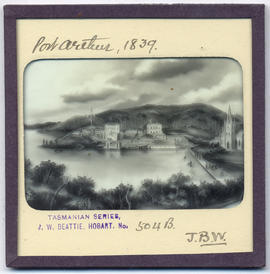
Lantern slide of Port Arthur 1839. Prepared by J.W. Beattie (1859-1930) whose studio locations were Elizabeth Street, Hobart from 1891-1920, Murray Street from 1921-40 and Cat and Fiddle until 1994.
Lantern slide of an early print of Hobart Town, Van Diemen's Land from the harbour. From the collection of James Backhouse Walker. Thought to have been prepared by J.W. Beattie (1859-1930) whose studio locations were in Elizabeth Street, Hobart from 1891-1920, Murray Street from 1921-40 and Cat and Fiddle Arcade, Hobart, until 1994.
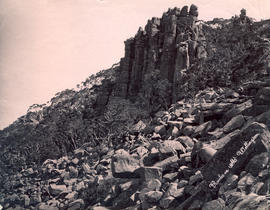
Photograph rocks on Mount Wellington. The photographer was Albert Sargeant who had studios in Macquarie Street, Hobart and George Street, Launceston between 1886 and 1913.
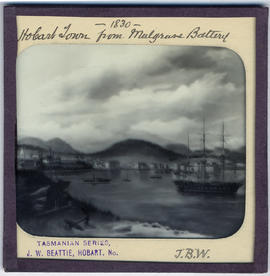
Lantern slide of Hobart Town from Mulgrave Battery, Van Diemen's Land, in 1830. From the collection of James Backhouse Walker. Prepared by J.W. Beattie (1859-1930) whose studio locations were in Elizabeth Street, Hobart from 1891-1920, Murray Street from 1921-40 and Cat and Fiddle Arcade, Hobart, until 1994.
Lantern slide of Hobart Town Harbour, Van Diemen's Land, in 1830. Prepared by J.W. Beattie (1859-1930) whose studio locations were in Elizabeth Street, Hobart from 1891-1920, Murray Street from 1921-40 and Cat and Fiddle Arcade, Hobart, until 1994.
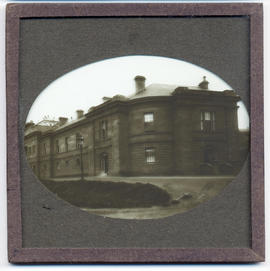
Lantern slide of Hobart Savings Bank, Murray Street Hobart c1860. Prepared by J.W. Beattie (1859-1930) whose studio locations were Elizabeth Street, Hobart from 1891-1920, Murray Street from 1921-40 and Cat and Fiddle until 1994.
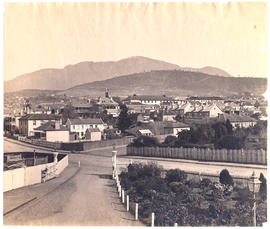
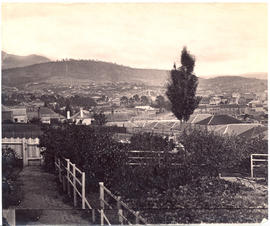
Photograph from the collection of James Backhouse Walker of a view of Hobart from West Hobart looking east toward the river, showing Holy Trinity Church. The photographer is Henry Hall Baily who had studios in Elizabeth and Liverpool Streets Hobart from 1865 until 1918..
Photograph of road to Mt Wellington showing man with a gun hunting. Taken in about 1870 by Alfred Winter, who had studios in Bathurst, Elizabeth and Liverpool Streets from 1869 until 1891.
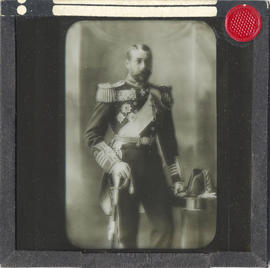
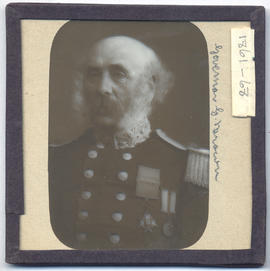
Lantern slide of Governor Sir Thomas Gore Browne. Governor of Tasmania from 1861-1868. Prepared by J.W. Beattie (1859-1930) whose studio locations were Elizabeth Street, Hobart from 1891-1920, Murray Street from 1921-40 and Cat and Fiddle until 1994.
Lantern slide of Government House and St David's Cathedral, Van Diemen's Land. Prepared by J.W. Beattie (1859-1930) whose studio locations were Elizabeth Street, Hobart from 1891-1920, Murray Street from 1921-40 and Cat and Fiddle until 1994. Lantern slide of detail from 'The Seat of His Excellency Lieut. Govr. Arthur / drawn from Nature and on Stone' by Charles Atkinson d.1837
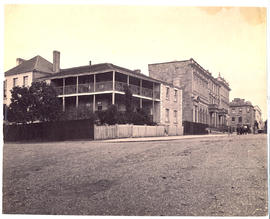
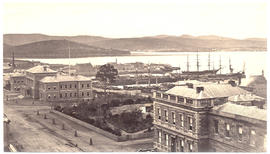
Photograph of buildings on corner of Macquarie and Murray Streets, Hobart c. 1877. Photographed by Henry Hall Baily who had studios in Elizabeth and Liverpool Streets, Hobart from 1865 until 1918.
Photograph of Franklin Square Hobart was taken by the Anson Brothers photographers, whose firm was located in Liverpool, Collins and Elizabeth Streets between 1878 and 1891.
Photograph from the collection of James Backhouse Walker of a view of Hobart looking South East with a garden in the foreground and Elizabeth Street in the middle distance. The photographer is Alfred Winter who had studios in Bathurst, Elizabeth and Liverpool Streets from 1874-1880.
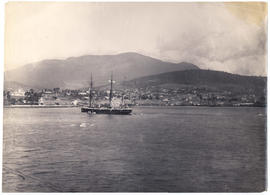
Photograph of a ship with Sullivans Cove and Mount Wellington in the background taken from HMS Nelson in 1882. The photographer is Henry Hall Baily who had studios in Elizabeth and Liverpool streets Hobart from 1865 until 1918.
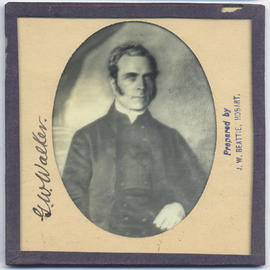
Lantern slide of George Washington Walker (1800-1859). Prepared by J.W. Beattie (1859-1930) whose studio locations were Elizabeth Street, Hobart from 1891-1920, Murray Street from 1921-40 and Cat and Fiddle until 1994.