Bush scenes round Mt Wellington, Fern Tree and Cascade
- AU TAS UTAS SPARC W9-Ph-74
- Item
- n.d.
Part of Walker Family Papers
Photograph of bush scenes round Mt Wellington, Fern Tree and Cascade
James Backhouse Walker

1802 results with digital objects Show results with digital objects
Bush scenes round Mt Wellington, Fern Tree and Cascade
Part of Walker Family Papers
Photograph of bush scenes round Mt Wellington, Fern Tree and Cascade
James Backhouse Walker
Bush scenes round Mt Wellington, Fern Tree and Cascade
Part of Walker Family Papers
Photograph of bush scenes round Mt Wellington, Fern Tree and Cascade
James Backhouse Walker
Part of Walker Family Papers
Photograph of the new Waterworks, Hobart showing water channel through bush.
James Backhouse Walker
Part of Walker Family Papers
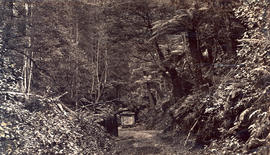
Photograph taken "On the Huon Road, Hobarton". Man standing by rough fence looking at bush (faded).
James Backhouse Walker
Part of Walker Family Papers
Photograph of People's Park Strahan, initialed "J M W". Glossy print, amateurishly mounted
James Backhouse Walker
Part of Walker Family Papers
Photograph of Huon Road, Hobart showing wide, graded dirt road, fence, and gum tree. Glossy print, amateurishly mounted.
James Backhouse Walker
Part of Walker Family Papers
Photograph of ferns and small waterfall, Hobart. Glossy print, amateurishly mounted.
James Backhouse Walker
Part of Walker Family Papers
Mounted photograph of a view of Hobart from West Hobart, showing the tower of old St. David's Cathedral
James Backhouse Walker
Cascades, Mount Wellington & Fern Tree Bower
Part of Walker Family Papers
Photograph of taken around Cascades, Mount Wellington, Fern Tree Bower.
James Backhouse Walker
Part of Walker Family Papers
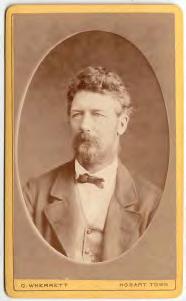
Collection of 3 photographs. A young man, wearing high collar and lilies of the valley in buttonhole; young lady with long hair, sailor type hat with flower and feather, white collar; young lady with hair combed back from face, white front on dark dress with bunched shoulders, tucked sleeves and bodice.
James Backhouse Walker
Part of Walker Family Papers
Photograph of Joan and Ursula Walker, daughters of John Ridley Walker (1847-1915) and Adah Caroline Giblin. Ursula seated at garden table, Joan standing behind, with cat.
James Backhouse Walker
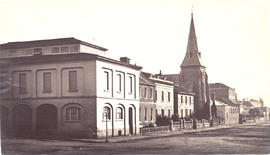
Photograph of the Oddfellows Hall
Part of Walker Family Papers
Photograph of Davey Street, Hobart, looking east, in about 1876. The photograph is taken from the intersection with Harrington Street and Oddfellows Hall is in the foreground. The photographer was Henry Hall Baily who had studios in Elizabeth and Liverpool Streets, Hobart from 1865 until 1918
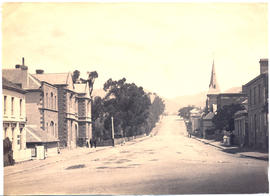
Photograph of Davey Street, Hobart, looking west
Part of Walker Family Papers
Photograph of Davey Street, Hobart, looking west, in about 1890, showing both sides of the street including St. David's Park.
Part of Walker Family Papers
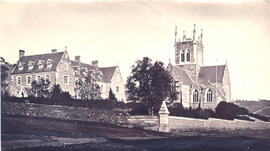
Photograph of St. Mary's Cathedral in Harrington Street in about 1870. Henry Hall Baily is the photographer. He had studios in Elizabeth and Liverpool Streets Hobart from 1865 until 1918.
Henry Hall Baily
Part of Walker Family Papers
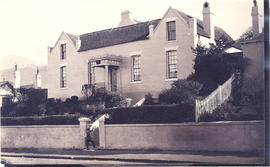
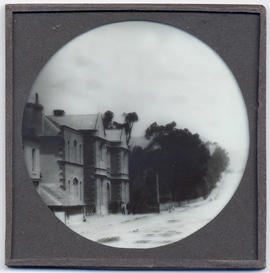
Photograph of Pressland House, formerly J.P. Cowle's School, in 1881. (from notes by J. B. Walker on back of photograph) The building has a sign on the front which reads 'These premises for sale'. (see detail). During the 1840s Pressland House was the home of Mr Cowle's 'Hobart Town Classical and Commercial Academy'. (Craig, Clifford 'More old Tasmanian Prints', Launceston, Foot and Playsted, 1984 p.312). Photographer: A. Winter, Hobart Town - embossed on bottom left corner of photograph - (Alfred Winter had a photographic studio in Bathurst Street, Hobart from 1869-1891).
Alfred Winter
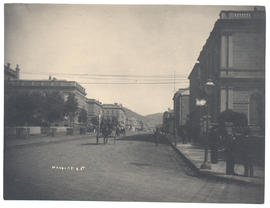
Eastern end of Macquarie Street
Part of Walker Family Papers
Photograph of the eastern end of Macquarie Street showing the trees on the edge of Franklin Square and horse drawn carriages.
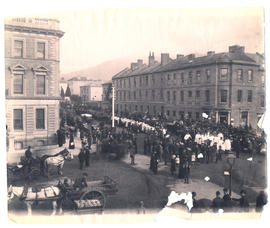
Procession approaching corner of Murray and Macquarie Streets
Part of Walker Family Papers
Photograph of a procession moving down Macquarie Street approaching the corner of Murray Street, Hobart, Tasmania
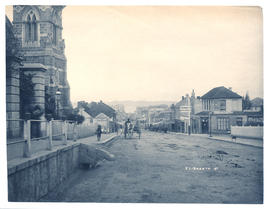
Elizabeth Street from Memorial Congregational Church
Part of Walker Family Papers
Photograph of Elizabeth Street looking toward the harbour from the Memorial Congregational Church
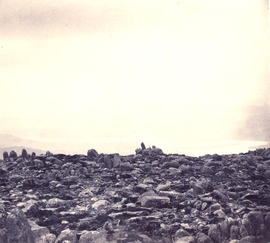
Rocks at summit of Mt Wellington
Part of Walker Family Papers
Photograph of rocks at summit of Mt Wellington
James Backhouse Walker
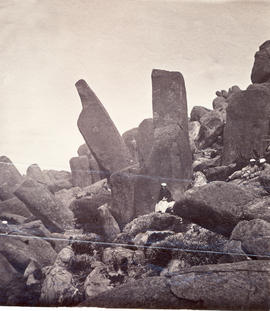
People among rocks at summit of Mt Wellington
Part of Walker Family Papers
Photograph of people sitting among large rocks at Mt Wellington summit
James Backhouse Walker
Cook's Monument, Fern Tree Bower
Part of Walker Family Papers
Photographs of Cook's Monument, Fern Tree Bower, Mount Wellington. Memorial stones commemorate Mayor Henry Cook and the Hobart Town Corporation Waterworks erected in 1861.
James Backhouse Walker
Part of Walker Family Papers
Photographs of Maatsuyker Island located 5.5 kilometres off the south coast of Tasmania. The island comprises part of the Southwest National Park and is a Tasmanian Wilderness World Heritage Site. The Maatsuyker Island Lighthouse, the southernmost Australian lighthouse, is located on the southern tip of the island
James Backhouse Walker
Part of Walker Family Papers
Photographs of Lake St. Clair at the southern end of the Cradle Mountain-Lake St Clair National Park. Is part of the Tasmanian Wilderness World Heritage Area. The Cradle Mountain-Lake St Clair area was declared a scenic reserve in 1922, a wildlife reserve in 1927, a national park in 1947 and a world heritage area from 1982.
James Backhouse Walker

Part of Walker Family Papers
Photograph of Fluted Cape, Adventure Bay, Bruny Island, Tasmania. The photographer was Henry Hall Baily who had studios in Elizabeth and Liverpool Streets, Hobart from 1865 until 1918
Henry Hall Baily
Part of Walker Family Papers
Portrait photograph of Government House, Hobart, Tasmania. The photographer was Henry Hall Baily who had studios in Elizabeth and Liverpool Streets, Hobart from 1865 until 1918
Henry Hall Baily
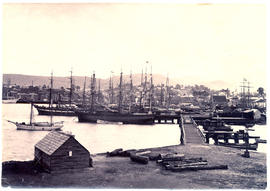
Hobart waterfront from Hunter Island
Part of Walker Family Papers
Photograph of the Hobart waterfront from Hunter Island looking towards Salamanca.
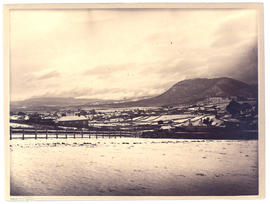
Part of Walker Family Papers
Photograph of New Town, Tasmania in the snow from Russell Young's Beaulieu (Swans Hill) taken on the morning of 16th June 1882. The photographer was Alfred Winter who had studios in Bathurst, Elizabeth and Liverpool Streets from 1869 until 1891.
Alfred Winter
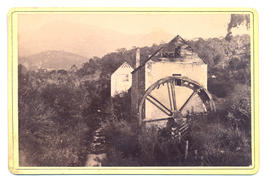
Part of Walker Family Papers
Photograph of Old Mill at New Town Creek showing creek, buildings and mill wheel in disrepair. Mt Wellington in distance
James Backhouse Walker
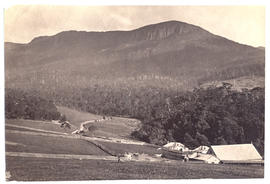
Part of Walker Family Papers
Photograph of Mount Wellington with farm buildings in the foreground in the vicinity of the Cascades Brewery, Hobart, Tasmania.
Anson Brothers
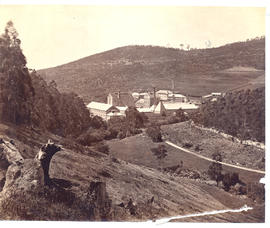
Part of Walker Family Papers
Photograph of the Cascade Brewery buildings from behind, Hobart, Tasmania. The photographers were Anson Brothers whose studios were located in Liverpool, Collins and Elizabeth Streets between 1878 and 1891.
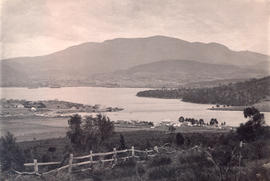
Part of Walker Family Papers
Photograph of Kangaroo Bay (Bellerive) on Hobart's Eastern Shore from hill showing wharf and houses c. 1882. The photographer was Henry Hall Baily who had studios in Elizabeth and Liverpool Streets, Hobart from 1865 until 1918.
Runnymede, Hobart Town, Van Diemen's Land
Part of Walker Family Papers
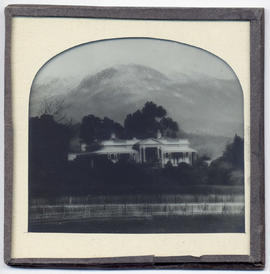
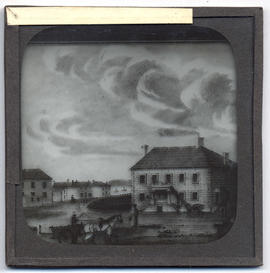
Lantern slide from the collection of James Backhouse Walker of Runnymede, Hobart Town, Van Diemen's Land. Thought to have been prepared by J.W. Beattie (1859-1930) whose studio locations were in Elizabeth Street, Hobart from 1891-1920, Murray Street from 1921-40 and Cat and Fiddle Arcade, Hobart, until 1994
John Watt Beattie
Part of Walker Family Papers
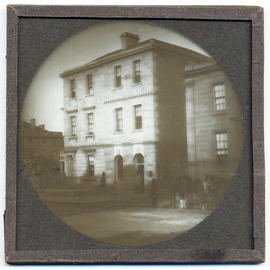
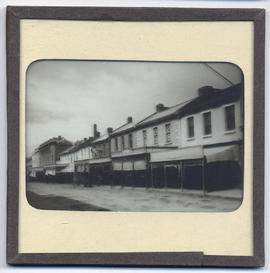
Lantern slide of J. Walch and Sons, Macquarie Street, Hobart c1880. Prepared by J.W. Beattie (1859-1930) whose studio locations were Elizabeth Street, Hobart from 1891-1920, Murray Street from 1921-40 and Cat and Fiddle until 1994.
John Watt Beattie
Part of Walker Family Papers
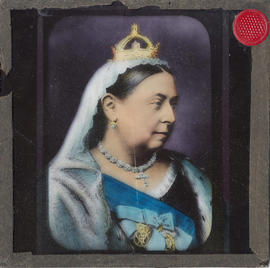
Lantern Slide of Queen Victoria, England.
Part of Walker Family Papers
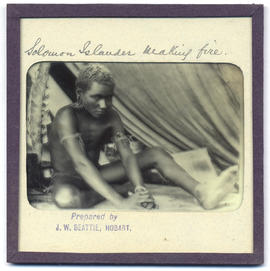
Lantern slide of Solomon Islander making fire. Prepared by J.W. Beattie (1859-1930) whose studio locations were Elizabeth Street, Hobart from 1891-1920, Murray Street from 1921-40 and Cat and Fiddle until 1994.
John Watt Beattie
St. David's Park, Davey Street, Hobart, Tasmania
Part of Walker Family Papers
Lantern slide from the collection of James Backhouse Walker of St. David's Park, Davey Street, Hobart, Tasmania. Thought to have been prepared by J.W. Beattie (1859-1930) whose studio locations were in Elizabeth Street, Hobart from 1891-1920, Murray Street from 1921-40 and Cat and Fiddle Arcade, Hobart, until 1994. Quaker Collection.
John Watt Beattie
Part of Cotton Family Papers
James Backhouse Cotton
Part of Cotton Family Papers
Part of Cotton Family Papers
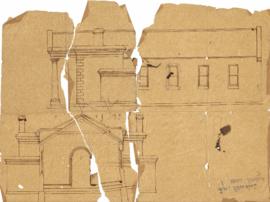
Part of an architectural drawing, possibly of the first Friends meeting house.
Part of Cotton Family Papers
Part of Cotton Family Papers
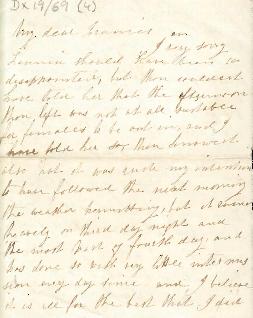
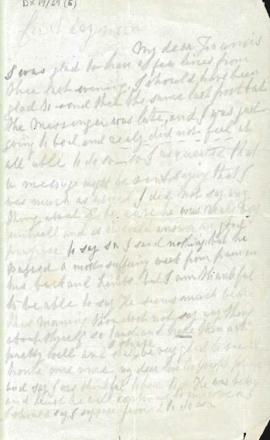
Miscellaneous papers of Edward Octavius Cotton. Includes: incomplete letter headed "Brock's Buildings" addressed "Dear
Edward" from Quaker woman, ?relative: Harry, many condemned her, many afraid to side with her for fear of grieving Ma, young man looking for job in Melbourne but might go to New Zealand after writing to Uncle Thomas Lidbetter, Arthur had called at Uncle A.G. Pollard's (11.3.81 }; incomplete letter from "Earlham": E.0.C. could not have made better choice [of bride], Helen Grueber had been "one of my patients" when others despaired of her, Lincoln and Duke broken in for ploughing, foster care for Ruby and foal, 3.6.1881 (letter incomplete from ? Edith c. daughter of John and Mary Ann (Wills) Cotton); notes for obituary of Francis Cotton 1883; draft letters
or articles, including: "national recreation grounds", "Quakerism"; typed article for the Courier, "The Schoutens" by E.0.C. 1905; poem, "Meredith Fishery Bay 1879"; note about income: "just manage to keep out of debt and provide my family with the bare necessaries of life ... more than 99 out of 100 farmers can say" 1895; New Year card: "Edward with Helen's love"; notebook containing miscellaneous memoranda in pencil, including "metallic shingles", paints needed, expenses, shorthand notes, verse on "passing of the sweetest soul", etc. (no name but probably by E.O. Cotton ). Also printed book transferred to Library: "Curfew must not ring tonight" (verse and illustrations, John Walker & Co. London, printed in Holland} inscribed ms: "with Helen's love to Edward" 1888 .
Edward Octavius Cotton
Mary Spencer (nee Grueber) to sister Helen
Part of Cotton Family Papers
Undated letter from Mary Spencer (nee Grueber) to her sister Helen
Elizabeth Helen Grueber
Part of Cotton Family Papers
Undated music: ms extracts from "Lilli Lilli" and "Auld lang syne", marked ms. W.Barlow
Letters from Mabel Mary Cotton to A.T & E.F Cotton
Part of Cotton Family Papers
Letters from Mabel Mary Cotton to A.T & E.F Cotton dated c 1949-1967. Includes letters from Sydney where she was nursing, letters from Kelvedon (including mention of bush fires 1967) while Mr and Mrs Cotton were over seas and some letters from Fiji. Most letters were addressed "Dear Olds", some "Dear
Nern", a few to "Frances" and one or two, c 1949, to "Dad" or "Dad & Mern". In a letter of 27 February [1967] she mentions that Doug. and Joan are letting her live in "the Doctor's old rooms" made into a flat, Doug. & Joan's son Crispin Pip just started at Hutchins School.
Part of Cotton Family Papers
Photograph of Edward Octavius Cotton
Print : Regent Street Fire Office
Part of Cotton Family Papers
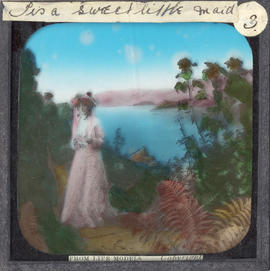
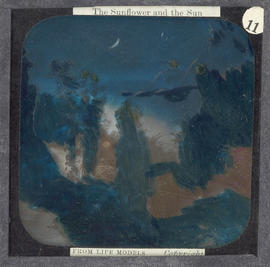
The sunflower and the sun, from life models
Coloured lantern slides. Painted pictures of flowers, views etc (or painted on photographic view): From the series "The sunflower and the sun, from life models".

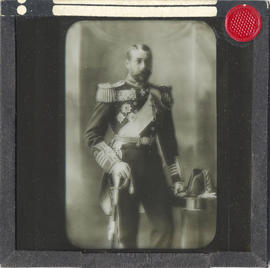
Black and white lantern slide of Prince Albert
Part of Broughton Archive
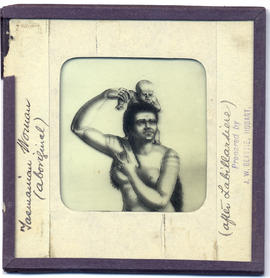
Tasmanian Aboriginal woman and child
Part of Walker Family Papers
Lantern slide of Tasmanian aboriginal woman and child 'after Labillardiere'. Prepared by J.W. Beattie (1859-1930) whose studio locations were Elizabeth Street, Hobart from 1891-1920, Murray Street from 1921-40 and Cat and Fiddle until 1994
John Watt Beattie
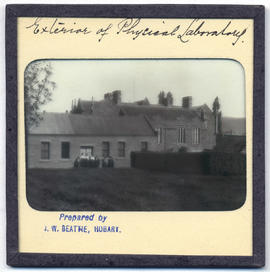
Part of Walker Family Papers
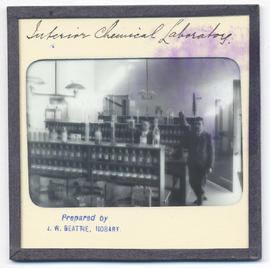
Lantern slides of the University of Tasmania, Queen's Domain, Hobart. Views of exterior and laboratories and library. Prepared by J.W. Beattie (1859-1930) whose studio locations were Elizabeth Street, Hobart from 1891-1920, Murray Street from 1921-40 and Cat and Fiddle until 1994 (Collection Pr.S.Uni/1-8)
John Watt Beattie
Part of Walker Family Papers
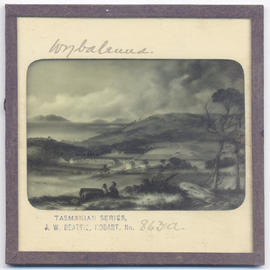
Lantern slide of Wybalena, Flinders Island. Prepared by J.W. Beattie (1859-1930) whose studio locations were Elizabeth Street, Hobart from 1891-1920, Murray Street from 1921-40 and Cat and Fiddle until 1994.
John Watt Beattie
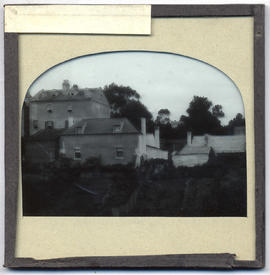
Buildings, early Hobart, Tasmania
Part of Walker Family Papers
Lantern slide from the collection of James Backhouse Walker of buildings in early Hobart, Tasmania. Thought to have been prepared by J.W. Beattie (1859-1930) whose studio locations were in Elizabeth Street, Hobart from 1891-1920, Murray Street from 1921-40 and Cat and Fiddle Arcade, Hobart, until 1994.
John Watt Beattie
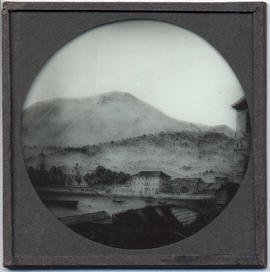
Early Hobart Town, Van Diemen's Land
Part of Walker Family Papers
Lantern slide from the collection of James Backhouse Walker of early Hobart Town, Van Diemen's Land from the harbour. Thought to have been prepared by J.W. Beattie (1859-1930) whose studio locations were in Elizabeth Street, Hobart from 1891-1920, Murray Street from 1921-40 and Cat and Fiddle Arcade, Hobart, until 1994. Quaker Collection.
John Watt Beattie
House, Hunter Street, Hobart, Van Diemen's Land
Part of Walker Family Papers
Lantern slide of house in Hunter Street, Hobart. Prepared by J.W. Beattie (1859-1930) whose studio locations were Elizabeth Street, Hobart from 1891-1920, Murray Street from 1921-40 and Cat and Fiddle until 1994.
John Watt Beattie
Part of Walker Family Papers
Lantern slide from the collection of James Backhouse Walker of a streetscape in Hobart, Tasmania. Thought to have been prepared by J.W. Beattie (1859-1930) whose studio locations were in Elizabeth Street, Hobart from 1891-1920, Murray Street from 1921-40 and Cat and Fiddle Arcade, Hobart, until 1994.
John Watt Beattie
Part of Cotton Family Papers
Anna Maria to Francis : undated
Part of Cotton Family Papers
Anna Maria to Francis : undated
Part of Cotton Family Papers
Part of Notes on Aborigines
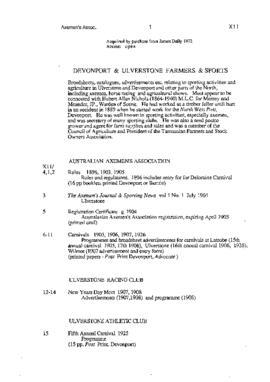
Index to X11 - Devonport and Ulverstone Farmers and Sport
Part of Olive Pink Collection
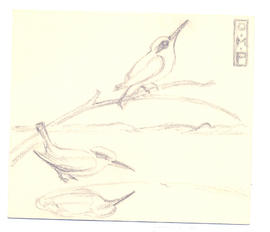
Pencil on card sketched by Olive Pink, (date and location unknown)
Olive Pink
Part of Olive Pink Collection
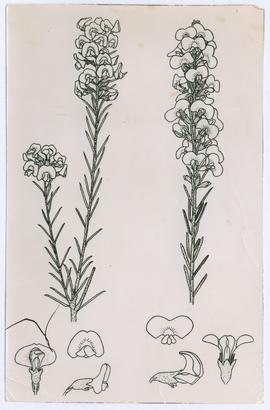
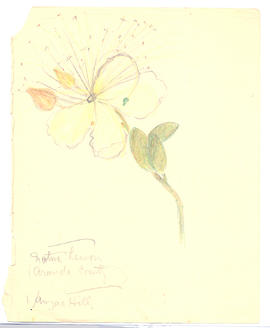
Coloured pencil on paper sketched by Olive Pink, at Anzac Hill (date unknown) "native lemon, Aranda country"
Olive Pink
Map showing the distribution of Aboriginal Tribes in Australia
Part of Olive Pink Collection
Correspondence, paintings by and related to Olive Pink
Part of Olive Pink Collection
Oil painting by Olive Pink of Cobbity near Camden, NSW.
Part of Olive Pink Collection
Oil painting by Olive Pink of Cobbity near Camden, NSW.
Olive Pink
Donated by Olive Pink's nieces in 2016
Part of Olive Pink Collection
This series includes Olive Pink's book collection, photographs, paintings, letters, items of clothing and other ephemera and memorabilia, some of which are nationally significant in their own right - such as the book plate made by Adrian Feint, notes and sketches done whilst camping with Daisy Bates, and photographs documenting life in Central Australia.
Part of Olive Pink Collection
Australian Aboriginal Decorative Art
Part of Olive Pink Collection
McCarthy, F.D.
Australian Aboriginal Decorative Art, Australian Museum Sydney,1938
Olive Pink
Part of Olive Pink Collection
Wright, Tom, New Deal for the Aborigines, Sydney
no publication date
Olive Pink
Part of Olive Pink Collection
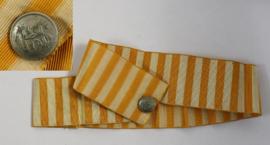
Orange/yellow and white striped hatband and metal badge embossed with decorative GHS. Worn by Olive Pink while attending The Girls’ High School, Hobart ,Tasmania
Olive Pink
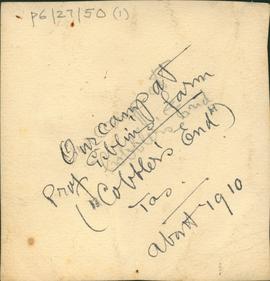
Photograph of Our Camp - verso
Part of Olive Pink Collection
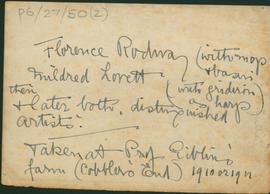
Photograph of Olive Pink and friends - verso
Part of Olive Pink Collection
Part of Olive Pink Collection
Part of Olive Pink Collection
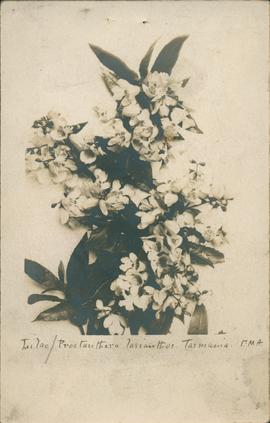
Black and white postcard of Lilac - Prostanthera lasianthos. with initials E.M.A.
Postcard of Olive Pink’s aboriginal gardener
Part of Olive Pink Collection
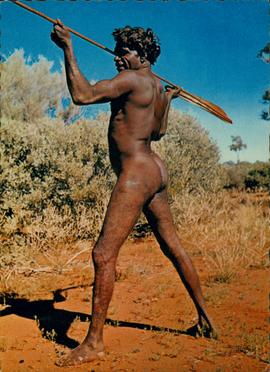
Postcard of Olive Pink’s aboriginal gardener Johnny Tambijimba Yannarilyi
Olive Pink
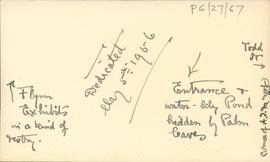
Photograph of Flynn Memorial Church, Alice Springs, Northern Territory - verso
Part of Olive Pink Collection
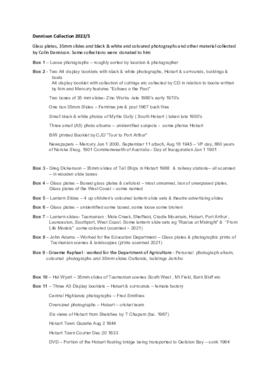
Part of Dennison Collection
Part of Dennison Collection
• Two A4 display booklets with black & white photographs, Hobart & surrounds, buildings & boats
• A4 display booklet with collection of cuttings etc collected by CD in relation to books written by him and Mercury features “Echoes of the Past”
• Two Boxes of 35mm slides- Zinc Works -late 1960’s early 1970’s
• One box 35mm Slides – Ferntree pre & post 1967 bush fires
• Small black & white photos of Myrtle Gully ( South Hobart ) taken late 1950’s
• Three small (A5) photo albums – unidentified subjects - some photos Hobart
• B/W printed booklet by CJD “Tour to Port Arthur”
• Newspapers – Mercury Jan 1 2000, September 11 attach, Aug 16 1945 – VP day, 660 years of Norske Skog, 1901 Commonwealth of Australia - Day of Inauguration Jan 1 1901
Greg Dickenson slide collection
Part of Dennison Collection
Slides taken by Greg Dickenson of Tall Ships in Hobart in 1988, Tasmanian maritime craft , Tasmanian railway stations, Tasmanian scenes and buildings
Greg Dickenson
Part of Dennison Collection
Glass plates – Boxed glass plates & celluloid – most unnamed, box of unexposed plates. Glass plates of the West Coast – some named
Part of Dennison Collection
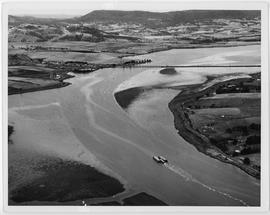
Aerial view of of the Derwent River at Bridgewater. Showing a paper mill barge on the river. Taken pre 1970s as the housing estate has not yet been built.
Part of Dennison Collection
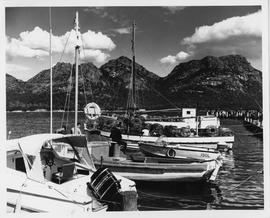
Photograph of pleasure craft and fishing boats at Coles Bay, Tasmania
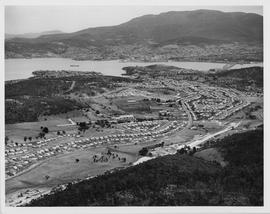
Aerial view of Mornington and Warrane
Part of Dennison Collection
Aerial photograph of Mornington and Warrane c. 1970 looking toward the Tasman Bridge and Hobart
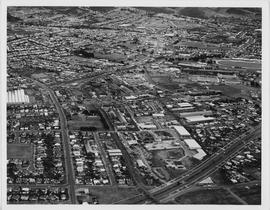
Aerial view of Brooker Highway
Part of Dennison Collection
Aerial view of Brooker Highway, Hobart looking toward the show grounds and Derwent Park
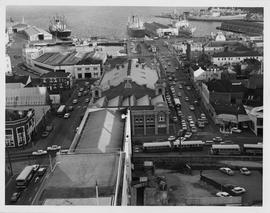
Aerial view of City Hall and port
Part of Dennison Collection
Aerial view of City Hall, Museum and Art Gallery and the port of Hobart, Constitution and Victoria Docks and wharfs
Part of Dennison Collection
Collection of 35mm slides taken by Hal Wyatt of Tasmanian scenes South West , Mt Field, Barn bluff etc
Hal Wyatt
Part of George Wilson Collection
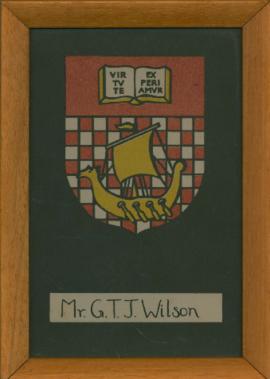
Hytten Hall crest. Framed Latin motto "Virtute experiamur" (Let courage be thy test). Red and white shield with image of Viking ship, with 'Mr. G.T.J. Wilson' under.
George Thomas Jamieson Wilson