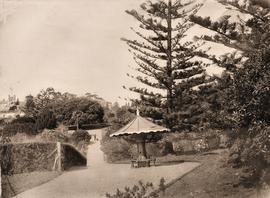
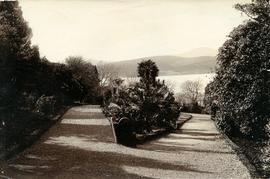
Black-and-white photograph of Royal Botanical Gardens, showing a decorative undercover seat constructed around the stump and butt of a tree. Government House visible in background
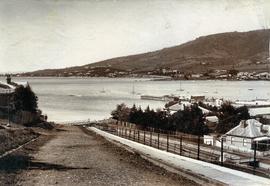
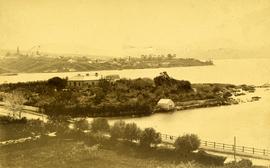
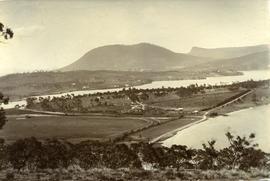
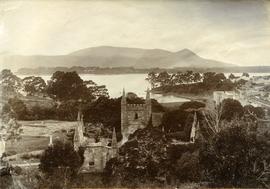
Black-and-white photograph shows Sandy Bay Road in foreground, the grand home St Helena on what is known as Dunkleys Point, and Battery Point on the opposite shore of the bay
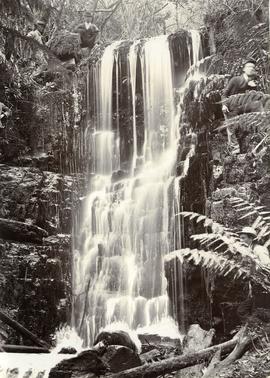
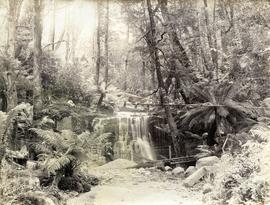
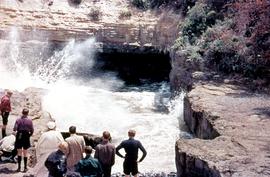
Black-and-white vertical/portrait photograph of four men posing for the camera while standing or squatting above or beside a waterfall on Mount Wellington, believed to be Silver Falls
Black-and-white photograph shows path to near base of waterfall in foothills of Mount Wellington, two men standing near a barrel beside a metal mesh and barbed wire fence and a padlocked gate barring access to the stream
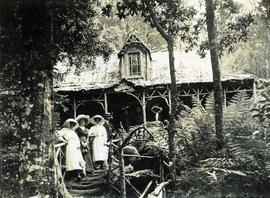
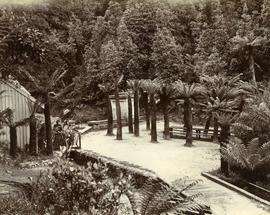
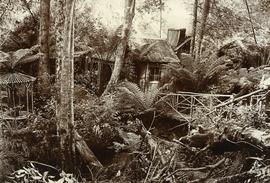
Black-and-white photograph of rustic hut built amid fern trees on walking track at Mount Wellington, two figures walking across timber bridge amid fern fronds
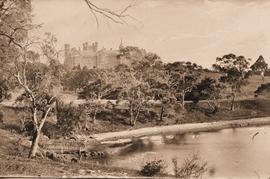
Black-and-white photograph shows waves lapping shoreline of Derwent River in foreground, with Government House on the hill, surrounded by mature trees, tall picket fence runs parallel with river, two wires strung between poles, visible through trees
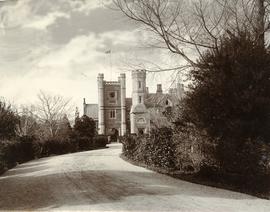
Black-and-white photograph shows gravel road leading to western approach to Government House, Hobart, featuring clocktower with Union Jack hoisted and bas relief sculpture above doorway.
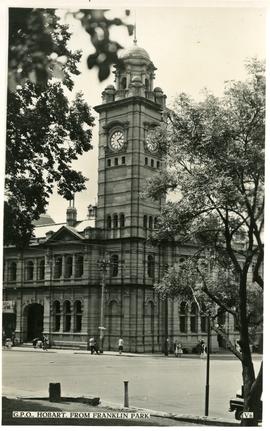
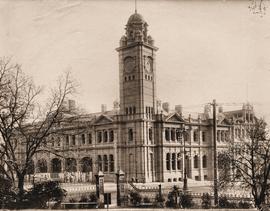
Black-and-white photograph shows Hobart General Post Office viewed from Franklin Park. Words “G.P.O., HOBART, FROM FRANKLIN PARK” and “V6” are typewritten in black on white reverse panel at bottom of photograph
Black-and-white photograph shows Hobart Railway Station, viewed from gardens of the University of Tasmania, including the Tasmanian Government Railways workshops
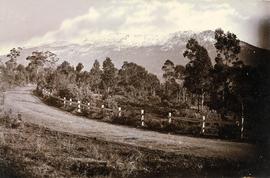
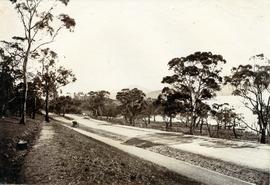
Black-and-white photograph shows snow on Mount Wellington viewed from the verge of the Huon Road, South Hobart, with post-and-rail fence alongside roadway.
Black-and-white photograph taken from elevated point on Queen’s Domain, looking north up Derwent River towards Cornelian Bay and New Town Bay; Risdon Park Racecourse (1880s-1926) at New Town in foreground, early burial plots in headland of Cornelian Bay Cemetery at right of picture.
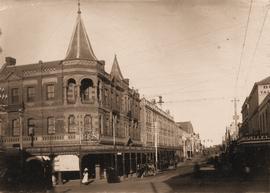
Black-and-white photograph depicts Miller’s Corner on the intersection of Liverpool Street and Murray streets, Hobart, looking towards waterfront down Murray Street. A.P. Miller, dispensing chemist, died 1904
Black-and-white photograph shows ruins of the church at Port Arthur, damaged by fire in 1884,with charred timber framework in the roof, remnant shingles on the roof and climbing plants covering the sandstone of the church walls. Handwritten words “Church at Port Arthur” in lower left corner of image.
Black-and-white photograph shows elevated view of ruined church at Port Arthur, including charred timber roof framework; with view of waterfront and other buildings on Port Arthur site; cut hay is drying in paddock at front of church.
Black-and-white photograph taken looking north along Gun Carriage Drive towards Government House, Hobart, with post-and-rail fences on Derwent River side; a horse harnessed to a four-wheel carriage, is on the left of the road; a small jetty extends from the shoreline and a boat is visible through the trees, anchored just off shore.
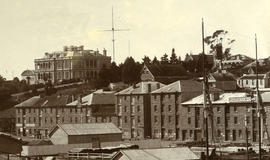
Black-and-white photograph shows stone buildings along Salamanca Place, timber stacked on New Wharf and masts of ships docked at the wharf; signs on buildings for “A.E. Lord Wool Merchant” and “W.D. Peacock and Co.”, historic home Lenna and eastern conservatory visible on hilltop behind towards Battery Point; maritime signal station with the Time Ball that was dropped automatically at 1pm, after a relayed telegraph signal from the Melbourne Observatory.
Black-and-white photograph shows Sandy Bay Road, with tram tracks on riverside of road, electric wires for Hobart Electric Tramway, carriage wheelmarks in the unpaved road surface, electricity transmission wires strung from poles mounted with porcelain insulators
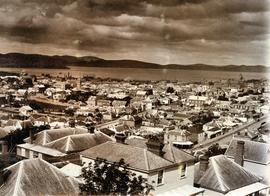
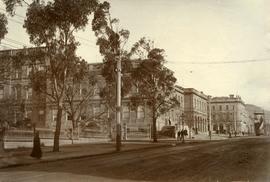
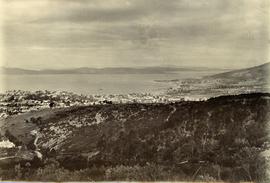
Black-and-white photograph taken from foothills of Mount Wellington shows settlement of Hobart and upper end of Liverpool Street, now called Liverpool Crescent
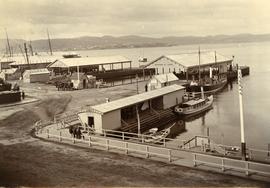
Black-and-white photograph shows three men sitting on a fence railing outside the entry to Watermen’s Wharf, with horse-drawn carriages pulled up near the Franklin Pier and Brooke Street Pier
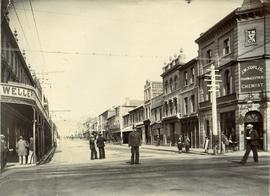
Black-and-white photograph depicts police officer standing in middle of Liverpool Street, Hobart, with YMCA and J.W. Toplis Pharmaceutical Chemist listed as tenants of the corner building.
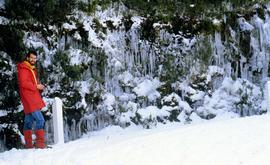
Colour photograph taken near the Springs of man dressed in red beside road to Mount Wellington, with icicles dangling from the vegetation after a snowstorm
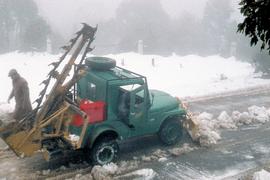
Colour photograph of Post Master General Department Jeep equipped with front-mounted and rear-mounted snowclearing implements moving snow and ice from road on Mount Wellington, 1960
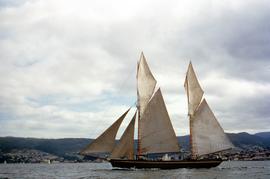
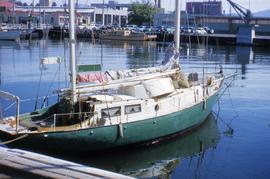
Colour photograph of small, two masted sailing boat, with green painted hull, and a sign Onrust, Holland, pinned to mast, Onrust also painted onto side of boat.
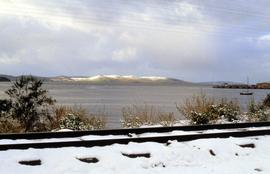
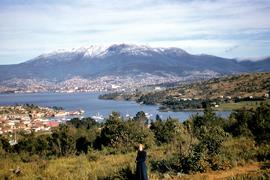
Colour photograph of snow on Mount Wellington, taken from eastern shore of Derwent River, overlooking Bellerive and Rosny; woman in dark blue overcoat, standing on path in foreground
Colour photograph of stone house at Bellerive, rendered or painted white, with flowers in bloom in front garden, in front of verandah, house old tin roof, on corner block, street pillar for PMG telephone cabling near letterbox
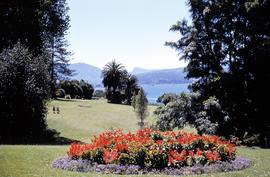
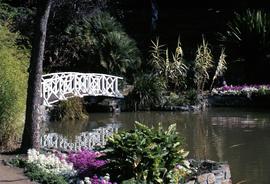
Colour photograph of Royal Tasmanian Botanical Gardens at Queens Domain, Hobart; depicts garden beds, lawns and Derwent River, looking towards Selfs Point Jetty and petroleum storage tanks at Selfs Point.
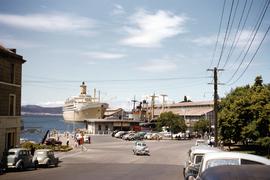
Colour photograph of ferry pier at bottom of Murray Street, Hobart, departure point for the Bellerive ferry; cargo and passenger ships docked at nearby Princes Wharf, including the steamer Orsova; sign advertising Cascade Ale on the Customs House Hotel.
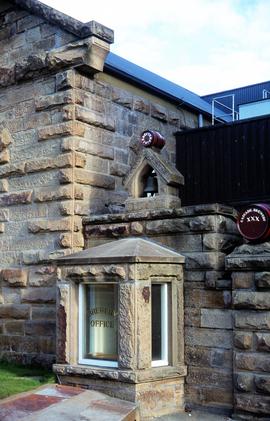
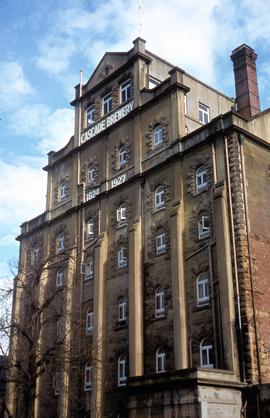
Colour photograph depicting facade of Cascade Brewery office, built in sandstone, with bell and decorative barrels mounted on roof, “Cascade Brewery XXX” and “Erected 1874”.
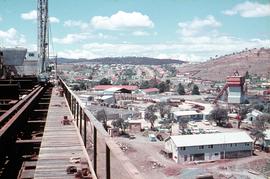
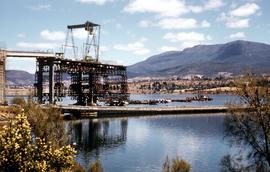
Colour photograph shows office and construction depot of Bridge Co on Derwent’s Eastern Shore, during construction of the Tasman Bridge across the Derwent River, 1964.
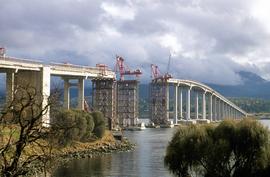
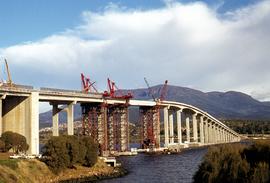
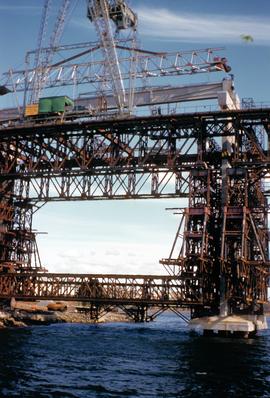
Colour photograph shows pylons supporting Tasman Bridge, viewed from the Derwent’s Eastern Shore, during construction of the Tasman Bridge across the Derwent River, 1964.
Colour photograph shows construction of Tasman Bridge, from Derwent River’s Eastern Shore. Shows spans of Tasman Bridge almost completed from Eastern Shore, temporary floating Hobart Bridge upstream of new multi-lane road bridge; snow on Mount Wellington in background. Printing or scanning error in photograph/slide shows coloured lines horizontally through. photograph.
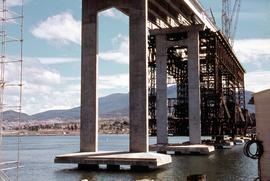
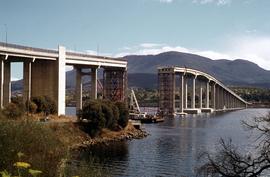
Colour photograph shows site of repair work to Tasman Bridge, damaged by the crash of the ore carrier Lake Illawarra in January 1975. Photo taken from Eastern Shore of Derwent.
Colour photograph shows site of repair work to Tasman Bridge, damaged by the crash of the ore carrier Lake Illawarra in January 1975; missing pylons being replaced
Photograph in colour, taken from Eastern Shore of Derwent River, depicting repairs to roadway and pylons damaged in January 1975 crash of bulk ore carrier Lake Illawarra. Mount Wellington in background.
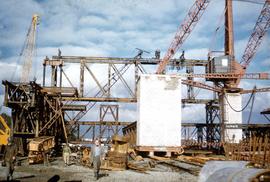
Construction site on riverbank as work begins on Tasman Bridge; cranes, steel scaffolding and brickwork evident. Workers in hard hats; one man striding towards camera, wearing gumboots is poking his tongue out at the photographer.
Colour photograph depicts vehicular traffic on the temporary, floating Hobart Bridge, as consctruction begins downstream on the multi-lane Tasman Bridge to join the eastern and western shores of the river.
Colour photograph of 30 MPH speed limit to motorists approaching the Hobart Bridge during construction of the downstream Tasman Bridge, from the eastern shore of the Derwent River.
Colour photograph taken from the western shore of the Derwent River, depicts vehicles travelling on the temporary, floating Hobart Bridge, while the nearly complete multi-lane Tasman Bridge to join the eastern and western shores of the river, is visible downstream.
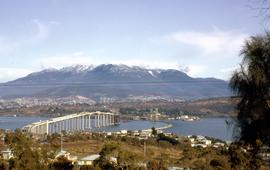
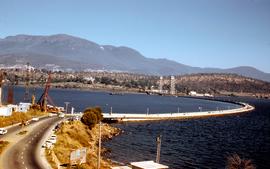
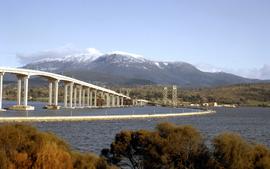
Colour photograph of two bridges across the Derwent River, the Hobart Bridge, right, and the Tasman Bridge, left, as viewed from the eastern shore of the Derwent in August 1964. Snow caps Mount Wellington in the background.
Colour photograph of the centre span of the Tasman Bridge is under construction in 1963, as viewed from a vehicle travelling on the nearby Hobart Bridge, which carries vehicular traffic across the Derwent River on a temporary, floating platform.
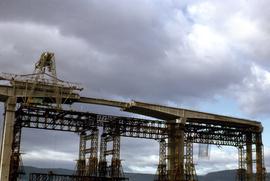
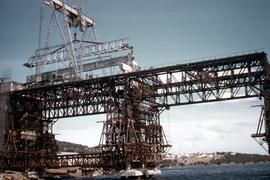
Colour photograph shows construction of Tasman Bridge, with scaffolding, cranes and workers atop frame, photographed from the water, bridge built across the Derwent River, taken 1963.
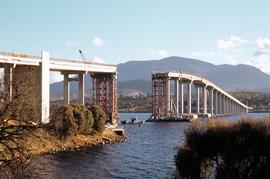
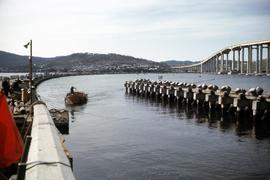
Colour photograph shows construction of a temporary traffic span of the new Tasman Bridge, as viewed from the western shore of the Derwent River, in 1964; the floating Hobart Bridge upstream is visible in background.
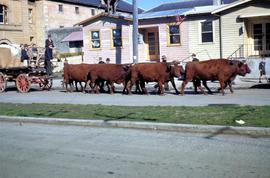
Colour photograph depicts team of eight red oxen, most likely Red Devon or Shorthorn cattle, pulling a wagon on concrete roadway, in Dunn Street, Hobart, 1952, towards the city away from waterfront, wagon laden with hessian bags, children riding on wagon alongside several hatted men; passing in front of newly extended weatherboard building with newly installed windows; exterior of 1902 sandstone Customs House visible in background. Photograph is taken looking towards current site of Tasmanian Museum Art Gallery courtyard entrance, in area now known as Dunn Place.
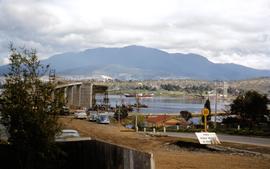
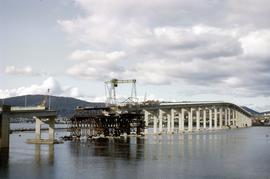
Colour photograph shows construction of the Tasman Bridge, in early 1960s, as viewed from the eastern shore of the Derwent River; the floating Hobart Bridge is visible in foreground; Mount Wellington in distance, with dry grasslands in the foothills of the mountains, visible on western shore of river.
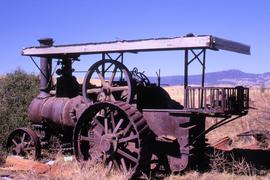
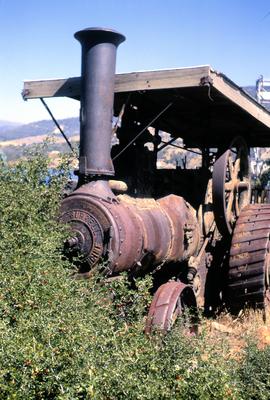
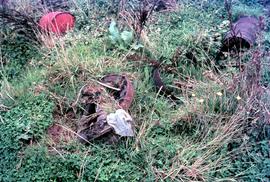
Colour photograph shows a Chas Burrell and Sons steam engine, abandoned and rusting, in a paddock, partially overgrown by runaway hawthorn hedge, in fruit, at Bridgewater. The maker’s name plate is partially visible on the front of the boiler. Visible at top right of photograph is western gantry of vertical lift roadway of Bridgewater bridge on eastern shore of Derwent River, where Bridgewater bridge and causeway joins towns of Bridgewater and Granton.
Colour photograph shows a child sailor at the rudder of a cadet dinghy on Derwent River sailing upstream, while another pleasure craft is travelling in opposite direction; both are sailing past the Royal Australian Navy ship, the Destroyer Escort, HMAS Torrens, (No. 53 emblazoned on the side) is berthed just off Port of Hobart.
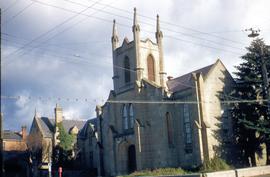
Colour photograph of a church building, constructed in greying sand stone, with ivy climbing up wall on attached building; originally the Chalmer’s Free Church and Manse, in Hobart, on the corner of Harrington and Bathurst streets, later the Chalmer’s Presbyterian Church; congregation merged with St Andrew’s in Hobart to form, Scots Church; Chalmers church building sold in 1954 to Neptune Oil Company, which demolished it to construct a fuel station.
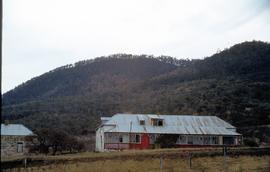
Colour photograph of Cleburne Homestead, also known as the Mount Direction Homestead, a dwelling built in the 1830s at Risdon and threatened with demolition during the construction of the nearby Bowen Bridge.
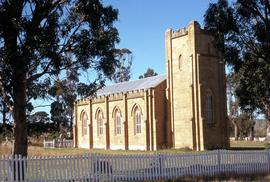
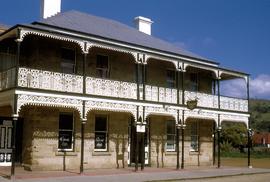
Colour photograph shows street view of Commercial Hotel, Richmond, a double-storey sandstone structure with decorative ironwork on the veranda posts, taken in 1970
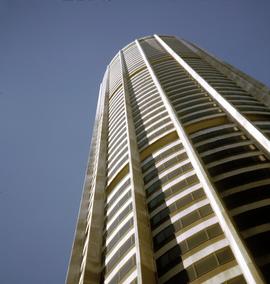
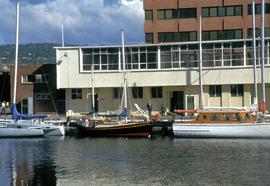
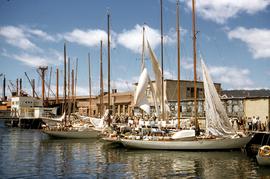
Colour photograph of boats moored at Constitution Dock, Hobart, early 1970s, with distinctive 11-storey brown clad Marine Board of Hobart building, visible in background. Image was erroneously labelled as being taken in 1954, but Marine Board of Hobart building was constructed between 1970 and 1972.
Colour photograph shows reflections in the water, of masts and sailing boats moored at Constitution Dock, Hobart, with State Library of Tasmania and Hobart GPO clocktower in background.