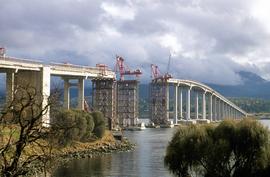
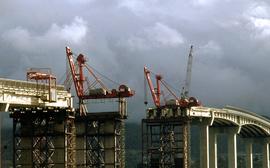
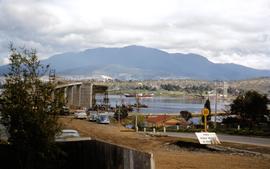
Colour photograph shows site of repair work to Tasman Bridge, damaged by the crash of the ore carrier Lake Illawarra in January 1975; missing pylons being replaced
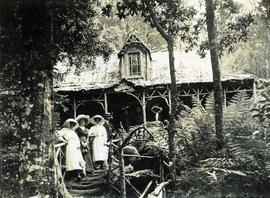
Black-and-white photograph of Royal Botanical Gardens, showing a decorative undercover seat constructed around the stump and butt of a tree. Government House visible in background
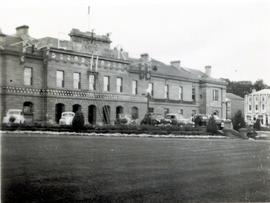
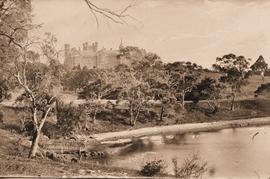
Black-and-white photograph shows waves lapping shoreline of Derwent River in foreground, with Government House on the hill, surrounded by mature trees, tall picket fence runs parallel with river, two wires strung between poles, visible through trees
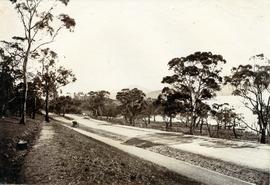
Black-and-white photograph taken looking north along Gun Carriage Drive towards Government House, Hobart, with post-and-rail fences on Derwent River side; a horse harnessed to a four-wheel carriage, is on the left of the road; a small jetty extends from the shoreline and a boat is visible through the trees, anchored just off shore.
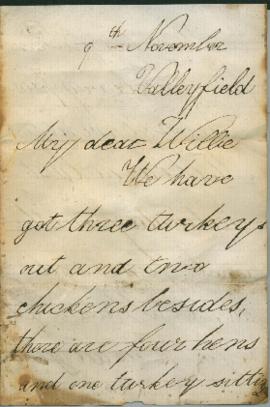
Handwritten letter from Adam Taylor to his brother William dated 9th November, Valleyfield. Transcribed : My dear Willie We have got three turkeys out and two chickens beside, there are four hens and one turkey sitting. We have had four or five gooseberry pies. Robert went to Melbourne last Saturday with uncle and Jamie and aunt Buist. Old Joe was out getting some wood and someone broke his window, got in and stole all his things. A beautiful owl came into the garden. Robert caught it in the laundry and we sent it to Mr Whitcomb. Miss ??? sends her love to you. I am your affectionate Adam Taylor
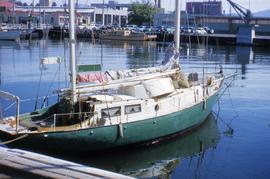
Colour photograph of small, two masted sailing boat, with green painted hull, and a sign Onrust, Holland, pinned to mast, Onrust also painted onto side of boat.
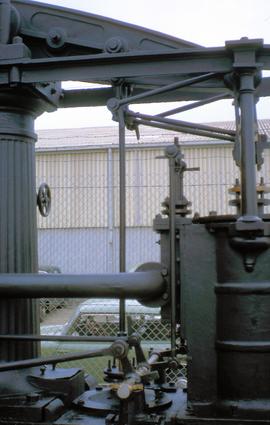
Colour photograph of beam engine in Hobart, purportedly the oldest McNaught Beam Engine in existence, originally built 1854 in Paisley Scotland, by A.W. Smith and used by Risby’s Sawmill in Hobart until 1955; photograph taken at Moonah public works depot 1967
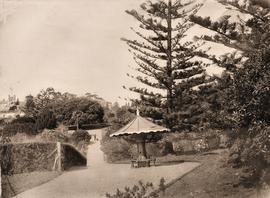
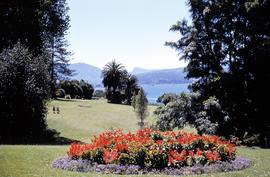
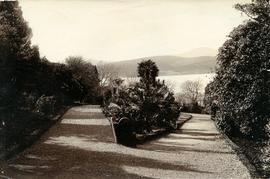
Colour photograph of Royal Tasmanian Botanical Gardens at Queens Domain, Hobart; depicts garden beds, lawns and Derwent River, looking towards Selfs Point Jetty and petroleum storage tanks at Selfs Point.
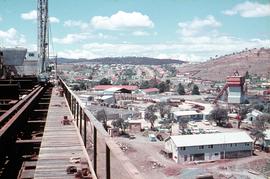
Colour photograph shows office and construction depot of Bridge Co on Derwent’s Eastern Shore, during construction of the Tasman Bridge across the Derwent River, 1964.
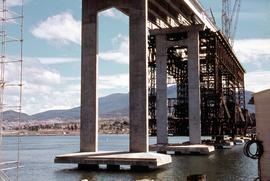
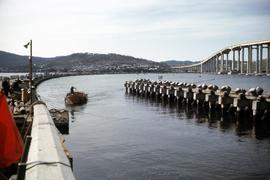
Colour photograph shows pylons supporting Tasman Bridge, viewed from the Derwent’s Eastern Shore, during construction of the Tasman Bridge across the Derwent River, 1964.
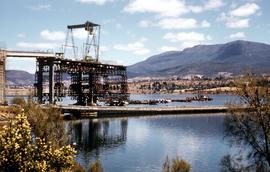
Colour photograph shows cranes atop pylons at the site of repair work to Tasman Bridge, damaged by the crash of the ore carrier Lake Illawarra in January 1975; missing pylons being replaced.
Colour photograph of 30 MPH speed limit to motorists approaching the Hobart Bridge during construction of the downstream Tasman Bridge, from the eastern shore of the Derwent River.
Colour photograph taken from the western shore of the Derwent River, depicts vehicles travelling on the temporary, floating Hobart Bridge, while the nearly complete multi-lane Tasman Bridge to join the eastern and western shores of the river, is visible downstream.
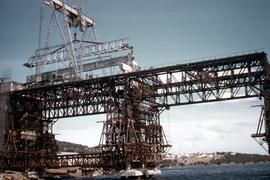
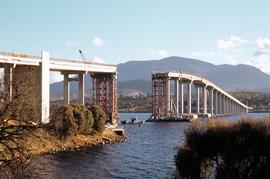
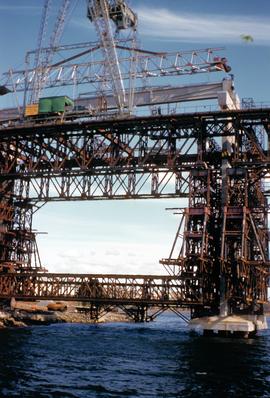
Colour photograph shows construction of Tasman Bridge, with scaffolding, cranes and workers atop frame, photographed from the water, bridge built across the Derwent River, taken 1963.
Colour photograph shows construction of the Tasman Bridge, in early 1960s, as viewed from the eastern shore of the Derwent River; the floating Hobart Bridge is visible in foreground; Mount Wellington in distance, with dry grasslands in the foothills of the mountains, visible on western shore of river.
Colour photograph shows a child sailor at the rudder of a cadet dinghy on Derwent River sailing upstream, while another pleasure craft is travelling in opposite direction; both are sailing past the Royal Australian Navy ship, the Destroyer Escort, HMAS Torrens, (No. 53 emblazoned on the side) is berthed just off Port of Hobart.
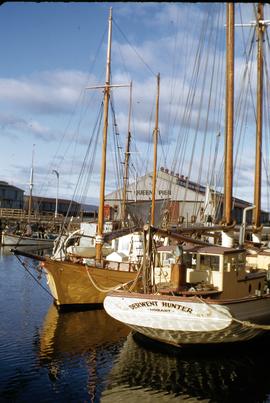
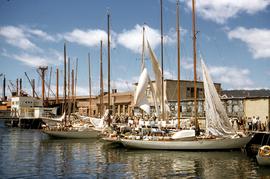
Colour photograph shows reflections in the water, of masts and sailing boats moored at Constitution Dock, Hobart, with State Library of Tasmania and Hobart GPO clocktower in background.
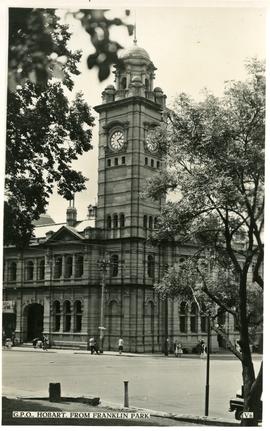
Black-and-white photograph shows Hobart General Post Office viewed from Franklin Park. Words “G.P.O., HOBART, FROM FRANKLIN PARK” and “V6” are typewritten in black on white reverse panel at bottom of photograph
Black-and-white photograph shows Hobart Railway Station, viewed from gardens of the University of Tasmania, including the Tasmanian Government Railways workshops
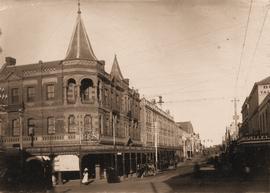
Black-and-white photograph depicts Miller’s Corner on the intersection of Liverpool Street and Murray streets, Hobart, looking towards waterfront down Murray Street. A.P. Miller, dispensing chemist, died 1904
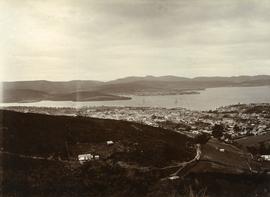
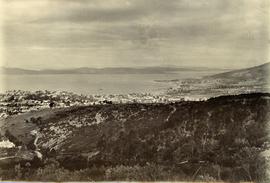
Black-and-white photograph taken from foothills of Mount Wellington shows settlement of Hobart and upper end of Liverpool Street, now called Liverpool Crescent
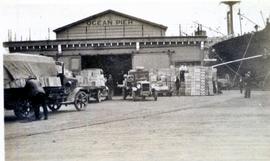
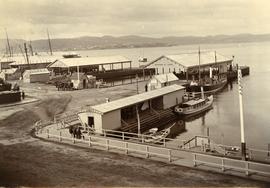
Black-and-white photograph shows three men sitting on a fence railing outside the entry to Watermen’s Wharf, with horse-drawn carriages pulled up near the Franklin Pier and Brooke Street Pier