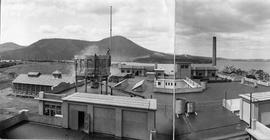
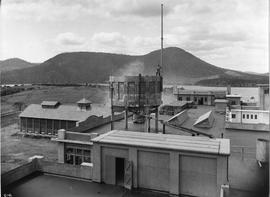
Tower on rooftop, Cadbury Factory
- AU TAS UTAS ITCCD 2017/18-38
- Item
- 1922-
Panorama showing cement tower and chimney stack on top of building forming part of Cadbury site, with view of Derwent River and Mount Direction in distance.
2748 results with digital objects Show results with digital objects
Tower on rooftop, Cadbury Factory
Panorama showing cement tower and chimney stack on top of building forming part of Cadbury site, with view of Derwent River and Mount Direction in distance.
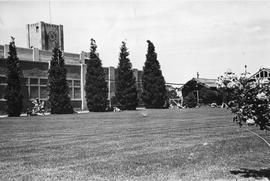
Lawn and Clock Tower, Cadbury Factory
People seated on lawn bordered by roses and Pencil pines, Cadbury factory clock tower visible.

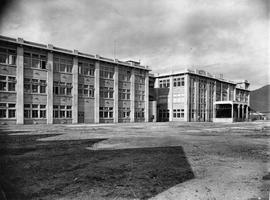
Cadbury Factory surrounded by fields
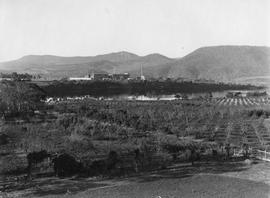
View of Cadbury factory buildings under construction, with grassy ground in front and wooded hills in distance.
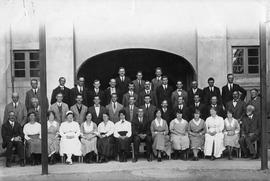
Group photograph, Cadbury Factory
Large group of people photographed outside portion of the Cadbury building.
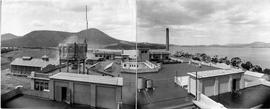
Panorama showing cement tower and chimney stack on top of building forming part of Cadbury site, with view of Derwent River in distance.
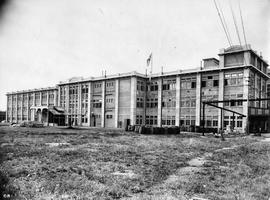
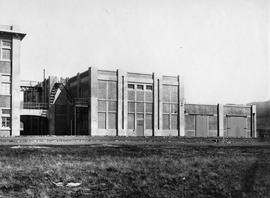
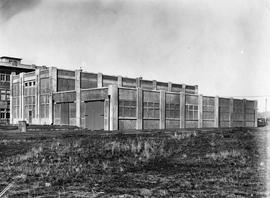
Two large three story buildings forming part of Cadbury factory.
Large multi-storied building forming part of the Cadbury factory under construction. Wooden barrels can be seen on grass in front.
Tower on Roof, Cadbury Factory
Man standing on edge of cement tower on top of a building, forming part of Cadbury site. Mount Direction in background.
Multi-story buildings, Cadbury Factory
Courtyard and paths between multi-storied buildings, Cadbury factory.
Multi-storied building with lettering reading Westway on corner, forming part of Cadbury factory.
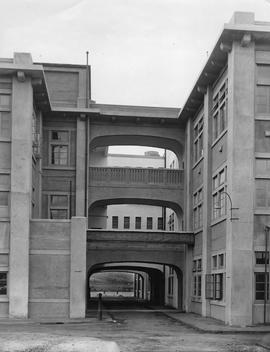
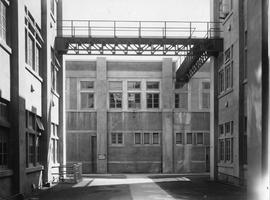
External Walkways, Cadbury Factory
Two multi-story buildings connected by walkways with road running through middle at ground level giving glimpse of water, forming part of the Cadbury factory.
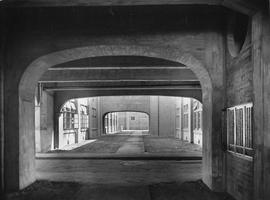
Internal Courtyard, Cadbury Factory
View of road through an internal courtyard linking factory buildings on Cadbury site.
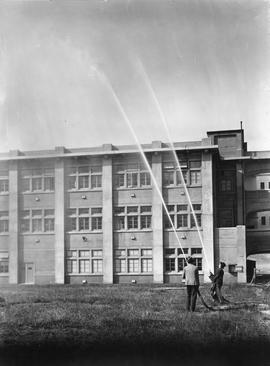
Two men spraying plumes of water into the air from high pressure fire hoses.

Group of men wearing suits and ties posing for photograph on lawn.
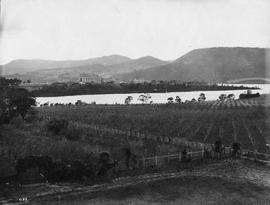
Orchard on the bank of the Derwent River with Cadbury factory in background.
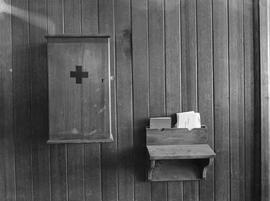
Wooden first aid cupboard and small shelf attached to wood panelled wall in the Cadbury factory at Claremont.
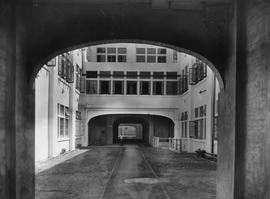
Internal Courtyard, Cadbury Factory
View of road through an internal courtyard, surrounded by multi-storied factory buildings on Cadbury site.
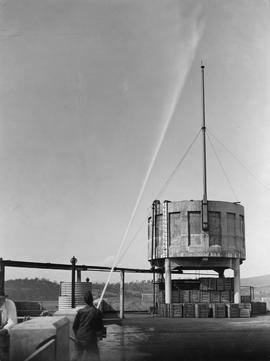
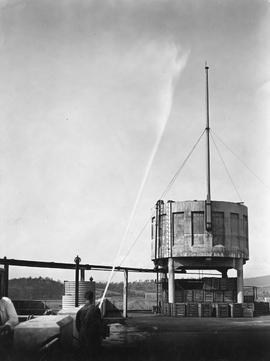
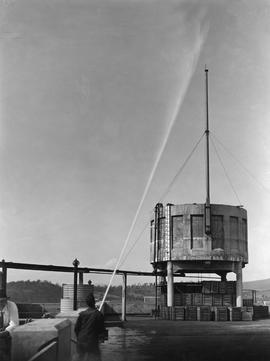
High Pressure Hose, Cadbury Factory
Large cement tank being sprayed with water by man holding high pressure fire hose.
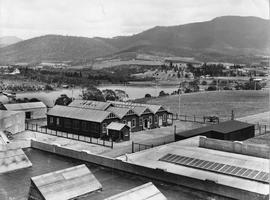
Wooden Buildings, Cadbury Factory
Interlinking wooden buildings on Cadbury site, with Derwent River in background.
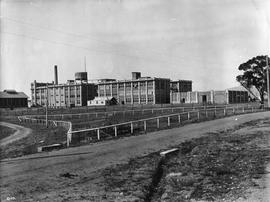
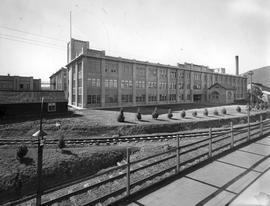
Three-storey buildings, Cadbury factory
Large three story complex forming part of the Cadbury factory.
Cadbury Fry Pascall Limited
Large cement tank being sprayed with water by man holding high pressure fire hose.
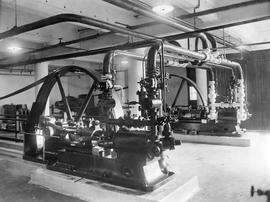
Piston engines.
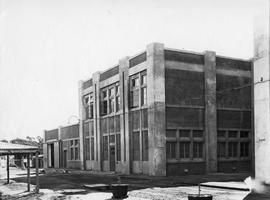
Cement clad building forming part of Cadbury factory.
Large cement tank being sprayed with water by man holding high pressure fire hose.

Cadbury factory with train loaded with supplies in front of building.
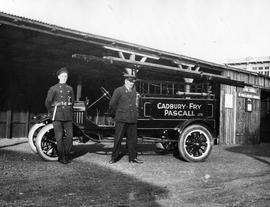
Two men in uniform standing in front of the Cadbury Fry Pascall fire truck.
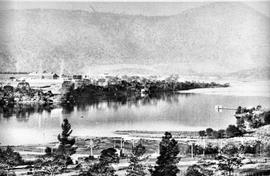
Indistinct black and white photograph looking across to the Cadbury site, Windermere Jetty visible.
Large two storey cement building, part of Cadbury factory.
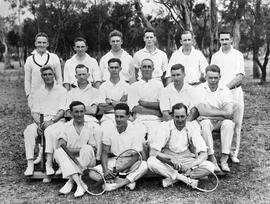
Group of men dressed in tennis whites, some holding rackets.
Cadbury Factory Under Construction
Looking across orchard to Cadbury buildings under construction.
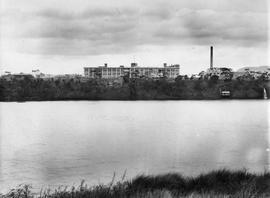
View across water to partially completed Cadbury factory.
Cadbury Building and Train Tracks
Three story building forming part of the Cadbury factory. Railway lines visible in front.
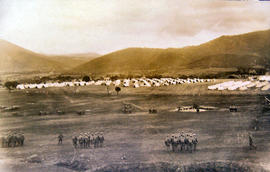
Soldiers being drilled at Claremont Military Camp
Soldiers being drilled in front of large group of military tents, part of the Claremont military camp.
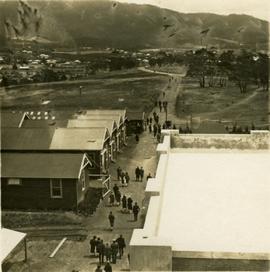
Employees leaving Cadbury Factory
Groups of employees walking past a row of wooden buildings at the end of their shift, Cadbury factory.

"Cadbury advertising studio, early 60s. Studio manager: Geoff Parr. Left to right Betty Aunders, Merilyn ?, Dianne Davis, Bob Clegg, John Forsyth."
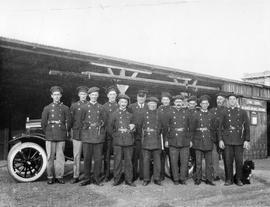
Group of firemen in uniform standing outside fire station, dog seated on ground at edge of group.
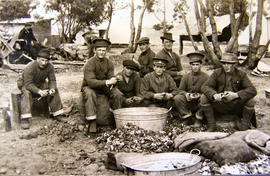
Men (some in uniform) peeling potatoes, seated around mental tubs. Tents and rough tin sheds visible in background.
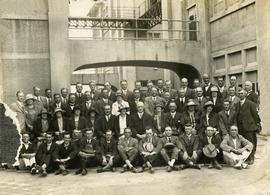
Large group of people photographed outside portion of the Cadbury building. Photograph slightly damaged at edge.
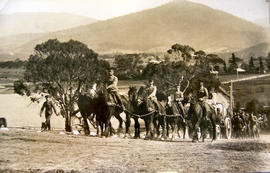
Procession at Claremont military camp
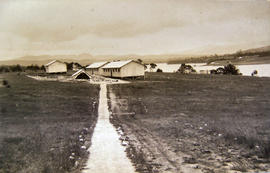
Detail Camp under construction
A collection of buildings identified as Detail Camp, part of the Claremont military camp.
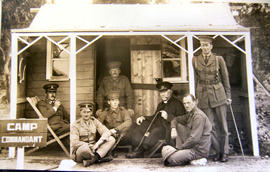
Men on verandah of Camp Commandant Cottage
Black and white photograph of Camp Commandant's hut with men in uniform seated outside, part of the Claremont military camp.

Sketches, mainly in pencil and crayon, made by Olive Muriel Pink of flowers found in the north of South Australia, Central and North Australia. The majority were made between June and December 1930, at various places along the railway between Port Augusta and Alice Springs. Later sketches were made in various parts of Australia between 1931 and 1960, but often without a note of the place and date. The sketches were often hurriedly made on pieces of thin, cheap paper, or even pieces of cardboard or brown paper. Some were coloured with crayon and a few, more finished drawings were coloured with watercolours. A later donation was made of books, personal belongings and sketches. A second series was received from the family of Olive Pink in 2016, this series includes Olive Pink's book collection, photographs, paintings, letters, items of clothing and other ephemera and memorabilia, some of which are nationally significant in their own right - such as the book plate made by Adrian Feint, notes and sketches done whilst camping with Daisy Bates, and photographs documenting life in Central Australia.
Olive Pink
Waterfront buildings and Salamanca, Hobart, Tasmania
Part of Walker Family Papers
Lantern slide from the collection of James Backhouse Walker of waterfront buildings and Salamanca, Hobart,Tasmania. Thought to have been prepared by J.W. Beattie (1859-1930) whose studio locations were in Elizabeth Street, Hobart from 1891-1920, Murray Street from 1921-40 and Cat and Fiddle Arcade, Hobart, until 1994.
John Watt Beattie
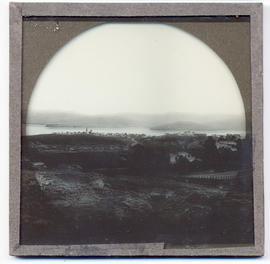
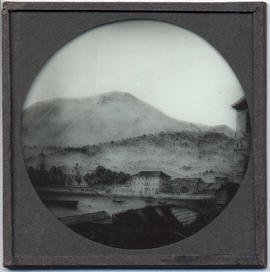
View of the Derwent River, Hobart, Tasmania
Part of Walker Family Papers
Lantern slide of view of the Derwent River, Hobart. Prepared by J.W. Beattie (1859-1930) whose studio locations were Elizabeth Street, Hobart from 1891-1920, Murray Street from 1921-40 and Cat and Fiddle until 1994. 1994.
John Watt Beattie

Part of Walker Family Papers
Lantern slide of Bishop Nixon Prepared by J.W. Beattie (1859-1930) whose studio locations were Elizabeth Street, Hobart from 1891-1920, Murray Street from 1921-40 and Cat and Fiddle until 1994.
John Watt Beattie
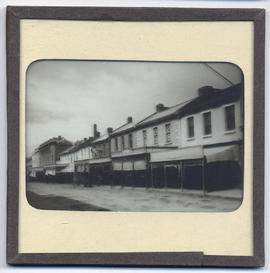
Part of Walker Family Papers
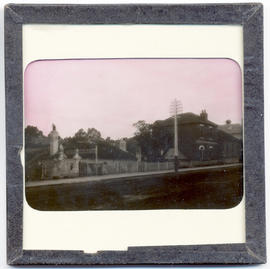
Lantern slide from the collection of James Backhouse Walker of a streetscape in Hobart, Tasmania. Thought to have been prepared by J.W. Beattie (1859-1930) whose studio locations were in Elizabeth Street, Hobart from 1891-1920, Murray Street from 1921-40 and Cat and Fiddle Arcade, Hobart, until 1994.
John Watt Beattie
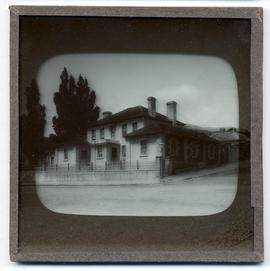
House, Hunter Street, Hobart, Van Diemen's Land
Part of Walker Family Papers
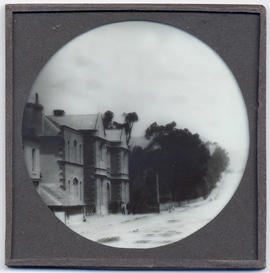
Lantern slide of house in Hunter Street, Hobart. Prepared by J.W. Beattie (1859-1930) whose studio locations were Elizabeth Street, Hobart from 1891-1920, Murray Street from 1921-40 and Cat and Fiddle until 1994.
John Watt Beattie
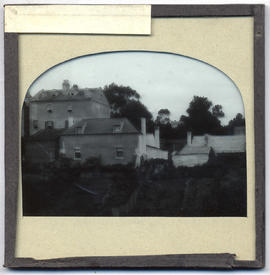
Part of Walker Family Papers
Lantern slide of house in Hobart. Prepared by J.W. Beattie (1859-1930) whose studio locations were Elizabeth Street, Hobart from 1891-1920, Murray Street from 1921-40 and Cat and Fiddle until 1994.
John Watt Beattie
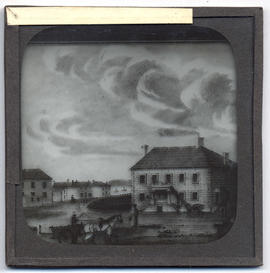
Early Hobart Town, Van Diemen's Land
Part of Walker Family Papers
Lantern slide from the collection of James Backhouse Walker of early Hobart Town, Van Diemen's Land from the harbour. Thought to have been prepared by J.W. Beattie (1859-1930) whose studio locations were in Elizabeth Street, Hobart from 1891-1920, Murray Street from 1921-40 and Cat and Fiddle Arcade, Hobart, until 1994. Quaker Collection.
John Watt Beattie
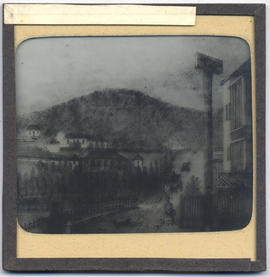
Buildings, early Hobart, Tasmania
Part of Walker Family Papers
Lantern slide from the collection of James Backhouse Walker of buildings in early Hobart, Tasmania. Thought to have been prepared by J.W. Beattie (1859-1930) whose studio locations were in Elizabeth Street, Hobart from 1891-1920, Murray Street from 1921-40 and Cat and Fiddle Arcade, Hobart, until 1994.
John Watt Beattie
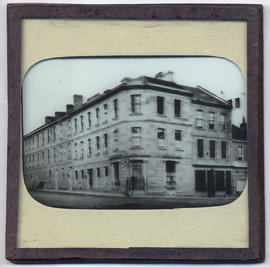
Buildings on the corner of Murray and Macquarie Street, Hobart ,Tasmania
Part of Walker Family Papers
Lantern slide from the collection of James Backhouse Walker of buildings on the corner of Murray and Macquarie Street, Hobart, Tasmania. Thought to have been prepared by J.W. Beattie (1859-1930) whose studio locations were in Elizabeth Street, Hobart from 1891-1920, Murray Street from 1921-40 and Cat and Fiddle Arcade, Hobart, until 1994. Quaker Collection.
John Watt Beattie
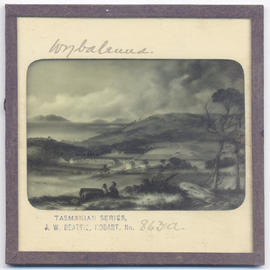
Part of Walker Family Papers
Lantern slide of Wybalena, Flinders Island. Prepared by J.W. Beattie (1859-1930) whose studio locations were Elizabeth Street, Hobart from 1891-1920, Murray Street from 1921-40 and Cat and Fiddle until 1994.
John Watt Beattie
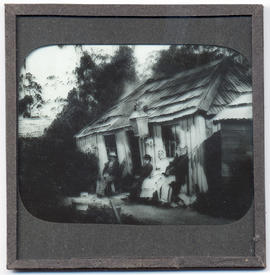
Wood's hut, the Springs, Mount Wellington, Hobart, Tasmania
Part of Walker Family Papers
Lantern slide of Wood's hut, the Springs, Mount Wellington, Hobart. Prepared by J.W. Beattie (1859-1930) whose studio locations were Elizabeth Street, Hobart from 1891-1920, Murray Street from 1921-40 and Cat and Fiddle until 1994.
John Watt Beattie
Waterloo Hotel, corner Murray and Davey Streets, Hobart, Van Diemen's Land, 1832
Part of Walker Family Papers
Lantern slide of Waterloo Hotel on the corner of Murray and Davey Streets, Hobart - from a painting dated 1832. Renamed Waterloo Tavern in 1842. Prepared by J.W. Beattie (1859-1930) whose studio locations were Elizabeth Street, Hobart from 1891-1920, Murray Street from 1921-40 and Cat and Fiddle until 1994.
John Watt Beattie
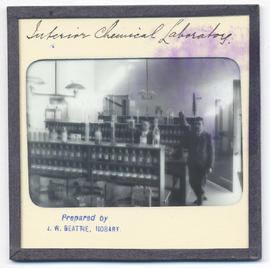
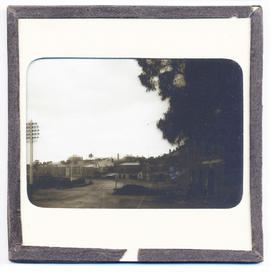
Part of Walker Family Papers
Lantern slides of the University of Tasmania, Queen's Domain, Hobart. Views of exterior and laboratories and library. Prepared by J.W. Beattie (1859-1930) whose studio locations were Elizabeth Street, Hobart from 1891-1920, Murray Street from 1921-40 and Cat and Fiddle until 1994 (Collection Pr.S.Uni/1-8)
John Watt Beattie
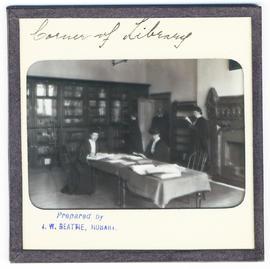
Corner of library, University of Tasmania, Queen's Domain, Hobart, late nineteenth century
Part of Walker Family Papers
Lantern slides of the University of Tasmania, Queen's Domain, Hobart. Views of exterior and laboratories and library. Prepared by J.W. Beattie (1859-1930) whose studio locations were Elizabeth Street, Hobart from 1891-1920, Murray Street from 1921-40 and Cat and Fiddle until 1994 (Collection Pr.S.Uni/1-8)
John Watt Beattie
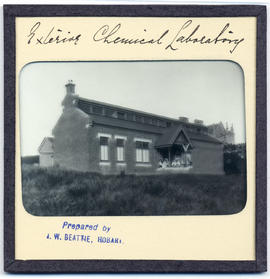
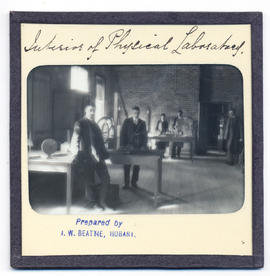
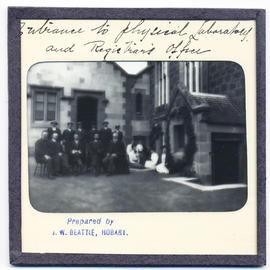
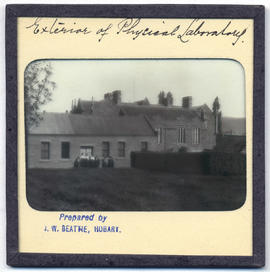
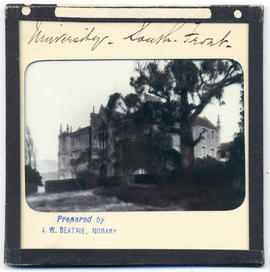
South front, University of Tasmania, Queen's Domain, Hobart, late nineteenth century
Part of Walker Family Papers
Lantern slides of the University of Tasmania, Queen's Domain, Hobart. Views of exterior and laboratories and library. Prepared by J.W. Beattie (1859-1930) whose studio locations were Elizabeth Street, Hobart from 1891-1920, Murray Street from 1921-40 and Cat and Fiddle until 1994 (Collection Pr.S.Uni/1-8)
John Watt Beattie
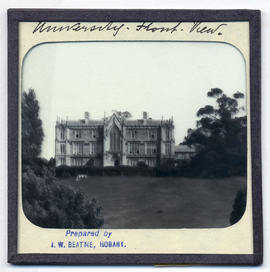
University of Tasmania, Queen's Domain, Hobart, late nineteenth century
Part of Walker Family Papers
Lantern slides of the University of Tasmania, Queen's Domain, Hobart. Views of exterior and laboratories and library. Prepared by J.W. Beattie (1859-1930) whose studio locations were Elizabeth Street, Hobart from 1891-1920, Murray Street from 1921-40 and Cat and Fiddle until 1994 (Collection Pr.S.Uni/1-8)
John Watt Beattie
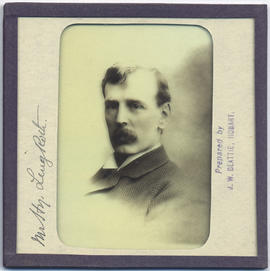
Henry Ling Roth (1855-1925) Tasmania
Part of Walker Family Papers
Lantern slide photograph of Henry Ling Roth. Prepared by J.W. Beattie (1859-1930) whose studio locations were Elizabeth Street, Hobart from 1891-1920, Murray Street from 1921-40 and Cat and Fiddle until 1994.
John Watt Beattie
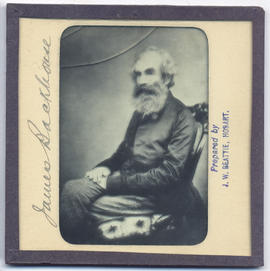
James Backhouse (1794-1869) Tasmania
Part of Walker Family Papers
Lantern slide of James Backhouse. Prepared by J.W. Beattie (1859-1930) whose studio locations were Elizabeth Street, Hobart from 1891-1920, Murray Street from 1921-40 and Cat and Fiddle until 1994.
John Watt Beattie
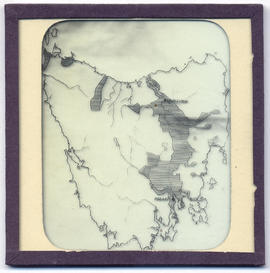
Part of Walker Family Papers
Lantern slide of maps of Tasmania. Prepared by J.W. Beattie (1859-1930) whose studio locations were Elizabeth Street, Hobart from 1891-1920, Murray Street from 1921-40 and Cat and Fiddle until 1994.
John Watt Beattie
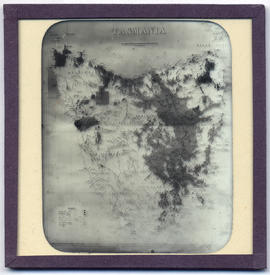
Part of Walker Family Papers
Lantern slide of maps of Tasmania. Prepared by J.W. Beattie (1859-1930) whose studio locations were Elizabeth Street, Hobart from 1891-1920, Murray Street from 1921-40 and Cat and Fiddle until 1994.
John Watt Beattie
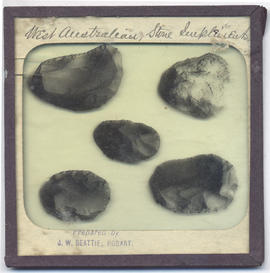
West Australian Aboriginal stone implements
Part of Walker Family Papers
Lantern slide of West Australian aboriginal stone implements. Prepared by J.W. Beattie (1859-1930) whose studio locations were Elizabeth Street, Hobart from 1891-1920, Murray Street from 1921-40 and Cat and Fiddle until 1994.
John Watt Beattie
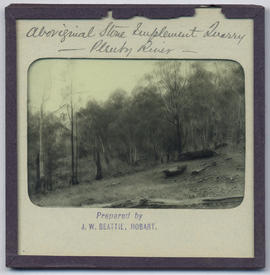
Plenty River, Van Diemen's Land, Tasmanian Aboriginal Stone Implement Quarry
Part of Walker Family Papers
Lantern slides of Tasmanian aboriginal stone implement quarry, Plenty river. Prepared by J.W. Beattie (1859-1930) whose studio locations were Elizabeth Street, Hobart from 1891-1920, Murray Street from 1921-40 and Cat and Fiddle until 1994.
John Watt Beattie

Tasmanian Aboriginal Stone Implement Quarry, Plenty River, Van Diemen's Land
Part of Walker Family Papers
Lantern slides of Tasmanian aboriginal stone implement quarry, Plenty river. Prepared by J.W. Beattie (1859-1930) whose studio locations were Elizabeth Street, Hobart from 1891-1920, Murray Street from 1921-40 and Cat and Fiddle until 1994.
John Watt Beattie
Part of Walker Family Papers
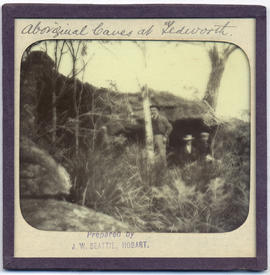
Lantern slide of aboriginal caves at Tedworth. Prepared by J.W. Beattie (1859-1930) whose studio locations were Elizabeth Street, Hobart from 1891-1920, Murray Street from 1921-40 and Cat and Fiddle until 1994.
John Watt Beattie
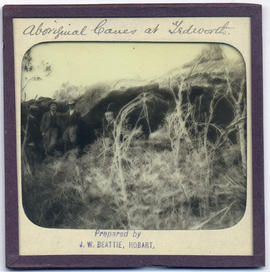
Part of Walker Family Papers
Lantern slide of aboriginal caves at Tedworth. Prepared by J.W. Beattie (1859-1930) whose studio locations were Elizabeth Street, Hobart from 1891-1920, Murray Street from 1921-40 and Cat and Fiddle until 1994.
John Watt Beattie
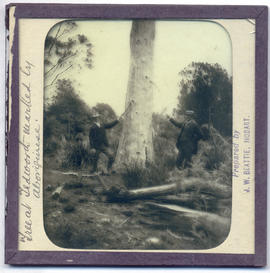
Tree marked by aborigines, Tedworth
Part of Walker Family Papers
Lantern slide of a tree marked by aborigines at Tedworth. Prepared by J.W. Beattie (1859-1930) whose studio locations were Elizabeth Street, Hobart from 1891-1920, Murray Street from 1921-40 and Cat and Fiddle until 1994.
John Watt Beattie
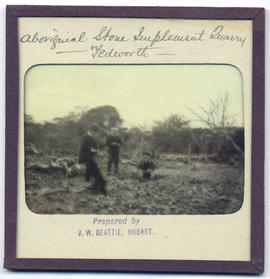
Part of Walker Family Papers
Lantern slide of an aboriginal implement quarry at Tedworth. Prepared by J.W. Beattie (1859-1930) whose studio locations were Elizabeth Street, Hobart from 1891-1920, Murray Street from 1921-40 and Cat and Fiddle until 1994.
John Watt Beattie
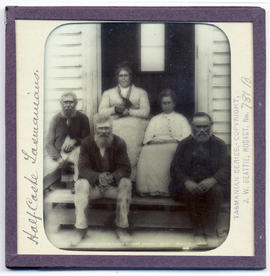
Part of Walker Family Papers
Lantern slide of mixed race Tasmanian aborigines. Prepared by J.W. Beattie (1859-1930) whose studio locations were Elizabeth Street, Hobart from 1891-1920, Murray Street from 1921-40 and Cat and Fiddle until 1994. The fourth person from the left is believed to be Mary Everett and the fifth person is believed to be Bunny Brown.
John Watt Beattie
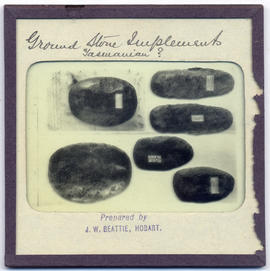
Ground stone Aboriginal implements
Part of Walker Family Papers
Lantern slide of ground stone aboriginal implements. Prepared by J.W. Beattie (1859-1930) whose studio locations were Elizabeth Street, Hobart from 1891-1920, Murray Street from 1921-40 and Cat and Fiddle until 1994.
John Watt Beattie
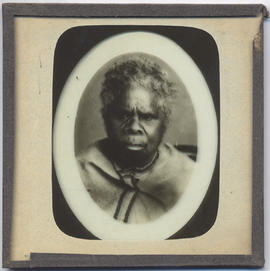
Part of Walker Family Papers
Lantern slide of a Tasmanian aboriginal woman. Prepared by J.W. Beattie (1859-1930) whose studio locations were Elizabeth Street, Hobart from 1891-1920, Murray Street from 1921-40 and Cat and Fiddle until 1994.
John Watt Beattie
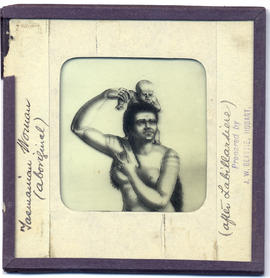
Tasmanian Aboriginal woman and child
Part of Walker Family Papers
Lantern slide of Tasmanian aboriginal woman and child 'after Labillardiere'. Prepared by J.W. Beattie (1859-1930) whose studio locations were Elizabeth Street, Hobart from 1891-1920, Murray Street from 1921-40 and Cat and Fiddle until 1994
John Watt Beattie
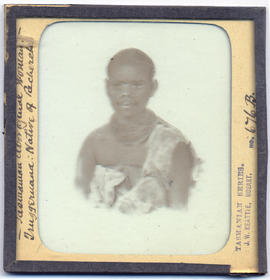
Tasmanian Aboriginal woman Truggeruana, native of Recherche, Van Diemen's Land
Part of Walker Family Papers
Lantern slide of Tasmanian aboriginal woman Truggeruana, native of Recherche. Prepared by J.W. Beattie (1859-1930) whose studio locations were Elizabeth Street, Hobart from 1891-1920, Murray Street from 1921-40 and Cat and Fiddle until 1994
John Watt Beattie
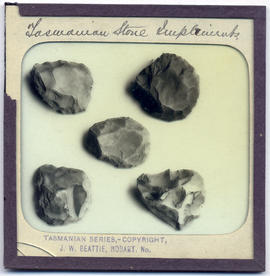
Tasmanian Aboriginal stone implements
Part of Walker Family Papers
Lantern slide of Tasmanian aboriginal stone implements. Prepared by J.W. Beattie (1859-1930) whose studio locations were Elizabeth Street, Hobart from 1891-1920, Murray Street from 1921-40 and Cat and Fiddle until 1994.
John Watt Beattie
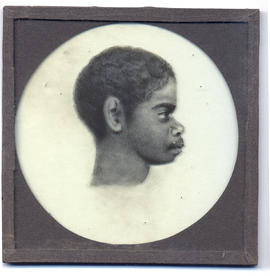
Part of Walker Family Papers
Lantern slide of Tasmanian aboriginal profile. Prepared by J.W. Beattie (1859-1930) whose studio locations were Elizabeth Street, Hobart from 1891-1920, Murray Street from 1921-40 and Cat and Fiddle until 1994.
John Watt Beattie
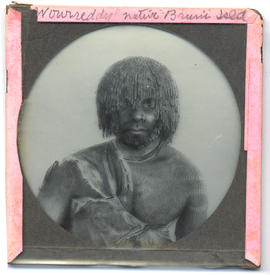
Tasmanian Aboriginal man Woureddy, native of Bruny Island, Van Diemen's Land
Part of Walker Family Papers
Lantern slide of Tasmanian aboriginal man Woureddy, native of Bruni[Bruny]Island. Prepared by J.W. Beattie (1859-1930) whose studio locations were Elizabeth Street, Hobart from 1891-1920, Murray Street from 1921-40 and Cat and Fiddle until 1994.
John Watt Beattie

Tasmanian Aboriginal man Timmy, native of the East Coast, Van Diemen's Land
Part of Walker Family Papers
Lantern slide of Tasmanian aboriginal man Timmy, native of the East Coast. Prepared by J.W. Beattie (1859-1930) whose studio locations were Elizabeth Street, Hobart from 1891-1920, Murray Street from 1921-40 and Cat and Fiddle until 1994.
John Watt Beattie
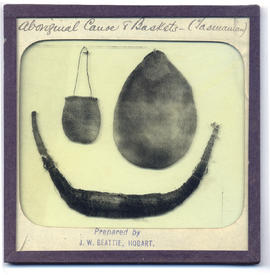
Tasmanian Aboriginal canoe and baskets
Part of Walker Family Papers
Lantern slide of Tasmanian aboriginal canoe and baskets. Prepared by J.W. Beattie (1859-1930) whose studio locations were Elizabeth Street, Hobart from 1891-1920, Murray Street from 1921-40 and Cat and Fiddle until 1994.
John Watt Beattie
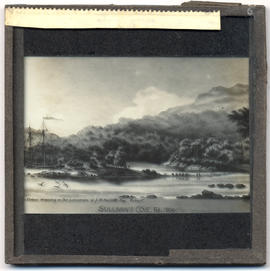
Sullivans Cove, Hobart Town, Van Diemen's Land in 1804
Part of Walker Family Papers
Lantern slide of Sullivans Cove, Hobart Town, Van Diemen's Land, in February, 1804. Inscribed with the words 'Water colour drawing in the possession of J. B. Walker Esq., Hobart, 1891'.
John Watt Beattie
Stonemason's house, Hobart ,Tasmania
Part of Walker Family Papers
Lantern slide from the collection of James Backhouse Walker of Stonemason's house, Hobart, Tasmania. Thought to have been prepared by J.W. Beattie (1859-1930) whose studio locations were in Elizabeth Street, Hobart from 1891-1920, Murray Street from 1921-40 and Cat and Fiddle Arcade, Hobart, until 1994.
John Watt Beattie
St. David's Park, Davey Street, Hobart, Tasmania
Part of Walker Family Papers
Lantern slide from the collection of James Backhouse Walker of St. David's Park, Davey Street, Hobart, Tasmania. Thought to have been prepared by J.W. Beattie (1859-1930) whose studio locations were in Elizabeth Street, Hobart from 1891-1920, Murray Street from 1921-40 and Cat and Fiddle Arcade, Hobart, until 1994. Quaker Collection.
John Watt Beattie
Part of Walker Family Papers
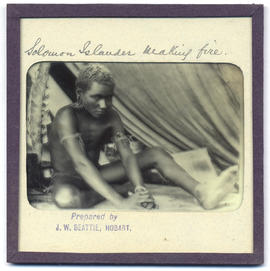
Lantern slide of Solomon Islander making fire. Prepared by J.W. Beattie (1859-1930) whose studio locations were Elizabeth Street, Hobart from 1891-1920, Murray Street from 1921-40 and Cat and Fiddle until 1994.
John Watt Beattie
Salamanca from Wharf, Hobart Town, Van Diemen's Land
Part of Walker Family Papers
Lantern slide from the collection of James Backhouse Walker of Salamanca from the Wharf, Hobart Town, Van Diemen's Land 1847. Prepared by J.W. Beattie (1859-1930) whose studio locations were in Elizabeth Street, Hobart from 1891-1920, Murray Street from 1921-40 and Cat and Fiddle Arcade, Hobart, until 1994. Quaker Collection.
John Watt Beattie
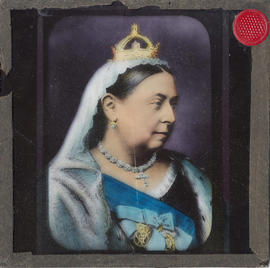
Part of Walker Family Papers
Lantern Slide of Queen Victoria, England.
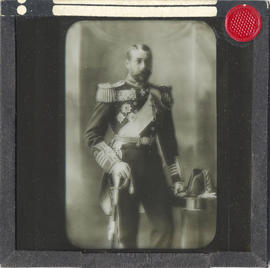
Part of Walker Family Papers
Lantern Slide of Prince Albert, husband of Queen Victoria, England.
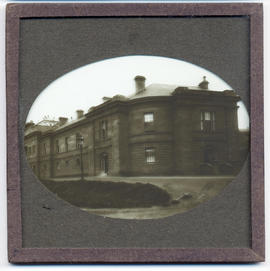
Parliament House, Hobart, Tasmania
Part of Walker Family Papers
Lantern slide of Parliament House, Hobart. Prepared by J.W. Beattie (1859-1930) whose studio locations were Elizabeth Street, Hobart from 1891-1920, Murray Street from 1921-40 and Cat and Fiddle until 1994.
John Watt Beattie
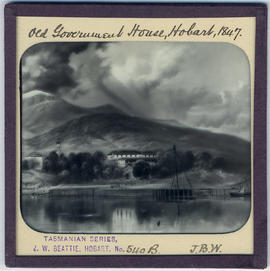
Old Government House, Hobart Town, Van Diemen's Land 1847
Part of Walker Family Papers
Lantern slide of early print of Old Government House, Hobart Town, Van Diemen's Land in 1847. From the collection of James Backhouse Walker. Prepared by J.W. Beattie (1859-1930) whose studio locations were in Elizabeth Street, Hobart from 1891-1920, Murray Street from 1921-40 and Cat and Fiddle Arcade, Hobart, until 1994.
John Watt Beattie
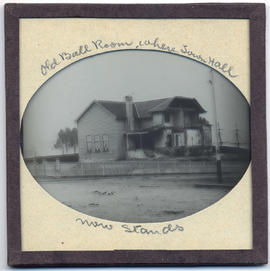
Old Ball Room where Town Hall now stands, Hobart
Part of Walker Family Papers
Lantern slide from the collection of James Backhouse Walker of the demolition of the old ball room where the Town Hall now stands, Hobart, Tasmania. Thought to have been prepared by J.W. Beattie (1859-1930) whose studio locations were in Elizabeth Street, Hobart from 1891-1920, Murray Street from 1921-40 and Cat and Fiddle Arcade, Hobart, until 1994.
John Watt Beattie
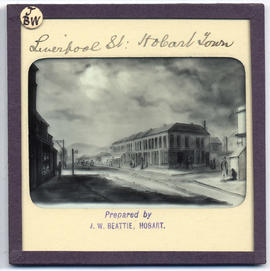
Part of Walker Family Papers
Lantern slide of Liverpool Street, Hobart. Prepared by J.W. Beattie (1859-1930) whose studio locations were Elizabeth Street, Hobart from 1891-1920, Murray Street from 1921-40 and Cat and Fiddle until 1994.
John Watt Beattie
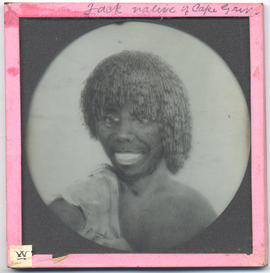
Part of Walker Family Papers
Lantern slide of Jack, native of Cape Grim. Prepared by J.W. Beattie (1859-1930) whose studio locations were Elizabeth Street, Hobart from 1891-1920, Murray Street from 1921-40 and Cat and Fiddle until 1994.
John Watt Beattie
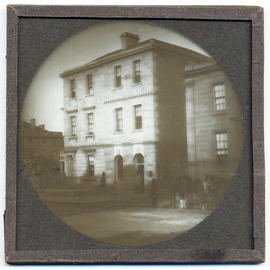
Part of Walker Family Papers
Lantern slide of J. Walch and Sons, Macquarie Street, Hobart c1880. Prepared by J.W. Beattie (1859-1930) whose studio locations were Elizabeth Street, Hobart from 1891-1920, Murray Street from 1921-40 and Cat and Fiddle until 1994.
John Watt Beattie

Hobart Town, Van Diemen's Land, from Old Wharf in 1839
Part of Walker Family Papers
Lantern slide of Hobart Town, Van Diemen's Land, from Old Wharf in 1839. From the collection of James Backhouse Walker. Prepared by J.W. Beattie (1859-1930) whose studio locations were in Elizabeth Street, Hobart from 1891-1920, Murray Street from 1921-40 and Cat and Fiddle Arcade, Hobart, until 1994.
John Watt Beattie
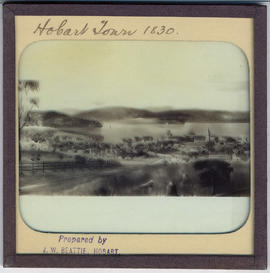
Hobart Town, Van Diemen's Land in 1830
Part of Walker Family Papers
Lantern slide of early print of Hobart Town, Van Diemen's Land in 1830. From the collection of James Backhouse Walker. Prepared by J.W. Beattie (1859-1930) whose studio locations were in Elizabeth Street, Hobart from 1891-1920, Murray Street from 1921-40 and Cat and Fiddle Arcade, Hobart, until 1994.
John Watt Beattie
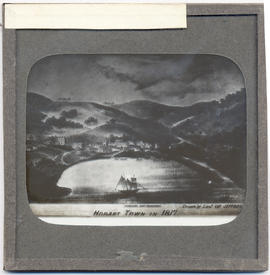
Hobart Town, Van Diemen's Land in 1817
Part of Walker Family Papers
Lantern slide of Hobart Town, Van Diemen's Land, in February, 1817. Inscribed with the words 'Hobart Town in 1817. Drawn by Lieut. Charles Jeffreys' - also shows the Government schooner the Kangaroo , church, Government House and Fort.
Charles Jeffreys
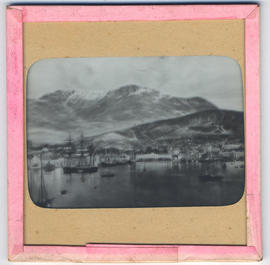
Hobart Town, Van Diemen's Land from the Harbour
Part of Walker Family Papers
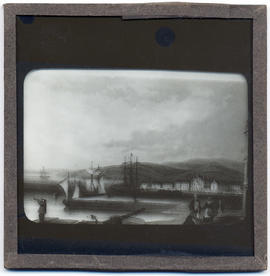
Lantern slide of an early print of Hobart Town, Van Diemen's Land from the harbour. From the collection of James Backhouse Walker. Thought to have been prepared by J.W. Beattie (1859-1930) whose studio locations were in Elizabeth Street, Hobart from 1891-1920, Murray Street from 1921-40 and Cat and Fiddle Arcade, Hobart, until 1994.
John Watt Beattie