Crotty near Mount Lyell rail spur
- AU TAS UTAS ITCCD 2017/3-AK179
- Item
- 1970
Part of Hal Wyatt Collection
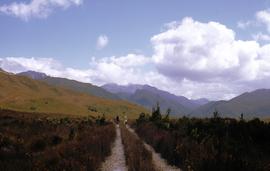
Colour photograph shows people walking on wheel path created on gravel track, at Crotty, near Mount Lyell rail spur.
Hal Wyatt
Crotty near Mount Lyell rail spur
Part of Hal Wyatt Collection
Colour photograph shows people walking on wheel path created on gravel track, at Crotty, near Mount Lyell rail spur.
Hal Wyatt
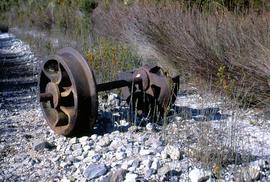
Narrow gauge rail wheels at Crotty
Part of Hal Wyatt Collection
Colour photograph shows rusted rail wheels from defunct narrow gauge rail line at Crotty
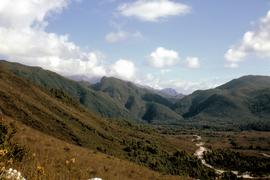
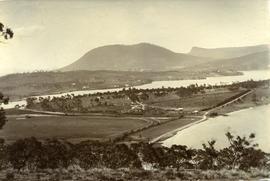
Crotty track to King River Gorge
Part of Hal Wyatt Collection
Colour photograph shows gravel track winding through low heathland scrub near Crotty.
Hal Wyatt
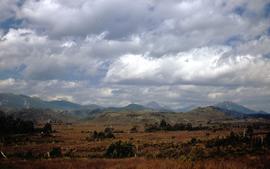
Part of Hal Wyatt Collection
Colour photograph shows low heath and scrub near Crotty, looking east to mountain range in distance.
Hal Wyatt
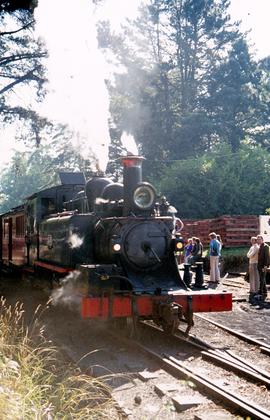
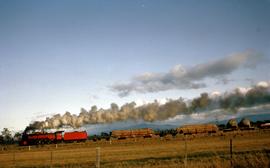
Steam train pulls into railyard near piles of sleepers
Part of Hal Wyatt Collection
Colour photograph shows people in railyard standing near switch equipment and stationary steam locomotive. Piles of several dozen railway sleepers stacked on side of rail line excavation.
Hal Wyatt
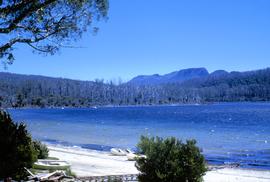
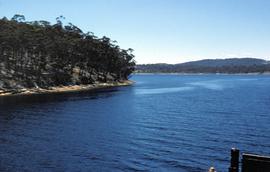
Boats on shore of Lake St Clair at Cynthia Bay
Part of Hal Wyatt Collection
Colour photograph shows boats on beach at Cynthia Bay, at southern end of Lake St Clair, near slipway rails leading to water.
Hal Wyatt
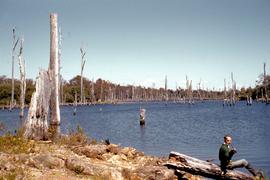
Part of Hal Wyatt Collection
Colour photograph shows man in gumboots sitting on a log, casting a fishing line into a dam near Waratah 1960.
Hal Wyatt
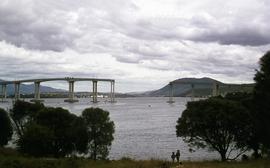
Missing span of Tasman Bridge after crash of Lake Illawarra
Part of Hal Wyatt Collection
Colour photograph of damaged Tasman Bridge, with two children standing on shoreline of Derwent River.
Hal Wyatt
Part of Hal Wyatt Collection
Colour photograph shows sailors in small yacht, with dark mainsail, on Derwent River, at dusk.
Hal Wyatt
Part of Hal Wyatt Collection
Colour photograph shows steam locomotive pulling timber on goods train at Perth 1964
Hal Wyatt
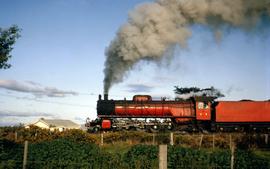
H Class locomotive steams slowly along at Perth
Part of Hal Wyatt Collection
Colour photograph shows Tasmanian Government Railways steam locomotive H3 on the tracks at Perth.
Hal Wyatt
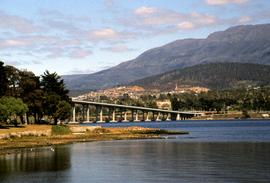
Derwent River and Tasman Bridge
Part of Hal Wyatt Collection
Colour photograph, undated, shows Tasman Bridge and Derwent River.
Hal Wyatt
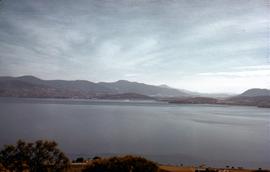
View of Derwent River from Doughty Point 1952
Part of Hal Wyatt Collection
Colour photograph of Derwent River, viewed from Doughty Point, taken 1952.
Hal Wyatt
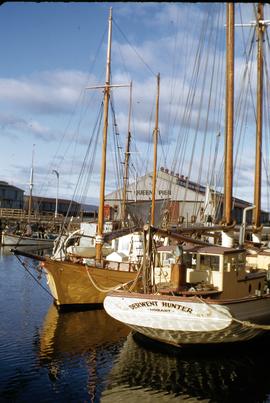
Derwent Hunter and Premier at Hobart docks
Part of Hal Wyatt Collection
Colour photograph of sailing boats, Derwent Hunter and Premier, moored at Hobart docks, near Queen’s Pier,
Hal Wyatt
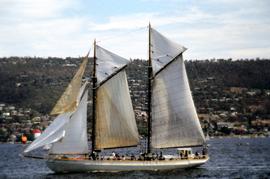
Derwent Hunter sailing off Sandy Bay
Part of Hal Wyatt Collection
Colour photograph of Derwent Hunter, sailing in Derwent River, off Sandy Bay, with other yachts under spinnaker in background.
Hal Wyatt
Part of Hal Wyatt Collection
Colour photograph taken 1960 of Barnes Bay, Bruny Island, showing shoreline, road and culvert, paddocks with horses and cattle grazing
Part of Hal Wyatt Collection
Colour photograph taken 1960 of Barnes Bay, Bruny Island, slightly out of focus, showing water and tree-covered headland
Hal Wyatt
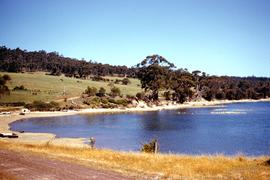
View of water across Barnes Bay 1960
Part of Hal Wyatt Collection
Colour photograph taken 1960 of Barnes Bay, Bruny Island, showing water and coastline, farmland across bay
Hal Wyatt
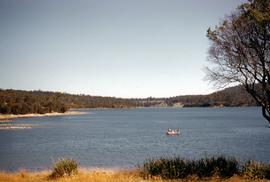
Dinghy on water in Barnes Bay 1960
Part of Hal Wyatt Collection
Colour photograph of three people in a dinghy, offshore at Barnes Bay, Bruny Island
Hal Wyatt
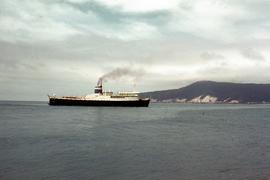
Bass Trader arriving in Emu Bay, 1962
Part of Hal Wyatt Collection
Colour photograph of cargo ship, Bass Trader, arriving at Port of Burnie, at Emu Bay, Round Hill in background of picture
Hal Wyatt
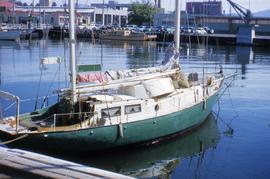
Sailing boat moored in Hobart, 1950s
Part of Hal Wyatt Collection
Colour photograph of small, two masted sailing boat, with green painted hull, and a sign Onrust, Holland, pinned to mast, Onrust also painted onto side of boat.
Hal Wyatt
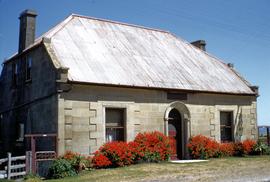
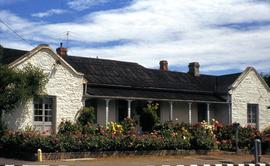
Part of Hal Wyatt Collection
Colour photograph of sandstone building with tin roof, geraniums blooming in front garden, Bath Inn, at Oatlands, Tasmania
Hal Wyatt
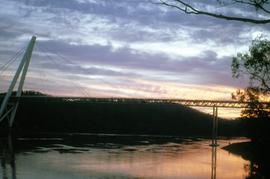
Part of Hal Wyatt Collection
Colour photograph of the Batman Bridge, looking across from eastern bank of Tamar River, 1960s, setting sun above hills
Hal Wyatt
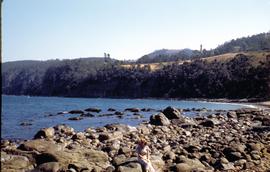
Part of Hal Wyatt Collection
Colour photograph of rocky foreshore at Taroona, 1951, with woman sitting on rock in foreground; shot tower visible in hills in rear of picture
Hal Wyatt
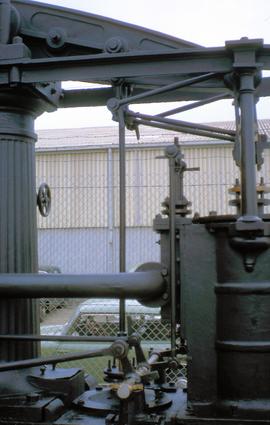
McNaught beam engine at works depot in Hobart 1967
Part of Hal Wyatt Collection
Colour photograph of beam engine in Hobart, purportedly the oldest McNaught Beam Engine in existence, originally built 1854 in Paisley Scotland, by A.W. Smith and used by Risby’s Sawmill in Hobart until 1955; photograph taken at Moonah public works depot 1967
Hal Wyatt

Part of Hal Wyatt Collection
Colour photograph of topiary bear alongside Midland Hwy, Tasmania
Hal Wyatt
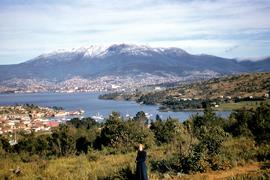
Snow cap on Mount Wellington taken from eastern shore
Part of Hal Wyatt Collection
Colour photograph of snow on Mount Wellington, taken from eastern shore of Derwent River, overlooking Bellerive and Rosny; woman in dark blue overcoat, standing on path in foreground
Hal Wyatt
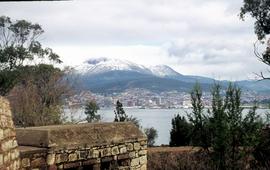
Mount Wellington viewed from Bellerive fort
Part of Hal Wyatt Collection
Colour photograph of Mount Wellington, as viewed from Kangaroo Bluff Fort at Bellerive, eastern shore of River Derwent
Hal Wyatt
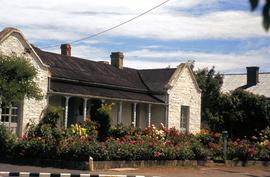
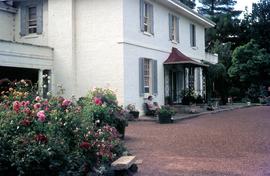
Rendered stone house with extensive floral garden
Part of Hal Wyatt Collection
Colour photograph of stone house, rendered white with flowers in bloom in front garden, in front of verandah, old tin roof, on corner block
Hal Wyatt
Rendered stone house at Bellerive with large floral garden
Part of Hal Wyatt Collection
Colour photograph of stone house at Bellerive, rendered or painted white, with flowers in bloom in front garden, in front of verandah, house old tin roof, on corner block, street pillar for PMG telephone cabling near letterbox
Hal Wyatt
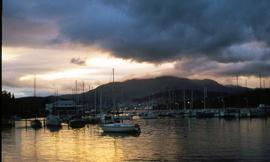
Part of Hal Wyatt Collection
Colour photograph taken at dusk, of Bellerive marina
Hal Wyatt
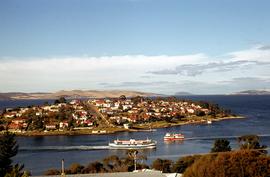
Part of Hal Wyatt Collection
Colour photograph shows two ferries travelling in opposite directions at Bellerive
Hal Wyatt
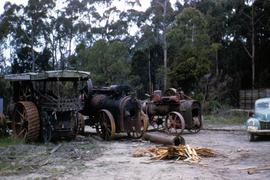
Part of Hal Wyatt Collection
Colour photograph of three steam engines in Best’s yard, Devonport, taken 1959; depicts three steam engines in a clearing in a eucalyptus bush setting with pile of scrap timber suitable for fuel and green motor vehicle.
Hal Wyatt
Part of Hal Wyatt Collection
Colour photograph of yachts racing on Derwent River with cargo ships berthed at Port of Hobart in background; foothills on land are dry
Hal Wyatt
Part of Hal Wyatt Collection
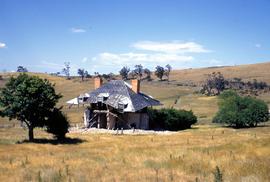
Colour photograph of abandoned farmhouse, with only a rickety timber roof frame, some internal walls and floors, three dormer windows and two orange brick chimneys intact; external brickwork has collapsed entirely into to piles of rubble; mature European trees planted surrounding house; electricity poles erected through property and roadside cutting across hillside shows line of road, possibly Midland Hwy, featuring white guide posts. Photograph file is named Bishton, possibly referring to Bishton Creek, near Jericho.
Hal Wyatt
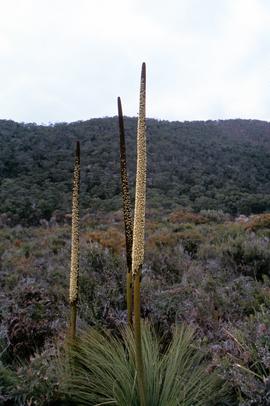
Spikes of flowering xanthorrhea australis
Part of Hal Wyatt Collection
Colour photograph of three spikes of the flowering xanthorrhea australis, also known as the black boy, in low heathland and bushland.
Hal Wyatt

Locomotive steam engine in railyard
Part of Hal Wyatt Collection
Colour photograph of black locomotive, shunting a rail car in unidentified rail yard, boiler design has a light, a low-profile front funnel, then two steam domes atop the centre of the locomotive boiler.
Hal Wyatt
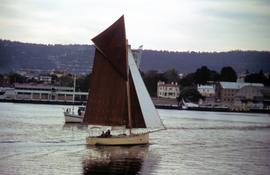
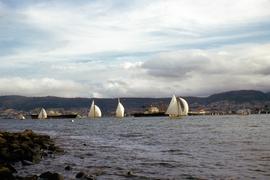
Yachts on river, one with black sail
Part of Hal Wyatt Collection
Colour photograph of three yachts under sail on Derwent River, one a ketch, has a black sail on the foremast.
Hal Wyatt
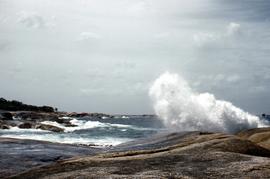
Rocky shoreline at blowhole, Bicheno
Part of Hal Wyatt Collection
Colour photograph of blowhole at Bicheno. Original filename misspells name of town as "Bichino".
Hal Wyatt
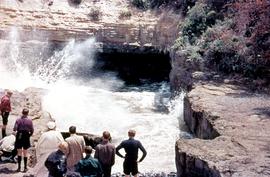
Sightseers at Eagle Hawk Neck blowhole
Part of Hal Wyatt Collection
Colour photograph of sightseers standing on rocks near blowhole at Eaglehawk Neck.
Hal Wyatt
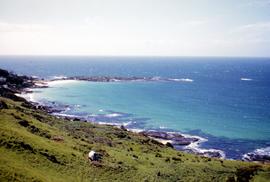
Shoreline at Boat Harbour, west of Wynyard
Part of Hal Wyatt Collection
Colour photograph of beach, rocks and paddocks leading to shore at Boat Harbour, west of Wynyard, looking out to sea. Photograph taken north-west over Boat Harbour Beach, also known as Jacobs Boat Harbour.
Hal Wyatt
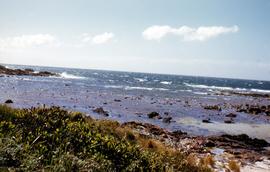
Rocky shore to west of Boat Harbour
Part of Hal Wyatt Collection
Colour photograph of rocky shoreline west of Boat Harbour, taken 1952.
Hal Wyatt
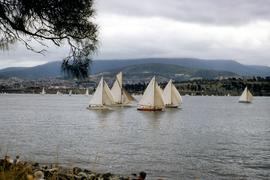
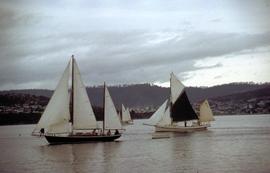
Boat race in Derwent River, 1954
Part of Hal Wyatt Collection
Colour photograph of single-masted yachts racing on Derwent River, 1954; people on rocky shore watching.
Hal Wyatt
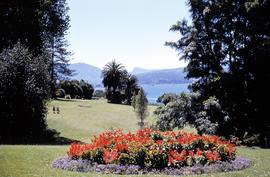
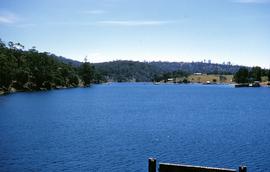
Flower bed at botanical gardens
Part of Hal Wyatt Collection
Colour photograph of Royal Tasmanian Botanical Gardens at Queens Domain, Hobart; depicts garden beds, lawns and Derwent River, looking towards Selfs Point Jetty and petroleum storage tanks at Selfs Point.
Hal Wyatt
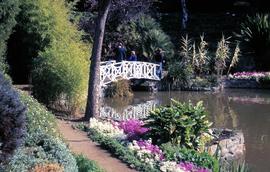
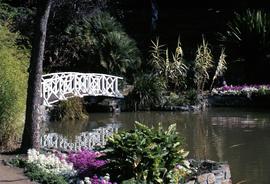
White bridge at botanical gardens
Part of Hal Wyatt Collection
Colour photograph shows people walking across white bridge, Royal Tasmanian Botanical Gardens, Queens Domain, Hobart.
Hal Wyatt
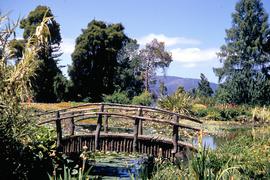
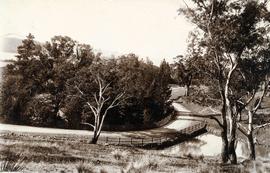
Timber bridge over pond at botanical gardens
Part of Hal Wyatt Collection
Colour photograph shows rustic timber bridge across a pond at Royal Tasmanian Botanical Gardens, Queens Domain, Hobart.
Hal Wyatt
White bridge, reflected in water, at botanical gardens
Part of Hal Wyatt Collection
Colour photograph of white bridge at Royal Tasmanian Botanical Gardens, Queens Domain, Hobart.
Hal Wyatt
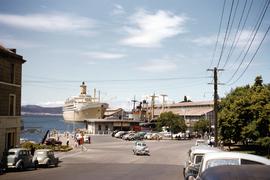
Murray Street ferry pier and ships docked in Hobart
Part of Hal Wyatt Collection
Colour photograph of ferry pier at bottom of Murray Street, Hobart, departure point for the Bellerive ferry; cargo and passenger ships docked at nearby Princes Wharf, including the steamer Orsova; sign advertising Cascade Ale on the Customs House Hotel.
Hal Wyatt
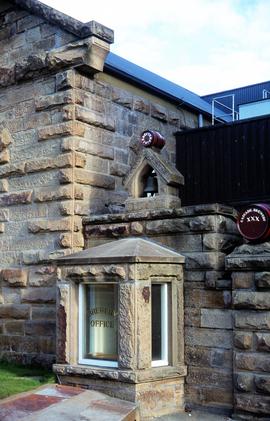
Office window at Cascade Brewery
Part of Hal Wyatt Collection
Colour photograph depicting facade of Cascade Brewery office, built in sandstone, with bell and decorative barrels mounted on roof, “Cascade Brewery XXX” and “Erected 1874”.
Hal Wyatt

Visitors at Brickendon, Longford
Part of Hal Wyatt Collection
Colour photograph shows two sightseers, man with camera hanging on strap around his neck and gloved woman carrying handbag, outside main house at Brickendon, historic 465ha estate established and farmed by William Archer and descendants since 1824, who invited tourists to their property from the late 20th century.
Hal Wyatt
Visitor seated near front door and garden at Brickendon
Part of Hal Wyatt Collection
Colour photograph shows a woman seated on park bench outside main house at Brickendon, historic 465ha estate established and farmed by William Archer and descendants since 1824, who invited tourists to their property from the late 20th century.
Hal Wyatt

Part of Hal Wyatt Collection
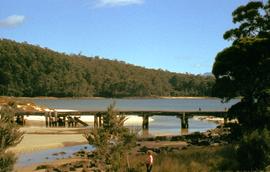
Colour photograph shows water flowing underneath sandstone piers and supports of road bridge at Jericho.
Hal Wyatt
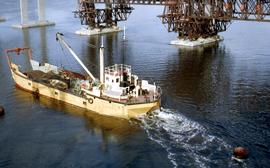
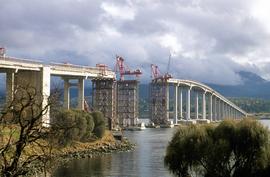
Barge working on Tasman Bridge construction
Part of Hal Wyatt Collection
Colour photograph shows a barge in the Derwent River, near partially constructed pylons of Tasman Bridge, 1964.
Hal Wyatt
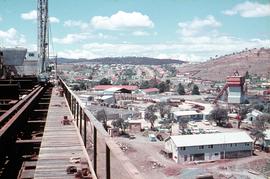
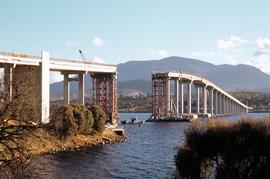
Construction depot and office of Tasman Bridge, 1964
Part of Hal Wyatt Collection
Colour photograph shows office and construction depot of Bridge Co on Derwent’s Eastern Shore, during construction of the Tasman Bridge across the Derwent River, 1964.
Hal Wyatt
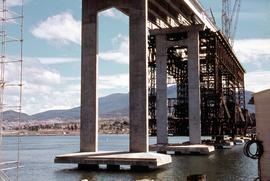
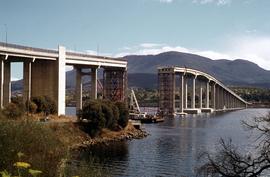
Tasman Bridge under construction from Eastern Shore
Part of Hal Wyatt Collection
Colour photograph shows pylons supporting Tasman Bridge, viewed from the Derwent’s Eastern Shore, during construction of the Tasman Bridge across the Derwent River, 1964.
Hal Wyatt
Part of Hal Wyatt Collection
Colour photograph of road bridge with white painted rails, amid bushland on East Coast, 1971.
Hal Wyatt
Part of Hal Wyatt Collection
Colour photograph of timber bridge traversing tidal creek with sand banks.
Hal Wyatt
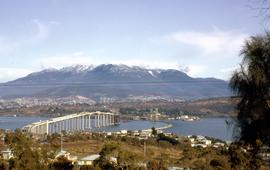
Tasman Bridge nears completion
Part of Hal Wyatt Collection
Colour photograph shows construction of Tasman Bridge, from Derwent River’s Eastern Shore. Shows spans of Tasman Bridge almost completed from Eastern Shore, temporary floating Hobart Bridge upstream of new multi-lane road bridge; snow on Mount Wellington in background. Printing or scanning error in photograph/slide shows coloured lines horizontally through. photograph.
Hal Wyatt
Part of Hal Wyatt Collection
Colour photograph shows site of repair work to Tasman Bridge, damaged by the crash of the ore carrier Lake Illawarra in January 1975.
Hal Wyatt
Repair work on Tasman Bridge from Eastern Shore
Part of Hal Wyatt Collection
Colour photograph shows site of repair work to Tasman Bridge, damaged by the crash of the ore carrier Lake Illawarra in January 1975. Photo taken from Eastern Shore of Derwent.
Hal Wyatt
Repair work on Tasman Bridge continues
Part of Hal Wyatt Collection
Colour photograph shows site of repair work to Tasman Bridge, damaged by the crash of the ore carrier Lake Illawarra in January 1975; missing pylons being replaced
Hal Wyatt
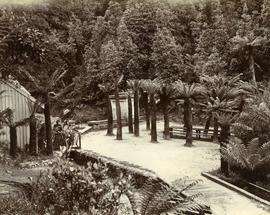
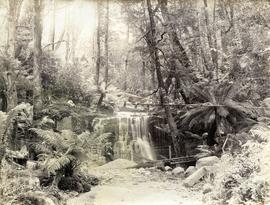
Part of Photographs of Edward Verrell
Black-and-white photograph shows walking path at Fern Tree Bower, Mount Wellington
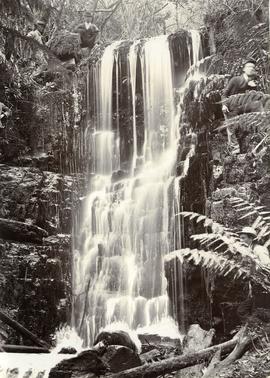
Men posing for camera at Silver Falls
Part of Photographs of Edward Verrell
Black-and-white vertical/portrait photograph of four men posing for the camera while standing or squatting above or beside a waterfall on Mount Wellington, believed to be Silver Falls
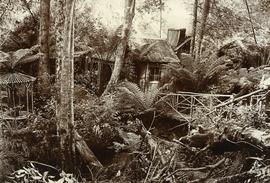
Part of Photographs of Edward Verrell
Black-and-white photograph of rustic hut built amid fern trees on walking track at Mount Wellington, two figures walking across timber bridge amid fern fronds
Part of Photographs of Edward Verrell
Black-and-white photograph shows path to near base of waterfall in foothills of Mount Wellington, two men standing near a barrel beside a metal mesh and barbed wire fence and a padlocked gate barring access to the stream
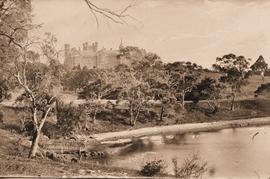
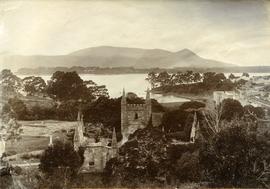
Government House in Hobart, viewed from the river, across Rose Bay
Part of Photographs of Edward Verrell
Black-and-white photograph shows waves lapping shoreline of Derwent River in foreground, with Government House on the hill, surrounded by mature trees, tall picket fence runs parallel with river, two wires strung between poles, visible through trees
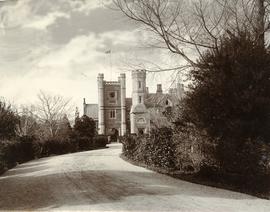
Western approach to Government House
Part of Photographs of Edward Verrell
Black-and-white photograph shows gravel road leading to western approach to Government House, Hobart, featuring clocktower with Union Jack hoisted and bas relief sculpture above doorway.
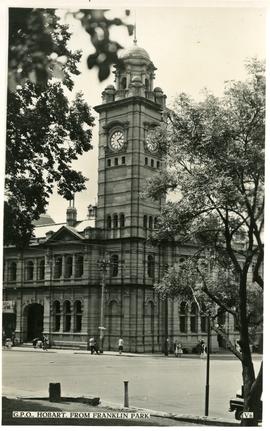
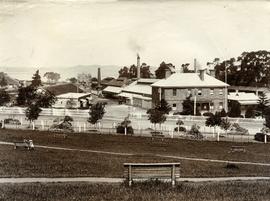
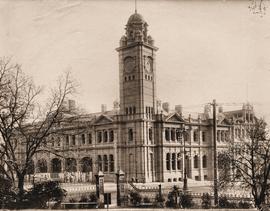
Hobart General Post Office from Franklin Park
Part of Photographs of Edward Verrell
Black-and-white photograph shows Hobart General Post Office viewed from Franklin Park. Words “G.P.O., HOBART, FROM FRANKLIN PARK” and “V6” are typewritten in black on white reverse panel at bottom of photograph
Hobart Railway Station, taken from university gardens
Part of Photographs of Edward Verrell
Black-and-white photograph shows Hobart Railway Station, viewed from gardens of the University of Tasmania, including the Tasmanian Government Railways workshops
Part of Photographs of Edward Verrell
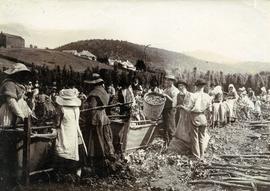
Black-and-white photograph shows men, women and children stripping hop cones into hessian-covered troughs, carrying baskets and sacks of harvested hops on the extensive hop grounds. The plant was cultivated widely at Glenorchy, Margate, Kingston and the Upper Derwent Valley area.
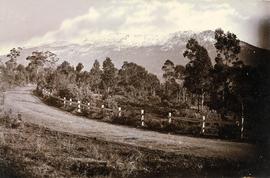
View of snow on Mount Wellington from Huon Road
Part of Photographs of Edward Verrell
Black-and-white photograph shows snow on Mount Wellington viewed from the verge of the Huon Road, South Hobart, with post-and-rail fence alongside roadway.
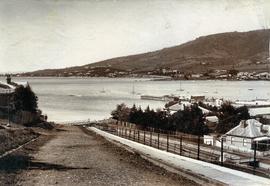
View from Bath Street, Battery Point
Part of Photographs of Edward Verrell
Black-and-white photograph of Bath Street, Battery Point, looking across Derwent River to Sandy Bay and St Helena Point.
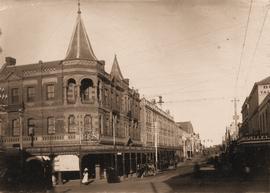
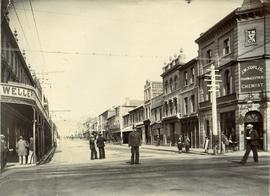
Miller’s Corner at Liverpool and Murray streets, Hobart
Part of Photographs of Edward Verrell
Black-and-white photograph depicts Miller’s Corner on the intersection of Liverpool Street and Murray streets, Hobart, looking towards waterfront down Murray Street. A.P. Miller, dispensing chemist, died 1904
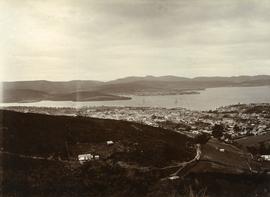
View from Queens Domain looking north to Cornelian Bay and New Town Bay
Part of Photographs of Edward Verrell
Black-and-white photograph taken from elevated point on Queen’s Domain, looking north up Derwent River towards Cornelian Bay and New Town Bay; Risdon Park Racecourse (1880s-1926) at New Town in foreground, early burial plots in headland of Cornelian Bay Cemetery at right of picture.
Hobart GPO before installation of clock in tower
Part of Photographs of Edward Verrell
Black-and-white photograph shows Hobart General Post Office viewed from Franklin Park before the installation of the clock in the clocktower.
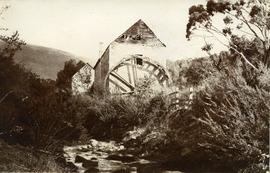
Water mill on New Town Rivulet
Part of Photographs of Edward Verrell
Black-and-white photograph shows water wheel on outside of mill on New Town Rivulet at Lenah Valley

Ruins of church at Port Arthur
Part of Photographs of Edward Verrell
Black-and-white photograph shows ruins of the church at Port Arthur, damaged by fire in 1884,with charred timber framework in the roof, remnant shingles on the roof and climbing plants covering the sandstone of the church walls. Handwritten words “Church at Port Arthur” in lower left corner of image.
Elevated view of church ruins at Port Arthur
Part of Photographs of Edward Verrell
Black-and-white photograph shows elevated view of ruined church at Port Arthur, including charred timber roof framework; with view of waterfront and other buildings on Port Arthur site; cut hay is drying in paddock at front of church.
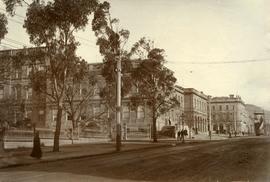
Public buildings near Franklin Square, Hobart
Part of Photographs of Edward Verrell
Black-and-white photograph shows public buildings near Franklin Square, Hobart
Road to Government House, on Gun Carriage Drive
Part of Photographs of Edward Verrell
Black-and-white photograph taken looking north along Gun Carriage Drive towards Government House, Hobart, with post-and-rail fences on Derwent River side; a horse harnessed to a four-wheel carriage, is on the left of the road; a small jetty extends from the shoreline and a boat is visible through the trees, anchored just off shore.
Part of Photographs of Edward Verrell
Black-and-white photograph shows stone buildings along Salamanca Place, timber stacked on New Wharf and masts of ships docked at the wharf; signs on buildings for “A.E. Lord Wool Merchant” and “W.D. Peacock and Co.”, historic home Lenna and eastern conservatory visible on hilltop behind towards Battery Point; maritime signal station with the Time Ball that was dropped automatically at 1pm, after a relayed telegraph signal from the Melbourne Observatory.
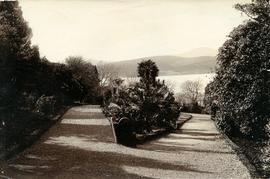
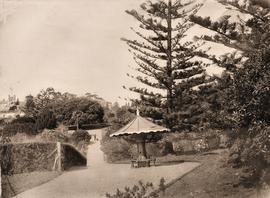
Walking path in Royal Botanical Gardens
Part of Photographs of Edward Verrell
Black-and-white photograph shows gravel walking path in Royal Botanical Gardens

Ships docked at New Wharf, Hobart
Part of Photographs of Edward Verrell
Black-and-white photograph shows sailing ships moored at New Wharf, Hobart, in front of Salamanca Place, with milled timber stacked on edge of wharf
Part of Photographs of Edward Verrell
Photograph showing the first hatchery building built in 1870 at the Salmon Ponds at Plenty surrounded by landscaped grounds filled with exotic trees.

Sandy Bay Road looking towards Hobart
Part of Photographs of Edward Verrell
Black-and-white photograph shows Sandy Bay Road, with tram tracks on riverside of road, electric wires for Hobart Electric Tramway, carriage wheelmarks in the unpaved road surface, electricity transmission wires strung from poles mounted with porcelain insulators
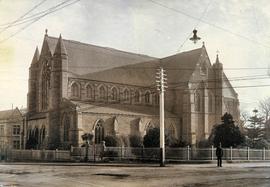
Part of Photographs of Edward Verrell
Black-and-white photograph of St David’s Cathedral, Hobart, including original fence of St David’s Church, which occupied the site until the 1860s
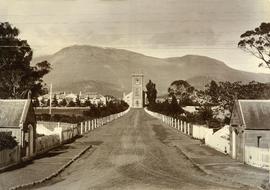
Part of Photographs of Edward Verrell
Black-and-white photograph looking up St John’s Avenue, towards St John’s Church, New Town
Part of Photographs of Edward Verrell
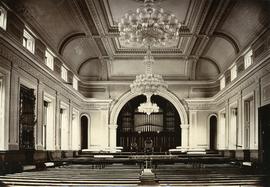
Black-and-white photograph shows interior of Hobart Town Hall, with low-hanging chandelier and pipe organ
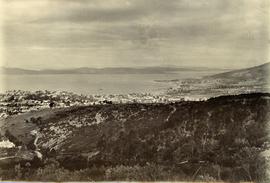
Elevated view of Hobart looking to upper end of Liverpool Street
Part of Photographs of Edward Verrell
Black-and-white photograph taken from foothills of Mount Wellington shows settlement of Hobart and upper end of Liverpool Street, now called Liverpool Crescent
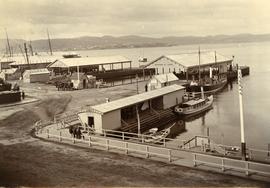
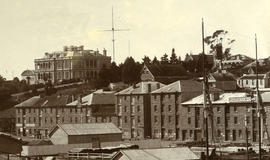
Franklin Pier, Brooke Street Pier and Watermen’s Wharf, Hobart
Part of Photographs of Edward Verrell
Black-and-white photograph shows three men sitting on a fence railing outside the entry to Watermen’s Wharf, with horse-drawn carriages pulled up near the Franklin Pier and Brooke Street Pier
Elevated view of Goulburn Street, Hobart
Part of Photographs of Edward Verrell
Black-and-white photograph shows an elevated view of Goulburn Street, Hobart, looking south down Derwent River estuary past Sandy Bay
Decorative seat at Royal Botanical Gardens
Part of Photographs of Edward Verrell
Black-and-white photograph of Royal Botanical Gardens, showing a decorative undercover seat constructed around the stump and butt of a tree. Government House visible in background
Part of Photographs of Edward Verrell
Black-and-white photograph depicts police officer standing in middle of Liverpool Street, Hobart, with YMCA and J.W. Toplis Pharmaceutical Chemist listed as tenants of the corner building.
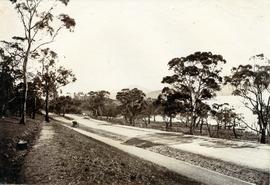
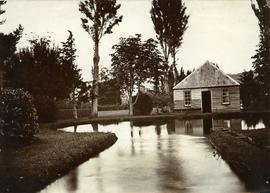
Lower Domain Road at back of Royal Botanical Gardens
Part of Photographs of Edward Verrell
Black-and-white photograph of road crossing a pond on Lower Domain Road near Royal Botanical Gardens. Towers of Government House visible behind trees.
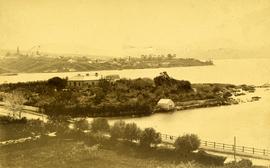
View of Dunkleys Point at Sandy Bay
Part of Photographs of Edward Verrell
Black-and-white photograph shows Sandy Bay Road in foreground, the grand home St Helena on what is known as Dunkleys Point, and Battery Point on the opposite shore of the bay
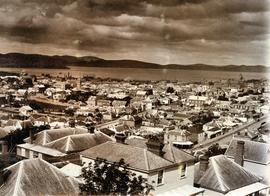
Rooftops of Hobart looking east
Part of Photographs of Edward Verrell
Black-and-white photograph shows view of Hobart rooftops looking east over central city streets including Harrington Street and Murray Street
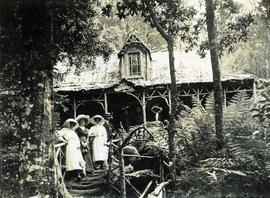
Visitors at Falls Hut, Mount Wellington
Part of Photographs of Edward Verrell
Black-and-white photograph shows visitors standing on front steps and veranda at Falls Hut, built 1897, at the Cascades, on road to Mount Wellington