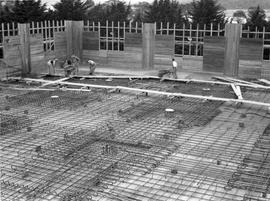
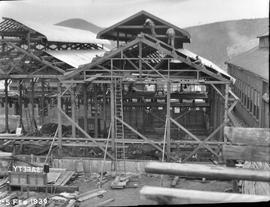
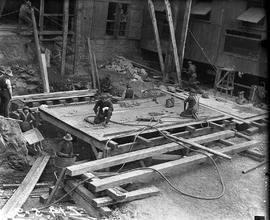
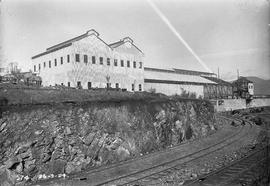
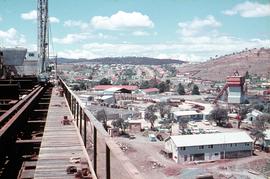
Construction of warehouse, Cadbury's Factory
- AU TAS UTAS ITCCD 2017/18-0391
- Item
- 1956
Construction of warehouse second floor, Cadbury's factory 1956.
Construction of warehouse, Cadbury's Factory
Construction of warehouse second floor, Cadbury's factory 1956.
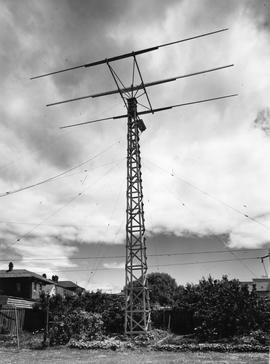
Aerial mast in suburban area.
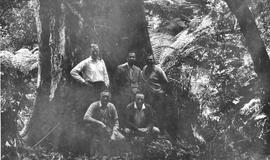
Men in front of Man ferns and a large tree
Men standing against large tree trunk, surrounded by man ferns.
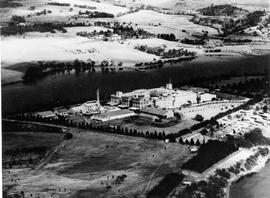
Cadbury factory and surrounding area, taken from above.
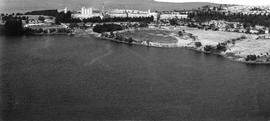
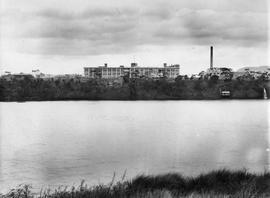
Cadbury Factory on the Derwent River
Looking across the river to Cadbury factory, Claremont.
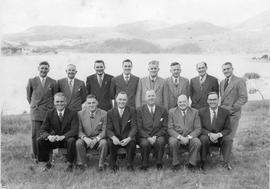
Group of men in business dress posing for photograph on lawn with water behind.
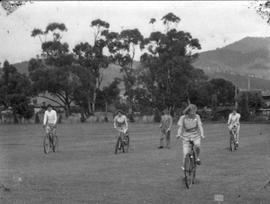
Men and women riding bikes across grassy field, gum trees and hills behind.
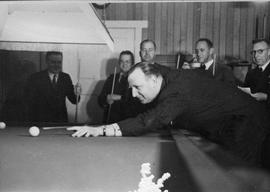
Man taking billiards shot with others looking on.
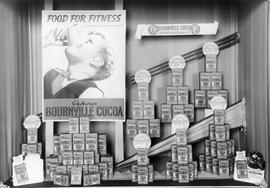
Display of Cadbury's Bournville Cocoa packets with signs indicating the product was reduced by one penny to one shilling and seven pence per quarter pound packet. Poster advertises cocoa as Food for Fitness with 120 cups from every pound.
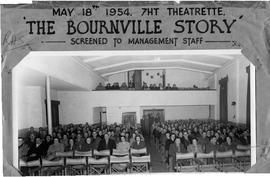
Cadbury Management staff attending the screening of The Bournville Story, at the 7HT Theatrette, May 18, 1954.
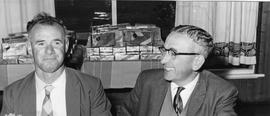
Two men seated in front of tables containing boxed chocolates.
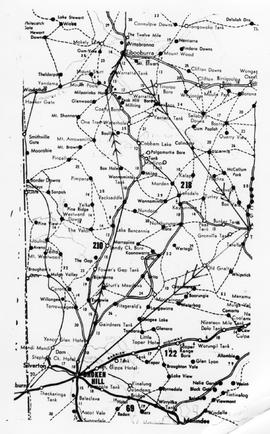
Map of Broken Hill and surrounds
Map of Broken Hill and surrounding area.
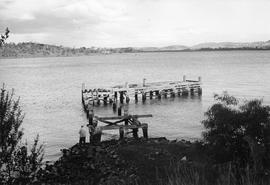
Two men standing next to a jetty in disrepair. River and suburbs in distance.
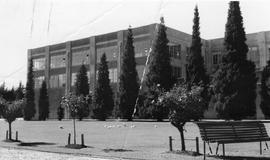
Part of the Cadbury factory with lawns, trees and standard rose bushes in front.
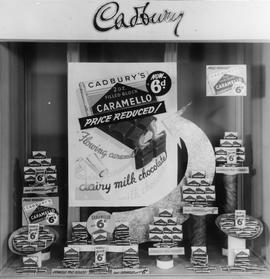
Cadbury Caramello Chocolate Display
Display of Cadbury Caramello chocolates showing a price reduction to sixpence for a 2 ounce block.
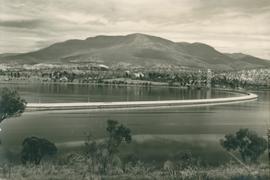
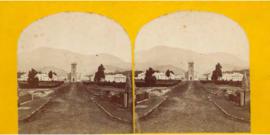
Floating Bridge, Derwent River
Parte de George Musgrave Parker : Correspondence and research records
Photograph of the Floating Bridge across the Derwent River
George Musgrave Parker

Parte de George Musgrave Parker : Correspondence and research records
Postcard by D.I.C. Photo of the Post Office, Hobart, taken from Franklin Square
George Musgrave Parker
Parte de George Musgrave Parker : Correspondence and research records
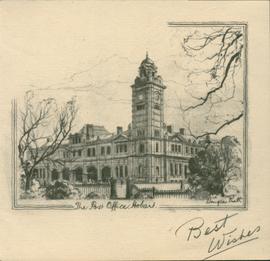
Small pencil sketch the Post Office, Hobart, by Douglas Pratt
George Musgrave Parker
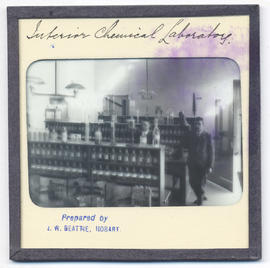
Interior of chemical laboratory at Domain House
Parte de Photographic reproduction collection
Interior of chemical laboratory, Domain House, Hobart.
John Watt Beattie
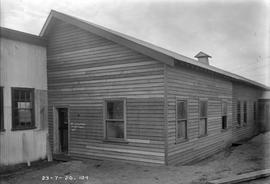
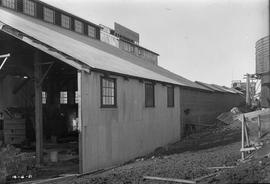
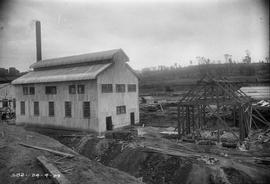
New weatherboard building at E.Z. Co. Zinc Works
Black-and-white photograph shows weatherboards fitted to new building at E.Z. Co. Zinc Works at Risdon
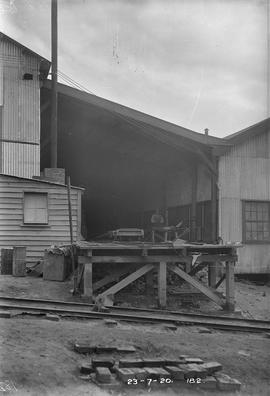
Loading bay at E.Z. Co. Zinc Works
Black-and-white photograph depicts man standing in the shelter of a loading bay beside trolleys on tracks at E.Z. Co. Zinc Works at Risdon
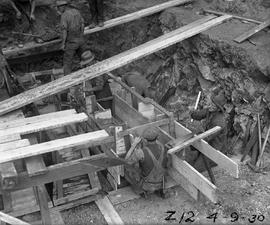
Expansion of E.Z. Co. Zinc Works cell room 1930
Black-and-white photograph of construction of cell room extension at E.Z. Co. Zinc Works at Risdon. Men climbing on beams of roof, a large sign reading “SAFETY” is mounted at ground level.
Concrete framework of new building at E.Z. Co. Zinc Works
Black-and-white photograph depicts workman kneeling at base of partially constructed concrete-framed building and man straddling the roof beams on site of E.Z. Co. Zinc Works at Risdon

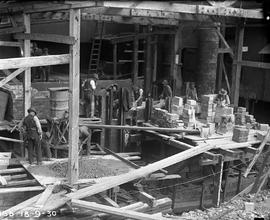
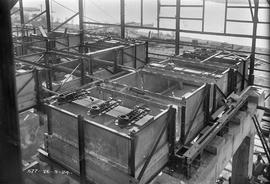
Construction of pure solution tank at E.Z. Co. Zinc Works
Black-and-white photograph shows construction of No. 6 pure solution tank in the cell division at E.Z. Co. Zinc Works at Risdon, January 1930
Corrugated iron shed dwarfed by larger building under construction at E.Z. Co. Zinc Works at Risdon
Black-and-white photograph shows small corrugated iron cottage or shed on a hillside below larger, open-fronted building under construction at E.Z. Co. Zinc Works at Risdon
Construction of furnace at E.Z. Co. Zinc Works
Black-and-white photograph shows workmen building the Derwent Prime furnace at E.Z. Co. Zinc Works at Risdon
Workers assembling base of furnace jacket at E.Z. Co. Zinc Works
Black-and-white photograph shows men assembling bottom jacket of Derwent Prime furnace at E.Z. Co. Zinc Works at Risdon
Boxing for foundations of Derwent Prime furnace at E.Z. Co. Zinc Works
Black-and-white photograph shows workmen building box work for foundations of Derwent Prime furnace at E.Z. Co Zinc Works at Risdon 1930
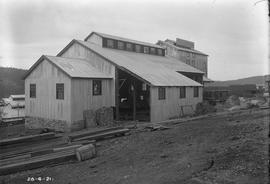
Bricks stacked inside corrugated iron shed at E.Z. Co. Zinc Works at Risdon
Black-and-white photograph shows construction and extension of factory building at E.Z. Co. Zinc Works at Risdon, with bricks stacked inside building partially clad in corrugated iron 1921
Bricks and timber stacked near corrugated iron building at E.Z. Co. Zinc Works at Risdon
Black-and-white photograph shows stacks of bricks and sawn timber near corrugated iron-clad building with solid stone foundation, situated above the railway line at E.Z. Co. Zinc Works at Risdon

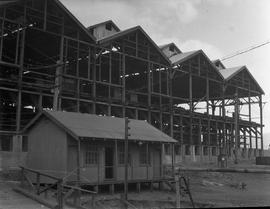
Black-and-white photograph shows elevated view of the construction of the roasting and leaching divisions of the 100-Ton Plant, below the cell room, at E.Z. Co. Zinc Works, looking west towards Mount Faulkner
New buildings under construction above railway cutting at E.Z. Co. Zinc Works 1924
Black-and-white photograph shows construction of new buildings above a railway line cutting, looking west, at E.Z. Co. Zinc Works at Risdon 1924
Interior tanks being fitted out in partially constructed building at E.Z. Co. Zinc Works
Black-and-white photograph shows partially completed tanks atop heavy concrete foundations in a building under construction, at E.Z. Co. Zinc Works at Risdon 1924
Bricks and timber stacked at E.Z. Co. Zinc Works at Risdon 1924
Black-and-white photograph shows piles of bricks and sawn timber amid excavation work and construction of new buildings at E.Z. Co. Zinc Works at Risdon
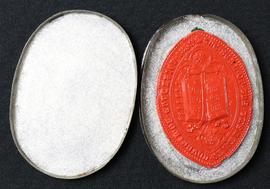
Seal of Degree of Associate of Arts
Seal of Tasmanian Council of Education 1859, red wax, lozenge shaped, backed paper: open book "Floreat Tasmania' on diamond pattern, in tin with document Diploma of degree of Associate of Arts awarded to Henry Lewis Garrett of Hobart Town.
Henry Lewis Garrett
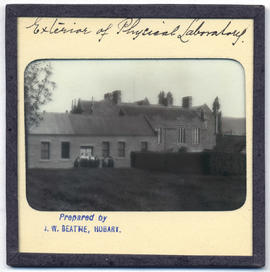
Exterior of physical laboratory at the rear of Domain House
Parte de Photographic reproduction collection
Exterior of physical laboratory at the rear of Domain House, Hobart.
John Watt Beattie
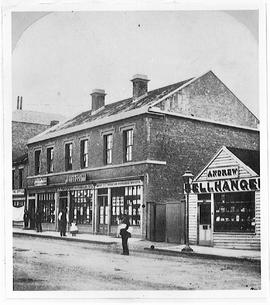
Photograph of Westcott's Bookshop and circulating library
Parte de Dallas Collection
Photograph of Westcott's Bookshop and circulating library, Collins Street, Hobart. Standing outside are Mr Westcott and a little girl, Till, wearing a pinafore. The photograph shows the shop of John Andrew, Bellhanger. The photograph was made by the University photographer from an original 'stereoscopic' photograph (i.e two adjacent photographs mounted on card to be viewed through a special viewer), made by S. Clifford, Hobart Town. The original was endorsed 'The little girl with pinafore Auntie Till, Dad in his
shirt sleeves standing next to her. Fitzgerald's building now; M. Westcott 4.7.32'.
In this photograph street numbers are not visible. Westcott's circulating library sign is shown on the middle shop in a two-storey brick building, with three shops. The shop on the right has the sign 'Depot Christian Knowledge Society'. The shop on the left has a sign, part of which can be read under a magnifying glass as 'wool warehouse', and underneath on the shop lintel is a faint sign which may include the word 'bookseller" On the right of the photograph a small weatherboard shop bears the sign 'Andrew, Bellhanger'. - W. Westcott of 63 Collins Street, advertised new and second-hand books and a circulating library in Wood's Tasmanian Almanac, 1856 (p.126). The same advertisement appears in Walch's Tasmanian Almanac, 1864, but in the 1865 Almanac the address is given as 63 & 65 Collins Street. However, Hull's Hobart Town Directory, 1859 lists W. Westcott as 65 Collins Street', (65 being apparently the middle shop), so possibly both premises were already occupied by Westcott. By 1871 it had become Westcott's Circulating Library, 63, 65 &67 Collins Street. In 1879 the advertisement read (Westcott, Beedham & Co. circulating library and importers of books, stationery and music', The last advertisement in Walch's almanac appeared in 1881. The Christian Knowledge Society (Tasmanian Auxiliary, President the Lord Bishop of Tasmania}, for which Westcott acted as depository was first listed in Walch's Almanac under (Societies and Institutions) in 1869 (p. 132). John Andrew, Bellhanger, Collins Street, advertised in Wood's Almanac in 1856 (p. 148L and is listed in HuWs Hobart Town Directory of 1859 at 61 Colllns Street. He does not appear in Walch's Almanac of 1863 or any later date, nor was he listed in Macphail's National Directory of Tasmania, 1867-68. S. Clifford, photographer, Liverpool Street, Hobart Town (photographer of album and stereographic portraits, private buildings, shipping, monuments....L advertised in Walch's Almanac of 1864 (p. 43) and again annually up to 1869. It would seem, therefore, that the photograph was probably taken between 1863 and 1869. It is a clear photograph of exceptional quality.
Kenneth McKenzie Dallas
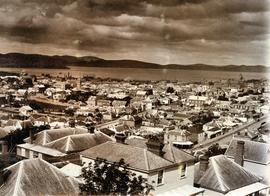
Rooftops of Hobart looking east
Parte de Photographs of Edward Verrell
Black-and-white photograph shows view of Hobart rooftops looking east over central city streets including Harrington Street and Murray Street
Parte de Photographs of Edward Verrell
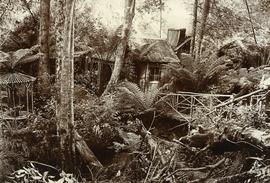
Black-and-white photograph of rustic hut built amid fern trees on walking track at Mount Wellington, two figures walking across timber bridge amid fern fronds
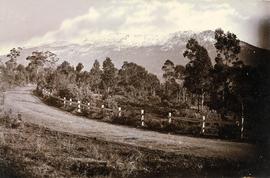
View of snow on Mount Wellington from Huon Road
Parte de Photographs of Edward Verrell
Black-and-white photograph shows snow on Mount Wellington viewed from the verge of the Huon Road, South Hobart, with post-and-rail fence alongside roadway.
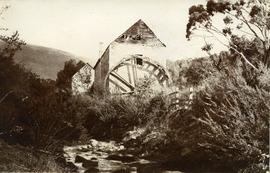
Water mill on New Town Rivulet
Parte de Photographs of Edward Verrell
Black-and-white photograph shows water wheel on outside of mill on New Town Rivulet at Lenah Valley
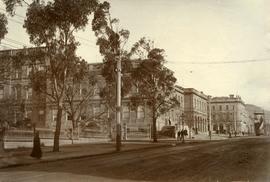
Public buildings near Franklin Square, Hobart
Parte de Photographs of Edward Verrell
Black-and-white photograph shows public buildings near Franklin Square, Hobart

Sandy Bay Road looking towards Hobart
Parte de Photographs of Edward Verrell
Black-and-white photograph shows Sandy Bay Road, with tram tracks on riverside of road, electric wires for Hobart Electric Tramway, carriage wheelmarks in the unpaved road surface, electricity transmission wires strung from poles mounted with porcelain insulators
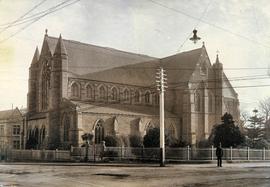
Parte de Photographs of Edward Verrell
Black-and-white photograph of St David’s Cathedral, Hobart, including original fence of St David’s Church, which occupied the site until the 1860s
Parte de Photographs of Edward Verrell
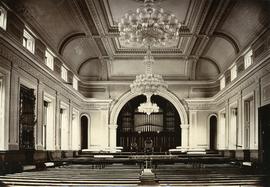
Black-and-white photograph shows interior of Hobart Town Hall, with low-hanging chandelier and pipe organ
Parte de Photographs of Edward Verrell
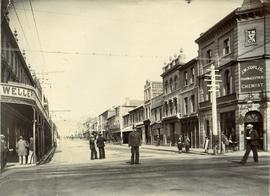
Black-and-white photograph depicts police officer standing in middle of Liverpool Street, Hobart, with YMCA and J.W. Toplis Pharmaceutical Chemist listed as tenants of the corner building.
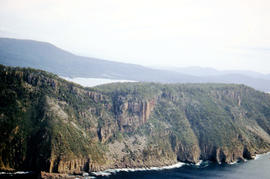
View of Cape Connella from sea level
Parte de Arthur Knight Slides
Colour photograph shows Cape Connella taken at sea level
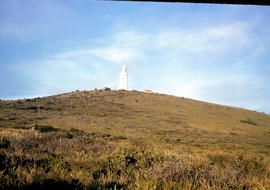
View of lighthouse at Cape Bruny
Parte de Arthur Knight Slides
Colour photograph of Bruny Island lighthouse looking south
View of Cape Connella from sea level
Parte de Arthur Knight Slides
Colour photograph of Cape Connella, viewed from sea level several hundred metres offshore
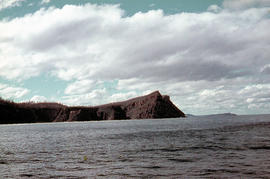
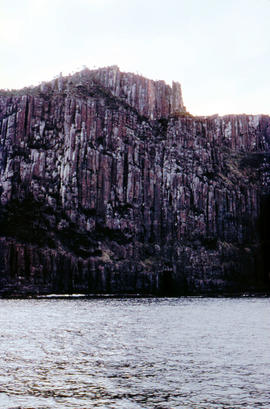
Aerial view of Fluted Cape, South Bruny Island
Parte de Arthur Knight Slides
Colour aerial photograph of Fluted Cape, South Bruny Island, 1956
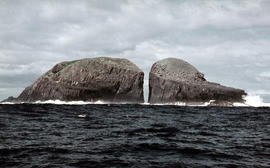
Gap between two Friars, off Bruny Island, 1962
Parte de Arthur Knight Slides
Colour photograph taken at sea level of the gap between vertical cliffs of two islands in the Friars island group, off the southern coast of Bruny Island
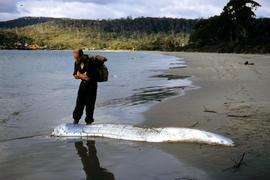
Man inspects ribbon fish on beach
Parte de Arthur Knight Slides
Colour photograph of man looking at ribbonfish washed up on beach at Adventure Bay, Bruny Island
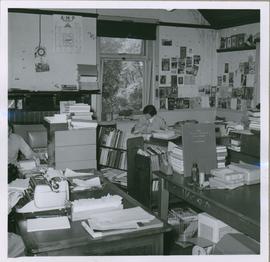
Parte de University Library Photographs
One small black and white photograph of Library workroom at Domain House taken in November 1960. Staff identified as J. Reynolds
University of Tasmania
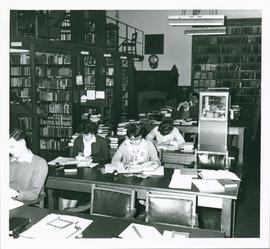
Parte de University Library Photographs
Photograph of the main reading area of the Library, Domain, House . Taken in November 1960 showing students working at desks. Fire place and mantel on rear wall.
University of Tasmania
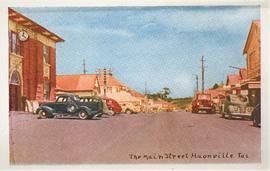
The Main Street, Huonville, Tas
Parte de De La Haye Postcard Collection

Parte de De La Haye Postcard Collection
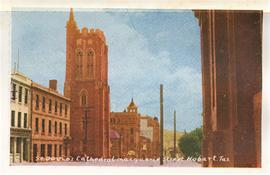
St. David's Cathedral, Macquarie Street, Hobart, Tasmania
Parte de De La Haye Postcard Collection
Parte de De La Haye Postcard Collection
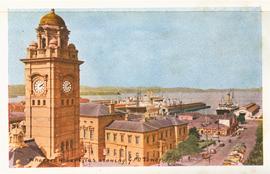
Wharves, Hobart, Tas., showing G.P.O. Tower
Parte de De La Haye Postcard Collection
Parte de De La Haye Postcard Collection
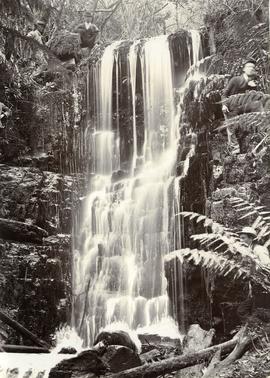
Men posing for camera at Silver Falls
Parte de Photographs of Edward Verrell
Black-and-white vertical/portrait photograph of four men posing for the camera while standing or squatting above or beside a waterfall on Mount Wellington, believed to be Silver Falls
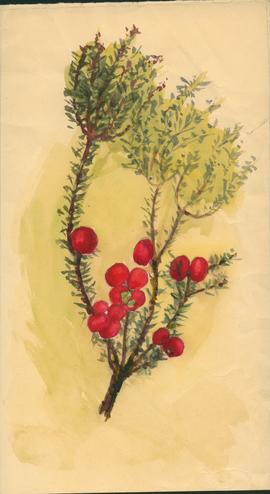
Parte de Olive Pink Collection
Sketch of Pink Mountain berries , Hobart
Olive Pink
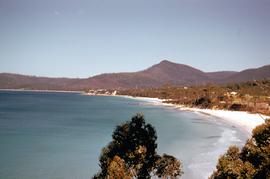
Adventure Bay from Coal Point 1960
Parte de Hal Wyatt Collection
Colour photograph of Adventure Bay on Bruny Island, taken from Coal Point in 1960
Hal Wyatt
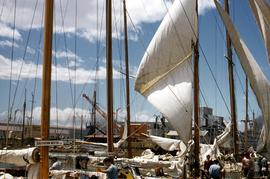
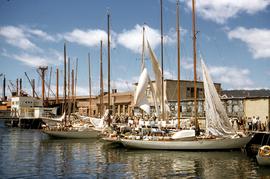
Parte de Hal Wyatt Collection
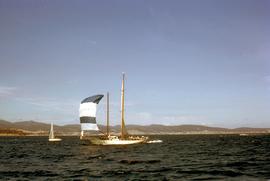
Colour photograph of yachts moored at Hobart waterfront, after a yacht race, masts, rigging, sails being stored by crew on yachts, including Southern Myth and Defiance.
Hal Wyatt
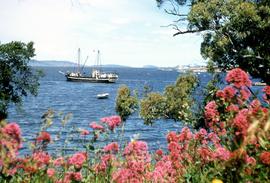
Auxiliary Ketch Argonaut off Powder Jetty 1957
Parte de Hal Wyatt Collection
Colour photograph depicts Auxiliary Ketch Argonaut anchored near Powder Jetty, aka Gunpowder Jetty, near Howden, in 1957.
Hal Wyatt
Astor at finish line of Sydney-Hobart Yacht Race
Parte de Hal Wyatt Collection
Colour photograph shows yacht with spinnaker hoisted, sailing on Derwent River, the Astor, purportedly in 1962 Sydney-Hobart Yacht Race, photograph quite possibly taken in 1961, 1963 or 1964 race when the craft took line honours.
Hal Wyatt
Parte de Hal Wyatt Collection
Colour photograph taken 1960 of Barnes Bay, Bruny Island, slightly out of focus, showing water and tree-covered headland
Hal Wyatt
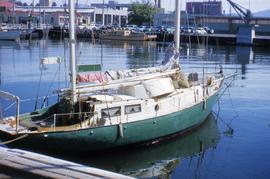
Sailing boat moored in Hobart, 1950s
Parte de Hal Wyatt Collection
Colour photograph of small, two masted sailing boat, with green painted hull, and a sign Onrust, Holland, pinned to mast, Onrust also painted onto side of boat.
Hal Wyatt
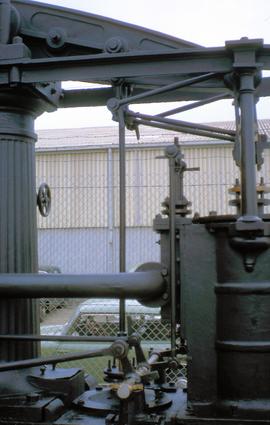
McNaught beam engine at works depot in Hobart 1967
Parte de Hal Wyatt Collection
Colour photograph of beam engine in Hobart, purportedly the oldest McNaught Beam Engine in existence, originally built 1854 in Paisley Scotland, by A.W. Smith and used by Risby’s Sawmill in Hobart until 1955; photograph taken at Moonah public works depot 1967
Hal Wyatt
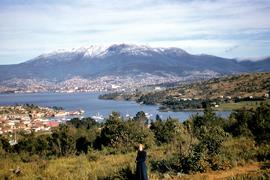
Snow cap on Mount Wellington taken from eastern shore
Parte de Hal Wyatt Collection
Colour photograph of snow on Mount Wellington, taken from eastern shore of Derwent River, overlooking Bellerive and Rosny; woman in dark blue overcoat, standing on path in foreground
Hal Wyatt
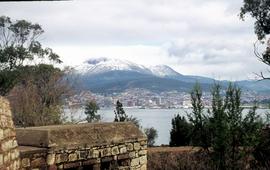
Mount Wellington viewed from Bellerive fort
Parte de Hal Wyatt Collection
Colour photograph of Mount Wellington, as viewed from Kangaroo Bluff Fort at Bellerive, eastern shore of River Derwent
Hal Wyatt
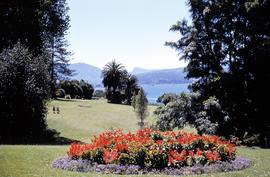
Flower bed at botanical gardens
Parte de Hal Wyatt Collection
Colour photograph of Royal Tasmanian Botanical Gardens at Queens Domain, Hobart; depicts garden beds, lawns and Derwent River, looking towards Selfs Point Jetty and petroleum storage tanks at Selfs Point.
Hal Wyatt
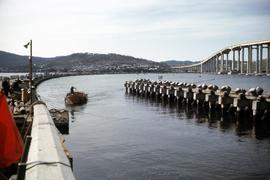
Construction depot and office of Tasman Bridge, 1964
Parte de Hal Wyatt Collection
Colour photograph shows office and construction depot of Bridge Co on Derwent’s Eastern Shore, during construction of the Tasman Bridge across the Derwent River, 1964.
Hal Wyatt
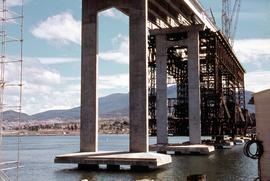
Tasman Bridge under construction from Eastern Shore
Parte de Hal Wyatt Collection
Colour photograph shows pylons supporting Tasman Bridge, viewed from the Derwent’s Eastern Shore, during construction of the Tasman Bridge across the Derwent River, 1964.
Hal Wyatt
Parte de Hal Wyatt Collection
Colour photograph shows site of repair work to Tasman Bridge, damaged by the crash of the ore carrier Lake Illawarra in January 1975.
Hal Wyatt
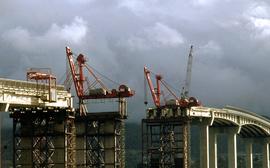
Cranes repairing Tasman Bridge
Parte de Hal Wyatt Collection
Colour photograph shows cranes atop pylons at the site of repair work to Tasman Bridge, damaged by the crash of the ore carrier Lake Illawarra in January 1975; missing pylons being replaced.
Eastern approach to Tasman Bridge during construction
Parte de Hal Wyatt Collection
Colour photograph of 30 MPH speed limit to motorists approaching the Hobart Bridge during construction of the downstream Tasman Bridge, from the eastern shore of the Derwent River.
Hal Wyatt
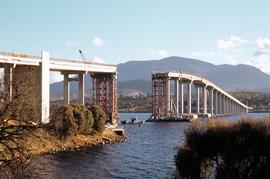
Hobart Bridge and Tasman Bridge
Parte de Hal Wyatt Collection
Colour photograph taken from the western shore of the Derwent River, depicts vehicles travelling on the temporary, floating Hobart Bridge, while the nearly complete multi-lane Tasman Bridge to join the eastern and western shores of the river, is visible downstream.
Hal Wyatt
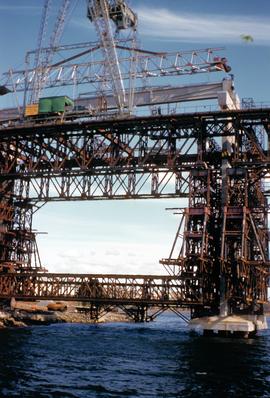
Parte de Hal Wyatt Collection
Colour photograph shows construction of Tasman Bridge, with scaffolding, cranes and workers atop frame, photographed from the water, bridge built across the Derwent River, taken 1963.
Hal Wyatt
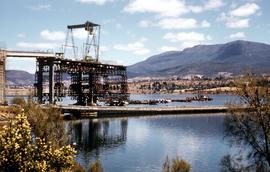
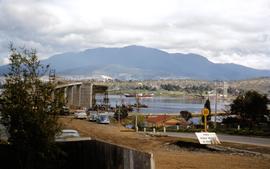
Building Tasman Bridge early 1960s
Parte de Hal Wyatt Collection
Colour photograph shows construction of the Tasman Bridge, in early 1960s, as viewed from the eastern shore of the Derwent River; the floating Hobart Bridge is visible in foreground; Mount Wellington in distance, with dry grasslands in the foothills of the mountains, visible on western shore of river.
Hal Wyatt

Parte de Hal Wyatt Collection
Colour photograph shows a child sailor at the rudder of a cadet dinghy on Derwent River sailing upstream, while another pleasure craft is travelling in opposite direction; both are sailing past the Royal Australian Navy ship, the Destroyer Escort, HMAS Torrens, (No. 53 emblazoned on the side) is berthed just off Port of Hobart.
Hal Wyatt
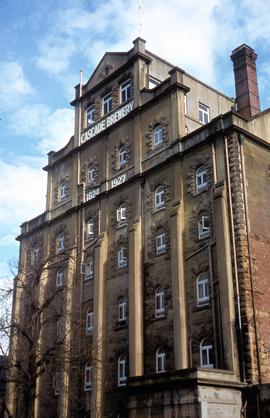
Parte de Hal Wyatt Collection
Colour photograph shows facade of Cascade Brewery building.
Hal Wyatt
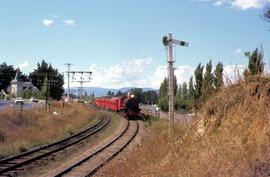
Steam train at Claremont, 1972
Parte de Hal Wyatt Collection
Colour photograph of a steam train pulling old style carriage stock leaving Claremont and heading towards Chigwell station.
Hal Wyatt
Sailing boats moored at Constitution Dock
Parte de Hal Wyatt Collection
Colour photograph of crowds gathered on docks looking at sailing boats moored at Constitution Dock, Hobart
Hal Wyatt

Reflections on water at Constitution Dock 1954
Parte de Hal Wyatt Collection
Colour photograph shows reflections in the water, of masts and sailing boats moored at Constitution Dock, Hobart, with State Library of Tasmania and Hobart GPO clocktower in background.
Hal Wyatt
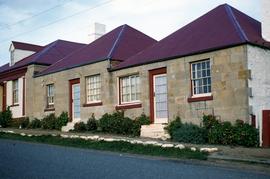
Parte de Hal Wyatt Collection
Colour photograph shows sandstone cottages at Richmond, taken 1959.
Hal Wyatt
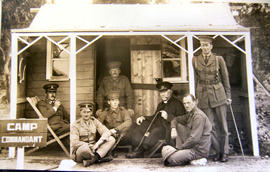
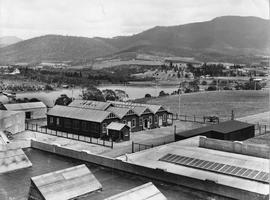
Men on verandah of Camp Commandant Cottage
Black and white photograph of Camp Commandant's hut with men in uniform seated outside, part of the Claremont military camp.
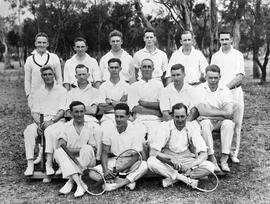
Group of men dressed in tennis whites, some holding rackets.
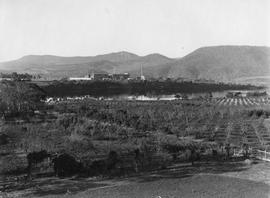
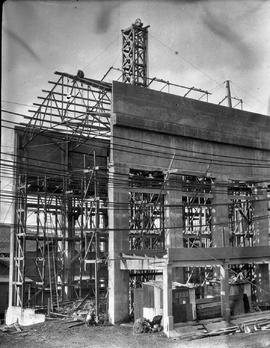
Cadbury Factory Under Construction
Looking across orchard to Cadbury buildings under construction.
View across water to partially completed Cadbury factory.
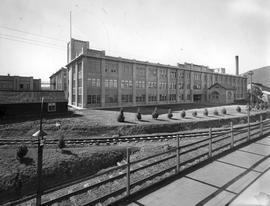
Cadbury Building and Train Tracks
Three story building forming part of the Cadbury factory. Railway lines visible in front.

Cadbury factory with train loaded with supplies in front of building.
Wooden Buildings, Cadbury Factory
Interlinking wooden buildings on Cadbury site, with Derwent River in background.
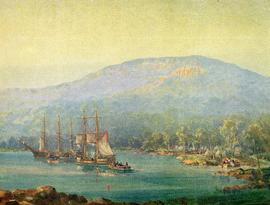
First Landing, printed reproduction of painting, coloured
Parte de George Musgrave Parker : Correspondence and research records
Printed reproduction of a painting of the First Landing in Van Diemens Land showing Mt. Wellington in the background
George Musgrave Parker
Friends' Meeting House, Murray Street
Parte de George Musgrave Parker : Correspondence and research records
Photograph titled First Friends' Meeting House: The first Quaker Meeting House in Hobart. A cottage at 39 Murray Street which was bought by James Backhouse in 1837 with a loan from Meeting for Sufferings, London. The cost was £400 including alterations. Shows Mr Cheverton and Mr Shields and uniformed police constable in front, Holy Trinity Church on hill in background. From 12 February 1832 the visiting Quakers James Backhouse and George Washington Walker held periods of worship in the Quaker manner and others sought leave to join them. These included ex-English Friends who had been transported, some of whom were still prisoners, other convicts and ‘locals’, together with four current members. The gatherings were held in private homes and various rented rooms. The Hobart Meeting began in 1833 when the first Meeting for Discipline was held on 20 September 1833 at the home of Thomas Crouch, Bathurst Street. Members present were Thomas Squire, Ann Pollard (minor), James Backhouse and George Washington Walker. Photograph (mounted) J. Bishop, Osborne (& copy neg)
George Musgrave Parker
Parte de George Musgrave Parker : Correspondence and research records
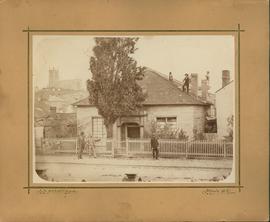
Stereoscopic photo, S. Clifford
George Musgrave Parker
Parte de George Musgrave Parker : Correspondence and research records
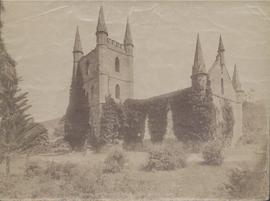
Photograph of the church at Port Arthur
George Musgrave Parker
Parte de George Musgrave Parker : Correspondence and research records
John Watt Beattie photograph
George Musgrave Parker
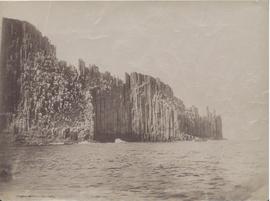
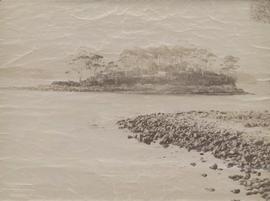
Parte de George Musgrave Parker : Correspondence and research records
John Watt Beattie photograph of Cape Raoul on the Tasman Peninsula
George Musgrave Parker
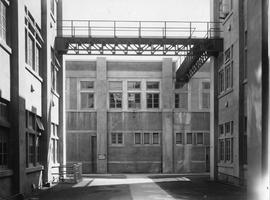
Multi-story buildings, Cadbury Factory
Courtyard and paths between multi-storied buildings, Cadbury factory.