Mostrar 300 resultados

Descrição arquivística
Sub-item Imagem Com objeto digital
Previsualizar a impressão Ver:

Hobart Town from the Queen's Domain

Photograph of Hobart Town, Tasmania, from the Queen's Domain, looking down Macquarie Street in the 1850s. This photograph appears on page 27 of Allan Sierp's 'Colonial Life in Tasmania: Fifty Years of Photography 1855-1905' (Rigby, 1976)

Hobart Railway Station

Photograph of Hobart from the Queen's Domain with the railway station in the foreground, c. 1881. The photographers were Anson Brothers who had studios in Liverpool, Collins and Elizabeth Streets between 1878 and 1891.

Anson Brothers

New Town from New Town Invalid Asylum

Photograph from New Town Invalid Asylum, Tasmania in about 1882. The photographer was Henry Hall Baily who had studios in Elizabeth and Liverpool Streets, Hobart from 1865 until 1918.

Henry Hall Baily

Austin's Old Inn

Photograph of Austins Ferry, Hobart, Tasmania, with Austin's old Inn to the right. The photographer was Alfred Winter who had studios in Bathurst, Elizabeth and Liverpool Streets from 1869 until 1891.

James Backhouse Walker

Sandy Bay Road

Photograph of Sandy Bay Road, with St. Helena , later Wrest Point, on the left.

James Backhouse Walker

Queenborough, Sandy Bay

Photograph of Queenborough, Sandy Bay, Tasmania, c.1881. The photographer was Alfred Winter who had studios in Bathurst, Elizabeth and Liverpool Streets from 1869 until 1891.

James Backhouse Walker

Cascades' Female Factory

Photograph of the Cascades' Female Factory looking toward Mt Wellington with the Cascade Brewery in the distance. In 1828 a Female Factory opened on the outskirts of Hobart at Cascades. It became the colony's largest Factory, expanding by 1853 into five major courtyards accommodating 1000 women and 175 children. The photographer was J.W. Beattie (1859-1930) whose studios were in Elizabeth and Murray Streets between 1891 and 1940

John Watt Beattie

George Washington Walker

Lantern slide of George Washington Walker (1800-1859). Prepared by J.W. Beattie (1859-1930) whose studio locations were Elizabeth Street, Hobart from 1891-1920, Murray Street from 1921-40 and Cat and Fiddle until 1994.

John Watt Beattie

Hobart Town Harbour, Van Diemen's Land

Lantern slide of Hobart Town Harbour, Van Diemen's Land, in 1830. Prepared by J.W. Beattie (1859-1930) whose studio locations were in Elizabeth Street, Hobart from 1891-1920, Murray Street from 1921-40 and Cat and Fiddle Arcade, Hobart, until 1994.

John Watt Beattie

Hobart Town, Van Diemen's Land in 1830

Lantern slide of early print of Hobart Town, Van Diemen's Land in 1830. From the collection of James Backhouse Walker. Prepared by J.W. Beattie (1859-1930) whose studio locations were in Elizabeth Street, Hobart from 1891-1920, Murray Street from 1921-40 and Cat and Fiddle Arcade, Hobart, until 1994.

John Watt Beattie

Hobart Town, Van Diemen's Land, from Old Wharf in 1839

Lantern slide of Hobart Town, Van Diemen's Land, from Old Wharf in 1839. From the collection of James Backhouse Walker. Prepared by J.W. Beattie (1859-1930) whose studio locations were in Elizabeth Street, Hobart from 1891-1920, Murray Street from 1921-40 and Cat and Fiddle Arcade, Hobart, until 1994.

John Watt Beattie

Liverpool Street, Hobart

Lantern slide of Liverpool Street, Hobart. Prepared by J.W. Beattie (1859-1930) whose studio locations were Elizabeth Street, Hobart from 1891-1920, Murray Street from 1921-40 and Cat and Fiddle until 1994.

John Watt Beattie

Old Ball Room where Town Hall now stands, Hobart

Lantern slide from the collection of James Backhouse Walker of the demolition of the old ball room where the Town Hall now stands, Hobart, Tasmania. Thought to have been prepared by J.W. Beattie (1859-1930) whose studio locations were in Elizabeth Street, Hobart from 1891-1920, Murray Street from 1921-40 and Cat and Fiddle Arcade, Hobart, until 1994.

John Watt Beattie

Tasmanian Aboriginal stone implements

Lantern slide of Tasmanian aboriginal stone implements. Prepared by J.W. Beattie (1859-1930) whose studio locations were Elizabeth Street, Hobart from 1891-1920, Murray Street from 1921-40 and Cat and Fiddle until 1994.

John Watt Beattie

Tasmanian Aboriginal woman

Lantern slide of a Tasmanian aboriginal woman. Prepared by J.W. Beattie (1859-1930) whose studio locations were Elizabeth Street, Hobart from 1891-1920, Murray Street from 1921-40 and Cat and Fiddle until 1994.

John Watt Beattie

Aboriginal implement quarry

Lantern slide of an aboriginal implement quarry at Tedworth. Prepared by J.W. Beattie (1859-1930) whose studio locations were Elizabeth Street, Hobart from 1891-1920, Murray Street from 1921-40 and Cat and Fiddle until 1994.

John Watt Beattie

Tedworth Aboriginal caves

Lantern slide of aboriginal caves at Tedworth. Prepared by J.W. Beattie (1859-1930) whose studio locations were Elizabeth Street, Hobart from 1891-1920, Murray Street from 1921-40 and Cat and Fiddle until 1994.

John Watt Beattie

Map of Tasmania

Lantern slide of maps of Tasmania. Prepared by J.W. Beattie (1859-1930) whose studio locations were Elizabeth Street, Hobart from 1891-1920, Murray Street from 1921-40 and Cat and Fiddle until 1994.

John Watt Beattie

James Backhouse (1794-1869) Tasmania

Lantern slide of James Backhouse. Prepared by J.W. Beattie (1859-1930) whose studio locations were Elizabeth Street, Hobart from 1891-1920, Murray Street from 1921-40 and Cat and Fiddle until 1994.

John Watt Beattie

South front, University of Tasmania, Queen's Domain, Hobart, late nineteenth century

Lantern slides of the University of Tasmania, Queen's Domain, Hobart. Views of exterior and laboratories and library. Prepared by J.W. Beattie (1859-1930) whose studio locations were Elizabeth Street, Hobart from 1891-1920, Murray Street from 1921-40 and Cat and Fiddle until 1994 (Collection Pr.S.Uni/1-8)

John Watt Beattie

Entrance to physical laboratory & registrars office, University of Tasmania, Queen's Domain, Hobart, late nineteenth century

Lantern slides of the University of Tasmania, Queen's Domain, Hobart. Views of exterior and laboratories and library. Prepared by J.W. Beattie (1859-1930) whose studio locations were Elizabeth Street, Hobart from 1891-1920, Murray Street from 1921-40 and Cat and Fiddle until 1994 (Collection Pr.S.Uni/1-8)

John Watt Beattie

Waterloo Hotel, corner Murray and Davey Streets, Hobart, Van Diemen's Land, 1832

Lantern slide of Waterloo Hotel on the corner of Murray and Davey Streets, Hobart - from a painting dated 1832. Renamed Waterloo Tavern in 1842. Prepared by J.W. Beattie (1859-1930) whose studio locations were Elizabeth Street, Hobart from 1891-1920, Murray Street from 1921-40 and Cat and Fiddle until 1994.

John Watt Beattie

Bishop Nixon

Lantern slide of Bishop Nixon Prepared by J.W. Beattie (1859-1930) whose studio locations were Elizabeth Street, Hobart from 1891-1920, Murray Street from 1921-40 and Cat and Fiddle until 1994.

John Watt Beattie

Man in a bowler hat

Photograph of a man in a bowler hat standing on the foreshore. Thought to be Beltana now Lindisfarne jetty in the background.

Woman and children on the foreshore

Photograph of a woman and three small barefooted girls on the foreshore with logs. Houses and orchards in the background. Thought to be Beltana now Lindisfarne.

View of track

Photograph of a hillside track in the bush may be Shag Bay or Natone Hill Track

View from Mr. Robert's garden, West Hobart

Photograph from the collection of James Backhouse Walker of a view of Hobart looking towards the Eastern Shore. The panorama has been taken from Mr. Roberts' garden with various shrubs and a Norfolk Island pine in the foreground. Henry Hall Baily is the photographer. He had studios in Elizabeth and Liverpool Streets Hobart from 1865 until 1918.

James Backhouse Walker

Mt. Wellington from the foot of St. George's Hill

Photograph from the collection of James Backhouse Walker of a view of Mt. Wellington from the foot of St. George's Hill in about 1870. The view is from the corner of Albeura St and Sandy Bay Rd. The photographer's name, Woolley, is recorded in a note on the reverse and presumably refers to Charles Alfred.

James Backhouse Walker

Old St. David's Cathedral

Photograph of old St. David's Cathedral on the corner of Macquarie and Murray Streets, Hobart c. 1870.

John Watt Beattie

The Bank of Van Diemen's Land and Hobart Town Hotel

Photograph of Macquarie Street Hobart, looking west in about 1870. The Bank of Van Diemen's Land and Hobart Town Hotel are in the foreground. The photographer is Henry Hall Baily who had studios in Elizabeth and Liverpool Streets between 1865 and 1918.

Henry Hall Baily

St. Joseph's Catholic Church

Photograph of Macquarie Street, Hobart looking east from St. Joseph's Catholic Church, c. 1870.

Henry Hall Baily

Murray Street, above Liverpool Street intersection

Photograph of Murray Street, taken from above the Liverpool Street intersection, Hobart, in about 1880. Webb's Hotel and Alexander McGregor's house, Lenna, are visible in the distance. Also shows Bishopsbourne Photographic studo; Ready & Mulcahy Drapers & Clothiers; Head and Plowman Baby Linen Warehouse Millinery & Underclothing ; Burgess & Barrett Provision merchants, Tea Dealers ; Bidencope Tailor & Hatter; J. Roberts Billiard & Coffee Saloon

Westella

Photograph of Elizabeth Street, Hobart, looking towards the harbour with Westella and the Memorial Congregational Church in the foreground. Taken prior to The photographer was Alfred Winter who had studios in Bathurst, Elizabeth and Liverpool Streets from 1869 until 1891.

Alfred Winter

Waterworks troughing

Photographs of Waterworks wooden troughing through bush

James Backhouse Walker

Waterworks Valley

Photograph of Stony Steps or Waterworks Valley, Hobart, Tasmania with Livingstone's house Marydale in the foreground and the Waterworks dam in the background, c.1870.

James Backhouse Walker

Bush Hotel, New Norfolk

Photograph of the Bush Hotel, New Norfolk, Tasmania, 1881. Proprietor at the time was Captain Blockey. The photographer was Alfred Winter who had studios in Bathurst, Elizabeth and Liverpool Streets from 1869 until 1891.

Alfred Winter

Port Arthur church and Penitentiary

Photograph of Port Arthur church and Penitentiary with view of Mt. Arthur in the distance. The photographers were Anson Brothers., Portrait and Landscape Photographers, Hobart Town whose firm was located in Liverpool, Collins and Elizabeth Streets between 1878 and 1891.

Anson Brothers

Port Arthur Penitentiary

Photograph of Port Arthur Penitentiary c. 1880. The photographers are Anson Brothers., Portrait and Landscape Photographers, Hobart Town whose firm was located in Liverpool, Collins and Elizabeth Streets between 1878 and 1891

Anson Brothers

Eaglehawk Neck

Photograph of Eaglehawk Neck. The photographers are Anson Brothers., Portrait and Landscape Photographers, Hobart Town whose firm was located in Liverpool, Collins and Elizabeth Streets between 1878 and 1891.

Anson Brothers

Ships and Salamanca warehouses

Photograph from the collection of James Backhouse Walker of the Hobart waterfront taken in about 1870 with a view of ships moored next to the Salamanca warehouses. The photographer is Henry Hall Baily who had studios in Elizabeth and Liverpool Streets, Hobart, from 1865 until 1918.

Henry Hall Baily

Salamanca and Hobart waterfront

Photograph of Hobart waterfront - Salamanca looking towards Customs House. Could be around 1870. Photograph appears to have been taken in front of the warehouses near the wharf with ships alongside and a shingle roofed wooden building in the foreground.

Sullivans Cove from Battery Point

Photograph taken from Battery Point of Sullivans Cove. Taken from a garden with fountain in the foreground. Dated about 1876 and taken by photographer Henry Hall Baily who had studios in Elizabeth and Liverpool Streets, Hobart from 1865 until 1918.

Old Mill at New Town Creek

Photograph of Old Mill at New Town Creek showing creek, buildings and mill wheel. Mt Wellington in distance

James Backhouse Walker

Sunnyside, New Town

Two photographs of Sunnyside, New Town, Tasmania, home of Thomas Daniel Chapman 1815-1884, Politician. Mt Wellington in distance. The photographer was Henry Hall Baily who had studios in Elizabeth and Liverpool Streets, Hobart from 1865 until 1918.

James Backhouse Walker

Plan of early Hobart Town

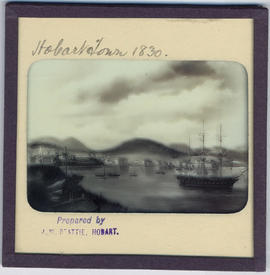
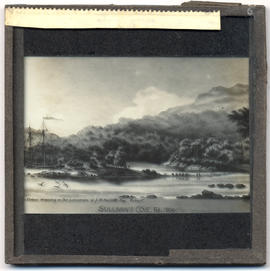
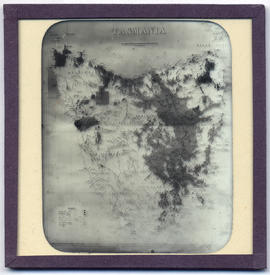
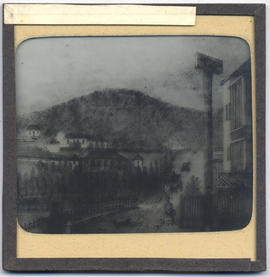
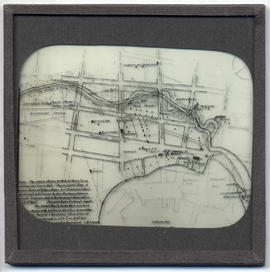
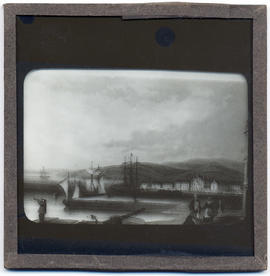
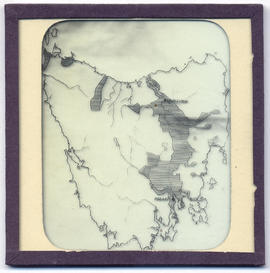
Lantern Slide of plan of early Hobart Town, from a survey done in 1804-1805, showing later alterations. The plan also appears in James Backhouse Walker's paper 'The Founding of Hobart, by Lieut.-Governor Collins' read to the Royal Society of Tasmania 14/10/1889. In this he describes the plan, "I am indebted to my friend Mr. Mault for a beautifully executed plan, which shows very clearly the original features of the ground, and the position of the first camp, and also indicates the alterations which have since taken place. It is taken from a survey made by Surveyor-General Harris in 1804-5. The original plan was discovered many years ago in the Lands Office at Sydney, and was presented by the New South Wales Government to our Lands Department. The Deputy- Commissioner of Crown Lands, Mr. Albert Reid, kindly presented me with a tracing of it."
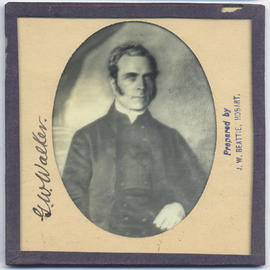
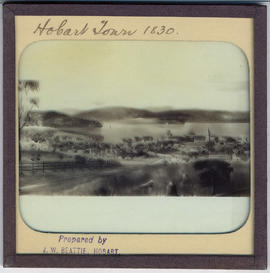
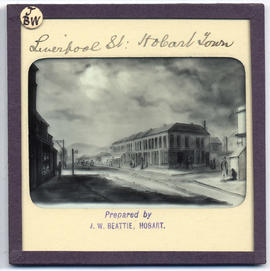
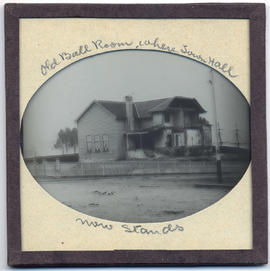
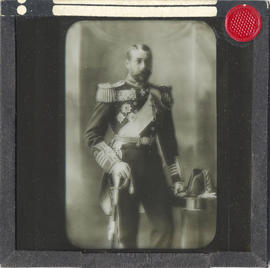
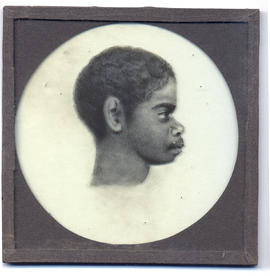
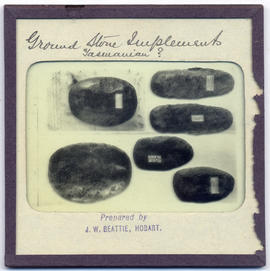
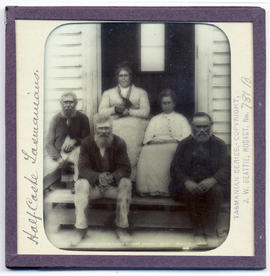
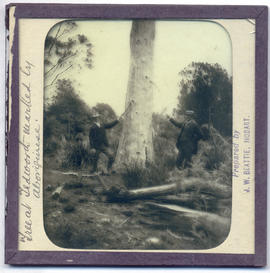
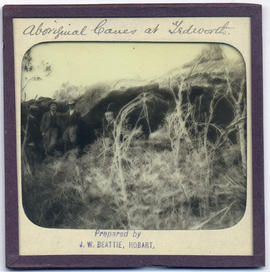
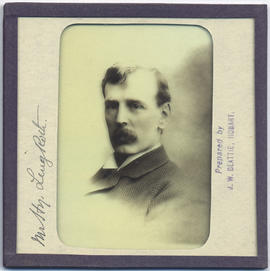
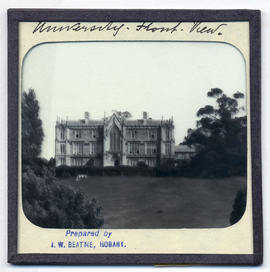
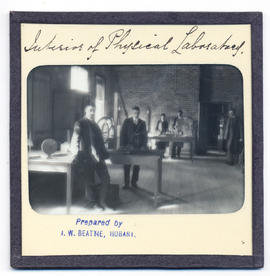
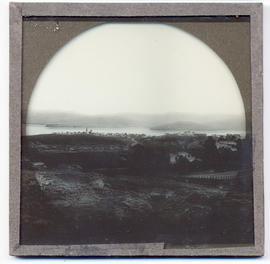
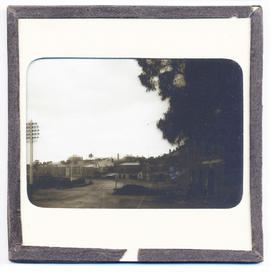
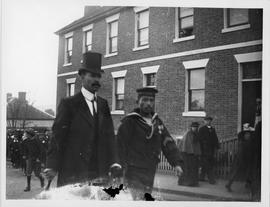
Lantern slide thought to have been prepared by J.W. Beattie (1859-1930) whose studio locations were in Elizabeth Street, Hobart from 1891-1920, Murray Street from 1921-40 and Cat and Fiddle Arcade, Hobart, until 1994.

John Watt Beattie

Captain Kelly's house

Lantern slide of Captain Kelly's house, Hobart, Tasmania. Thought to have been prepared by J.W. Beattie (1859-1930) whose studio locations were in Elizabeth Street, Hobart from 1891-1920, Murray Street from 1921-40 and Cat and Fiddle Arcade, Hobart, until 1994.

John Watt Beattie

Governor Sir Thomas Gore Browne

Lantern slide of Governor Sir Thomas Gore Browne. Governor of Tasmania from 1861-1868. Prepared by J.W. Beattie (1859-1930) whose studio locations were Elizabeth Street, Hobart from 1891-1920, Murray Street from 1921-40 and Cat and Fiddle until 1994.

John Watt Beattie

Hobart Town, Van Diemen's Land in 1817

Lantern slide of Hobart Town, Van Diemen's Land, in February, 1817. Inscribed with the words 'Hobart Town in 1817. Drawn by Lieut. Charles Jeffreys' - also shows the Government schooner the Kangaroo , church, Government House and Fort.

Charles Jeffreys

Jack, native of Cape Grim

Lantern slide of Jack, native of Cape Grim. Prepared by J.W. Beattie (1859-1930) whose studio locations were Elizabeth Street, Hobart from 1891-1920, Murray Street from 1921-40 and Cat and Fiddle until 1994.

John Watt Beattie

Old Government House, Hobart Town, Van Diemen's Land 1847

Lantern slide of early print of Old Government House, Hobart Town, Van Diemen's Land in 1847. From the collection of James Backhouse Walker. Prepared by J.W. Beattie (1859-1930) whose studio locations were in Elizabeth Street, Hobart from 1891-1920, Murray Street from 1921-40 and Cat and Fiddle Arcade, Hobart, until 1994.

John Watt Beattie

Parliament House, Hobart, Tasmania

Lantern slide of Parliament House, Hobart. Prepared by J.W. Beattie (1859-1930) whose studio locations were Elizabeth Street, Hobart from 1891-1920, Murray Street from 1921-40 and Cat and Fiddle until 1994.

John Watt Beattie

Salamanca from Wharf, Hobart Town, Van Diemen's Land

Lantern slide from the collection of James Backhouse Walker of Salamanca from the Wharf, Hobart Town, Van Diemen's Land 1847. Prepared by J.W. Beattie (1859-1930) whose studio locations were in Elizabeth Street, Hobart from 1891-1920, Murray Street from 1921-40 and Cat and Fiddle Arcade, Hobart, until 1994. Quaker Collection.

John Watt Beattie

Stonemason's house, Hobart ,Tasmania

Lantern slide from the collection of James Backhouse Walker of Stonemason's house, Hobart, Tasmania. Thought to have been prepared by J.W. Beattie (1859-1930) whose studio locations were in Elizabeth Street, Hobart from 1891-1920, Murray Street from 1921-40 and Cat and Fiddle Arcade, Hobart, until 1994.

John Watt Beattie

Tasmanian Aboriginal profile

Lantern slide of Tasmanian aboriginal profile. Prepared by J.W. Beattie (1859-1930) whose studio locations were Elizabeth Street, Hobart from 1891-1920, Murray Street from 1921-40 and Cat and Fiddle until 1994.

John Watt Beattie

Ground stone Aboriginal implements

Lantern slide of ground stone aboriginal implements. Prepared by J.W. Beattie (1859-1930) whose studio locations were Elizabeth Street, Hobart from 1891-1920, Murray Street from 1921-40 and Cat and Fiddle until 1994.

John Watt Beattie

Mixed race Tasmanians

Lantern slide of mixed race Tasmanian aborigines. Prepared by J.W. Beattie (1859-1930) whose studio locations were Elizabeth Street, Hobart from 1891-1920, Murray Street from 1921-40 and Cat and Fiddle until 1994. The fourth person from the left is believed to be Mary Everett and the fifth person is believed to be Bunny Brown.

John Watt Beattie

Tree marked by aborigines, Tedworth

Lantern slide of a tree marked by aborigines at Tedworth. Prepared by J.W. Beattie (1859-1930) whose studio locations were Elizabeth Street, Hobart from 1891-1920, Murray Street from 1921-40 and Cat and Fiddle until 1994.

John Watt Beattie

Aboriginal caves Tedworth

Lantern slide of aboriginal caves at Tedworth. Prepared by J.W. Beattie (1859-1930) whose studio locations were Elizabeth Street, Hobart from 1891-1920, Murray Street from 1921-40 and Cat and Fiddle until 1994.

John Watt Beattie

Tasmania Map

Lantern slide of maps of Tasmania. Prepared by J.W. Beattie (1859-1930) whose studio locations were Elizabeth Street, Hobart from 1891-1920, Murray Street from 1921-40 and Cat and Fiddle until 1994.

John Watt Beattie

Henry Ling Roth (1855-1925) Tasmania

Lantern slide photograph of Henry Ling Roth. Prepared by J.W. Beattie (1859-1930) whose studio locations were Elizabeth Street, Hobart from 1891-1920, Murray Street from 1921-40 and Cat and Fiddle until 1994.

John Watt Beattie

University of Tasmania, Queen's Domain, Hobart, late nineteenth century

Lantern slides of the University of Tasmania, Queen's Domain, Hobart. Views of exterior and laboratories and library. Prepared by J.W. Beattie (1859-1930) whose studio locations were Elizabeth Street, Hobart from 1891-1920, Murray Street from 1921-40 and Cat and Fiddle until 1994 (Collection Pr.S.Uni/1-8)

John Watt Beattie

Interior of physical laboratory, University of Tasmania, Queen's Domain, Hobart, late nineteenth century

Lantern slides of the University of Tasmania, Queen's Domain, Hobart. Views of exterior and laboratories and library. Prepared by J.W. Beattie (1859-1930) whose studio locations were Elizabeth Street, Hobart from 1891-1920, Murray Street from 1921-40 and Cat and Fiddle until 1994 (Collection Pr.S.Uni/1-8)

John Watt Beattie

View of the Derwent River, Hobart, Tasmania

Lantern slide of view of the Derwent River, Hobart. Prepared by J.W. Beattie (1859-1930) whose studio locations were Elizabeth Street, Hobart from 1891-1920, Murray Street from 1921-40 and Cat and Fiddle until 1994. 1994.

John Watt Beattie

Waterfront buildings and Salamanca, Hobart, Tasmania

Lantern slide from the collection of James Backhouse Walker of waterfront buildings and Salamanca, Hobart,Tasmania. Thought to have been prepared by J.W. Beattie (1859-1930) whose studio locations were in Elizabeth Street, Hobart from 1891-1920, Murray Street from 1921-40 and Cat and Fiddle Arcade, Hobart, until 1994.

John Watt Beattie

Photograph of Japanese sailors

Photograph of Japanese sailor and Japanese gentleman walking in front of Portsea Terrace, Montpelier Retreat, Battery Point.

Aerial view of UTAS Sandy Bay Campus

Aerial view of the Sandy Bay Campus of the University of Tasmania. Showing sporting fields, Hutchins School, surrounding houses and Wrest Point Hotel prior to the construction of the casino

Photograph of family group fishing

Photograph of a man, woman and small child sitting on the rocks fishing. Thought to be Beltana now Lindisfarne with jetty in background.

Children and pony on the beach

Photograph of children and pony on the beach at a small cove on the eastern shore of the Derwent River.

Resultados 201 a 300 de 300