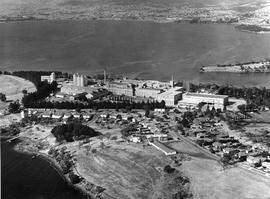
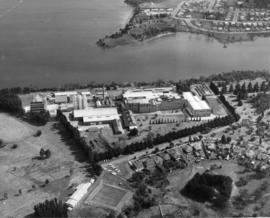
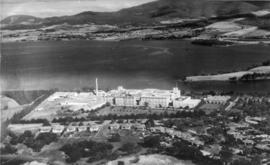
Aerial photograph of Cadbury Factory and surrounding area
- AU TAS UTAS ITCCD 2017/18-0405
- Item
- 1920's
Aerial view of Cadbury factory and surrounding area, Claremont.

Aerial photograph of Cadbury Factory and surrounding area
Aerial view of Cadbury factory and surrounding area, Claremont.
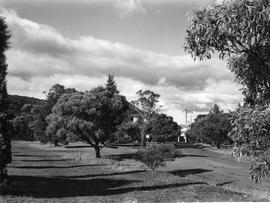
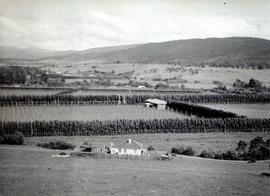
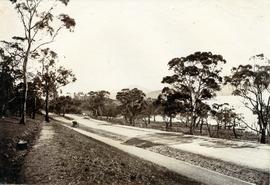
Tree lined road approaching Cadbury factory, surrounded by lawn.
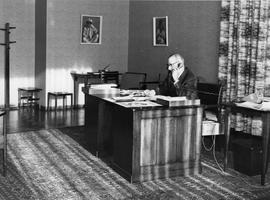
Business man seated at office desk.
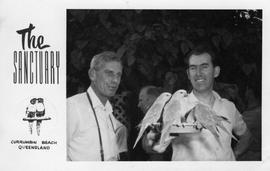
Postcard from The Sanctuary Currumbin Beach, Queensland. Two men pictured, one holding bird feeder dish with parrots sitting around rim of dish eating.
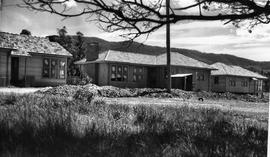
Houses under construction, possibly on the Cadbury Estate.
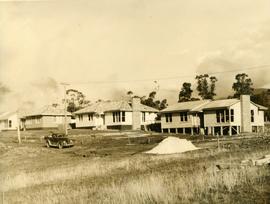
Several houses under construction
Several houses under construction, possibly on the Cadbury Estate.
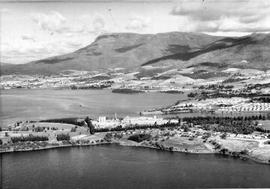
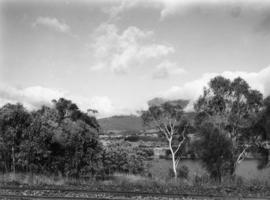
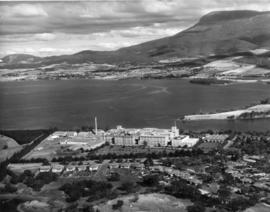
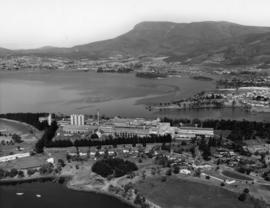
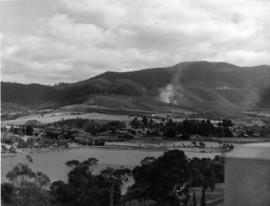
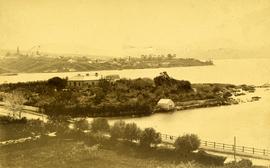
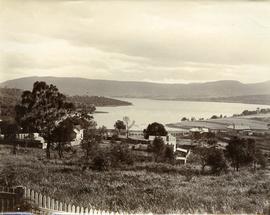
Derwent River and Cadbury Factory
Derwent River, Cadbury Factory and surrounding suburb of Berriedale. Mount Wellington and foothills in background.
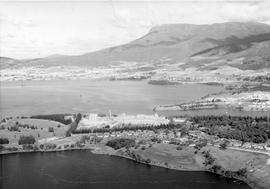
Derwent River and Cadbury Factory
Derwent River, Cadbury Factory and surrounding suburb of Berriedale. Mount Wellington and foothills in background.
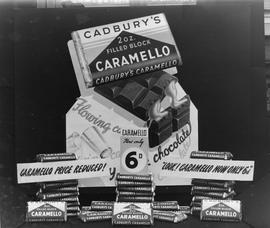
Cadbury Caramello Chocolate Display
Display of Cadbury Caramello chocolate blocks showing a price reduction to sixpence.
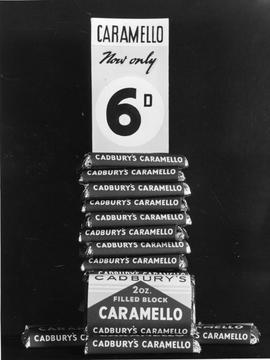
Cadbury Caramello Chocolate Display
Display of Cadbury Caramello chocolate blocks showing a price reduction to sixpence.
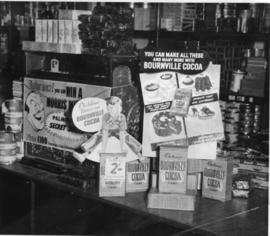
Cadbury display and cash register
Cash register surrounded by display of Cadbury products, including half pound packets of Bournville cocoa for two shillings. Competition advertising a chance to win a Morris Minor plus 100 pound
Colin Dennison (Curator)
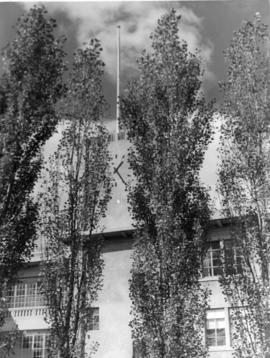
Cadbury building and clock tower seen through stand of poplar trees
Colin Dennison (Curator)
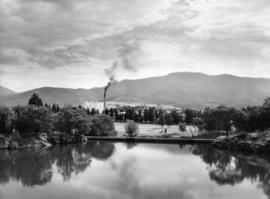
Looking across to Mount Wellington
Looking across river toward Mount Wellington, with railway line in foreground
Colin Dennison (Curator)
Helicopter on grassy area, with Mount Wellington in background
Colin Dennison (Curator)
Crane hoisting a large steel girder, Cadbury factory
Colin Dennison (Curator)
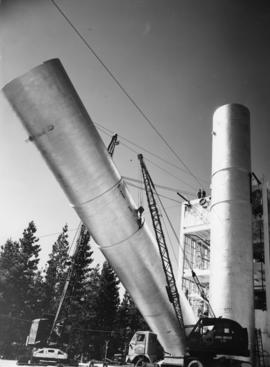
Two cranes, one marked Johns & Waygood Ltd, erecting large cylinders at Cadbury factory
Colin Dennison (Curator)

Cadbury Bournville cocoa advertising
Advertising material stating Children thrive on Cadbury’s Bournville cocoa. Drawing of a boy jumping a packet of cocoa with a hot cup of cocoa at the side
Colin Dennison (Curator)
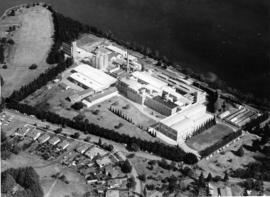
Aerial photograph of Cadbury factory and surrounding area, with Windermere in background. Photograph taken 1960
Colin Dennison (Curator)
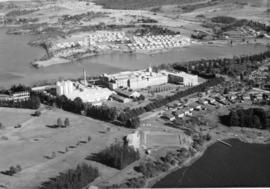
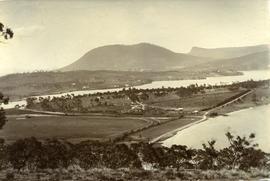
Golf course and Cadbury factory
Aerial photograph of Cadbury factory and part of the golf course
Colin Dennison (Curator)
Cadbury factory and Derwent River, with Mount Wellington in distance
Colin Dennison (Curator)
Aerial photograph of Cadbury factory and surrounding area, with Windermere in background. Photograph taken 1958
Colin Dennison (Curator)
Factory and river from the air
Cadbury factory and Derwent River, with foothills of Mount Wellington in distance
Colin Dennison (Curator)
Cadbury factory and Derwent River, with Mount Wellington and surrounding suburbs in distance
Colin Dennison (Curator)
Looking across water to the Cadbury factory, with golfer on course in foreground.
Colin Dennison (Curator)
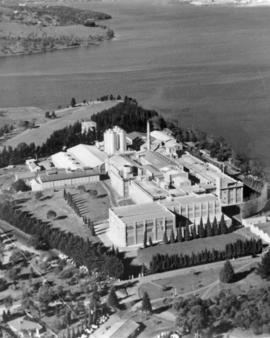
Aerial shot of Cadbury Factory
Aerial photograph of Cadbury Factory with river behind
Colin Dennison (Curator)
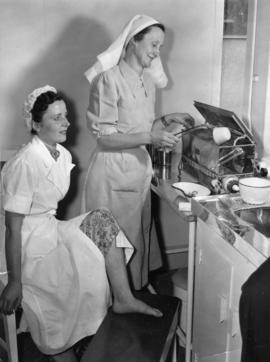
Cadbury employee being treated for toe injury by a first aid nurse Sister Cole. Nurse is using sterilising equipment. Photograph taken 1952 Laurie Richards Studio
Colin Dennison (Curator)
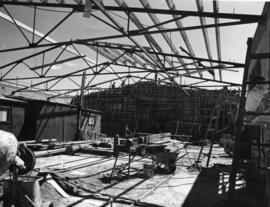
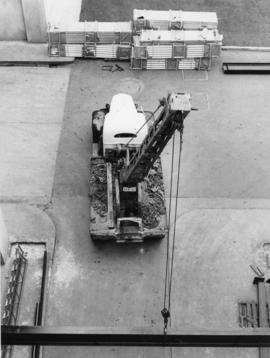
Construction of new flour room, Cadbury Factory. Photograph taken 1957
Colin Dennison (Curator)
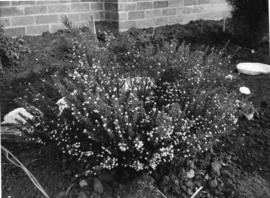
Small flowering shrub planted in newly tilled soil, brick wall behind
Colin Dennison (Curator)
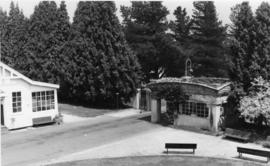
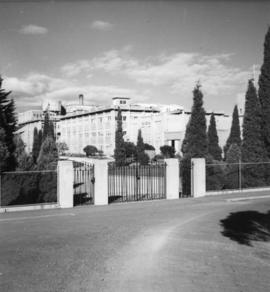
Looking from within Cadbury compound toward the entrance gates and lodge. Large trees surround the area
Colin Dennison (Curator)
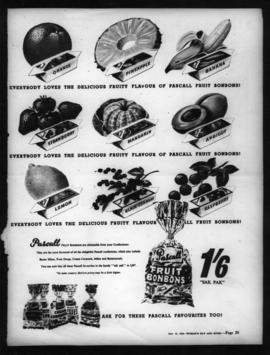
Poster advertising Fruit Bonbons
Poster advertising Pascall Fruit Bonbons, including the following flavours - orange, pineapple, banana, strawberry, mandarin, apricot, lemon, black currant and raspberry. Sak Pak priced at one shilling and sixpence
Colin Dennison (Curator)
Secondary set of gates Cadbury Factory
Secondary set of entrance gates to Cadbury Factory with various buildings behind
Colin Dennison (Curator)
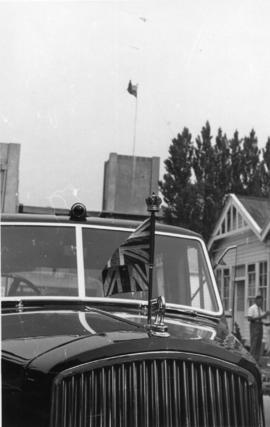
Car of the Governor of Tasmania
Car waiting for the Governor of Tasmania to conclude his visit of the Cadbury Factory
Colin Dennison (Curator)
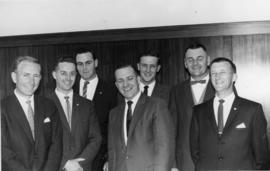
A group of seven men in suits and ties.
Colin Dennison (Curator)
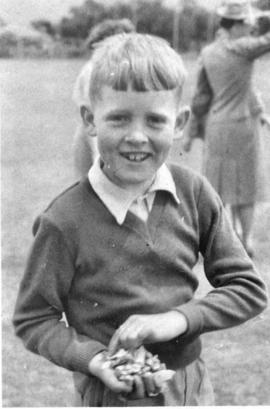
A smiling boy with a hand full of lollies at an outside event
Colin Dennison (Curator)
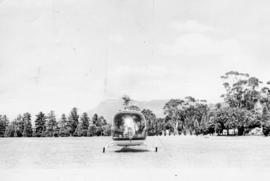
Photograph of a helicopter flying across water with lawn and houses in foreground
Colin Dennison (Curator)
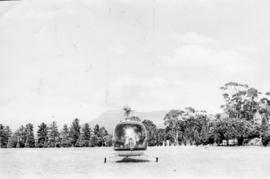
Helicopter on lawn at Cadbury Factory, with Mount Wellington visible in distance
Colin Dennison (Curator)
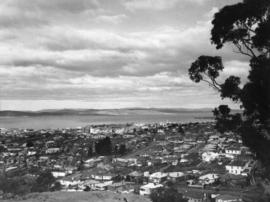
Looking across Hobart central business district and port toward the Eastern Shore. Taken from West Hobart
Colin Dennison (Curator)
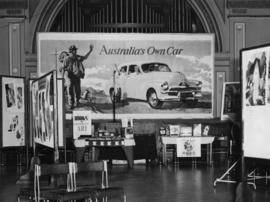
Books on display, including books on commercial art and a table of items promoting OBM Bookshop. Poster in background promoting Australias own car, shows a family in a Holden car waving to a man carrying a swag.
Colin Dennison (Curator)
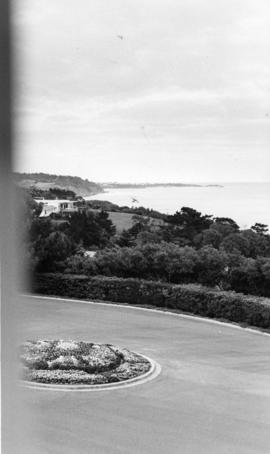
Looking across the water from Cadbury Factory toward Windermere
Colin Dennison (Curator)
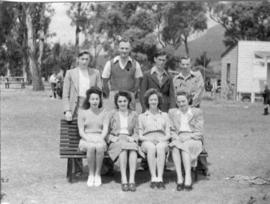
Enjoying an outdoor social function
Colin Dennison (Curator)
Chocolate being mixed in vat, while worker looks on
Colin Dennison (Curator)
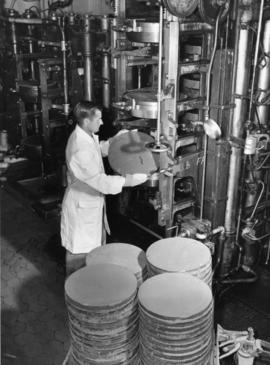
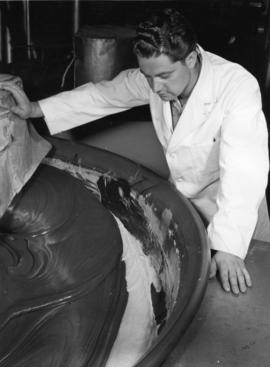
Worker inspecting pressed cocoa discs coming out of the presses
Colin Dennison (Curator)
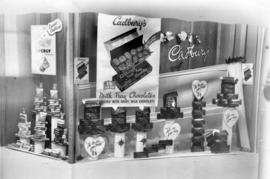
Display of Cadbury products including quarter pound boxes of Milk Tray chocolates for 1 shilling and sixpence, Energy chocolate bars and Nut Milk bars for 1 shilling and tuppence
Colin Dennison (Curator)
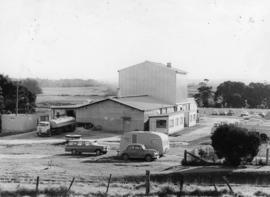
Cadbury milk depot with tankers parked nearby. Small caravan and several cars also parked on site
Colin Dennison (Curator)
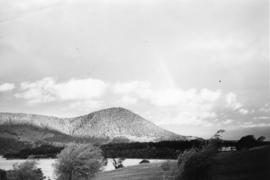
Mount Direction, located on the eastern shore of Hobart
Colin Dennison (Curator)
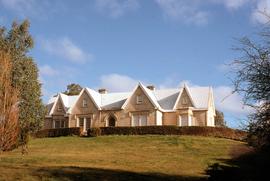
Colour landscape photograph of property Cawood, Ouse,
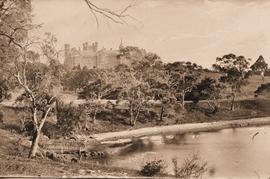
Clifton Priory atop Barrack Hill, Bothwell
Colour photograph of Clifton Priory, Bothwell. National heritage register citation is as follows: “Two storey stone Tudor Gothic house built in 1847-8 by Rev. Robert Wilson from public subscription. Wilson caused a scandal when he ran into financial difficulties and sold it owing a considerable sum. The house is magnificently sited on Barrack Hill from where it enjoys fine views of Bothwell, the Clyde River and surrounding countryside.”
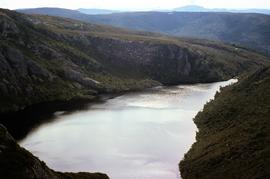
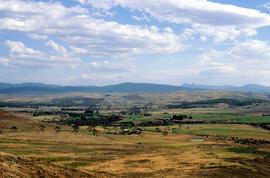
View of Crater Lake, near Cradle Mountain
Colour photograph shows Crater Lake, near Cradle Mountain
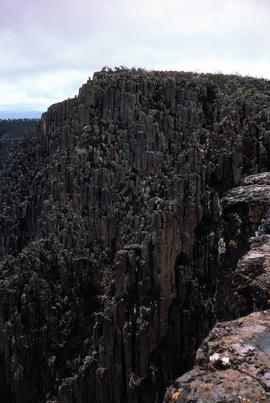
Colour photograph shows view from Devils Gullet Lookout
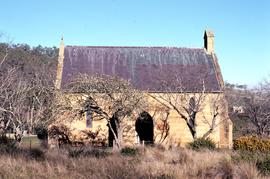
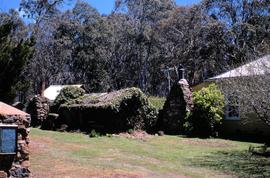
Colour photograph taken in winter showing side view of St James Chapel at Montacute, with the Hallett family serving as caretakers, since 1897
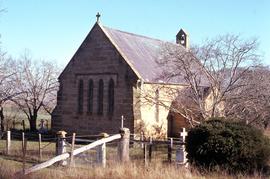
View of church yard surrounding St James chapel at Montacute
Colour photograph taken in winter, shows burial ground and churchyard surrounding St James Chapel at Montacute, under the care of the Hallett Family, since 1897
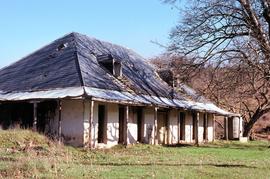
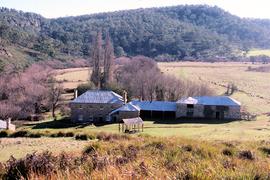
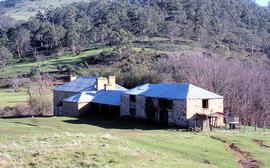
Abandoned slate-roofed homestead at Montacute
Colour photograph of slate-roofed dwelling with dormer windows and veranda on the property at Montacute, Hollow Tree
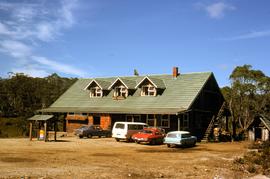
Colour photograph of Pencil Pine Lodge near Cradle Mountain, with cars parked outside accommodation block near Golden Fleece petrol bowser
View of Sherwood, homestead in Clyde River Valley
Colour photograph of sandstone homestead, Sherwood, with nearby outbuildings, willows lining the banks of nearby Clyde River at Hollow Tree
Colour photograph of sandstone homestead, Sherwood, with farm outbuildings and Clyde River Valley
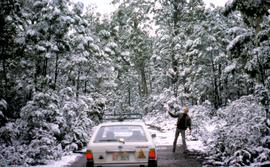
Colour photograph shows man standing beside Subaru station wagon on road through snow-covered forest near Tarraleah

Stable ruins at Langloh Colliery
Colour photograph of abandoned Langloh coalmine and colliery near Hamilton
Colour photograph of exterior of the Steppes homestead, on the Lake Highway

Headrace at Tarraleah Power Station
Colour photograph looking downhill to Tarraleah Power Station
Colour photograph shows Toyota Landcruiser parked outside Thorpe Water Mill at Bothwell
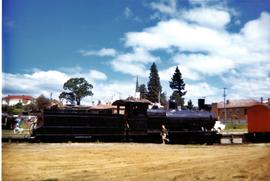
Children playing on black steam locomotive
Black steam locomotive uncoupled from carriages, with several children climbing and playing on engine.
Graeme Raphael
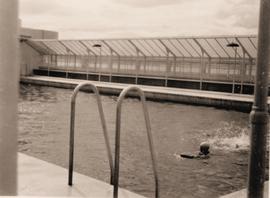
Swimming pool at Wrest Point Casino
Outdoor swimming pool with wall of glass providing windbreak.
Graeme Raphael
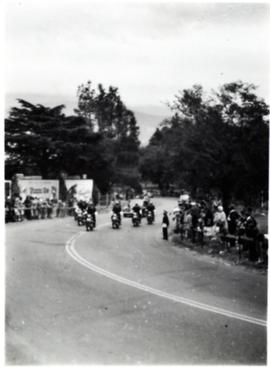
Escort for car near the Domain
Group of motor bikes escorting car up slope. Crowds lining either side of road.
Graeme Raphael
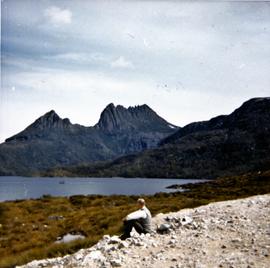
Man sitting on gravel near Cradle Mountain
Colour photograph of Cradle Mountain with man seated on rocks in foreground. Dove Lake.
Graeme Raphael

Water flows through dam spillway
Black and white photograph of water flowing through spill way on dam, with snow capped mountain in distance.
Graeme Raphael
Decoration on Tasmanian Parliament House
Parliament House Hobart. Flags being placed on front of building as decoration.
Graeme Raphael
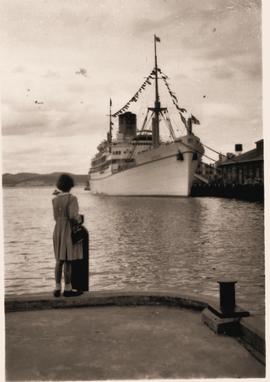
Passenger liner Gothic at Princess Wharf, Hobart
Graeme Raphael
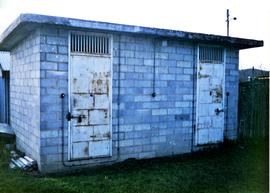
Small cement block building with two padlocked doors with grilles above.
Graeme Raphael
Photograph of several hop fields bordered by windbreak trees, possibly poplars
Graeme Raphael
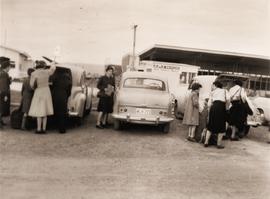
Loading luggage at Hobart Aerodrome
Group of people loading or unloading luggage from the rear boot of vehicles parked in the car park at Hobart Aerodrome. Building site and an aircraft parked on tarmac visible in background.
Graeme Raphael
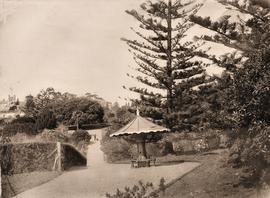
Decorative seat at Royal Botanical Gardens
Part of Photographs of Edward Verrell
Black-and-white photograph of Royal Botanical Gardens, showing a decorative undercover seat constructed around the stump and butt of a tree. Government House visible in background
Part of Photographs of Edward Verrell
Black-and-white photograph looking south at Cornelian Bay on the Derwent River, with one boatshed on far shore
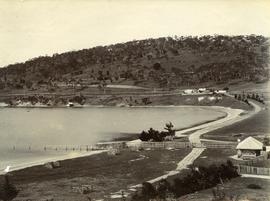
View of Dunkleys Point at Sandy Bay
Part of Photographs of Edward Verrell
Black-and-white photograph shows Sandy Bay Road in foreground, the grand home St Helena on what is known as Dunkleys Point, and Battery Point on the opposite shore of the bay
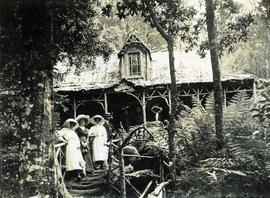
Visitors at Falls Hut, Mount Wellington
Part of Photographs of Edward Verrell
Black-and-white photograph shows visitors standing on front steps and veranda at Falls Hut, built 1897, at the Cascades, on road to Mount Wellington
Part of Photographs of Edward Verrell
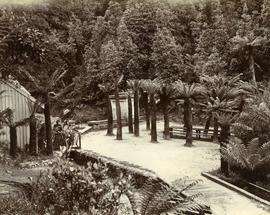
Black-and-white photograph shows walking path at Fern Tree Bower, Mount Wellington
Government House in Hobart, viewed from the river, across Rose Bay
Part of Photographs of Edward Verrell
Black-and-white photograph shows waves lapping shoreline of Derwent River in foreground, with Government House on the hill, surrounded by mature trees, tall picket fence runs parallel with river, two wires strung between poles, visible through trees
Part of Photographs of Edward Verrell
Black-and-white photograph shows dwellings, fences and farmland at Lindisfarne Bay, looking across Derwent River to Hobart
View from Queens Domain looking north to Cornelian Bay and New Town Bay
Part of Photographs of Edward Verrell
Black-and-white photograph taken from elevated point on Queen’s Domain, looking north up Derwent River towards Cornelian Bay and New Town Bay; Risdon Park Racecourse (1880s-1926) at New Town in foreground, early burial plots in headland of Cornelian Bay Cemetery at right of picture.
Road to Government House, on Gun Carriage Drive
Part of Photographs of Edward Verrell
Black-and-white photograph taken looking north along Gun Carriage Drive towards Government House, Hobart, with post-and-rail fences on Derwent River side; a horse harnessed to a four-wheel carriage, is on the left of the road; a small jetty extends from the shoreline and a boat is visible through the trees, anchored just off shore.

Ships docked at New Wharf, Hobart
Part of Photographs of Edward Verrell
Black-and-white photograph shows sailing ships moored at New Wharf, Hobart, in front of Salamanca Place, with milled timber stacked on edge of wharf
Part of Photographs of Edward Verrell
Photograph showing the first hatchery building built in 1870 at the Salmon Ponds at Plenty surrounded by landscaped grounds filled with exotic trees.

View of the Post Office, Queenstown, Tasmania
Part of Images of West Coast Tasmania
Image contains text identifying the subject. Possibly originally a post card.
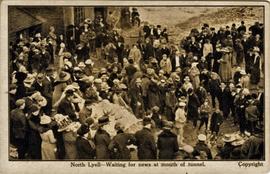
North Lyell - waiting for news at the mouth of the tunnel
Part of Images of West Coast Tasmania
Image contains text identifying the subject and also 'copyright'. Originally taken from a postcard published in the weeks following the 1912 North Mount Lyell mine disaster. Image shows people milling around outside of unidentified building.
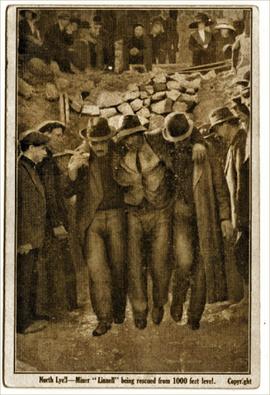
North Lyell - Miner 'Linnell' being rescued from 1000 feet level
Part of Images of West Coast Tasmania
Image contains text identifying the subject and also 'copyright'. Originally taken from a postcard published in the weeks following the 1912 North Mount Lyell mine disaster. Image shows people supporting Linnell as he moves towards the photographer, possibly with the mine entrance at the rear.
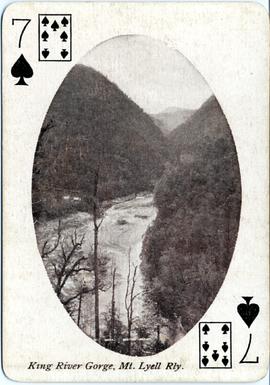
King River Gorge, Mt Lyell Railway
Part of Images of West Coast Tasmania
The image appears on a printed playing card (7 of Spades) with legend in text at the bottom. The cards were part of a tourism promotion campaign by the Northern Tasmanian Tourist Association, printed and distributed just after the Great War (World War I).
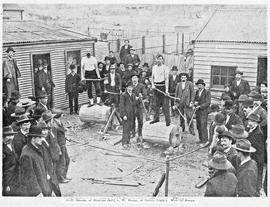
View of woodchoppers Burge and Garcie preparing for competition, Queenstown Tasmania
Part of Images of West Coast Tasmania
Image likely taken from a newspaper and has a partial printed legend at the bottom: 6 T. Garcie, of Strahan (left) v W . Burge, of Crotty (right). Won by Burge.
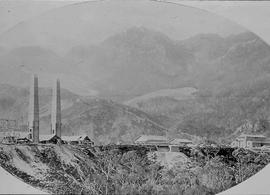
View across the smelters towards the hills at Crotty, Tasmania.
Part of Images of West Coast Tasmania
Image clearly shows the smelters in the foreground. Image is oval and slightly cropped.

View of steam train on trestle bridge likely at the smelting works, Crotty, Tasmania.
Part of Images of West Coast Tasmania
Image likely sourced from a newspaper or publication as it contains printed legend with hand written amendment at the bottom: Smelter site showing works in course of construction and method of disposing of slag. Mount Jukes in the background. Crotty 1898.
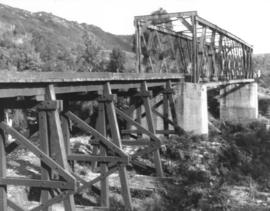
View of steel railway bridge with adjacent timber trestle extension, Crotty, Tasmania
Part of Images of West Coast Tasmania
Image shows the bridge in good condition making the dating difficult. Image quality tends to suggest a later date.
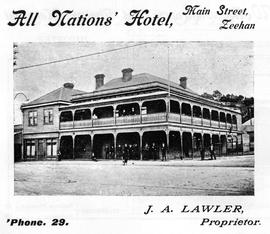
View of the All Nations Hotel, Zeehan, Tasmania
Part of Images of West Coast Tasmania
Image is an advertisement with the Hotel in the centre and text above and below providing the name, address, proprietor and telephone number.
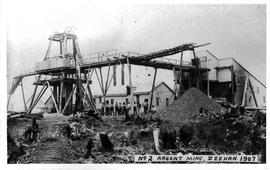
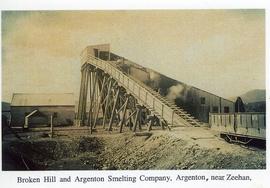
View of the Argent Mine Number 2, Zeehan, Tasmania
Part of Images of West Coast Tasmania
Image has hand printed label giving title and date in bottom right.
Part of Images of West Coast Tasmania
Image likely sourced from a newspaper or publication as it has a printed legend at the bottom.
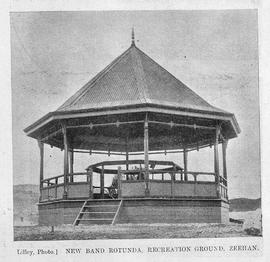
View of the Band Rotunda, Zeehan, Tasmania
Part of Images of West Coast Tasmania
Image has hand printed label giving title and date in bottom.
Lilley
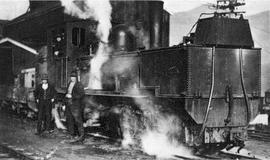
View of the Beyer Peacock Steam engine at Silver Bell, near Zeehan, Tasmania
Part of Images of West Coast Tasmania
Image has the engine dominant with two male figures to the left. Image is grainy.
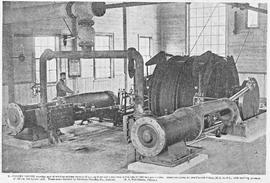
Part of Images of West Coast Tasmania
Image is likely sourced from a newspaper or publication as it shows legend at the bottom identifying the scene and providing technical information.
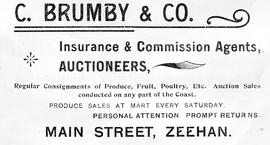
Advertising flyer for C Brumby & Co, auctioneers and insurance agents, Zeehan, Tasmania
Part of Images of West Coast Tasmania
Image does not provide a view of any buildings however provides details of the Company and its services.

View of Central Main street, Zeehan, Tasmania
Part of Images of West Coast Tasmania
Image has printed label at the bottom and is possibly a post card.
Part of Arthur Knight Slides
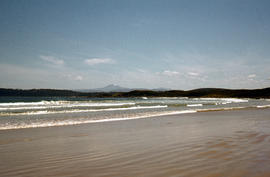
Colour photograph taken from beach at Cloudy Bay on Bruny Island, looking west to Adamsons Peak on Tasmanian mainland
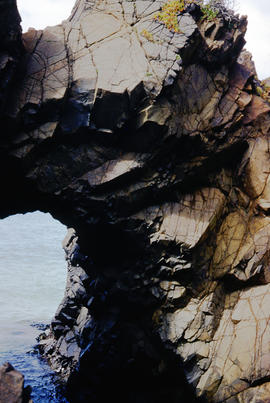
Cape Elizabeth arch on North Bruny Island
Part of Arthur Knight Slides
Colour photograph of archway at Cape Elizabeth on shoreline at North Bruny Island
Arthur Knight
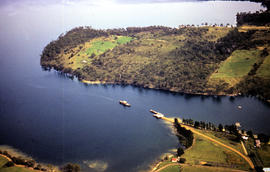
Aerial picture of boat in Barnes Bay
Part of Arthur Knight Slides
Colour photograph from the air showing a boat in Barnes Bay approaching or leaving jetty.