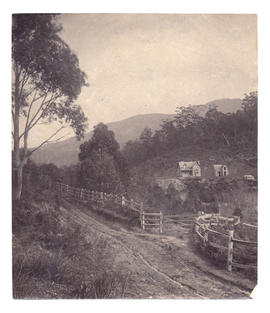
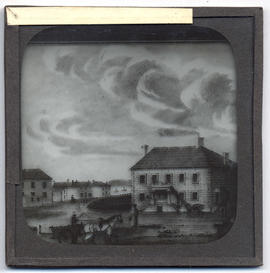
Caretakers house on dam of the reservoir
- AU TAS UTAS SPARC W9-Ph-136-28
- Sub-item
- c1870
Fait partie de Walker Family Papers
Photograph of caretakers house on dam of the reservoir, Waterworks Road, Hobart, Tasmania c.1870.
James Backhouse Walker
237 résultats avec objets numériques Afficher les résultats avec des objets numériques
Caretakers house on dam of the reservoir
Fait partie de Walker Family Papers
Photograph of caretakers house on dam of the reservoir, Waterworks Road, Hobart, Tasmania c.1870.
James Backhouse Walker
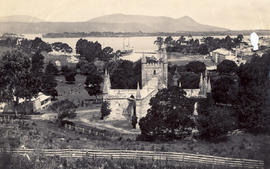
Port Arthur from behind the church
Fait partie de Walker Family Papers
Photograph of Port Arthur from behind the church with ship in the harbour, taken by Henry Hall Baily who had studios in Elizabeth and Liverpool Streets, Hobart from 1865 until 1918.
Henry Hall Baily

Fait partie de Walker Family Papers
Photograph of Fluted Cape, Adventure Bay, Bruny Island, Tasmania. The photographer was Henry Hall Baily who had studios in Elizabeth and Liverpool Streets, Hobart from 1865 until 1918
Henry Hall Baily
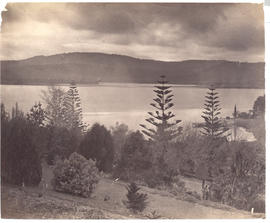
View from the Botanical Gardens
Fait partie de Walker Family Papers
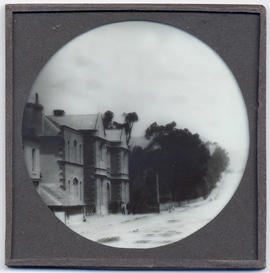
Photograph of view from the Botanical Gardens, Hobart, Tasmania in about 1880. Three Norfolk Island pines dominate the foreground and the view looks out to the River Derwent and Eastern Shore. The photographers were Anson Brothers, whose firm was located in Liverpool, Collins and Elizabeth Streets between 1878 and 1891.
Anson Brothers
Fait partie de Walker Family Papers
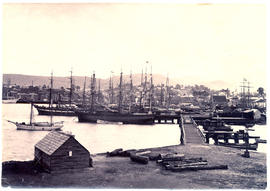
Photograph from the collection of James Backhouse Walker of Sullivan's Cove in about 1870 according to a note on the reverse. Taken from around Victoria Dock, Old St David's cathedral in background. The photographer is Henry Hall Baily who had studios in Elizabeth and Liverpool Streets Hobart from 1865 until 1918.
Henry Hall Baily
Hobart waterfront from Hunter Island
Fait partie de Walker Family Papers
Photograph of the Hobart waterfront from Hunter Island looking towards Salamanca.
Fait partie de Walker Family Papers
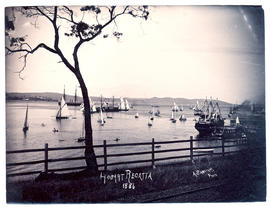
Photograph of the Hobart Regatta taken in 1886. The photographer was Albert Sargeant who had studios in Macquarie Street, Hobart from 1886-1890 and George Street, Launceston from 1900-1913
Albert Sargeant

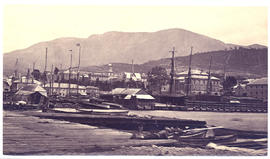
Hobart waterfront from the Queen's Domain
Fait partie de Walker Family Papers
Photograph of the Hobart waterfront from the old quarry on the Queen's Domain taken in the 1870s before the railway.
Hobart Regatta Grandstand from the water
Fait partie de Walker Family Papers
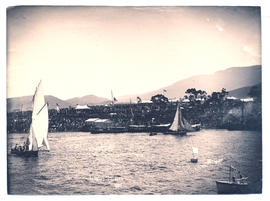
Photograph of the Hobart Regatta grandstand taken from the water in 1886. The photographer was Albert Sargeant who had studios in Macquarie Street, Hobart, Tasmania from 1886-1890 and George Street, Launceston, Tasmania from 1900-1913.
Albert Sargeant
Fait partie de Walker Family Papers
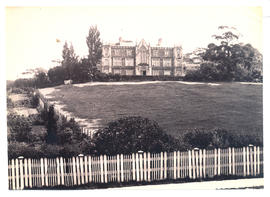
Photograph of the old University building (Domain House) on Queen's Domain, Hobart, Tasmania, c. 1890s.
Fait partie de Walker Family Papers
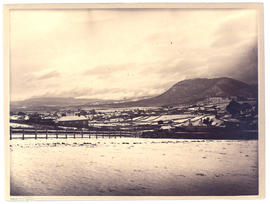
Photograph of New Town, Tasmania in the snow from Russell Young's Beaulieu (Swans Hill) taken on the morning of 16th June 1882. The photographer was Alfred Winter who had studios in Bathurst, Elizabeth and Liverpool Streets from 1869 until 1891.
Alfred Winter
Fait partie de Walker Family Papers
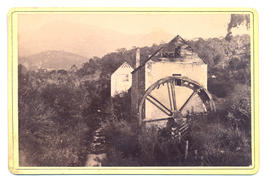
Photograph of Old Mill at New Town Creek showing creek, buildings and mill wheel in disrepair. Mt Wellington in distance
James Backhouse Walker
Fait partie de Walker Family Papers
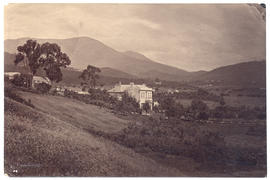
Photograph of Derwentwater, Sandy Bay, Tasmania, home of Captain Langdon Swan, c.1881. The photographer was Alfred Winter who had studios in Bathurst, Elizabeth and Liverpool Streets from 1869 until 1891.
James Backhouse Walker
Fait partie de Walker Family Papers
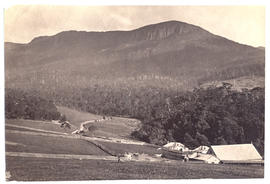
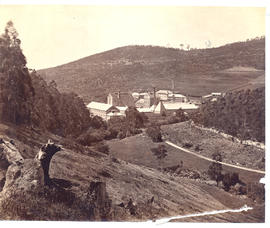
Photograph of Mount Wellington with farm buildings in the foreground in the vicinity of the Cascades Brewery, Hobart, Tasmania.
Anson Brothers
Fait partie de Walker Family Papers
Photograph of the Cascade Brewery buildings from behind, Hobart, Tasmania. The photographers were Anson Brothers whose studios were located in Liverpool, Collins and Elizabeth Streets between 1878 and 1891.
Fait partie de Walker Family Papers
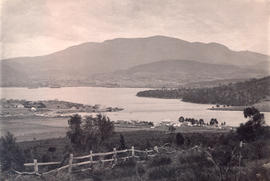
Photograph of Kangaroo Bay (Bellerive) on Hobart's Eastern Shore from hill showing wharf and houses c. 1882. The photographer was Henry Hall Baily who had studios in Elizabeth and Liverpool Streets, Hobart from 1865 until 1918.

Fait partie de Walker Family Papers
Photograph of Kangaroo Point (Bellerive) Beach on Hobart's Eastern Shore looking toward settlement c. 1882. The photographer was Henry Hall Baily who had studios in Elizabeth and Liverpool Streets, Hobart from 1865 until 1918.
Fait partie de Walker Family Papers
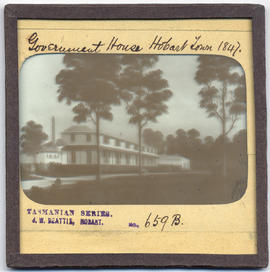
Lantern slide from the collection of James Backhouse Walker of old Government House, Hobart Town, Van Diemen's Land 1847. Prepared by J.W. Beattie (1859-1930) whose studio locations were in Elizabeth Street, Hobart from 1891-1920, Murray Street from 1921-40 and Cat and Fiddle Arcade, Hobart, until 1994.
John Watt Beattie
Fait partie de Walker Family Papers
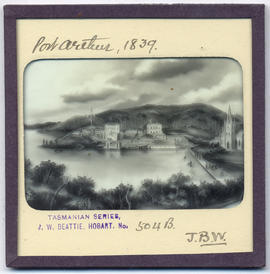
Lantern slide of Port Arthur 1839. Prepared by J.W. Beattie (1859-1930) whose studio locations were Elizabeth Street, Hobart from 1891-1920, Murray Street from 1921-40 and Cat and Fiddle until 1994.
John Watt Beattie
Fait partie de Walker Family Papers
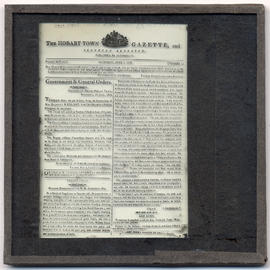
Lantern slide of front page of the Hobart Town Gazette, June 1816. Prepared by J.W. Beattie (1859-1930) whose studio locations were Elizabeth Street, Hobart from 1891-1920, Murray Street from 1921-40 and Cat and Fiddle until 1994.
John Watt Beattie
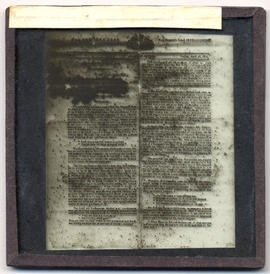
Funeral notice of Lieutenant Governor David Collins
Fait partie de Walker Family Papers
Lantern slide of funeral notice of Lieutenant Governor David Collins, 1810. From The Derwent Star, and Van Diemen’s Land Intelligencer no. 7, Tuesday April 3rd 1810. Prepared by J.W. Beattie (1859-1930) whose studio locations were Elizabeth Street, Hobart from 1891-1920, Murray Street from 1921-40 and Cat and Fiddle until 1994.
John Watt Beattie
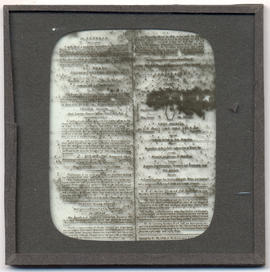
Death of Lieutenant Governor David Collins
Fait partie de Walker Family Papers
Lantern slide of the death of Lieutenant Governor David Collins, 1810. From The Derwent Star, and Van Diemen’s Land Intelligencer no. 7, Tuesday April 3rd 1810. Prepared by J.W. Beattie (1859-1930) whose studio locations were Elizabeth Street, Hobart from 1891-1920, Murray Street from 1921-40 and Cat and Fiddle until 1994.
John Watt Beattie
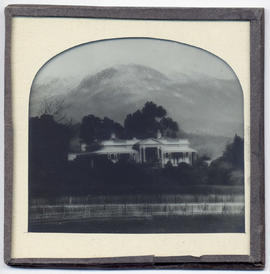
Runnymede, Hobart Town, Van Diemen's Land
Fait partie de Walker Family Papers
Lantern slide from the collection of James Backhouse Walker of Runnymede, Hobart Town, Van Diemen's Land. Thought to have been prepared by J.W. Beattie (1859-1930) whose studio locations were in Elizabeth Street, Hobart from 1891-1920, Murray Street from 1921-40 and Cat and Fiddle Arcade, Hobart, until 1994
John Watt Beattie
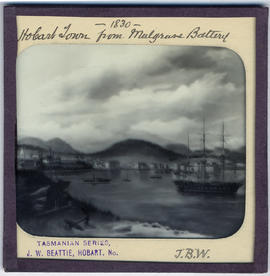
Hobart Town from Mulgrave Battery, Van Diemen's Land
Fait partie de Walker Family Papers
Lantern slide of Hobart Town from Mulgrave Battery, Van Diemen's Land, in 1830. From the collection of James Backhouse Walker. Prepared by J.W. Beattie (1859-1930) whose studio locations were in Elizabeth Street, Hobart from 1891-1920, Murray Street from 1921-40 and Cat and Fiddle Arcade, Hobart, until 1994.
John Watt Beattie
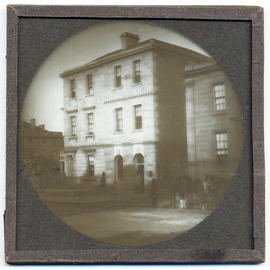
Fait partie de Walker Family Papers
Lantern slide of J. Walch and Sons, Macquarie Street, Hobart c1880. Prepared by J.W. Beattie (1859-1930) whose studio locations were Elizabeth Street, Hobart from 1891-1920, Murray Street from 1921-40 and Cat and Fiddle until 1994.
John Watt Beattie
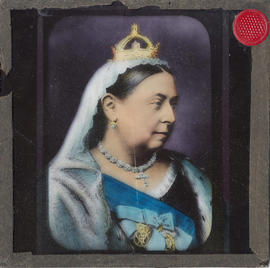
Fait partie de Walker Family Papers
Lantern Slide of Queen Victoria, England.
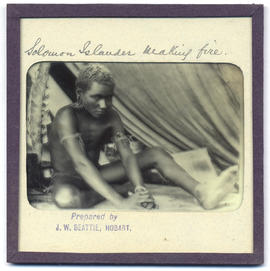
Fait partie de Walker Family Papers
Lantern slide of Solomon Islander making fire. Prepared by J.W. Beattie (1859-1930) whose studio locations were Elizabeth Street, Hobart from 1891-1920, Murray Street from 1921-40 and Cat and Fiddle until 1994.
John Watt Beattie
St. David's Park, Davey Street, Hobart, Tasmania
Fait partie de Walker Family Papers
Lantern slide from the collection of James Backhouse Walker of St. David's Park, Davey Street, Hobart, Tasmania. Thought to have been prepared by J.W. Beattie (1859-1930) whose studio locations were in Elizabeth Street, Hobart from 1891-1920, Murray Street from 1921-40 and Cat and Fiddle Arcade, Hobart, until 1994. Quaker Collection.
John Watt Beattie
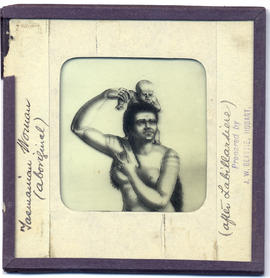
Tasmanian Aboriginal woman and child
Fait partie de Walker Family Papers
Lantern slide of Tasmanian aboriginal woman and child 'after Labillardiere'. Prepared by J.W. Beattie (1859-1930) whose studio locations were Elizabeth Street, Hobart from 1891-1920, Murray Street from 1921-40 and Cat and Fiddle until 1994
John Watt Beattie
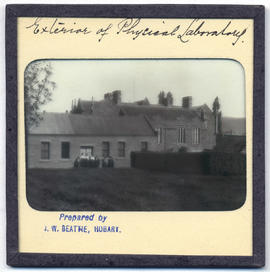
Fait partie de Walker Family Papers
Lantern slides of the University of Tasmania, Queen's Domain, Hobart. Views of exterior and laboratories and library. Prepared by J.W. Beattie (1859-1930) whose studio locations were Elizabeth Street, Hobart from 1891-1920, Murray Street from 1921-40 and Cat and Fiddle until 1994 (Collection Pr.S.Uni/1-8)
John Watt Beattie
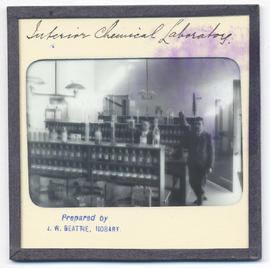
Fait partie de Walker Family Papers
Lantern slides of the University of Tasmania, Queen's Domain, Hobart. Views of exterior and laboratories and library. Prepared by J.W. Beattie (1859-1930) whose studio locations were Elizabeth Street, Hobart from 1891-1920, Murray Street from 1921-40 and Cat and Fiddle until 1994 (Collection Pr.S.Uni/1-8)
John Watt Beattie
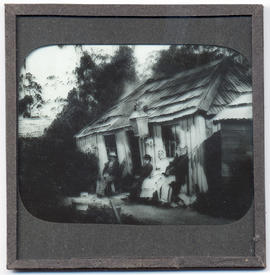
Wood's hut, the Springs, Mount Wellington, Hobart, Tasmania
Fait partie de Walker Family Papers
Lantern slide of Wood's hut, the Springs, Mount Wellington, Hobart. Prepared by J.W. Beattie (1859-1930) whose studio locations were Elizabeth Street, Hobart from 1891-1920, Murray Street from 1921-40 and Cat and Fiddle until 1994.
John Watt Beattie
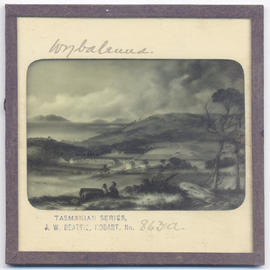
Fait partie de Walker Family Papers
Lantern slide of Wybalena, Flinders Island. Prepared by J.W. Beattie (1859-1930) whose studio locations were Elizabeth Street, Hobart from 1891-1920, Murray Street from 1921-40 and Cat and Fiddle until 1994.
John Watt Beattie
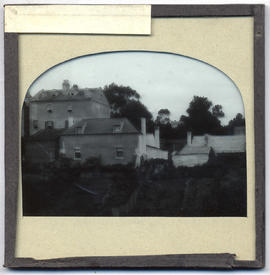
Buildings, early Hobart, Tasmania
Fait partie de Walker Family Papers
Lantern slide from the collection of James Backhouse Walker of buildings in early Hobart, Tasmania. Thought to have been prepared by J.W. Beattie (1859-1930) whose studio locations were in Elizabeth Street, Hobart from 1891-1920, Murray Street from 1921-40 and Cat and Fiddle Arcade, Hobart, until 1994.
John Watt Beattie
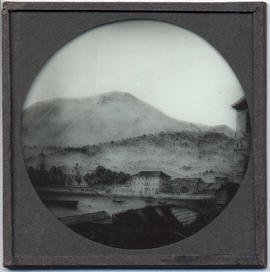
Early Hobart Town, Van Diemen's Land
Fait partie de Walker Family Papers
Lantern slide from the collection of James Backhouse Walker of early Hobart Town, Van Diemen's Land from the harbour. Thought to have been prepared by J.W. Beattie (1859-1930) whose studio locations were in Elizabeth Street, Hobart from 1891-1920, Murray Street from 1921-40 and Cat and Fiddle Arcade, Hobart, until 1994. Quaker Collection.
John Watt Beattie
House, Hunter Street, Hobart, Van Diemen's Land
Fait partie de Walker Family Papers
Lantern slide of house in Hunter Street, Hobart. Prepared by J.W. Beattie (1859-1930) whose studio locations were Elizabeth Street, Hobart from 1891-1920, Murray Street from 1921-40 and Cat and Fiddle until 1994.
John Watt Beattie
Fait partie de Walker Family Papers
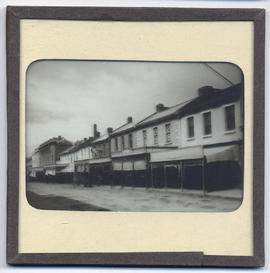
Lantern slide from the collection of James Backhouse Walker of a streetscape in Hobart, Tasmania. Thought to have been prepared by J.W. Beattie (1859-1930) whose studio locations were in Elizabeth Street, Hobart from 1891-1920, Murray Street from 1921-40 and Cat and Fiddle Arcade, Hobart, until 1994.
John Watt Beattie