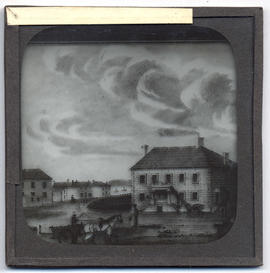
- AU TAS UTAS SPARC DX19-C-69-2
- Sub-item
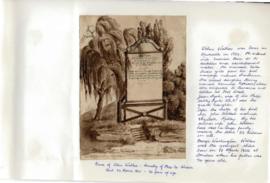
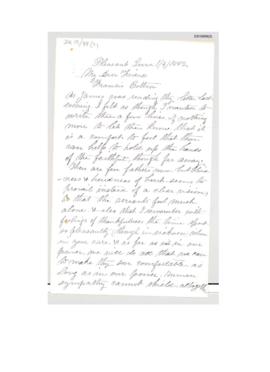
- 1871
Part of Cotton Family Papers
423 results with digital objects Show results with digital objects
Part of Cotton Family Papers
Part of Donald Davie Papers
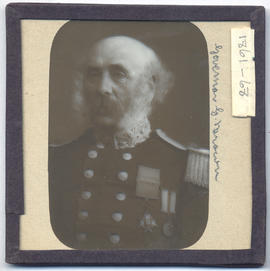
Photograph of Sir John Franklin from Allport Library and Museum of Fine Arts
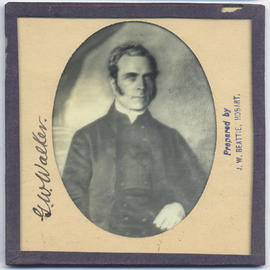
Part of Walker Family Papers
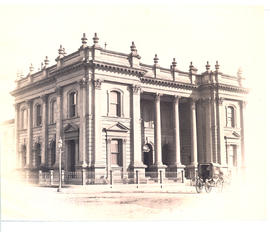
Photograph of Franklin Square Hobart was taken by the Anson Brothers photographers, whose firm was located in Liverpool, Collins and Elizabeth Streets between 1878 and 1891.
Anson Brothers
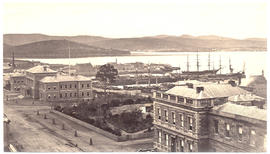
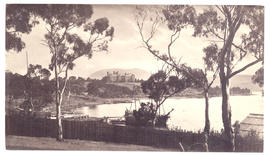
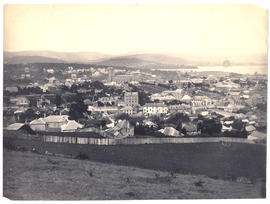
Franklin Square and Hobart waterfront
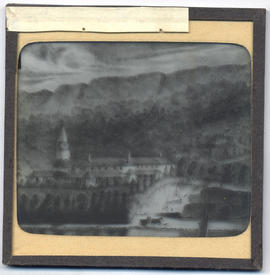
Part of Walker Family Papers
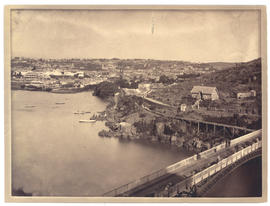
Photograph from the collection of James Backhouse Walker of Franklin Square and the Hobart waterfront taken in about 1870 possibly from St. David's Cathedral according to a note on the reverse. The photographer is Henry Hall Baily who had studios in Elizabeth and Liverpool Streets Hobart from 1865 until 1918.
Henry Hall Baily
Funeral notice of Lieutenant Governor David Collins
Part of Walker Family Papers
Lantern slide of funeral notice of Lieutenant Governor David Collins, 1810. From The Derwent Star, and Van Diemen’s Land Intelligencer no. 7, Tuesday April 3rd 1810. Prepared by J.W. Beattie (1859-1930) whose studio locations were Elizabeth Street, Hobart from 1891-1920, Murray Street from 1921-40 and Cat and Fiddle until 1994.
John Watt Beattie
Part of Walker Family Papers
Lantern slide of George Washington Walker (1800-1859). Prepared by J.W. Beattie (1859-1930) whose studio locations were Elizabeth Street, Hobart from 1891-1920, Murray Street from 1921-40 and Cat and Fiddle until 1994.
John Watt Beattie
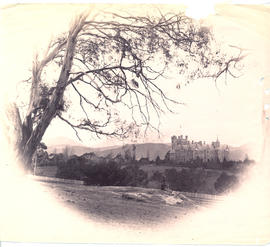
Part of Walker Family Papers
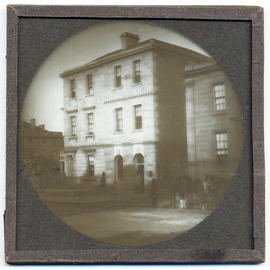
Portrait photograph of Government House, Hobart, Tasmania. The photographer was Henry Hall Baily who had studios in Elizabeth and Liverpool Streets, Hobart from 1865 until 1918
Henry Hall Baily
Government House and St David's Cathedral, Van Diemen's Land
Part of Walker Family Papers
Lantern slide of Government House and St David's Cathedral, Van Diemen's Land. Prepared by J.W. Beattie (1859-1930) whose studio locations were Elizabeth Street, Hobart from 1891-1920, Murray Street from 1921-40 and Cat and Fiddle until 1994. Lantern slide of detail from 'The Seat of His Excellency Lieut. Govr. Arthur / drawn from Nature and on Stone' by Charles Atkinson d.1837
John Watt Beattie
Part of Walker Family Papers
Photograph of Government House Hobart taken from the bay below the Queen's Domain, c.1890s. The photographer was Henry Hall Baily who had studios in Elizabeth and Liverpool Streets, Hobart from 1865 until 1918.
Henry Hall Baily
Government House from the Domain
Part of Walker Family Papers
Vignette photograph of Government House, Hobart, Tasmania taken from the Domain in about 1880. Showing gentleman in a bowler hat sitting on mound.

Government House from the Queen's Domain
Part of Walker Family Papers
Photograph of Government House, Hobart taken from the Queen's Domain, c. 1890s. A note on the reverse says 'after railway'. The photographer was Henry Hall Baily who had studios in Elizabeth and Liverpool Streets, Hobart from 1865 until 1918.
Henry Hall Baily
Government House from the shipyards
Part of Walker Family Papers
Photograph of Government House, Hobart, Tasmania in about 1870. Showing the shipyard in the foreground and Mount Direction behind.. The photographer was Henry Hall Baily who had studios in Elizabeth and Liverpool Streets, Hobart from 1865 until 1918.
Henry Hall Baily
Part of Donald Davie Papers
Photograph of Governor John Stephen Hampton comptroller-general of convicts in V.D.L 1846 & Governor of Western Australia 1862
Governor Sir Thomas Gore Browne
Part of Walker Family Papers
Lantern slide of Governor Sir Thomas Gore Browne. Governor of Tasmania from 1861-1868. Prepared by J.W. Beattie (1859-1930) whose studio locations were Elizabeth Street, Hobart from 1891-1920, Murray Street from 1921-40 and Cat and Fiddle until 1994.
John Watt Beattie
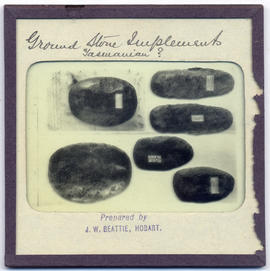
Ground stone Aboriginal implements
Part of Walker Family Papers
Lantern slide of ground stone aboriginal implements. Prepared by J.W. Beattie (1859-1930) whose studio locations were Elizabeth Street, Hobart from 1891-1920, Murray Street from 1921-40 and Cat and Fiddle until 1994.
John Watt Beattie
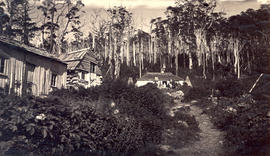
Group at Woods Huts, Mt Wellington
Part of Walker Family Papers
Photograph of a group of people outside of Woods Hut, Mt Wellington.
James Backhouse Walker

Part of Dennison Collection
Photograph of a group on the rocky foreshore. Two older women with young children and three young girls in pinafores holding hands in the background. Thought to be taken at Beltana now Lindisfarne.

Harrington Street with the Collins Street intersection
Part of Walker Family Papers
Photograph thought to be of Harrington Street, Hobart near the Collins street intersection
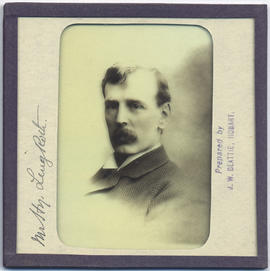
Henry Ling Roth (1855-1925) Tasmania
Part of Walker Family Papers
Lantern slide photograph of Henry Ling Roth. Prepared by J.W. Beattie (1859-1930) whose studio locations were Elizabeth Street, Hobart from 1891-1920, Murray Street from 1921-40 and Cat and Fiddle until 1994.
John Watt Beattie
Historic Port Arthur Tasmania : postcard sketches
Part of Donald Davie Papers
Seven postcard sketches - Historic Port Arthur Tasmania. (NuColorvue Productions Pty.Ltd. Mulgrave Vic).
Part of Donald Davie Papers
BHP "History of Bass Strait" series Nos. 1-12 : reproductions of maps and pictures issued each month with The Australian Financial Review, Jan-Dec. 1972.
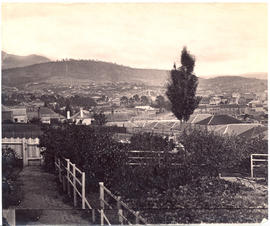
Hobart from a garden behind Salamanca Place
Part of Walker Family Papers
Photograph from the collection of James Backhouse Walker of a view of Hobart from a garden behind Salamanca Place.
James Backhouse Walker

Hobart from Huon Road looking east
Part of Walker Family Papers
Photograph from the collection of James Backhouse Walker of a view of Hobart from Huon Road looking east in about 1879, according to notes on the reverse.
James Backhouse Walker
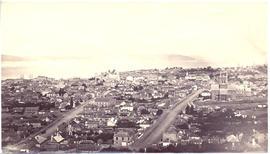
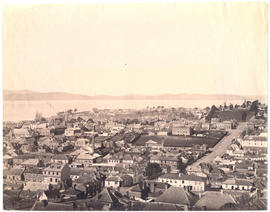
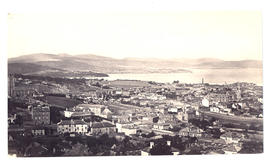
Hobart from the Railway Station
Part of Walker Family Papers
Photograph of Hobart, Tasmania from the railway station, in about c1881.
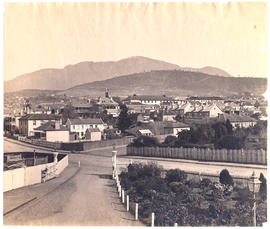
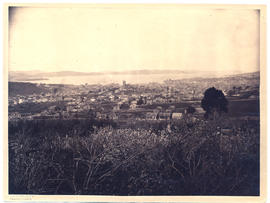
Hobart from the top of Murray Street
Part of Walker Family Papers
Photograph from the collection of James Backhouse Walker of a view of Hobart from the top of Murray St in about 1876 according to notes on the reverse. The photographer is Henry Hall Baily who had studios in Elizabeth and Liverpool Streets Hobart from 1865 until 1918.
James Backhouse Walker
Part of Walker Family Papers
Photograph from the collection of James Backhouse Walker of a view of Hobart from West Hobart looking east toward the river, showing Holy Trinity Church. The photographer is Henry Hall Baily who had studios in Elizabeth and Liverpool Streets Hobart from 1865 until 1918..
James Backhouse Walker
Part of Walker Family Papers
Photograph from the collection of James Backhouse Walker of a view of Hobart looking south along Barrack Street toward St Georges Hill, Battery Point
James Backhouse Walker
Part of Walker Family Papers
Photograph from the collection of James Backhouse Walker of a view of Hobart looking South East with a garden in the foreground and Elizabeth Street in the middle distance. The photographer is Alfred Winter who had studios in Bathurst, Elizabeth and Liverpool Streets from 1874-1880.
James Backhouse Walker
Part of Walker Family Papers
Photograph of Hobart from the Queen's Domain with the railway station in the foreground, c. 1881. The photographers were Anson Brothers who had studios in Liverpool, Collins and Elizabeth Streets between 1878 and 1891.
Anson Brothers
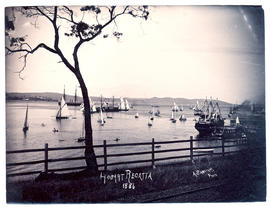
Part of Walker Family Papers
Photograph of the Hobart Regatta taken in 1886. The photographer was Albert Sargeant who had studios in Macquarie Street, Hobart from 1886-1890 and George Street, Launceston from 1900-1913
Albert Sargeant
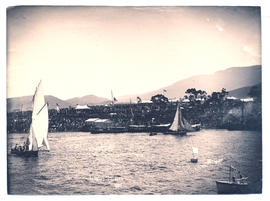
Hobart Regatta Grandstand from the water
Part of Walker Family Papers
Photograph of the Hobart Regatta grandstand taken from the water in 1886. The photographer was Albert Sargeant who had studios in Macquarie Street, Hobart, Tasmania from 1886-1890 and George Street, Launceston, Tasmania from 1900-1913.
Albert Sargeant
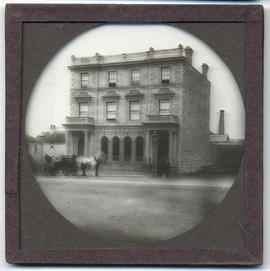
Part of Walker Family Papers
Lantern slide of Hobart Savings Bank, Murray Street Hobart c1860. Prepared by J.W. Beattie (1859-1930) whose studio locations were Elizabeth Street, Hobart from 1891-1920, Murray Street from 1921-40 and Cat and Fiddle until 1994.
John Watt Beattie
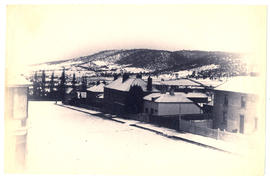
Part of Walker Family Papers
Photograph from the collection of James Backhouse Walker of a Hobart streetscape in snow - looking towards Mt Nelson and Sandy Bay.
James Backhouse Walker
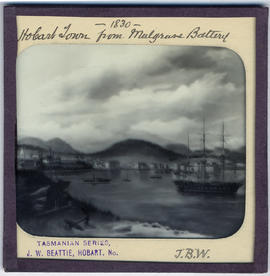
Hobart Town from Mulgrave Battery, Van Diemen's Land
Part of Walker Family Papers
Lantern slide of Hobart Town from Mulgrave Battery, Van Diemen's Land, in 1830. From the collection of James Backhouse Walker. Prepared by J.W. Beattie (1859-1930) whose studio locations were in Elizabeth Street, Hobart from 1891-1920, Murray Street from 1921-40 and Cat and Fiddle Arcade, Hobart, until 1994.
John Watt Beattie

Hobart Town from the Queen's Domain
Part of Walker Family Papers
Photograph of Hobart Town, Tasmania, from the Queen's Domain, looking down Macquarie Street in the 1850s. This photograph appears on page 27 of Allan Sierp's 'Colonial Life in Tasmania: Fifty Years of Photography 1855-1905' (Rigby, 1976)
Part of Walker Family Papers
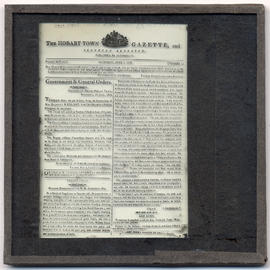
Lantern slide of front page of the Hobart Town Gazette, June 1816. Prepared by J.W. Beattie (1859-1930) whose studio locations were Elizabeth Street, Hobart from 1891-1920, Murray Street from 1921-40 and Cat and Fiddle until 1994.
John Watt Beattie
Hobart Town Harbour, Van Diemen's Land
Part of Walker Family Papers
Lantern slide of Hobart Town Harbour, Van Diemen's Land, in 1830. Prepared by J.W. Beattie (1859-1930) whose studio locations were in Elizabeth Street, Hobart from 1891-1920, Murray Street from 1921-40 and Cat and Fiddle Arcade, Hobart, until 1994.
John Watt Beattie
Hobart Town, Van Diemen's Land from the Harbour
Part of Walker Family Papers
Lantern slide of an early print of Hobart Town, Van Diemen's Land from the harbour. From the collection of James Backhouse Walker. Thought to have been prepared by J.W. Beattie (1859-1930) whose studio locations were in Elizabeth Street, Hobart from 1891-1920, Murray Street from 1921-40 and Cat and Fiddle Arcade, Hobart, until 1994.
John Watt Beattie
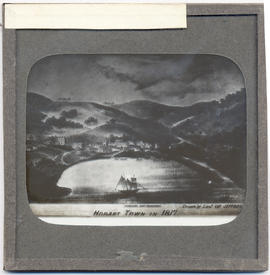
Hobart Town, Van Diemen's Land in 1817
Part of Walker Family Papers
Lantern slide of Hobart Town, Van Diemen's Land, in February, 1817. Inscribed with the words 'Hobart Town in 1817. Drawn by Lieut. Charles Jeffreys' - also shows the Government schooner the Kangaroo , church, Government House and Fort.
Charles Jeffreys
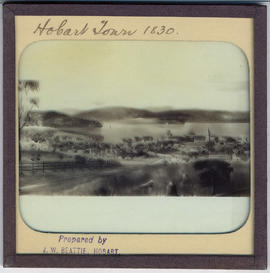
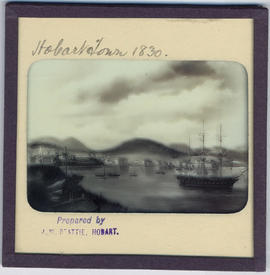
Hobart Town, Van Diemen's Land in 1830
Part of Walker Family Papers
Lantern slide of early print of Hobart Town, Van Diemen's Land in 1830. From the collection of James Backhouse Walker. Prepared by J.W. Beattie (1859-1930) whose studio locations were in Elizabeth Street, Hobart from 1891-1920, Murray Street from 1921-40 and Cat and Fiddle Arcade, Hobart, until 1994.
John Watt Beattie

Hobart Town, Van Diemen's Land, from Old Wharf in 1839
Part of Walker Family Papers
Lantern slide of Hobart Town, Van Diemen's Land, from Old Wharf in 1839. From the collection of James Backhouse Walker. Prepared by J.W. Beattie (1859-1930) whose studio locations were in Elizabeth Street, Hobart from 1891-1920, Murray Street from 1921-40 and Cat and Fiddle Arcade, Hobart, until 1994.
John Watt Beattie
Part of Walker Family Papers
Photograph from the collection of James Backhouse Walker of Hobart viewing over St. Davids Park, probably from Hampden Road, (in about 1878 according to a note on the reverse). The photographer is Henry Hall Baily who had studios in Elizabeth and Liverpool Streets Hobart from 1865 until 1918.
.
James Backhouse Walker
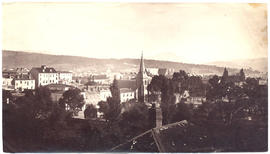
Part of Walker Family Papers
Photograph from the collection of James Backhouse Walker of an elevated view of Hobart looking east taken near Browne Street, (about 1876, according to a note on the reverse). Warwick Street in the foreground. Photographed by Henry Hall Baily who had studios in Elizabeth and Liverpool Streets, Hobart from 1865 until 1918.
James Backhouse Walker
Part of Walker Family Papers
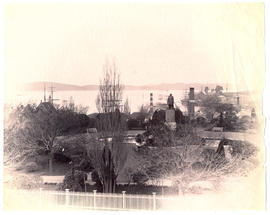
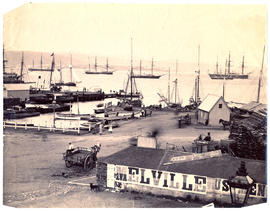
View of Hobart waterfront c.1880 showing docks, carts, ships at anchor and woodyard
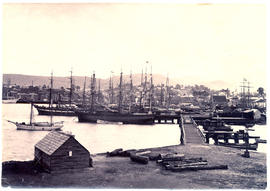
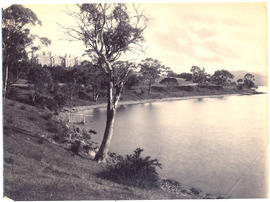
Hobart waterfront from Hunter Island
Part of Walker Family Papers
Photograph of the Hobart waterfront from Hunter Island looking towards Salamanca.

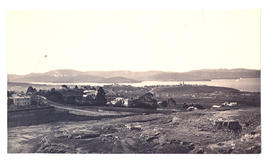
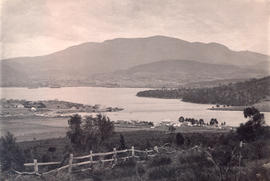
Hobart waterfront from the Queen's Domain
Part of Walker Family Papers
Photograph of the Hobart waterfront from the old quarry on the Queen's Domain taken in the 1870s before the railway.
Hobart, looking towards St. George's Hill
Part of Walker Family Papers
Photograph from the collection of James Backhouse Walker of a view of Hobart, looking towards St. George's Hill, Battery Point. Showing St Georges Church and James Luckman's windmill probably taken in the 1870s.
James Backhouse Walker
Part of Walker Family Papers
Lantern slide of house in Hobart. Prepared by J.W. Beattie (1859-1930) whose studio locations were Elizabeth Street, Hobart from 1891-1920, Murray Street from 1921-40 and Cat and Fiddle until 1994.
John Watt Beattie
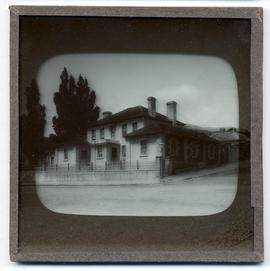
House, Hunter Street, Hobart, Van Diemen's Land
Part of Walker Family Papers
Lantern slide of house in Hunter Street, Hobart. Prepared by J.W. Beattie (1859-1930) whose studio locations were Elizabeth Street, Hobart from 1891-1920, Murray Street from 1921-40 and Cat and Fiddle until 1994.
John Watt Beattie

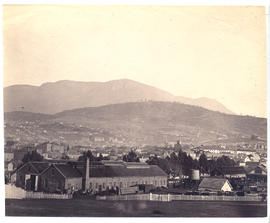
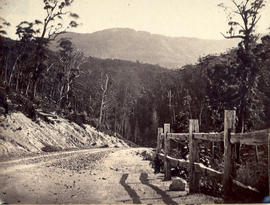
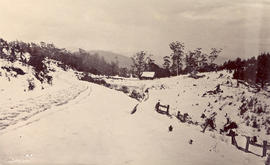
Huon Road with Mt Wellington in snow
Part of Walker Family Papers
Photograph of Huon Road with Mt Wellington in snow
James Backhouse Walker
Huon Road with post and rail fence
Part of Walker Family Papers
Photograph of Huon Road with post and rail fence
James Backhouse Walker
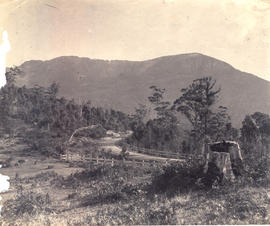
Huon Road with post and rail fence looking to Mt Wellington
Part of Walker Family Papers
Photograph of Huon Road with post and rail fence looking to Mt Wellington
James Backhouse Walker
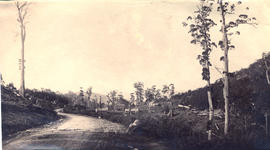
Part of Walker Family Papers
Photograph of Huon Road near Fern Tree Inn, Hobart, Tasmania, in about 1872 showing clearing and huts
James Backhouse Walker
Part of Walker Family Papers
Photograph of Huon Road near Fern Tree Inn, Hobart, Tasmania, in about 1882 showing clearing and huts under snow
James Backhouse Walker
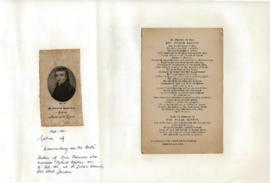
Image of the Rev. Joseph Benson
Part of Walker Family Papers 2007
Image of the Rev. Joseph Benson (1748-1821) husband of Sarah and father of Ann who married Robert Mather. Inscription on the tombstone of Joseph and Sarah. From Walker Family Scrapbook compiled by Peter Benson Walker. Private collection. Page 4
Joseph Benson
In memoriam Hannah Maria Benson
Part of Walker Family Papers
Folded memorial card with black margins. In loving memory of Hannah Maria, widow of the rev. Samuel Benson M.A. Chaplin of St. Saviour’s Southwark who died February 18th, 1882 aged 73 years. Interred at Norwood Cemetery, grave number 18495
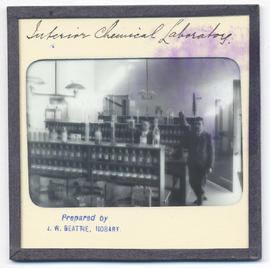
Part of Walker Family Papers
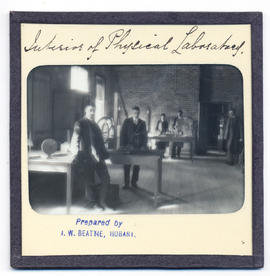
Lantern slides of the University of Tasmania, Queen's Domain, Hobart. Views of exterior and laboratories and library. Prepared by J.W. Beattie (1859-1930) whose studio locations were Elizabeth Street, Hobart from 1891-1920, Murray Street from 1921-40 and Cat and Fiddle until 1994 (Collection Pr.S.Uni/1-8)
John Watt Beattie
Part of Walker Family Papers
Lantern slides of the University of Tasmania, Queen's Domain, Hobart. Views of exterior and laboratories and library. Prepared by J.W. Beattie (1859-1930) whose studio locations were Elizabeth Street, Hobart from 1891-1920, Murray Street from 1921-40 and Cat and Fiddle until 1994 (Collection Pr.S.Uni/1-8)
John Watt Beattie
Part of Cotton Family Papers
Part of Cotton Family Papers
Part of Walker Family Papers
Lantern slide of J. Walch and Sons, Macquarie Street, Hobart c1880. Prepared by J.W. Beattie (1859-1930) whose studio locations were Elizabeth Street, Hobart from 1891-1920, Murray Street from 1921-40 and Cat and Fiddle until 1994.
John Watt Beattie
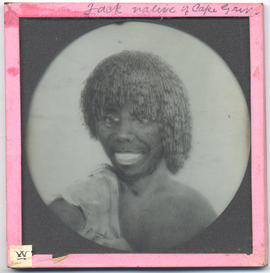
Part of Walker Family Papers
Lantern slide of Jack, native of Cape Grim. Prepared by J.W. Beattie (1859-1930) whose studio locations were Elizabeth Street, Hobart from 1891-1920, Murray Street from 1921-40 and Cat and Fiddle until 1994.
John Watt Beattie
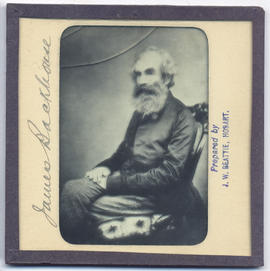
James Backhouse (1794-1869) Tasmania
Part of Walker Family Papers
Lantern slide of James Backhouse. Prepared by J.W. Beattie (1859-1930) whose studio locations were Elizabeth Street, Hobart from 1891-1920, Murray Street from 1921-40 and Cat and Fiddle until 1994.
John Watt Beattie
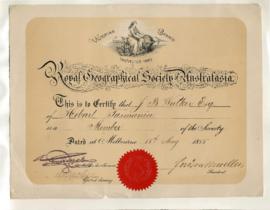
James Backhouse Walker's Certificate of Membership of the Royal Geographical Society of Australasia
Part of Walker Family Papers 2007
James Backhouse Walker's certificate of membership of the Royal Geographical Society of Australasia, 1885. From Walker Family Scrapbook compiled by Peter Benson Walker. Private collection. Page39
James Backhouse Walker
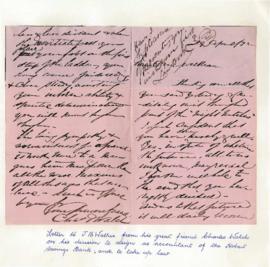
James Backhouse Walker's resignation from the Hobart Savings Bank
Part of Walker Family Papers 2007
Letter to James Backhouse Walker from his great friend Charles Walch on his decision to resign as accountant of the Hobart Savings Bank and to take up law. Also draft letter written by James Backhouse Walker. From Walker Family Scrapbook compiled by Peter Benson Walker. Private collection. Page 37
Charles Walch
James Erskine Calder : photograph
Part of Donald Davie Papers
Photograph of James Erskine Calder
Part of Donald Davie Papers
Photograph of John A. King
John Walker's gravestone and biography
Part of Walker Family Papers 2007
Image of the grave of John Walker in the cemetery of Pere-la-Chaise, Paris. Biographical information about John Walker, the father of George Washington Walker - the youngest of 22 children from John's two marriages. From Walker Family Scrapbook compiled by Peter Benson Walker. Private collection. Page 5
John Walker
Part of Walker Family Papers
Photograph of Kangaroo Bay (Bellerive) on Hobart's Eastern Shore from hill showing wharf and houses c. 1882. The photographer was Henry Hall Baily who had studios in Elizabeth and Liverpool Streets, Hobart from 1865 until 1918.

Part of Walker Family Papers
Photograph of Kangaroo Point (Bellerive) Beach on Hobart's Eastern Shore looking toward settlement c. 1882. The photographer was Henry Hall Baily who had studios in Elizabeth and Liverpool Streets, Hobart from 1865 until 1918.
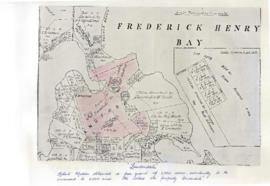
Part of Walker Family Papers 2007
Land grant map including Robert Mather's free grant of 1,500 acres, eventually to be increased to 2,500 acres. He called the property 'Lauderdale'. From Walker Family Scrapbook compiled by Peter Benson Walker. Private collection. Page 16
Joseph Benson

Launceston from beyond Cataract Bridge
Part of Walker Family Papers
Photograph of Launceston, Tasmania, from beyond the Cataract Bridge in about 1881. The photographer was Alfred Winter who had studios in Bathurst, Elizabeth and Liverpool Streets, Hobart, from 1869 until 1891.
Alfred Winter

Part of Walker Family Papers
Photograph of Launceston from Windmill Hill looking north taken in c1881. The photographer was Alfred Winter who had studios in Bathurst, Elizabeth and Liverpool Streets from 1869 until 1891.
Alfred Winter
Part of Walker Family Papers
Photograph of the Town Hall in Launceston, Tasmania. The photographers were Anson Brothers who had studios in Liverpool, Collins and Elizabeth Streets, Hobart, between 1878 and 1891.
Anson Brothers
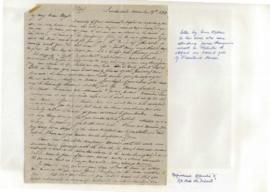
Letter : Ann Mather to her sons
Part of Walker Family Papers 2007
Letter from Ann Mather to her sons who were attending James Thompson's school, Hobart on the present site of Pressland House. Reproduced in Appendix A of 'All that we Inherit' by Peter Benson Walker. From Walker Family Scrapbook compiled by Peter Benson Walker. Private collection.. Page 17
Ann Mather
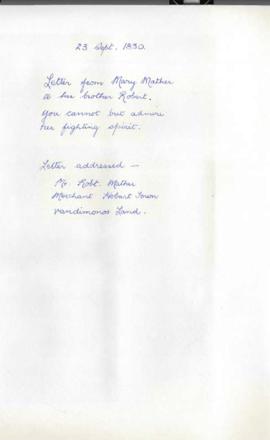
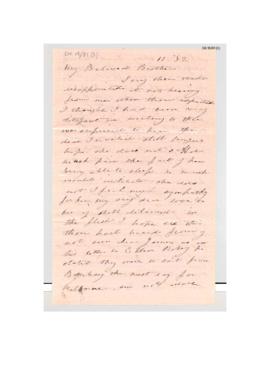
Letter : Mary Mather to her brother Robert
Part of Walker Family Papers 2007
Letter from Mary Mather in London to her brother Robert in Van Diemen's Land dated 23 September 1830. From Walker Family Scrapbook compiled by Peter Benson Walker. Private collection. Page 20
Robert Mather
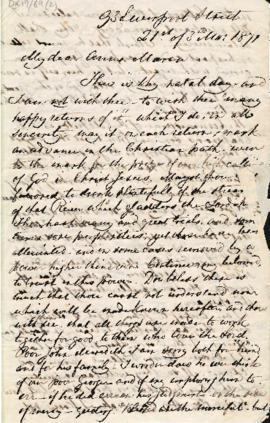
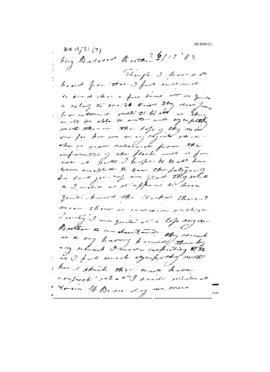
Part of Cotton Family Papers

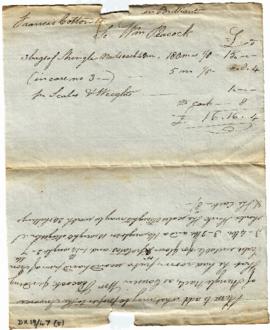
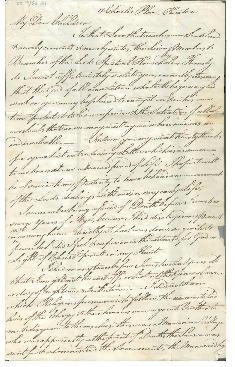
Letter : Thomas Cotton to son, Francis Cotton
Part of Cotton Family Papers
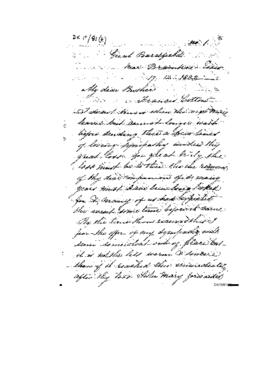
Letter : Thomas Cotton to son, Francis Cotton, 1834
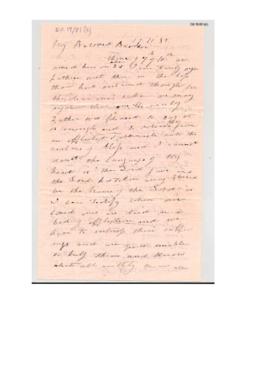
Part of Cotton Family Papers
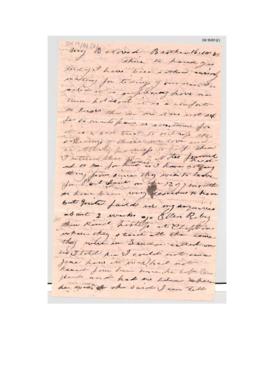
Part of Cotton Family Papers
Part of Cotton Family Papers
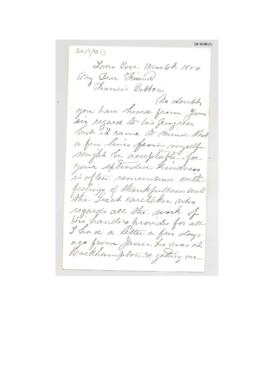
Part of Cotton Family Papers
Part of Cotton Family Papers

Part of Cotton Family Papers
Part of Cotton Family Papers
Part of Cotton Family Papers