- AU TAS UTAS SPARC UT460-45
- Item
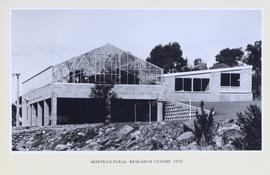
- 1970
Photograph showing the greenhouse at the Horticultural Research Centre, University Campus, Sandy Bay.
University of Tasmania
Photograph showing the greenhouse at the Horticultural Research Centre, University Campus, Sandy Bay.
University of Tasmania
Part of Arthur Knight Slides
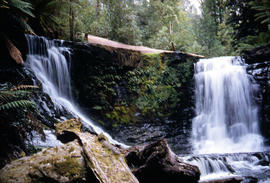
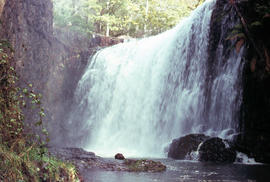
An out-of-focus colour photograph shows Horseshoe Falls on the Russell River, above Russell Falls
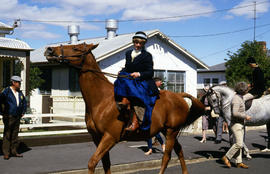
Horse riding at Evandale penny farthing races
Part of Arthur Knight Slides
Colour photographs riders on horseback, including one riding side saddle, at the penny farthing races at Evandale
Arthur Knight
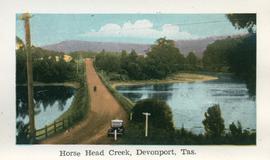
Horse Head Creek, Devonport, Tas.
Part of De La Haye Postcard Collection
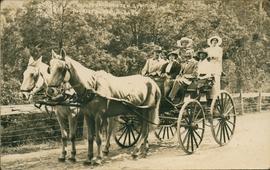
Horse drawn carriage with passengers
Part of Olive Pink Collection
On front Webster-Rometch Ltd - Tourist Bureau Hobart. Taking passengers to the Huon.
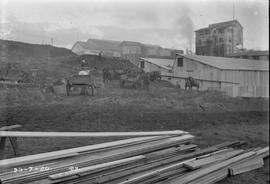
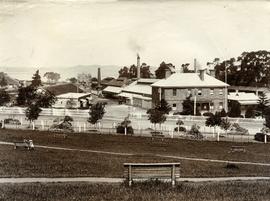
Horse carts and timber at E.Z. Co. Zinc Works
Black-and-white photograph shows stacks of sawn timber and workmen with horses and carts removing earth at an excavation on site E.Z. Co. Zinc Works at Risdon
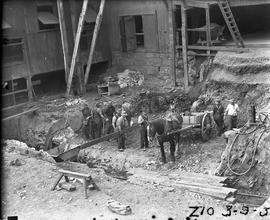
Horse and cart used in excavation of Derwent Prime furnace site at E.Z. Co. Zinc Works
Black-and-white photograph shows horse and cart positioned in pit while men excavate the site of the Derwent Prime furnace by hand at the E.Z. Co Zinc Works 1930
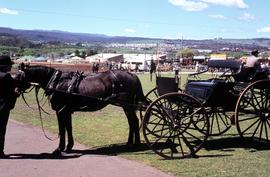
Horse and carriage at Launceston Show 1972
Part of Hal Wyatt Collection
Colour photograph of dark bay or black horse in harness, with a black carriage at Launceston Show, 1972. Groom or driver also dressed in black. Other carriages in background.
Hal Wyatt
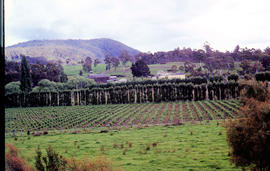
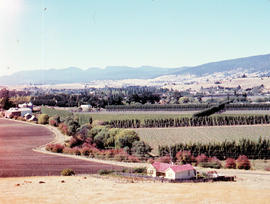
Photograph of several hop fields bordered by windbreak trees, possibly poplars
Graeme Raphael
Part of Arthur Knight Slides
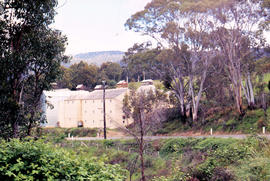
Colour photograph shows hop kilns, or oast houses, at Westerway
Part of Photographs of Edward Verrell
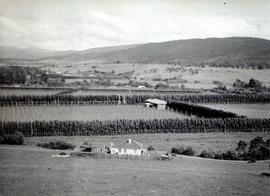
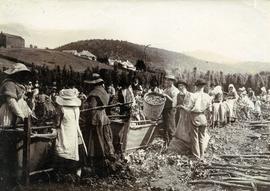
Black-and-white photograph shows men, women and children stripping hop cones into hessian-covered troughs, carrying baskets and sacks of harvested hops on the extensive hop grounds. The plant was cultivated widely at Glenorchy, Margate, Kingston and the Upper Derwent Valley area.
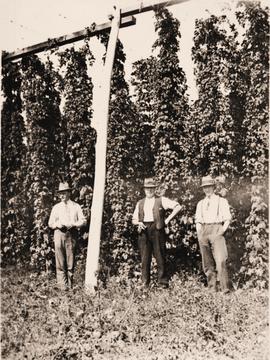
Black and white photograph of men in shirtsleeves, wearing hats, standing in a field of hops.
Graeme Raphael
Part of Arthur Knight Slides
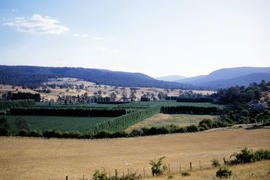
Colour photograph shows hop fields in at Glenora, 1959
Part of Arthur Knight Slides
Colour photograph shows hop fields, farm buildings and dwellings at Glenora, 1959
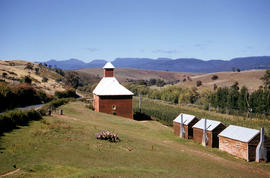
Hop fields and oast house near Rosegarland
Part of Arthur Knight Slides
Colour photograph shows hop fields, timber huts and oast house near Rosegarland
Part of Arthur Knight Slides
Colour photograph shows hop fields and kilns, or oast houses, at Westerway

Part of De La Haye Postcard Collection
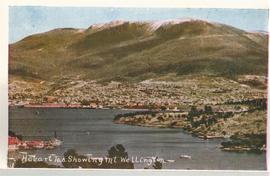
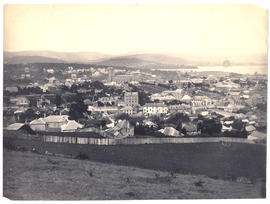
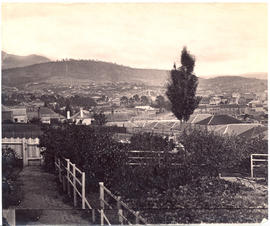
Hobart, Tas. Showing Mt. Wellington
Part of De La Haye Postcard Collection
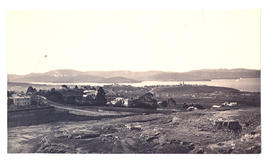
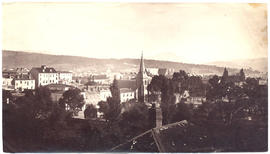
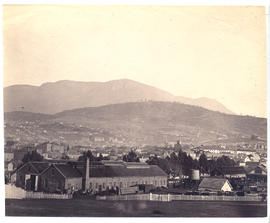
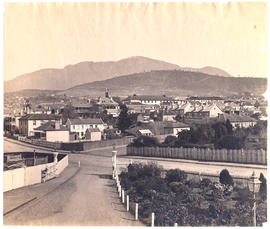
Hobart, looking towards St. George's Hill
Part of Walker Family Papers
Photograph from the collection of James Backhouse Walker of a view of Hobart, looking towards St. George's Hill, Battery Point. Showing St Georges Church and James Luckman's windmill probably taken in the 1870s.
James Backhouse Walker
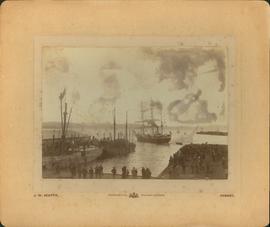
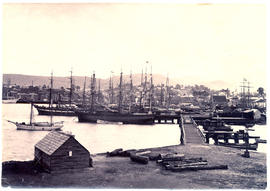
Hobart wharves, steam sail boats
Part of George Musgrave Parker : Correspondence and research records
Photograph of Hobart wharves showing steam sail boats taken by J.W. Beattie. The photograph does have some marks on it.
George Musgrave Parker

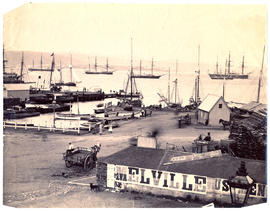
Hobart waterfront from the Queen's Domain
Part of Walker Family Papers
Photograph of the Hobart waterfront from the old quarry on the Queen's Domain taken in the 1870s before the railway.
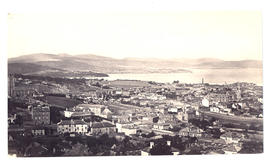
Hobart waterfront from Hunter Island
Part of Walker Family Papers
Photograph of the Hobart waterfront from Hunter Island looking towards Salamanca.
Part of Walker Family Papers
View of Hobart waterfront c.1880 showing docks, carts, ships at anchor and woodyard
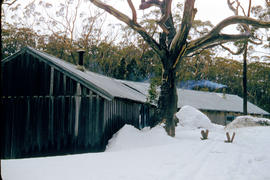
Part of Arthur Knight Slides
Colour photograph shows smoke curling out of the flue from a woodheater or fireplace of the Hobart Walking Club timber hut at Mount Field National Park, with snowdrifts banked halfway up the walls of the hut
Part of Walker Family Papers
Photograph from the collection of James Backhouse Walker of an elevated view of Hobart looking east taken near Browne Street, (about 1876, according to a note on the reverse). Warwick Street in the foreground. Photographed by Henry Hall Baily who had studios in Elizabeth and Liverpool Streets, Hobart from 1865 until 1918.
James Backhouse Walker
Part of Walker Family Papers
Photograph from the collection of James Backhouse Walker of Hobart viewing over St. Davids Park, probably from Hampden Road, (in about 1878 according to a note on the reverse). The photographer is Henry Hall Baily who had studios in Elizabeth and Liverpool Streets Hobart from 1865 until 1918.
.
James Backhouse Walker

Hobart Town, Van Diemen's Land, from Old Wharf in 1839
Part of Walker Family Papers
Lantern slide of Hobart Town, Van Diemen's Land, from Old Wharf in 1839. From the collection of James Backhouse Walker. Prepared by J.W. Beattie (1859-1930) whose studio locations were in Elizabeth Street, Hobart from 1891-1920, Murray Street from 1921-40 and Cat and Fiddle Arcade, Hobart, until 1994.
John Watt Beattie
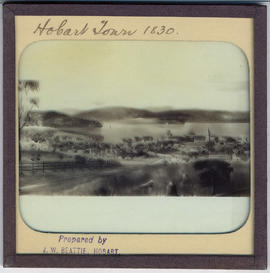
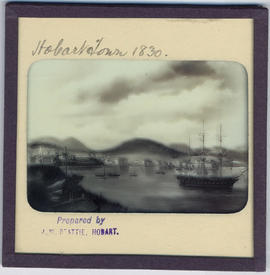
Hobart Town, Van Diemen's Land in 1830
Part of Walker Family Papers
Lantern slide of early print of Hobart Town, Van Diemen's Land in 1830. From the collection of James Backhouse Walker. Prepared by J.W. Beattie (1859-1930) whose studio locations were in Elizabeth Street, Hobart from 1891-1920, Murray Street from 1921-40 and Cat and Fiddle Arcade, Hobart, until 1994.
John Watt Beattie
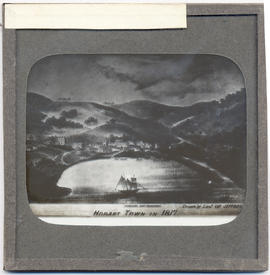
Hobart Town, Van Diemen's Land in 1817
Part of Walker Family Papers
Lantern slide of Hobart Town, Van Diemen's Land, in February, 1817. Inscribed with the words 'Hobart Town in 1817. Drawn by Lieut. Charles Jeffreys' - also shows the Government schooner the Kangaroo , church, Government House and Fort.
Charles Jeffreys
Hobart Town, Van Diemen's Land from the Harbour
Part of Walker Family Papers
Lantern slide of an early print of Hobart Town, Van Diemen's Land from the harbour. From the collection of James Backhouse Walker. Thought to have been prepared by J.W. Beattie (1859-1930) whose studio locations were in Elizabeth Street, Hobart from 1891-1920, Murray Street from 1921-40 and Cat and Fiddle Arcade, Hobart, until 1994.
John Watt Beattie
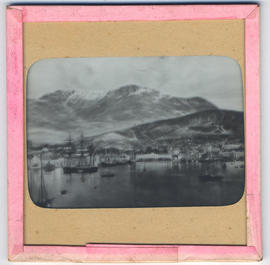
Hobart Town Harbour, Van Diemen's Land
Part of Walker Family Papers
Lantern slide of Hobart Town Harbour, Van Diemen's Land, in 1830. Prepared by J.W. Beattie (1859-1930) whose studio locations were in Elizabeth Street, Hobart from 1891-1920, Murray Street from 1921-40 and Cat and Fiddle Arcade, Hobart, until 1994.
John Watt Beattie
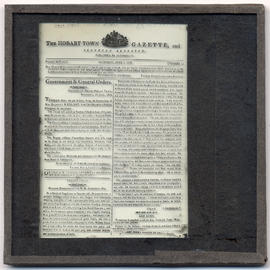
Part of Walker Family Papers
Lantern slide of front page of the Hobart Town Gazette, June 1816. Prepared by J.W. Beattie (1859-1930) whose studio locations were Elizabeth Street, Hobart from 1891-1920, Murray Street from 1921-40 and Cat and Fiddle until 1994.
John Watt Beattie

Hobart Town from the Queen's Domain
Part of Walker Family Papers
Photograph of Hobart Town, Tasmania, from the Queen's Domain, looking down Macquarie Street in the 1850s. This photograph appears on page 27 of Allan Sierp's 'Colonial Life in Tasmania: Fifty Years of Photography 1855-1905' (Rigby, 1976)
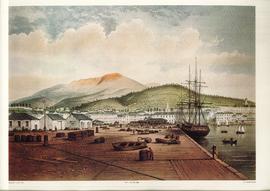
Hobart Town from the New Wharf - print
Coloured print Lloyd, Henry Grant, 1830-1904 :Hobart town from the new wharf.
W.L. Walton lith; H. Grant Lloyd del. [London, M & N Hanhart, ca. 1857].
Reprinted from the original by Foscan No. 438
Henry Grant Lloyd
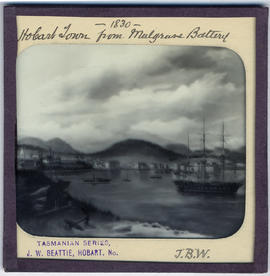
Hobart Town from Mulgrave Battery, Van Diemen's Land
Part of Walker Family Papers
Lantern slide of Hobart Town from Mulgrave Battery, Van Diemen's Land, in 1830. From the collection of James Backhouse Walker. Prepared by J.W. Beattie (1859-1930) whose studio locations were in Elizabeth Street, Hobart from 1891-1920, Murray Street from 1921-40 and Cat and Fiddle Arcade, Hobart, until 1994.
John Watt Beattie
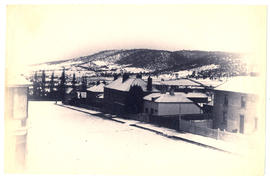
Part of Walker Family Papers
Photograph from the collection of James Backhouse Walker of a Hobart streetscape in snow - looking towards Mt Nelson and Sandy Bay.
James Backhouse Walker
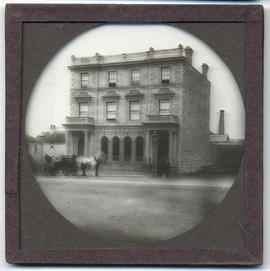
Part of Walker Family Papers
Lantern slide of Hobart Savings Bank, Murray Street Hobart c1860. Prepared by J.W. Beattie (1859-1930) whose studio locations were Elizabeth Street, Hobart from 1891-1920, Murray Street from 1921-40 and Cat and Fiddle until 1994.
John Watt Beattie
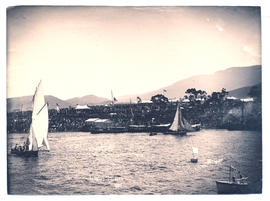
Hobart Regatta Grandstand from the water
Part of Walker Family Papers
Photograph of the Hobart Regatta grandstand taken from the water in 1886. The photographer was Albert Sargeant who had studios in Macquarie Street, Hobart, Tasmania from 1886-1890 and George Street, Launceston, Tasmania from 1900-1913.
Albert Sargeant
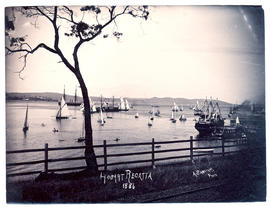
Part of Walker Family Papers
Photograph of the Hobart Regatta taken in 1886. The photographer was Albert Sargeant who had studios in Macquarie Street, Hobart from 1886-1890 and George Street, Launceston from 1900-1913
Albert Sargeant
Hobart Railway Station, taken from university gardens
Part of Photographs of Edward Verrell
Black-and-white photograph shows Hobart Railway Station, viewed from gardens of the University of Tasmania, including the Tasmanian Government Railways workshops
Part of Walker Family Papers
Photograph of Hobart from the Queen's Domain with the railway station in the foreground, c. 1881. The photographers were Anson Brothers who had studios in Liverpool, Collins and Elizabeth Streets between 1878 and 1891.
Anson Brothers
Part of Walker Family Papers
Photograph from the collection of James Backhouse Walker of a view of Hobart looking South East with a garden in the foreground and Elizabeth Street in the middle distance. The photographer is Alfred Winter who had studios in Bathurst, Elizabeth and Liverpool Streets from 1874-1880.
James Backhouse Walker
Part of Walker Family Papers
Photograph from the collection of James Backhouse Walker of a view of Hobart looking south along Barrack Street toward St Georges Hill, Battery Point
James Backhouse Walker
Part of Walker Family Papers
Photograph from the collection of James Backhouse Walker of a view of Hobart from West Hobart looking east toward the river, showing Holy Trinity Church. The photographer is Henry Hall Baily who had studios in Elizabeth and Liverpool Streets Hobart from 1865 until 1918..
James Backhouse Walker
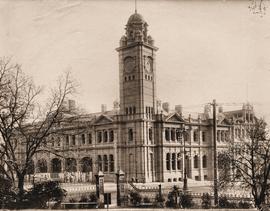
Hobart GPO before installation of clock in tower
Part of Photographs of Edward Verrell
Black-and-white photograph shows Hobart General Post Office viewed from Franklin Park before the installation of the clock in the clocktower.
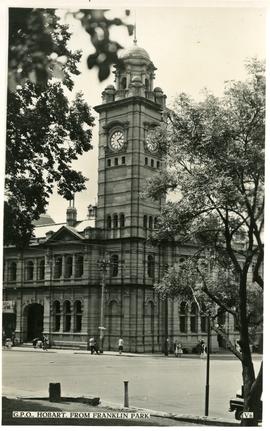
Hobart General Post Office from Franklin Park
Part of Photographs of Edward Verrell
Black-and-white photograph shows Hobart General Post Office viewed from Franklin Park. Words “G.P.O., HOBART, FROM FRANKLIN PARK” and “V6” are typewritten in black on white reverse panel at bottom of photograph
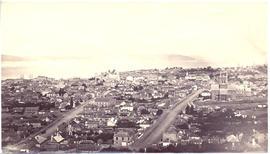
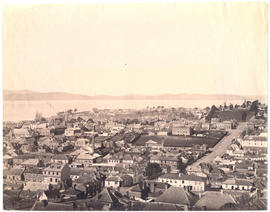
Hobart from the top of Murray Street
Part of Walker Family Papers
Photograph from the collection of James Backhouse Walker of a view of Hobart from the top of Murray St in about 1876 according to notes on the reverse. The photographer is Henry Hall Baily who had studios in Elizabeth and Liverpool Streets Hobart from 1865 until 1918.
James Backhouse Walker
Hobart from the Railway Station
Part of Walker Family Papers
Photograph of Hobart, Tasmania from the railway station, in about c1881.

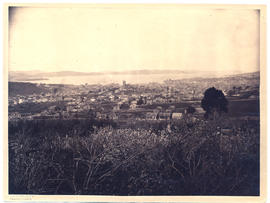
Hobart from Huon Road looking east
Part of Walker Family Papers
Photograph from the collection of James Backhouse Walker of a view of Hobart from Huon Road looking east in about 1879, according to notes on the reverse.
James Backhouse Walker
Hobart from a garden behind Salamanca Place
Part of Walker Family Papers
Photograph from the collection of James Backhouse Walker of a view of Hobart from a garden behind Salamanca Place.
James Backhouse Walker
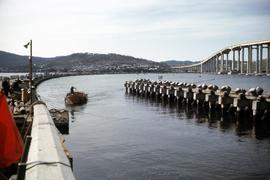
Hobart Bridge and Tasman Bridge in winter 1964
Part of Hal Wyatt Collection
Colour photograph of two bridges across the Derwent River, the Hobart Bridge, right, and the Tasman Bridge, left, as viewed from the eastern shore of the Derwent in August 1964. Snow caps Mount Wellington in the background.
Hal Wyatt
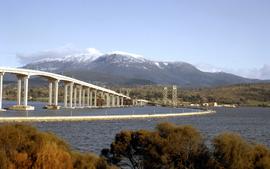
Hobart Bridge and Tasman Bridge
Part of Hal Wyatt Collection
Colour photograph taken from the western shore of the Derwent River, depicts vehicles travelling on the temporary, floating Hobart Bridge, while the nearly complete multi-lane Tasman Bridge to join the eastern and western shores of the river, is visible downstream.
Hal Wyatt
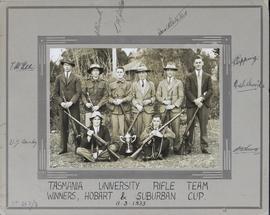
Part of McDonell Watkyn Woods Collection
Group photograph of the T.U.R.C. team, winners of the Hobart and Suburban Cup. Photograph signed and dated 11 March, 1933.
McDonell Watkyn Woods
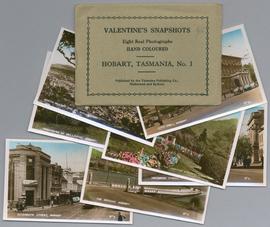
Part of De La Haye Postcard Collection
Seven captioned hand coloured images in proprietary envelope. Showing views of Hobart.
From envelope - Valentine's Snapshots. Eight real photographs. Hand Coloured Hobart, No. 1. Published by The Valentine Publishing Co. Melbourne and Sydney.
Valentine Publishing

Part of De La Haye Postcard Collection
Eight captioned hand coloured images in proprietary envelope. Showing views of Hobart.
From envelope - Valentine's Snapshots. Eight real photographs. Hand Coloured Hobart, No. 1. Published by The Valentine Publishing Co. Melbourne and Sydney.
Valentine Publishing
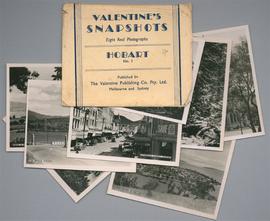
Part of De La Haye Postcard Collection
Eight captioned black and white images in proprietary envelope. Showing views of Hobart.
From envelope - Valentine's Snapshots. Eight real photographs. Hobart, No. 1. Published by The Valentine Publishing Co. Pty. Ltd. Melbourne and Sydney.
Valentine Publishing
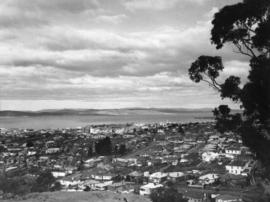
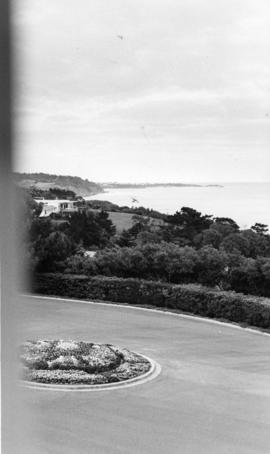
Looking across Hobart central business district and port toward the Eastern Shore. Taken from West Hobart
Colin Dennison (Curator)
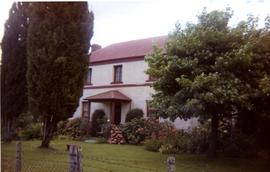
Photograph of two-storey rendered house, Georgian in style, with trees, lawn and flower garden at front, behind fence with old lichen-covered fenceposts, strands of rusty barbed wire and wire mesh.
Graeme Raphael
Collection consists of material produced and collected by Hilda Bridges. Contains photographs, newspaper articles, material relating to Roy Bridges and his publications and many loose manuscripts and typescripts written by Hilda Bridges
Hilda Bridges
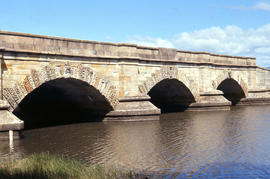
Part of Arthur Knight Slides
Colour photograph shows fast-flowing water of the Macquarie River at the Ross Bridge
Arthur Knight
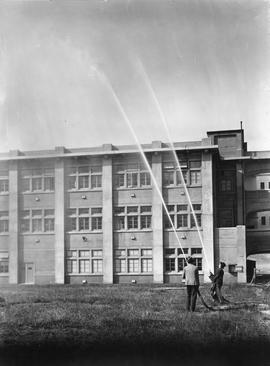
Two men spraying plumes of water into the air from high pressure fire hoses.
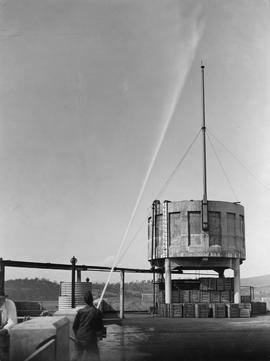
High Pressure Hose, Cadbury Factory
Large cement tank being sprayed with water by man holding high pressure fire hose.
Part of George Wilson Collection
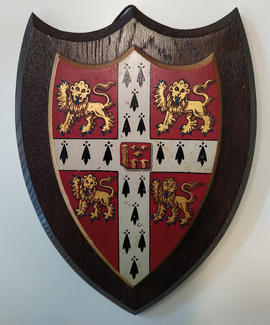
Mounted wooden wall shield from A W Crisp & Co., 16 King's Parade, Cambridge. Unidentified. Four lions on red background
George Thomas Jamieson Wilson
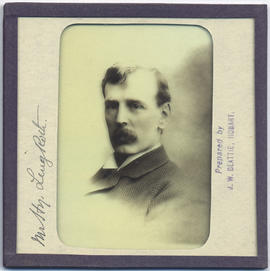
Henry Ling Roth (1855-1925) Tasmania
Part of Walker Family Papers
Lantern slide photograph of Henry Ling Roth. Prepared by J.W. Beattie (1859-1930) whose studio locations were Elizabeth Street, Hobart from 1891-1920, Murray Street from 1921-40 and Cat and Fiddle until 1994.
John Watt Beattie

Henry Lewis Garrett : Degree of Associate of Arts
Diploma of degree of Associate of Arts awarded to Henry Lewis Garrett of Hobart Town, who passed in English, Latin(with credit and prize) Greek, French (with credit) and pure mathematics and was placed in the second class Signed by H. Officer, president of the Tasmanian Council of Education. Seal of Tasmanian Council of Education 1859, red wax, lozenge shaped, backed paper: open book "Floreat Tasmania' on diamond pattern, in tin (separate from document). Diploma has decorative border of oak Leaves and acorns designed by Henry Hunter and engraved by Alfred Bock.
Henry Lewis Garrett
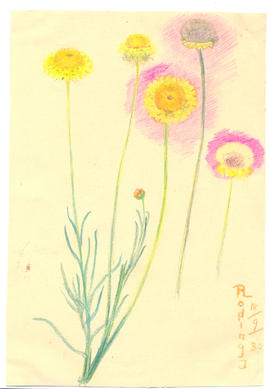
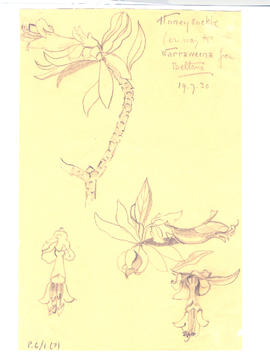
Part of Olive Pink Collection
Coloured pencil on card, sketched by Olive Pink at Rodinga, Northern Territory 18/9/30. Identified by Olive Pink as Helicrisum
Olive Pink
Helicopter on lawn at Cadbury Factory, with Mount Wellington visible in distance
Colin Dennison (Curator)
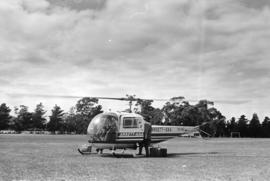
Ansett-ANA helicopter landed on lawned area at Cadbury factory, gentlemen with cases alighting
Colin Dennison (Curator)
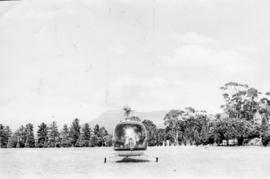
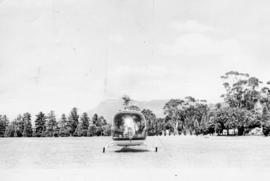
Photograph of a helicopter flying across water with lawn and houses in foreground
Colin Dennison (Curator)
Helicopter on grassy area, with Mount Wellington in background
Colin Dennison (Curator)
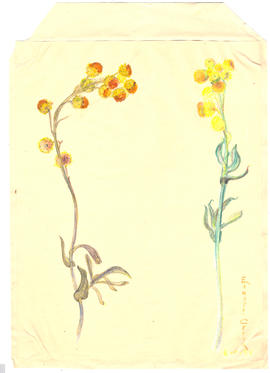
Part of Olive Pink Collection
Watercolour and coloured pencil on paper painted by Olive Pink at Edwards Creek, South Australia 6/8/30. Identified by Olive Pink as Helichrysum semi-papisum
Olive Pink

Heavy snowfall at Hobart Walking Club hut at Lake Dobson
Part of Hal Wyatt Collection
Colour photograph shows smoke curling from the chimney of the Hobart Walking Club hut at Lake Dobson after heavy snowfall

Headrace at Tarraleah Power Station
Colour photograph looking downhill to Tarraleah Power Station
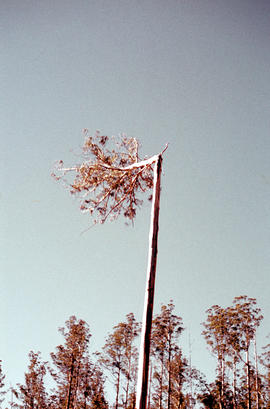
Heading a tree in the Florentine Valley
Part of Arthur Knight Slides
Colour portrait format photograph shows the head of a tall eucalypt tree falling when a timber worker chopped it down after scaling the three
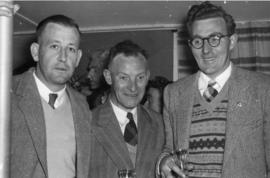
Group of friends sharing a drink at a social gathering
Colin Dennison (Curator)
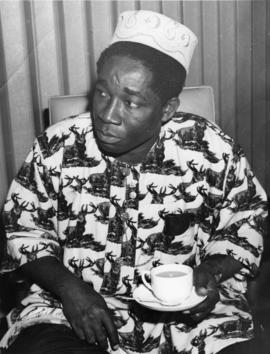
Seated man having a cup of tea, wearing a traditional African hat
Colin Dennison (Curator)
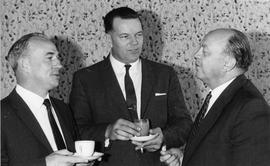
Three men wearing suits and ties, chatting over tea and coffee.
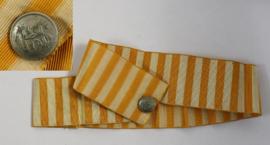
Part of Olive Pink Collection
Orange/yellow and white striped hatband and metal badge embossed with decorative GHS. Worn by Olive Pink while attending The Girls’ High School, Hobart ,Tasmania
Olive Pink
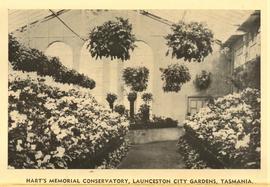
Hart's Memorial Conservatory, Launceston City Gardens, Tasmania
Part of De La Haye Postcard Collection

Harrington Street with the Collins Street intersection
Part of Walker Family Papers
Photograph thought to be of Harrington Street, Hobart near the Collins street intersection
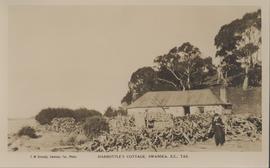
Harbottle's cottage at Swansea
Part of George Musgrave Parker : Correspondence and research records
Postcard produced by Swansea photographer, Miss F.M. Kennedy, (c1880-c1950s) of titled Harbottle's at Swansea, Tasmania.
This Cottage has also been know as Harbottle's Cottage and Caulfield Cottage. This single storey, sandstone rubble building with a corrugated iron hipped roof was listed by the National Trust in 1976 as it demonstrated the principal characteristics of a single storey, sandstone Victorian Georgian domestic building . Located at 45 Shaw Street, Swansea, Tasmania
George Musgrave Parker
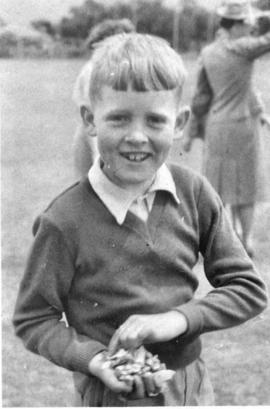
A smiling boy with a hand full of lollies at an outside event
Colin Dennison (Curator)
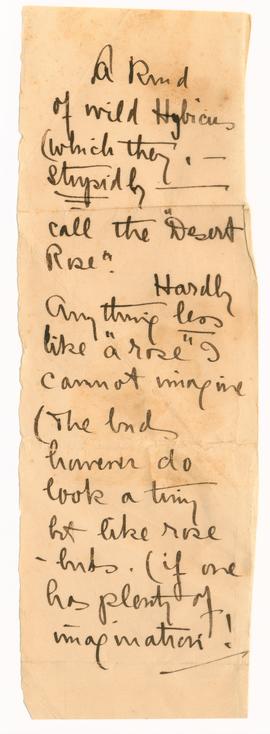
Part of Olive Pink Collection
1 handwritten note on paper - A kind of wild Hybicus [Hybiscus] which they stupidly call the "Desert Rose". Hardly anything less like "a rose" I cannot imagine. The buds however do look a tiny bit like rose buds (if one has plenty of imagination!)
Olive Pink
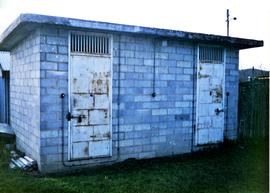
Small cement block building with two padlocked doors with grilles above.
Graeme Raphael
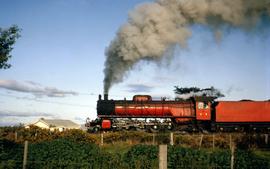
H Class locomotive steams slowly along at Perth
Part of Hal Wyatt Collection
Colour photograph shows Tasmanian Government Railways steam locomotive H3 on the tracks at Perth.
Hal Wyatt
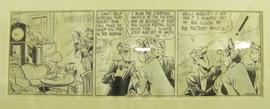
Black and white line drawing with blue highlights, in three frames depicting an antique dealer and a factory time keeper discussing setting of clocks
Alexander George Gurney

Part of Arthur Knight Slides
Colour photograph shows stalactites in Gunns Plains Cave
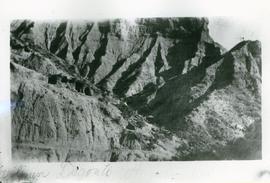
Black and white photograph showing gun dugouts in the mountains
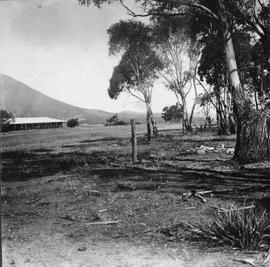
Clearing with gum trees at side, with long tin roofed building in distance.
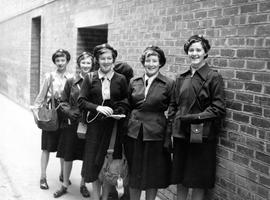
Black and white photograph of girl guides in uniform, taken in the 1950s.
Graeme Raphael
Part of Arthur Knight Slides
Colour photograph shows Guide Falls near Burnie, 1963
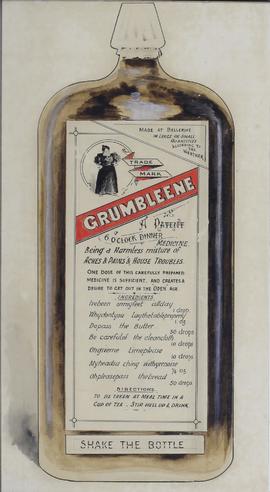
Part of Midwood Collection
Framed coloured drawing of a bottle of Grumbleene. My father (T.C.W. Midwood) did not like any grumbling at meal time hence this medicine for it.
Thomas Claude Wade Midwood
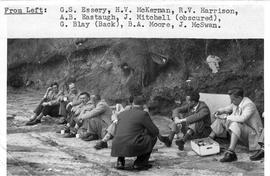
Group seated on ground taking a rest break
Group seated on ground drinking from cups, fruit in box. Left to right: GS Essery, HV McKernan, RV Harrison, AB Eastaugh, J Mitchell (obscured) G Blay (back) BA Moore, J McSwan.
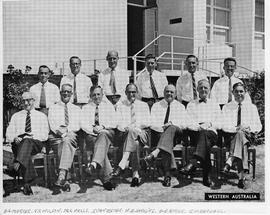
Group photograph, Western Australian Conference
Group photograph, Western Australian conference. Information available for front row only: A.G. Mercer, J.C. Wilson, M.G. Wells, I. van Assche, W.A. Hopkins, A.E. Burke, J,.W. Randall
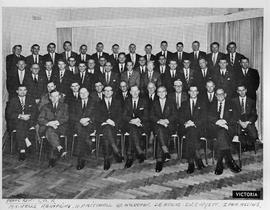
Group photograph, Victorian Conference
Group photograph, Victorian conference. Information available for front row only: M.G. Wells, W.A. Hopkins, N.F. Mitchell, H.V. McKernan, D.R. Atkins, J.W.C. Wyett, I. Van Assche
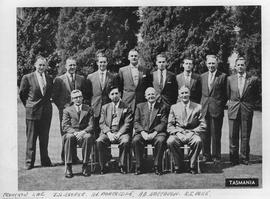
Group photograph, Tasmanian Conference
Group photograph, Tasmanian Conference. Information available for front row only. Left to right: JH Cooper, HC Partridge, AB Eastaugh, RS Poke
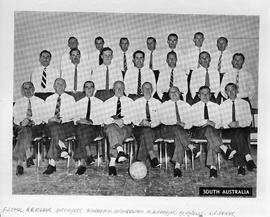
Group photograph, South Australian Conference
Group photograph, South Australian conference. Information available for front row only: F. Stock, R.B. Fisher, J.W.C. Wyett, A.H. Seaton, H. V. McKernan, W.A. Hopkins, M. G. Wells, L.S. Coker. Date of conference annotated on ball 1960.
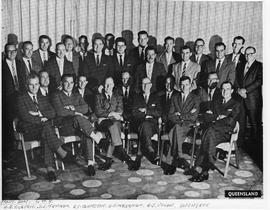
Group photograph, Queensland Conference
Group photograph, Queensland conference. Information available for front row only: N.E. Tilburn, D.S. Newman, B.C. Johnston, H.V. McKernan, A.J.V. Glow, J.W.C. Wyett