- AU TAS UTAS ITCCD 2017/18-0309
- Stuk
- 1940's
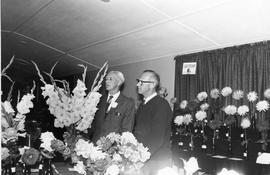
Two men judging flowers in show. Included are: Gladioli, roses and dahlias.
Two men judging flowers in show. Included are: Gladioli, roses and dahlias.
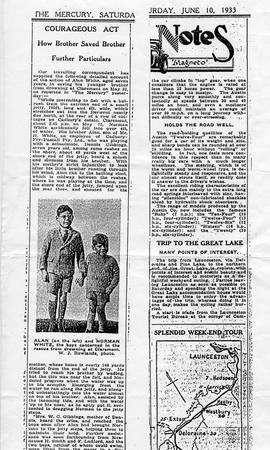
Article from the Mercury newspaper describing how Alan White (seven years of age) saved his younger brother from drowning in the Derwent River at Claremont, June 1933.
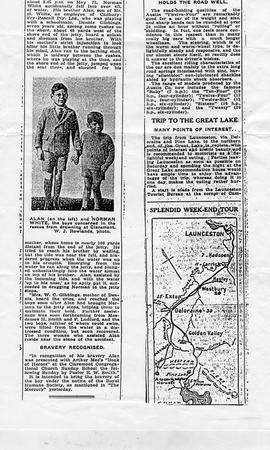
Continuation of article from the Mercury newspaper describing how Alan White (seven years of age) saved his younger brother from drowning in the Derwent River at Claremont, June 1933.
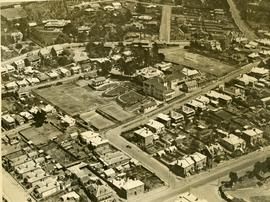
Aerial photograph of North Hobart
Aerial shot of North Hobart including Friends School and grounds.
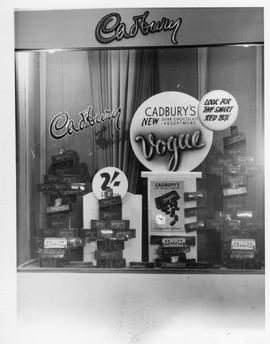
Display of Cadbury's new dark chocolate assortment Vogue, priced at two shillings. Poster states Look for the Smart Red Box
Cadbury factory viewed from triangular area in front, showing the bean store on the left where raw cocoa beans are stored.
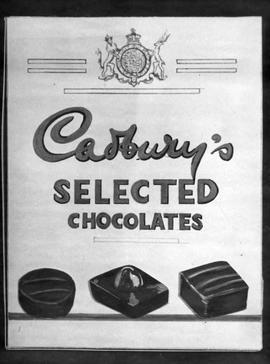
Draft of a poster advertising Cadbury’s Selected Chocolates.
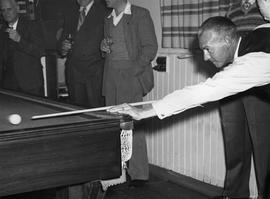
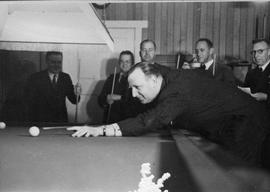
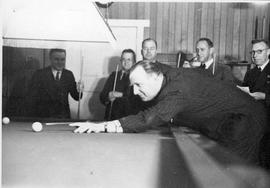
Cadbury Billiards and Snooker Social Club Playoff
Cadbury Social Club billiards and snooker play off, taken at the Social Hall, Cadbury’s. Left to right: Doug Hickman, Alan Hyland, Eric Bass, Bert Austin, Bill Wedd.
Man playing snooker with others watching on. Some have drinks and cigarettes in hand.
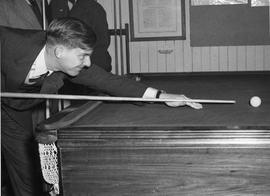
Man taking a snooker shot, wearing suit and tie.
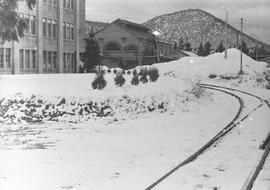
Snowy Cadbury Factory and grounds
Snow covering train tracks outside Cadbury factory, Claremont.
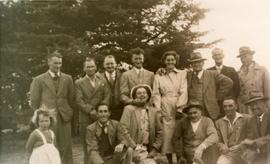
Cadbury Welfare Committee Picnic
Welfare Committee Picnic South Arm, 1947. Len Langridge and granddaughter, Ron Eaton, Charles Johnson, Maurie Reid, Laurie Kelly, Nancy Rust, Jack O'Neil, Charlie -, Percy Scott, Reg Baily, Harley Howell, Joe Barrow.
Cadbury State Managers Conference
Cadbury State Managers Conference, Melbourne, April 1949.
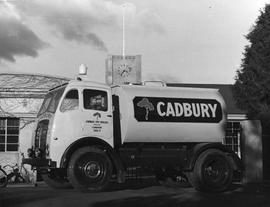
Small Cadbury Fry Pascall milk tanker number 7 parked outside factory gates at Claremont. Clock tower is visible in background.
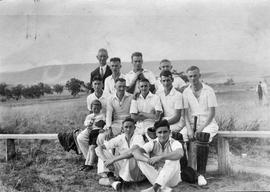
Youth Club Cricket Team taken at Gretna. Back Row: Mr Easther, Jack Cliffe, Stan Ransley, Frank Butler. Middle Row: Alan Easther, Alan Hyland (captain) Dudley Coleman, Spud Ransley, Basil Easther. Front: Brian Richardson, Walter Thomas. Boy: Harry Smith.
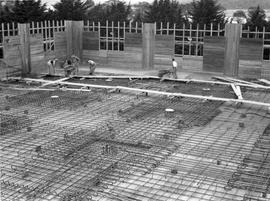
Construction of warehouse, Cadbury's Factory
Construction of warehouse second floor, Cadbury's factory 1956.
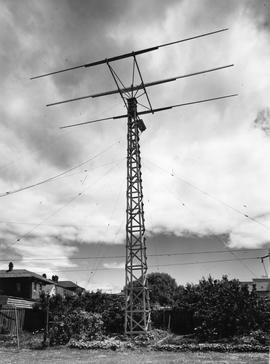
Aerial mast in suburban area.
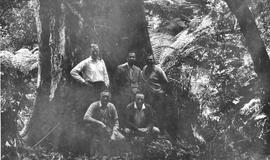
Men in front of Man ferns and a large tree
Men standing against large tree trunk, surrounded by man ferns.
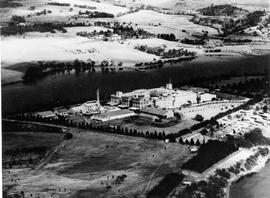
Cadbury factory and surrounding area, taken from above.
Cadbury Factory on the Derwent River
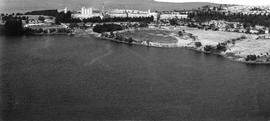
Looking across the river to Cadbury factory, Claremont.
Group of men in business dress posing for photograph on lawn with water behind.
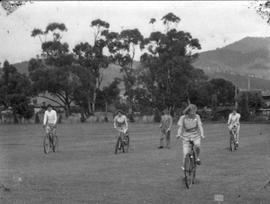
Men and women riding bikes across grassy field, gum trees and hills behind.
Man taking billiards shot with others looking on.
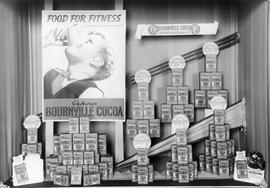
Display of Cadbury's Bournville Cocoa packets with signs indicating the product was reduced by one penny to one shilling and seven pence per quarter pound packet. Poster advertises cocoa as Food for Fitness with 120 cups from every pound.
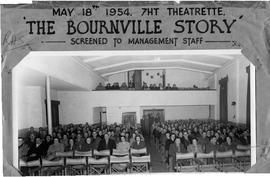
Cadbury Management staff attending the screening of The Bournville Story, at the 7HT Theatrette, May 18, 1954.
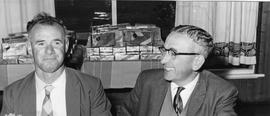
Two men seated in front of tables containing boxed chocolates.
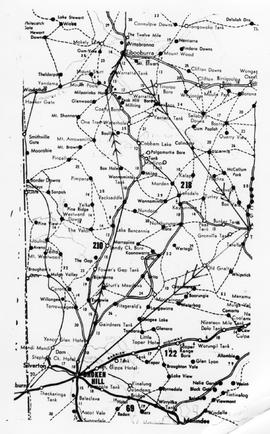
Map of Broken Hill and surrounds
Map of Broken Hill and surrounding area.
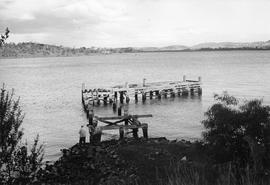
Two men standing next to a jetty in disrepair. River and suburbs in distance.
Part of the Cadbury factory with lawns, trees and standard rose bushes in front.
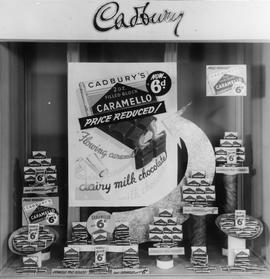
Cadbury Caramello Chocolate Display
Display of Cadbury Caramello chocolates showing a price reduction to sixpence for a 2 ounce block.
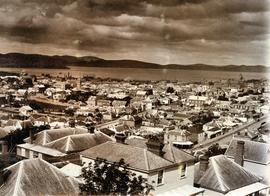
Rooftops of Hobart looking east
Part of Photographs of Edward Verrell
Black-and-white photograph shows view of Hobart rooftops looking east over central city streets including Harrington Street and Murray Street
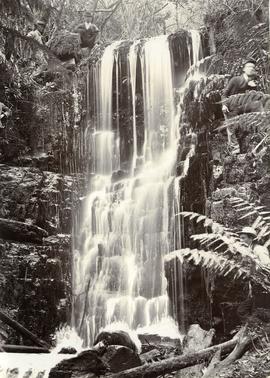
Men posing for camera at Silver Falls
Part of Photographs of Edward Verrell
Black-and-white vertical/portrait photograph of four men posing for the camera while standing or squatting above or beside a waterfall on Mount Wellington, believed to be Silver Falls
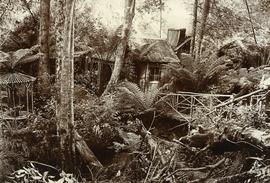
Part of Photographs of Edward Verrell
Black-and-white photograph of rustic hut built amid fern trees on walking track at Mount Wellington, two figures walking across timber bridge amid fern fronds
View of snow on Mount Wellington from Huon Road
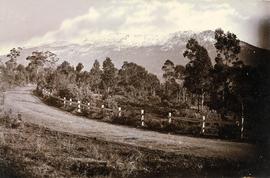
Part of Photographs of Edward Verrell
Black-and-white photograph shows snow on Mount Wellington viewed from the verge of the Huon Road, South Hobart, with post-and-rail fence alongside roadway.
Water mill on New Town Rivulet
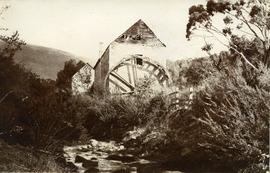
Part of Photographs of Edward Verrell
Black-and-white photograph shows water wheel on outside of mill on New Town Rivulet at Lenah Valley
Public buildings near Franklin Square, Hobart
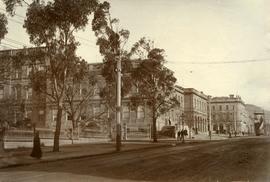
Part of Photographs of Edward Verrell
Black-and-white photograph shows public buildings near Franklin Square, Hobart

Sandy Bay Road looking towards Hobart
Part of Photographs of Edward Verrell
Black-and-white photograph shows Sandy Bay Road, with tram tracks on riverside of road, electric wires for Hobart Electric Tramway, carriage wheelmarks in the unpaved road surface, electricity transmission wires strung from poles mounted with porcelain insulators
Part of Photographs of Edward Verrell
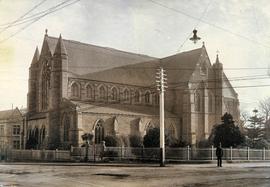
Black-and-white photograph of St David’s Cathedral, Hobart, including original fence of St David’s Church, which occupied the site until the 1860s
Part of Photographs of Edward Verrell
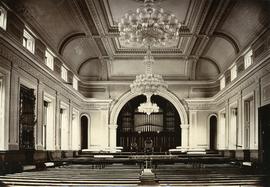
Black-and-white photograph shows interior of Hobart Town Hall, with low-hanging chandelier and pipe organ
Part of Hal Wyatt Collection
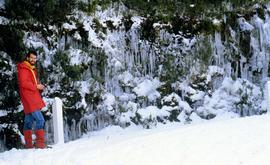
Colour photograph taken near the Springs of man dressed in red beside road to Mount Wellington, with icicles dangling from the vegetation after a snowstorm
Part of Hal Wyatt Collection
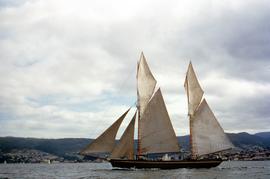
Colour photograph of SV May Queen, sailing on Derwent River in trading vessel race in 1954
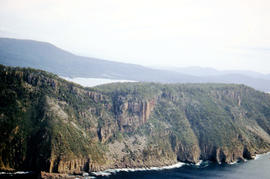
View of Cape Connella from sea level
Part of Arthur Knight Slides
Colour photograph shows Cape Connella taken at sea level
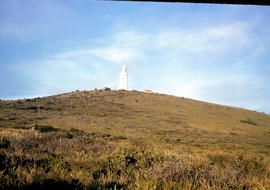
View of lighthouse at Cape Bruny
Part of Arthur Knight Slides
Colour photograph of Bruny Island lighthouse looking south
View of Cape Connella from sea level
Part of Arthur Knight Slides
Colour photograph of Cape Connella, viewed from sea level several hundred metres offshore
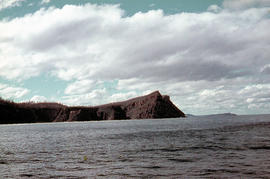
Aerial view of Fluted Cape, South Bruny Island
Part of Arthur Knight Slides
Colour aerial photograph of Fluted Cape, South Bruny Island, 1956
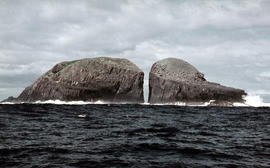
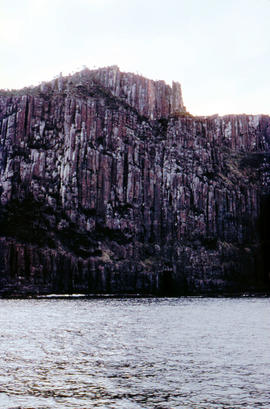
Gap between two Friars, off Bruny Island, 1962
Part of Arthur Knight Slides
Colour photograph taken at sea level of the gap between vertical cliffs of two islands in the Friars island group, off the southern coast of Bruny Island
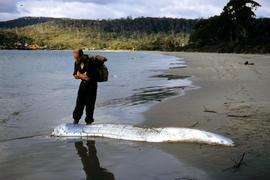
Man inspects ribbon fish on beach
Part of Arthur Knight Slides
Colour photograph of man looking at ribbonfish washed up on beach at Adventure Bay, Bruny Island
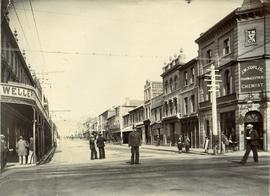
Part of Photographs of Edward Verrell
Black-and-white photograph depicts police officer standing in middle of Liverpool Street, Hobart, with YMCA and J.W. Toplis Pharmaceutical Chemist listed as tenants of the corner building.

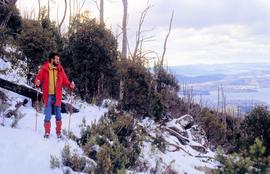
Man looking to Mount Marian from Mount Charles
Part of Hal Wyatt Collection
Colour photograph of man standing on ledge of Mount Charles looking towards Mount Marian. Man wearing brown felt hat, leather chaps and woollen shirt
Part of Hal Wyatt Collection
Colour photograph of man looking down Mount Wellington, with skis, from Milles Track
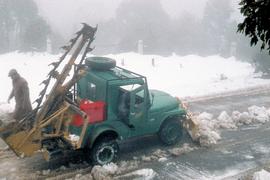
Snow plowing on road to Mount Wellington
Part of Hal Wyatt Collection
Colour photograph of Post Master General Department Jeep equipped with front-mounted and rear-mounted snowclearing implements moving snow and ice from road on Mount Wellington, 1960
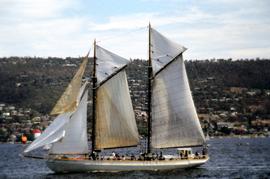
Derwent Hunter sailing off Sandy Bay
Part of Hal Wyatt Collection
Colour photograph of Derwent Hunter, sailing in Derwent River, off Sandy Bay, with other yachts under spinnaker in background.
Hal Wyatt
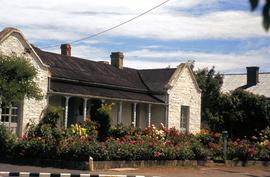
Rendered stone house with extensive floral garden
Part of Hal Wyatt Collection
Colour photograph of stone house, rendered white with flowers in bloom in front garden, in front of verandah, old tin roof, on corner block
Hal Wyatt
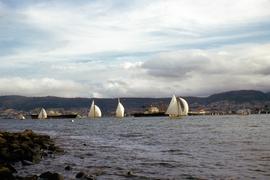
Part of Hal Wyatt Collection
Colour photograph of yachts racing on Derwent River with cargo ships berthed at Port of Hobart in background; foothills on land are dry
Hal Wyatt
Repair work on Tasman Bridge continues
Part of Hal Wyatt Collection
Colour photograph shows site of repair work to Tasman Bridge, damaged by the crash of the ore carrier Lake Illawarra in January 1975; missing pylons being replaced
Hal Wyatt
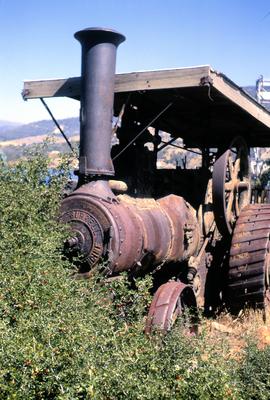
Rusting Burrell steam engine overgrown by hawthorn at Bridgewater 1970
Part of Hal Wyatt Collection
Colour photograph shows a Chas Burrell and Sons steam engine, abandoned and rusting, in a paddock, partially overgrown by runaway hawthorn hedge, in fruit, at Bridgewater. The maker’s name plate is partially visible on the front of the boiler. Visible at top right of photograph is western gantry of vertical lift roadway of Bridgewater bridge on eastern shore of Derwent River, where Bridgewater bridge and causeway joins towns of Bridgewater and Granton.
Hal Wyatt
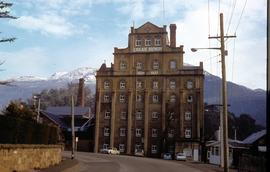
Cascade Brewery building in front of snow-capped mountain
Part of Hal Wyatt Collection
Colour photograph of Cascade Brewery with snow-capped Mount Wellington in background.
Hal Wyatt
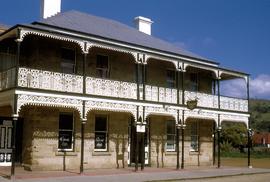
Commercial Hotel Richmond 1970
Part of Hal Wyatt Collection
Colour photograph shows street view of Commercial Hotel, Richmond, a double-storey sandstone structure with decorative ironwork on the veranda posts, taken in 1970
Hal Wyatt
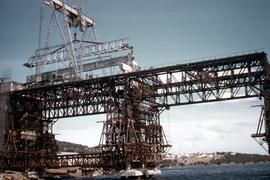
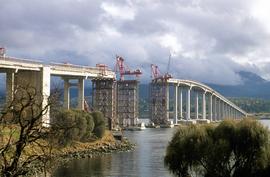
Construction of Tasman Bridge 1961
Part of Hal Wyatt Collection
Colour photograph taken from Derwent River shows construction of Tasman Bridge, 1961, shows scaffolding and crane gantry in place near shoreline.
Hal Wyatt
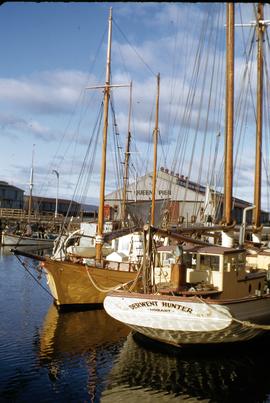
Derwent Hunter and Premier at Hobart docks
Part of Hal Wyatt Collection
Colour photograph of sailing boats, Derwent Hunter and Premier, moored at Hobart docks, near Queen’s Pier,
Hal Wyatt
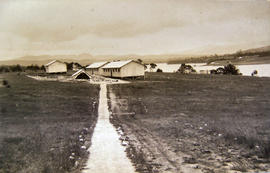
Detail Camp under construction
A collection of buildings identified as Detail Camp, part of the Claremont military camp.
Men (some in uniform) peeling potatoes, seated around mental tubs. Tents and rough tin sheds visible in background.
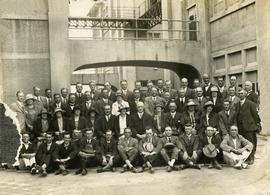
Large group of people photographed outside portion of the Cadbury building. Photograph slightly damaged at edge.
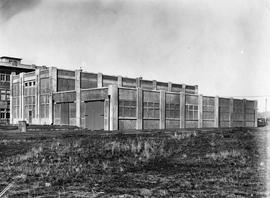
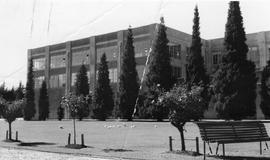
Large two storey cement building, part of Cadbury factory.
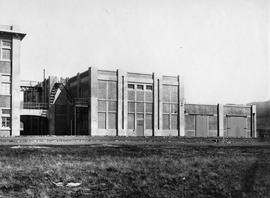
Cement clad building forming part of Cadbury factory.
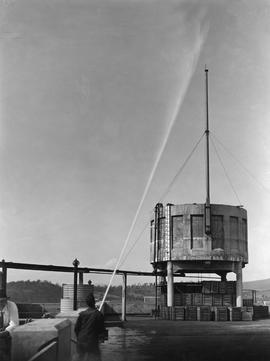
Large cement tank being sprayed with water by man holding high pressure fire hose.
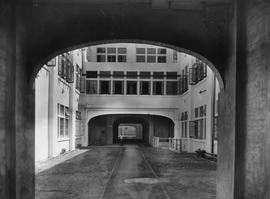
Internal Courtyard, Cadbury Factory
View of road through an internal courtyard, surrounded by multi-storied factory buildings on Cadbury site.
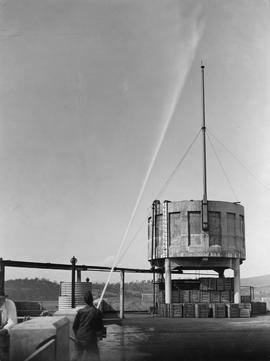
High Pressure Hose, Cadbury Factory
Large cement tank being sprayed with water by man holding high pressure fire hose.
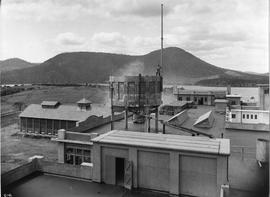
Tower on Roof, Cadbury Factory
Man standing on edge of cement tower on top of a building, forming part of Cadbury site. Mount Direction in background.
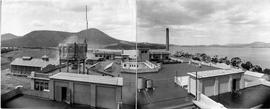
Panorama showing cement tower and chimney stack on top of building forming part of Cadbury site, with view of Derwent River in distance.
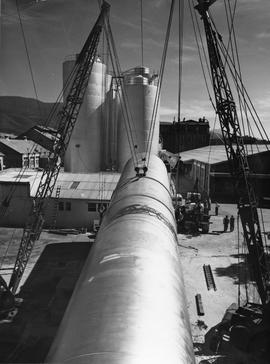
Erection of several large cylinders at Cadbury factory.
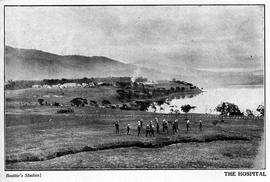
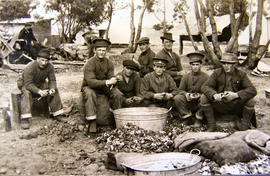
Soldiers at Claremont Military Camp
Soldiers in uniform in field, Tents and buildings of Claremont Military camp and hospital also visible. Photograph annotated The Hospital. Photograph by Beattie's Studios.
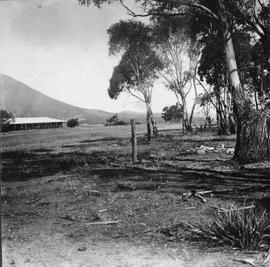
Clearing with gum trees at side, with long tin roofed building in distance.
Cricket game in progress, Cadbury Factory.

Cadbury Factory and River from Air
Aerial view of Cadbury factory and surrounding area. Photograph taken by J J N Barnett. Photograph annotated A4 A2.

Men playing golf
Cleared land with man holding a shovel, bulldozer at side.
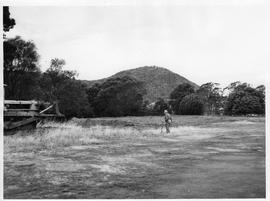
Cleared land with hills in background
Cleared land with hills and water behind.
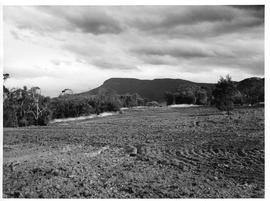
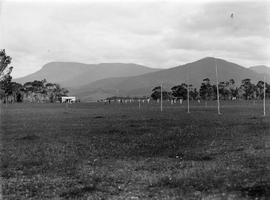
Large clearing, Mt. Wellington in background
Cleared land with Mt. Wellington behind.
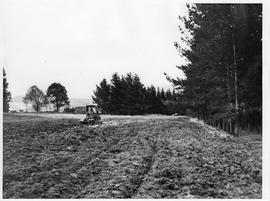
Bulldozer clearing land, pine trees around edge of plot.

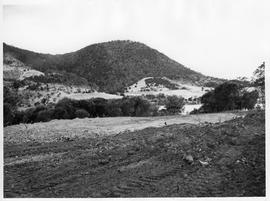
Cleared land with hills behind
Cleared land with golf course and wooded hills behind.
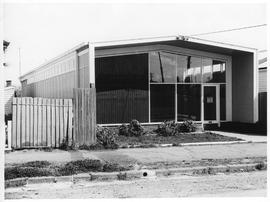
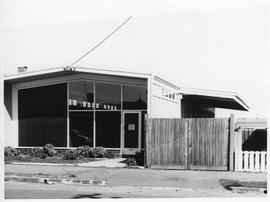
Single storey industrial building with glass frontage on roadside. Sign on door gives opening hours.
Glass fronted building, viewed from street
Single-storey industrial building with glass frontage on roadside. Verandah and gates across driveway to left of building.
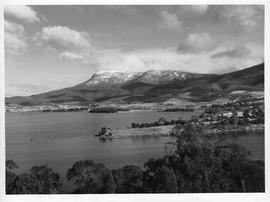
Cadbury site with snow covered Mt. Wellington
Cadbury site with Berriedale and Glenorchy mid-ground. Snow covered Mount Wellington in distance.
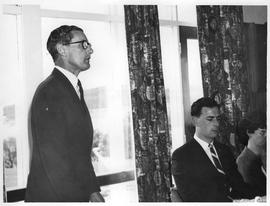
Mr Lloyd speaks at Cadbury farewell luncheon
Mr JPD Lloyd at Mr Paul Cadbury's farewell luncheon, 20th October 1965 at Claremont Golf Club.
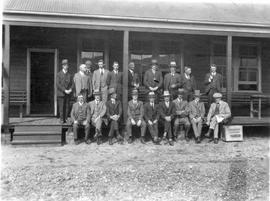
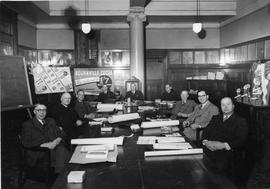
Representatives Conference, Cadbury 1922
Representatives Conference 1922. Left to right. Back: JC Tankard, JF Jeffrey, JP Wilson, JH Cooper, VC Smith, JE Cooper, DC Vernon, H Hives, JP Whitworth, WH Clark. Front: JA Ersjine, J Coley, WH Palmer, EA Clarke, N Benson, WH Lees, S Lees, W Cooper, WA Cadbury.
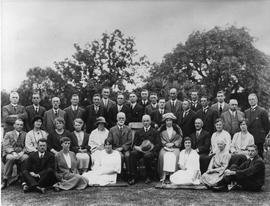
Representatives Conference Garden Party at Thos. E. Coopers residence “Chigwell”
Representatives Conference Garden Party at Thos. E. Coopers residence “Chigwell” Left to right. Back: JP Wilson, HE Theobold, J Cooley, DC Vernon, A Hackett, W Lees, N Benson, JC Tankard, F Erskine, AE Lodge, S Lees, JP Whitworth, WH Palmer, H Hives, JH Cooper, JT Jeffrey, (.) Front: EH Colleyshaw, Mrs Colleyshaw, Mrs Clarke, Mrs W Cooper, Miss Joy Cadbury, D. Cooper, William Cadbury, Mrs Cadbury, TE Cooper, Mrs TE Cooper, Miss Gallimore. Seated: WH clarke, Miss Russell, Miss Joyce Cooper, Mrs HV McKernn, Miss H Cooper, Mrs Coley, VC Smith. 1922?
Marketing Conference, Cadbury 1949
Marketing Conference, Cadbury July 1949
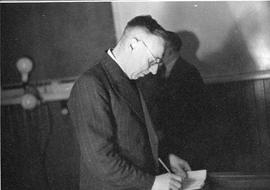
Mr BC Johnston at Marketing Conference, Cadbury 1949
BC Johnston. Marketing Conference, Cadbury July 1949.
HV McKernan attending social function, 1949
HV McKernan (with cue) and members of the Marketing Conference July 1949.
Attendees of Marketing Conference
Attendees of Marketing Conference July 1949.
AG Whitlam, Marketing Conference July 1949
AG Whitlam taking a cigarette break from the Marketing Conference July 1949. Cadbury clock tower can be seen in background.
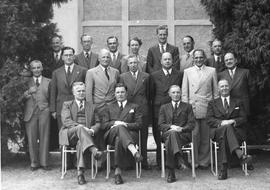
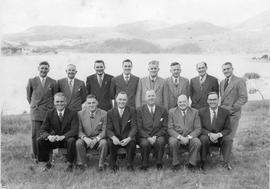
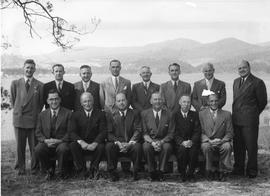
Directors ‘A’ Staff & State & Sales Managers. Claremont March 12th, 1951
Directors ‘A’ Staff & State & Sales Managers. Photographed Claremont March 12th, 1951. Left to right. Back: VA Benjafield, DR Campbell, JWC Wyett, Miss DA Wyly, KWG Mason, WA Smith, BA Wells. Middle: A Watts, DS Newman (Victoria) AH Seaton (S.Aus.) BC Johnston (Queensland) EF McDade (NSW) I van Assche (W. Aus) WA Hopkins (Tasmania) Front: VG Burley, JPD Lloyd, VC Smith, HV Mckernan.
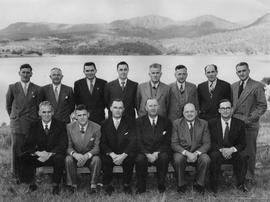
Sales Managers Conference Claremont March 16th-19th, 1953
Sales Managers Conference Claremont March 16th-19th, 1953. Taken outside at Social Hall, Derwent River in background. Left to right. Back: RM Conway, TO Kelly, MG Wells, JWC Wyett, AB Eastaugh, DR Atkins, RB Thistlethwayte, WA Hopkins. Front: DS Newman, AH Seaton, EF McDade, HV McKernan, BC Johnston, I van Assche.
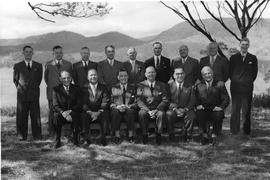
Sales Conference Attendees, Claremont March 15th 1954
1954 Sales Conference March 15th, Claremont. Left to right. Standing: TO Kelly, MG Wells, BC Johnston, DR Atkins, AB Eastaugh, JWC Wyett, WA Hopkins, RB Thistlethwayte, RM Conway. Seated: I van Assche, EF McDade, JPD Lloyd, HV McKernan, DS Newman, AH Seaton.
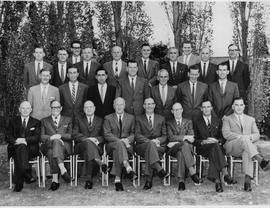
Senior Representatives Conference Claremont 11th-15th October, 1954
Senior Representatives Conference Claremont 11th-15th October, 1954. Left to right. Standing: RM Conway, AB Eastaugh, DC Whiter, RV Palesy, WE Tilburn, MG Wells, RW Oxley, DR Atkins. Sitting: FW Thomas, FA Pollard, JWC Wyett, HV McKernan, WA Hopkins, NF Mitchell. Derwent River in background.
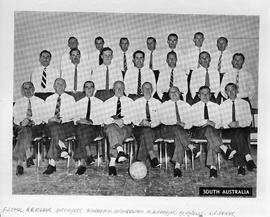
Group photograph, South Australian Conference
Group photograph, South Australian conference. Information available for front row only: F. Stock, R.B. Fisher, J.W.C. Wyett, A.H. Seaton, H. V. McKernan, W.A. Hopkins, M. G. Wells, L.S. Coker. Date of conference annotated on ball 1960.
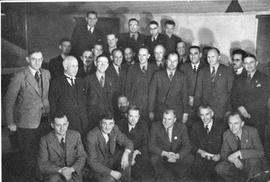
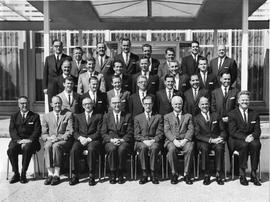
ASM's Conference February 1961
ASM's Conference February 1961. Back: TO Kelly, FA Pollard, EM Firth, MG Wells, RB Thistlethwayte, RV Palesy, DR Atkins, DC Whiter, G Blay, NF Mitchell. Centre: RM Conway, DE McEnvoy, HG Partridge, M Glanville, FW Thomas, GJ Budd, JP Quayle. Front: AB Eastaugh, I van Assche, WA Hopkins, AH Seaton, HV Mckernan, BC Johnston, JWC Wyett, DS Newman.
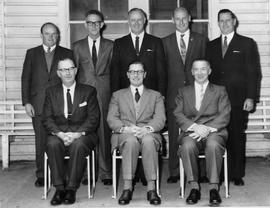
Depot Managers Conference Claremont July, 1961.
Depot Managers Conference Claremont July, 1961. Left to right. Back: JC Reid (Sydney) NL Adamson (Brisbane) NH Simmons (Melbourne) WE Croome (Perth) LH Cocker (Adelaide). Front: HV McKernan, JPD Lloyd, RA Smith.
Representatives Conference Claremont, 1965
Representatives Conference 1965. Left to right. Front Row: BA Manners, GF Fox, RA Smith, HV McKernan, JPD Lloyd, VG Burley, F Stock, AB Adkins. 2nd Row: IA Pollard, DB Mathieson, GC Lees, FA Banyard, DM Abbott, AB Tinner, AE Meaker. 3rd Row: K Mitton, KR Chipman, GE Munday, SI Morse, JP Ford, R Leggett. Back Row: DS Newman, LD O'Connor, JP Sedgebeer, RJ Rees, JP Webb, JA Brough, DI Owen, WA Hopkins.