- AU TAS UTAS SPARC 2020/1-PC-LTN 9-2
- Item
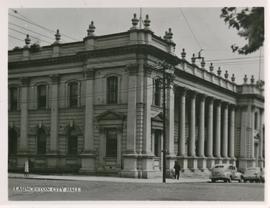
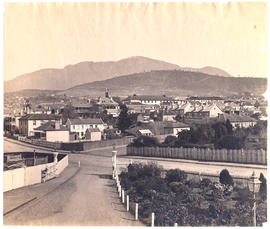
Part of De La Haye Postcard Collection

Part of De La Haye Postcard Collection
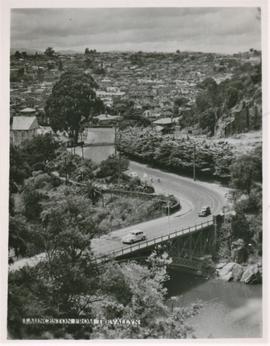
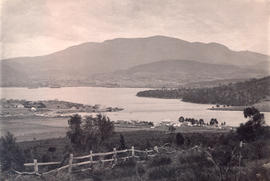
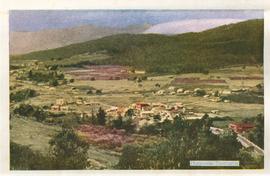
Launceston and Kings Bridge from Trevallyn
Part of De La Haye Postcard Collection
Part of De La Haye Postcard Collection
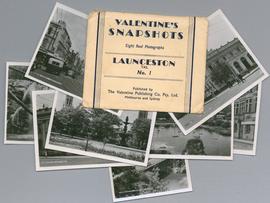
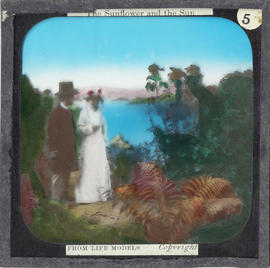
Seven small captioned black & white images in proprietary envelope showing views of Launceston.
From envelope - Valentine's Snapshots. Eight real photographs. Launceston, Tas, No. 1. Published by The Valentine Publishing Co. Pty. Ltd. Melbourne and Sydney.
Valentine Publishing
Part of De La Haye Postcard Collection
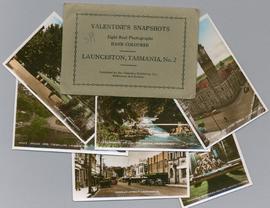
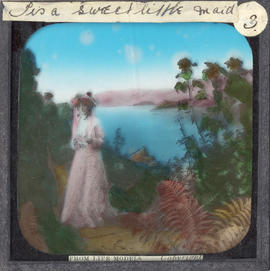
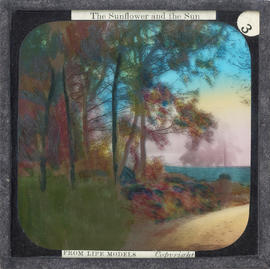
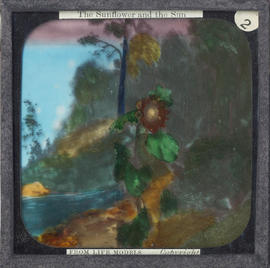
Seven small captioned and numbered hand coloured images in proprietary envelope showing views of Launceston.
From envelope - Valentine's Snapshots. Eight real photographs. Hand coloured. Launceston, Tasmania, No. 2. Published by the Valentine Publishing Co., Melbourne and Sydney.
Valentine Publishing
Part of De La Haye Postcard Collection
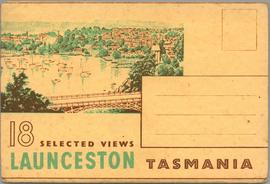
Eighteen captioned fold out black and white images in proprietary post-able envelope. Showing views of Launceston.
From envelope : 18 Selected Views, Launceston, Tasmania Launceston. Produced by Murray View, Gympie, Q
Murray Views

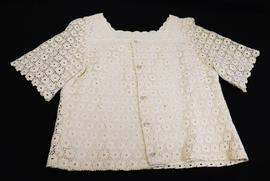
Part of Olive Pink Collection
1 cream lace short sleeved blouse, square neck and button front with the label "Charming Blouses Sydney"
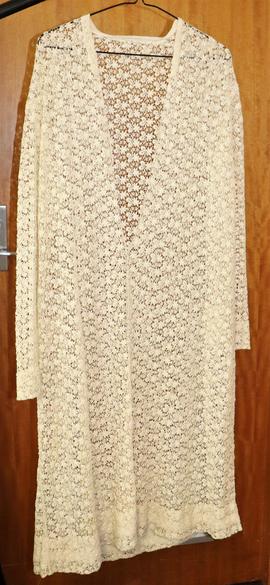
Part of Olive Pink Collection
Cream lace over-dress
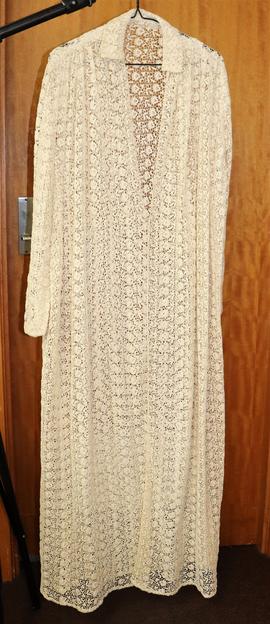
Part of Olive Pink Collection
1 cream lace dress with gathered shoulders and collar
Part of Olive Pink Collection
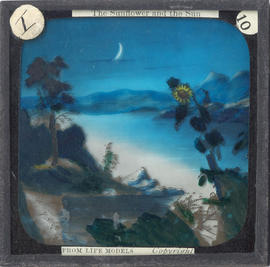
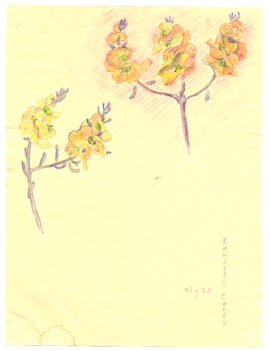
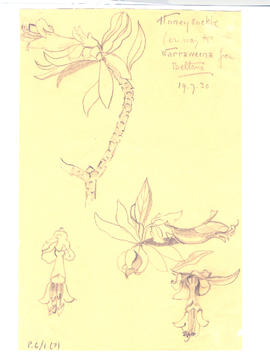
Watercolour and coloured pencil on paper painted by Olive Pink, Edwards Creek, South Australia, 26/7/30. Identified by Olive Pink as Kochia tomentosa
Olive Pink
Part of Olive Pink Collection
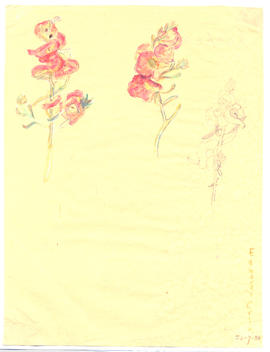
Watercolour on paper, painted by Olive Pink at Edwards Creek, South Australia, 26/7/30. Identified by Olive Pink as Kochia
Olive Pink
Manuscripts of sermons preached by Rev. Knopwood in Tasmania dated 1801 - 1829
Robert Knopwood
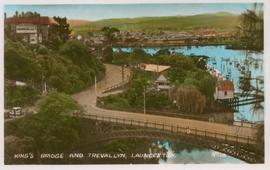
Kings Bridge and Trevallyn, Launceston
Part of De La Haye Postcard Collection
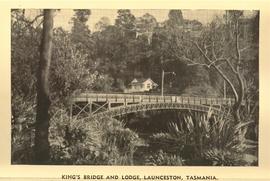
Kings Bridge and Lodge, Launceston, Tasmania
Part of De La Haye Postcard Collection
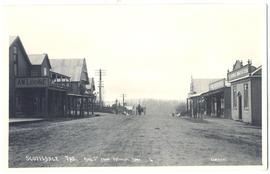
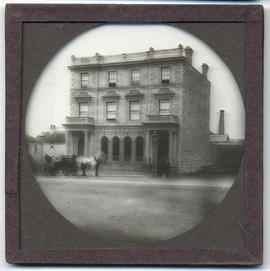
King Street, Scottsdale from the National Bank
Black and white photograph of a view of King Street, Scottsdale from the National Bank. Showing the businesses of A.W. Loone and A.A. Orchard.
Thomas G. R. Williams
Part of George Musgrave Parker : Correspondence and research records
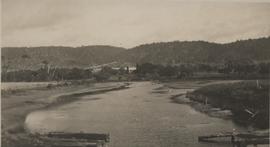
Photograph of the distant view of Kelvedon taken over the river from the main road (from Mrs Mitchell)
George Musgrave Parker
Part of George Musgrave Parker : Correspondence and research records
Photograph of Kelvedon taken by George Musgrave Parker
George Musgrave Parker
Part of George Musgrave Parker : Correspondence and research records
Photograph taken by George Musgrave Parker (see also book ch.3)
George Musgrave Parker
Part of George Musgrave Parker : Correspondence and research records
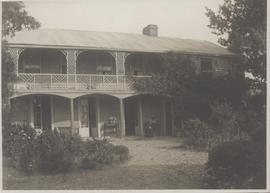
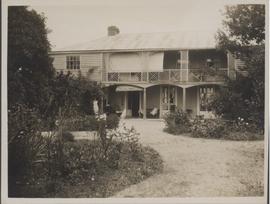
Photograph of Kelvedon House thought to be taken around 1926
George Musgrave Parker
Part of Walker Family Papers
Photograph of Kangaroo Bay (Bellerive) on Hobart's Eastern Shore from hill showing wharf and houses c. 1882. The photographer was Henry Hall Baily who had studios in Elizabeth and Liverpool Streets, Hobart from 1865 until 1918.

Part of Walker Family Papers
Photograph of Kangaroo Point (Bellerive) Beach on Hobart's Eastern Shore looking toward settlement c. 1882. The photographer was Henry Hall Baily who had studios in Elizabeth and Liverpool Streets, Hobart from 1865 until 1918.
Part of Olive Pink Collection
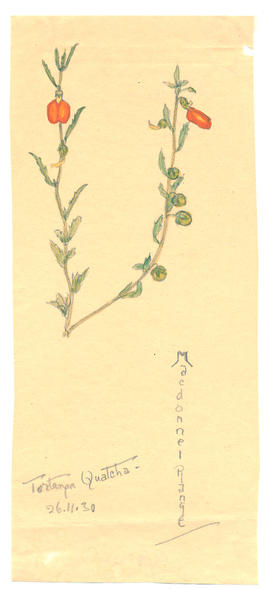
Pencil and watercolour on paper sketched by Olive Pink, Tortanga Quatcha, Macdonnel Range, Northern Territory, 26/11/30. Identified by Olive Pink as Jonidium
Olive Pink
Part of Midwood Collection
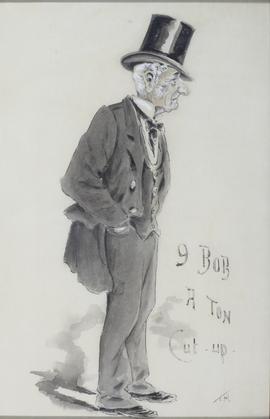
Framed caricature of John Turner, father of J.G. Turner and grandfather of Col. Turner. In the early days of Hobart he had a woodyard on the land in front of Parliament House. It was then the Customs House.
Thomas Claude Wade Midwood
Part of Midwood Collection
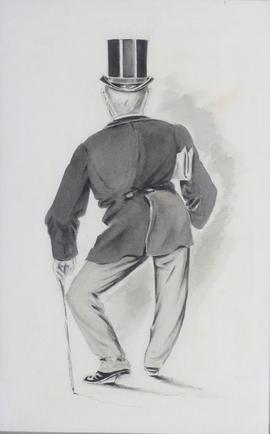
Framed caricature of Jerry, one of the boys at the Public Works
Thomas Claude Wade Midwood
Part of Midwood Collection
Framed caricature of James White, Recorder of Titles, Hobart.
Thomas Claude Wade Midwood
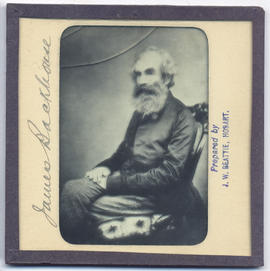
James Backhouse (1794-1869) Tasmania
Part of Walker Family Papers
Lantern slide of James Backhouse. Prepared by J.W. Beattie (1859-1930) whose studio locations were Elizabeth Street, Hobart from 1891-1920, Murray Street from 1921-40 and Cat and Fiddle until 1994.
John Watt Beattie
James and Sarah Meredith to son John
Part of Meredith Family Papers
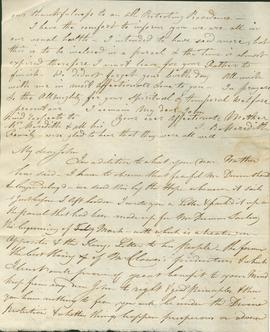
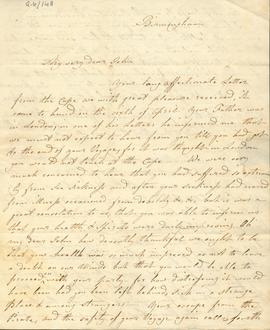
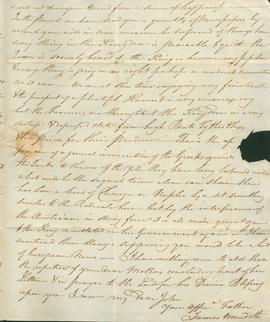
Letter from James Meredith and wife Sarah Meredith to their son John Meredith dated 1821. Sorry to hear he was ill on voyage, regards to Mr George Meredith and family - glad to hear they were well, sending letter with packet of newspapers by "Hope" and also letter in March by Mr Dunn, news of King, harvest, high rates and tithes, insurrection of Greeks against Turks.
James and Sarah Meredith to son John
Part of Meredith Family Papers
Letter from James Meredith and wife Sarah Meredith to their son John Meredith dated 1821. Sorry to hear he was ill on voyage, regards to Mr George Meredith and family - glad to hear they were well, sending letter with packet of newspapers by "Hope" and also letter in March by Mr Dunn, news of King, harvest, high rates and tithes, insurrection of Greeks against Turks.
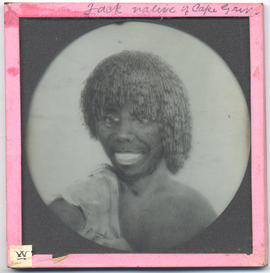
Part of Walker Family Papers
Lantern slide of Jack, native of Cape Grim. Prepared by J.W. Beattie (1859-1930) whose studio locations were Elizabeth Street, Hobart from 1891-1920, Murray Street from 1921-40 and Cat and Fiddle until 1994.
John Watt Beattie
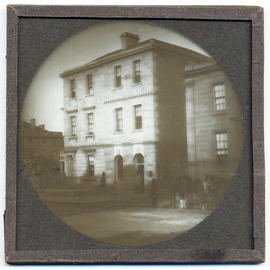
Part of Walker Family Papers
Lantern slide of J. Walch and Sons, Macquarie Street, Hobart c1880. Prepared by J.W. Beattie (1859-1930) whose studio locations were Elizabeth Street, Hobart from 1891-1920, Murray Street from 1921-40 and Cat and Fiddle until 1994.
John Watt Beattie
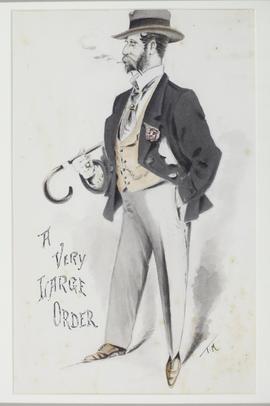
Part of Midwood Collection
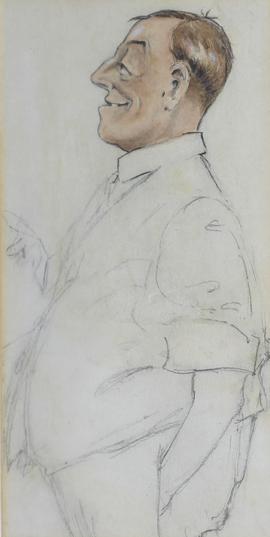
Framed caricature of J. Brain, a well-known citizen, a big order.
Thomas Claude Wade Midwood

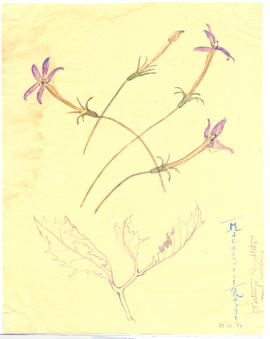
Part of Olive Pink Collection
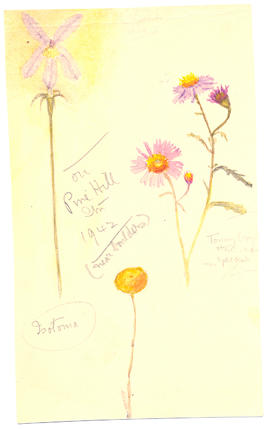
Pencil on paper sketched by Olive Pink, Macdonnell Ranges, Northern Territory 26/11/30. Identified by Olive Pink as Isotoma petraea
Olive Pink
Part of Olive Pink Collection
Coloured pencil on paper sketched by Olive Pink, Macdonnell Ranges, Northern Territory 28/11/30. Identified by Olive Pink as Isotoma petraea "goonboonbu in Aranda Country"
Olive Pink
Part of Olive Pink Collection
Watercolour on card sketched by Olive Pink, Pine Hill Station (near boulders), 1942. Identified by Olive Pink as Isotoma
Olive Pink
Part of Walker Family Papers
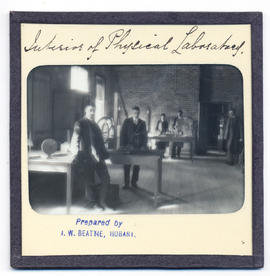
Lantern slides of the University of Tasmania, Queen's Domain, Hobart. Views of exterior and laboratories and library. Prepared by J.W. Beattie (1859-1930) whose studio locations were Elizabeth Street, Hobart from 1891-1920, Murray Street from 1921-40 and Cat and Fiddle until 1994 (Collection Pr.S.Uni/1-8)
John Watt Beattie

Interior of physical laboratory at the rear of Domain House
Interior of physical laboratory at the rear of Domain House, Hobart.
John Watt Beattie
Part of Walker Family Papers
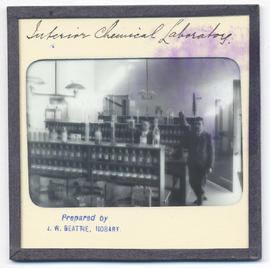
Lantern slides of the University of Tasmania, Queen's Domain, Hobart. Views of exterior and laboratories and library. Prepared by J.W. Beattie (1859-1930) whose studio locations were Elizabeth Street, Hobart from 1891-1920, Murray Street from 1921-40 and Cat and Fiddle until 1994 (Collection Pr.S.Uni/1-8)
John Watt Beattie

Interior of chemical laboratory at Domain House
Interior of chemical laboratory, Domain House, Hobart.
John Watt Beattie

Part of Olive Pink Collection
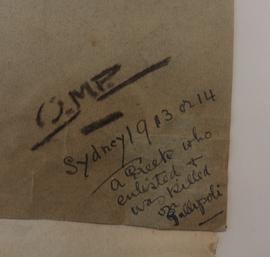
Inscription bottom right corner of "Study from life by Olive Pink"
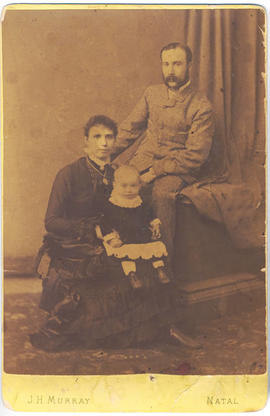
Infant with parents - Edmund Morris Miller
Part of Edmund Morris Miller Collection
Photograph of Edmund Morris Miller as an infant taken with his parents in Natal, South Africa by photographer J.H. Murray in c1882
Edmund Morris Miller
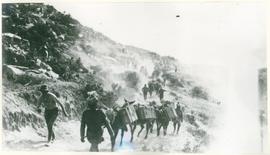
Black and white photograph showing an Indian mule transport going up a hillside track
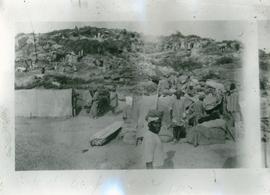
Blak and white photograph showing an Indian camp
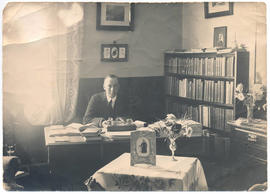
In study - Edmund Morris Miller
Part of Edmund Morris Miller Collection
Undated photograph of Edmund Morris Miller taken in his study
Edmund Morris Miller
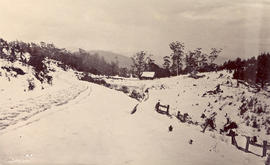
Part of Walker Family Papers
Photograph of Huon Road near Fern Tree Inn, Hobart, Tasmania, in about 1882 showing clearing and huts under snow
James Backhouse Walker
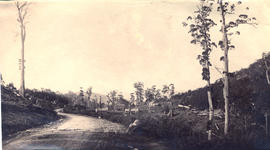
Part of Walker Family Papers
Photograph of Huon Road near Fern Tree Inn, Hobart, Tasmania, in about 1872 showing clearing and huts
James Backhouse Walker
Part of De La Haye Postcard Collection
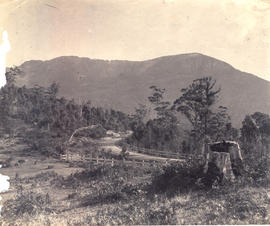
Huon Road with post and rail fence looking to Mt Wellington
Part of Walker Family Papers
Photograph of Huon Road with post and rail fence looking to Mt Wellington
James Backhouse Walker
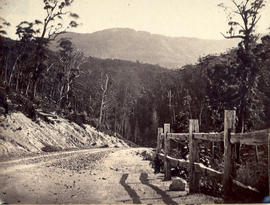
Huon Road with post and rail fence
Part of Walker Family Papers
Photograph of Huon Road with post and rail fence
James Backhouse Walker

Huon Road with Mt Wellington in snow
Part of Walker Family Papers
Photograph of Huon Road with Mt Wellington in snow
James Backhouse Walker
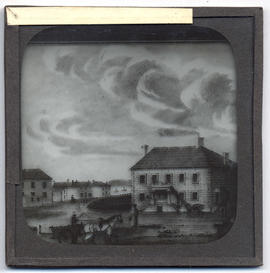
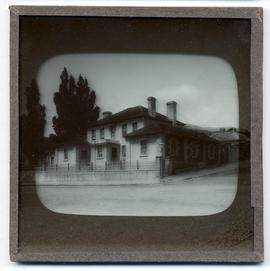
House, Hunter Street, Hobart, Van Diemen's Land
Part of Walker Family Papers
Lantern slide of house in Hunter Street, Hobart. Prepared by J.W. Beattie (1859-1930) whose studio locations were Elizabeth Street, Hobart from 1891-1920, Murray Street from 1921-40 and Cat and Fiddle until 1994.
John Watt Beattie
Part of Walker Family Papers
Lantern slide of house in Hobart. Prepared by J.W. Beattie (1859-1930) whose studio locations were Elizabeth Street, Hobart from 1891-1920, Murray Street from 1921-40 and Cat and Fiddle until 1994.
John Watt Beattie
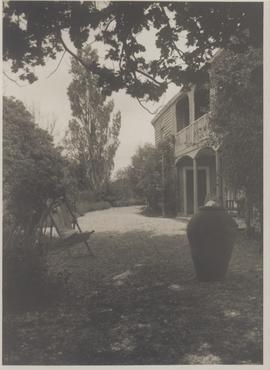
Part of George Musgrave Parker : Correspondence and research records
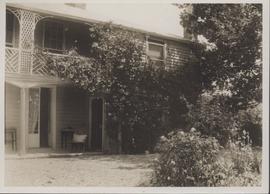
Photograph of Kelvedon house and garden showing deck chair and urn thought to have been taken c1926-1928
George Musgrave Parker
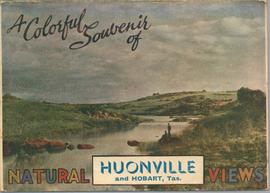
Part of De La Haye Postcard Collection
Ten captioned fold out colour images in unidentified proprietary post-able envelope. Showing views of Huonville on one side and Hobart on the other.
From envelope : A Colorful Souvenir of Huonville and Hobart, Tas.. Natural views.
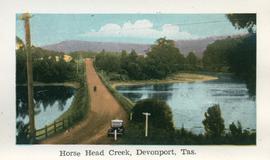
Horse Head Creek, Devonport, Tas.
Part of De La Haye Postcard Collection
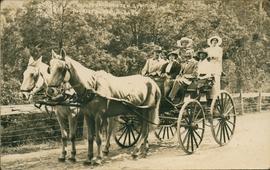
Horse drawn carriage with passengers
Part of Olive Pink Collection
On front Webster-Rometch Ltd - Tourist Bureau Hobart. Taking passengers to the Huon.

Part of De La Haye Postcard Collection
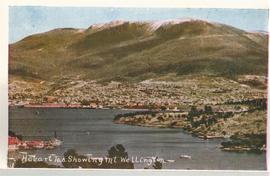
Hobart, Tas. Showing Mt. Wellington
Part of De La Haye Postcard Collection
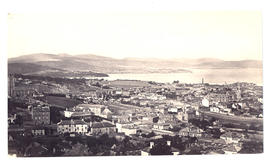
Hobart, looking towards St. George's Hill
Part of Walker Family Papers
Photograph from the collection of James Backhouse Walker of a view of Hobart, looking towards St. George's Hill, Battery Point. Showing St Georges Church and James Luckman's windmill probably taken in the 1870s.
James Backhouse Walker
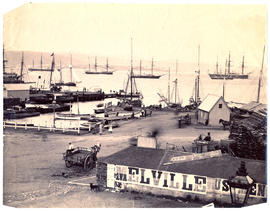
Hobart wharves, steam sail boats
Part of George Musgrave Parker : Correspondence and research records
Photograph of Hobart wharves showing steam sail boats taken by J.W. Beattie. The photograph does have some marks on it.
George Musgrave Parker

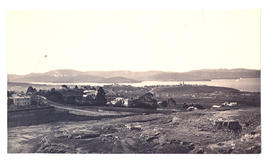
Hobart waterfront from the Queen's Domain
Part of Walker Family Papers
Photograph of the Hobart waterfront from the old quarry on the Queen's Domain taken in the 1870s before the railway.
Hobart waterfront from Hunter Island
Part of Walker Family Papers
Photograph of the Hobart waterfront from Hunter Island looking towards Salamanca.
Part of Walker Family Papers
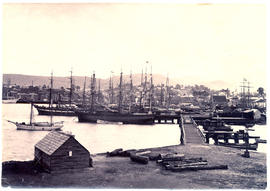
View of Hobart waterfront c.1880 showing docks, carts, ships at anchor and woodyard
Part of Walker Family Papers
Photograph from the collection of James Backhouse Walker of an elevated view of Hobart looking east taken near Browne Street, (about 1876, according to a note on the reverse). Warwick Street in the foreground. Photographed by Henry Hall Baily who had studios in Elizabeth and Liverpool Streets, Hobart from 1865 until 1918.
James Backhouse Walker
Part of Walker Family Papers
Photograph from the collection of James Backhouse Walker of Hobart viewing over St. Davids Park, probably from Hampden Road, (in about 1878 according to a note on the reverse). The photographer is Henry Hall Baily who had studios in Elizabeth and Liverpool Streets Hobart from 1865 until 1918.
.
James Backhouse Walker

Hobart Town, Van Diemen's Land, from Old Wharf in 1839
Part of Walker Family Papers
Lantern slide of Hobart Town, Van Diemen's Land, from Old Wharf in 1839. From the collection of James Backhouse Walker. Prepared by J.W. Beattie (1859-1930) whose studio locations were in Elizabeth Street, Hobart from 1891-1920, Murray Street from 1921-40 and Cat and Fiddle Arcade, Hobart, until 1994.
John Watt Beattie
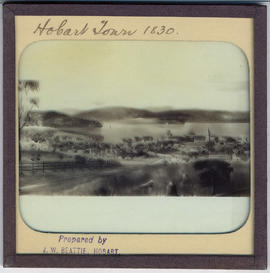
Hobart Town, Van Diemen's Land in 1830
Part of Walker Family Papers
Lantern slide of early print of Hobart Town, Van Diemen's Land in 1830. From the collection of James Backhouse Walker. Prepared by J.W. Beattie (1859-1930) whose studio locations were in Elizabeth Street, Hobart from 1891-1920, Murray Street from 1921-40 and Cat and Fiddle Arcade, Hobart, until 1994.
John Watt Beattie
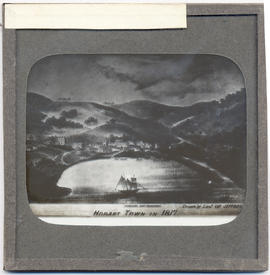
Hobart Town, Van Diemen's Land in 1817
Part of Walker Family Papers
Lantern slide of Hobart Town, Van Diemen's Land, in February, 1817. Inscribed with the words 'Hobart Town in 1817. Drawn by Lieut. Charles Jeffreys' - also shows the Government schooner the Kangaroo , church, Government House and Fort.
Charles Jeffreys
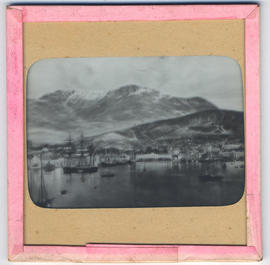
Hobart Town, Van Diemen's Land from the Harbour
Part of Walker Family Papers
Lantern slide of an early print of Hobart Town, Van Diemen's Land from the harbour. From the collection of James Backhouse Walker. Thought to have been prepared by J.W. Beattie (1859-1930) whose studio locations were in Elizabeth Street, Hobart from 1891-1920, Murray Street from 1921-40 and Cat and Fiddle Arcade, Hobart, until 1994.
John Watt Beattie
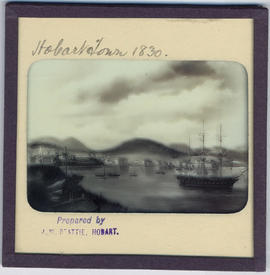
Hobart Town Harbour, Van Diemen's Land
Part of Walker Family Papers
Lantern slide of Hobart Town Harbour, Van Diemen's Land, in 1830. Prepared by J.W. Beattie (1859-1930) whose studio locations were in Elizabeth Street, Hobart from 1891-1920, Murray Street from 1921-40 and Cat and Fiddle Arcade, Hobart, until 1994.
John Watt Beattie
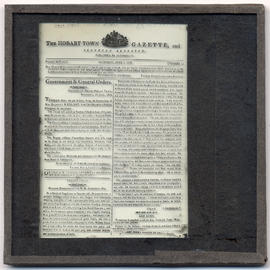
Part of Walker Family Papers
Lantern slide of front page of the Hobart Town Gazette, June 1816. Prepared by J.W. Beattie (1859-1930) whose studio locations were Elizabeth Street, Hobart from 1891-1920, Murray Street from 1921-40 and Cat and Fiddle until 1994.
John Watt Beattie

Hobart Town from the Queen's Domain
Part of Walker Family Papers
Photograph of Hobart Town, Tasmania, from the Queen's Domain, looking down Macquarie Street in the 1850s. This photograph appears on page 27 of Allan Sierp's 'Colonial Life in Tasmania: Fifty Years of Photography 1855-1905' (Rigby, 1976)
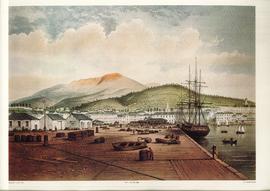
Hobart Town from the New Wharf - print
Coloured print Lloyd, Henry Grant, 1830-1904 :Hobart town from the new wharf.
W.L. Walton lith; H. Grant Lloyd del. [London, M & N Hanhart, ca. 1857].
Reprinted from the original by Foscan No. 438
Henry Grant Lloyd
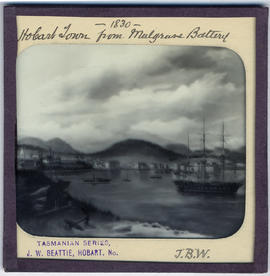
Hobart Town from Mulgrave Battery, Van Diemen's Land
Part of Walker Family Papers
Lantern slide of Hobart Town from Mulgrave Battery, Van Diemen's Land, in 1830. From the collection of James Backhouse Walker. Prepared by J.W. Beattie (1859-1930) whose studio locations were in Elizabeth Street, Hobart from 1891-1920, Murray Street from 1921-40 and Cat and Fiddle Arcade, Hobart, until 1994.
John Watt Beattie
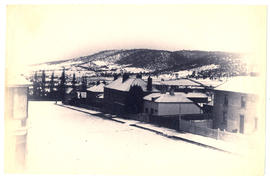
Part of Walker Family Papers
Photograph from the collection of James Backhouse Walker of a Hobart streetscape in snow - looking towards Mt Nelson and Sandy Bay.
James Backhouse Walker
Part of Walker Family Papers
Lantern slide of Hobart Savings Bank, Murray Street Hobart c1860. Prepared by J.W. Beattie (1859-1930) whose studio locations were Elizabeth Street, Hobart from 1891-1920, Murray Street from 1921-40 and Cat and Fiddle until 1994.
John Watt Beattie
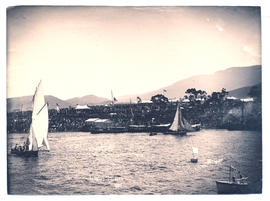
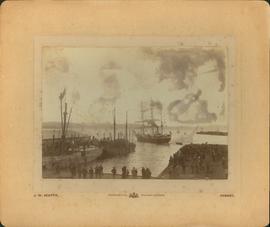
Hobart Regatta Grandstand from the water
Part of Walker Family Papers
Photograph of the Hobart Regatta grandstand taken from the water in 1886. The photographer was Albert Sargeant who had studios in Macquarie Street, Hobart, Tasmania from 1886-1890 and George Street, Launceston, Tasmania from 1900-1913.
Albert Sargeant
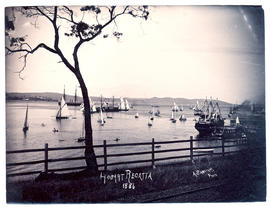
Part of Walker Family Papers
Photograph of the Hobart Regatta taken in 1886. The photographer was Albert Sargeant who had studios in Macquarie Street, Hobart from 1886-1890 and George Street, Launceston from 1900-1913
Albert Sargeant
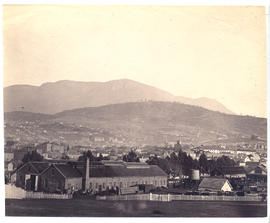
Part of Walker Family Papers
Photograph of Hobart from the Queen's Domain with the railway station in the foreground, c. 1881. The photographers were Anson Brothers who had studios in Liverpool, Collins and Elizabeth Streets between 1878 and 1891.
Anson Brothers
Part of Walker Family Papers
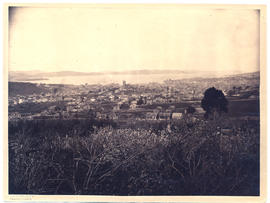
Photograph from the collection of James Backhouse Walker of a view of Hobart looking South East with a garden in the foreground and Elizabeth Street in the middle distance. The photographer is Alfred Winter who had studios in Bathurst, Elizabeth and Liverpool Streets from 1874-1880.
James Backhouse Walker
Part of Walker Family Papers
Photograph from the collection of James Backhouse Walker of a view of Hobart looking south along Barrack Street toward St Georges Hill, Battery Point
James Backhouse Walker
Part of Walker Family Papers
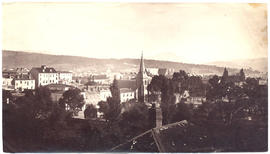
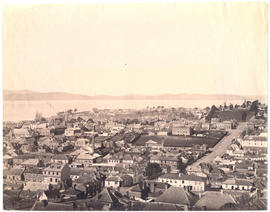
Photograph from the collection of James Backhouse Walker of a view of Hobart from West Hobart looking east toward the river, showing Holy Trinity Church. The photographer is Henry Hall Baily who had studios in Elizabeth and Liverpool Streets Hobart from 1865 until 1918..
James Backhouse Walker
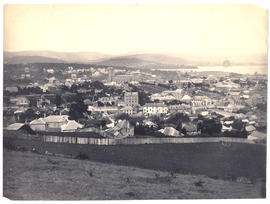
Hobart from the top of Murray Street
Part of Walker Family Papers
Photograph from the collection of James Backhouse Walker of a view of Hobart from the top of Murray St in about 1876 according to notes on the reverse. The photographer is Henry Hall Baily who had studios in Elizabeth and Liverpool Streets Hobart from 1865 until 1918.
James Backhouse Walker
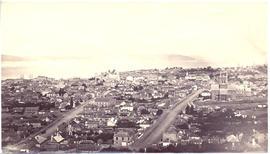
Hobart from the Railway Station
Part of Walker Family Papers
Photograph of Hobart, Tasmania from the railway station, in about c1881.