- AU TAS UTAS ITCCD 2017/18-0341
- Unidad documental simple
- 1920's
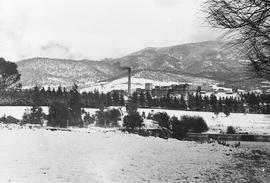
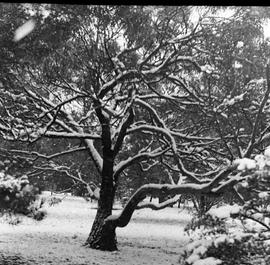
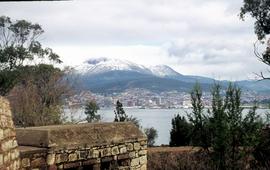
Light covering of snow on Mount Wellington with Cadbury factory and surrounding area midground.

Light covering of snow on Mount Wellington with Cadbury factory and surrounding area midground.
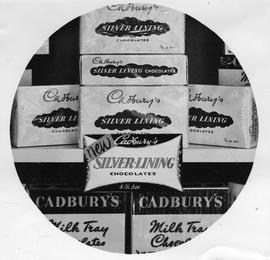
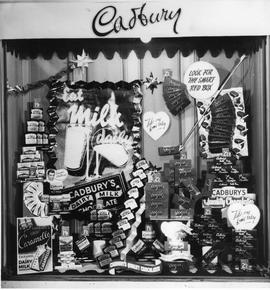
Cadbury's Silver Lining Chocolates
Display of a new Cadbury product: half pound boxes of Cadbury’s Silver Lining Chocolates.
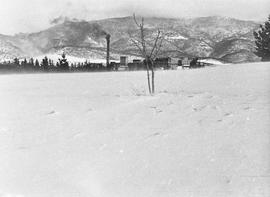
Snow covered ground with Cadbury Factory in background
Looking across snowy ground to the rear of the Cadbury factory, Claremont. Snow covered hills in background.
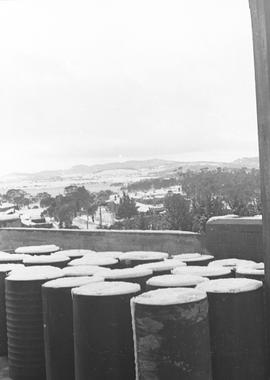
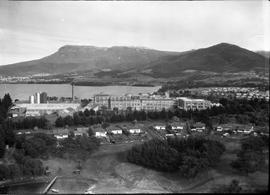
Cadbury Factory and surrounds with snow
Photograph taken from the roof of the Cadbury factory showing surrounding area covered in snow. Snow can also be seen piled on top of drums in foreground.
Cadbury factory Claremont, showing hills and surrounding area covered with snow.
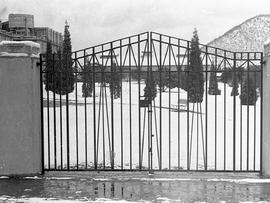
Melting snow outside the Cadbury Factory gates
Snow staring to melt outside gates of Cadbury factory, Claremont.
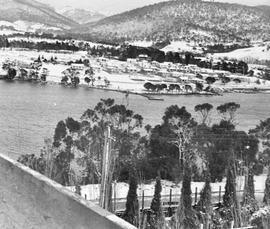
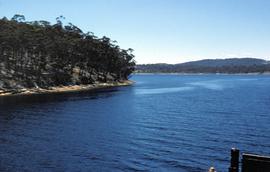
Looking across river toward a snow covered Windamere, with wooded hills behind.
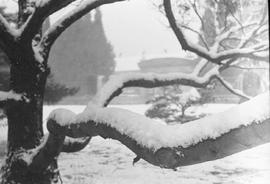
Snow on ground and settled on branches of trees. Cadbury buildings just visible through the mist.
Snow on ground and settled on branches of trees, Cadbury Factory
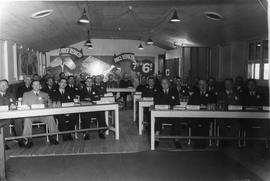
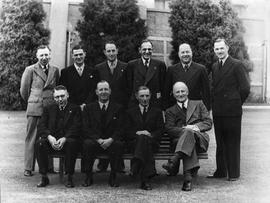
Attendees of the State Managers conference, Claremont
Attendees of the State Managers conference, Claremont
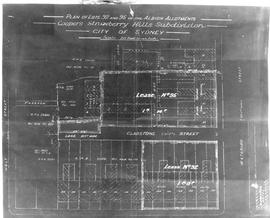
Plan of lots 92 and 95 Cooper's Strawberry Hills Subdivision, Sydney
Plan of lots 92 and 95 of the Albion Allotments, Cooper's Strawberry Hills Subdivision, City of Sydney.
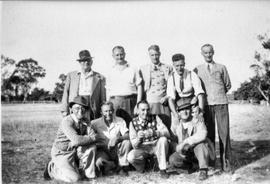
Group of men posing for photograph in grassed area.
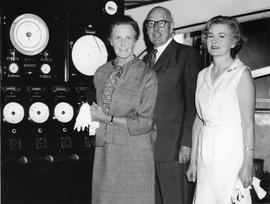
Visitors to the Cadbury factory, pictured standing in front of pressure valves and other display dials.
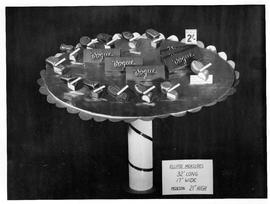
Marketing display of Cadbury Vogue chocolates
Mock display table holding individual and boxed chocolates from the Vogue range, including cherry nougat, strawberry creme, loganberry creme, orange marzipan, caramel, butter crunch and walnut dessert. Sign indicates the ellipse measures 32 inches long, 17 inches wide and the pedestal is 21 inches high.
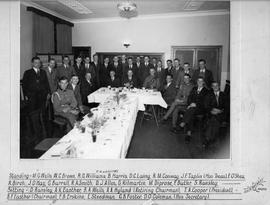
Claremont Works Youth Club Dinner Attendees
Claremont Works Youth Club dinner at Belvedere, Hobart March 20th, 1940. Standing: MG Wells, WC Brown, RG Williams, TA Griffiths, B Harris, DC Laing, RM Conway, JF Taplin (Hon Treas.) F O'Shea. Sitting: D Ransley, AK Easther, BA Wells, AA Hyland, (Retiring Chairman) TA Cooper (President) BF Easther (Chairman) FB Erskine, L Steedman, GB Foster, DO Coleman (Hon. Secretary) Photograph by J J N Barnett.
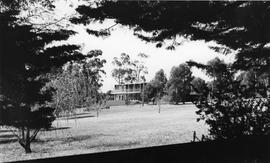
Two story house surrounded by trees and lawn
Photograph of a two story brick house with veranda, set on large area with trees and lawn.
Group photograph, Cadbury Factory
Group photograph of men wearing suits, taken outside Cadbury factory Claremont.
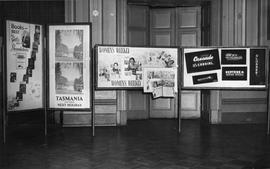
Group of advertising posters including: Books are Best for Gifts and Presentations, Fuller's Bookshop, Tasmania - For your Next Holiday, Women's Weekly, Drink Cascade Fruit Juice Cordial, ANA, Shop at FitzGeralds, Neptune Motor Spirit, Glasser.
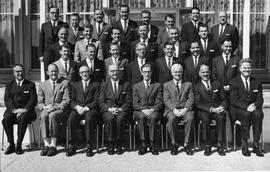
Large group posing outside Cadbury Factory
Group of men all wearing name tags, suits and ties, seated outside Cadbury factory building.
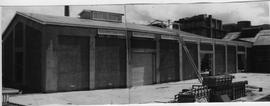
New bean store at Cadbury factory, 1951.
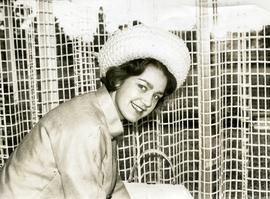
Young woman wearing straw hat and light weight coat.
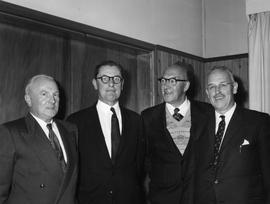
Group of four men, all wearing business attire.
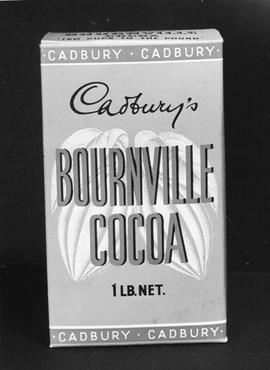
One pound box of Cadbury's Bournville Cocoa.
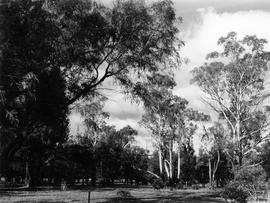
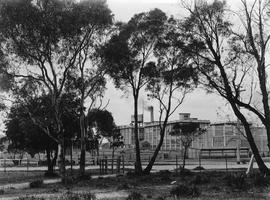
Stand of gum trees, Cadbury Factory
Stand of gum trees, Cadbury Factory. Clock tower and flag pole just visible through trees.
Display of various Cadbury chocolates including Vogue boxed chocolates, Milk Tray boxed chocolates and Dairy Milk and Caramello chocolate bars.
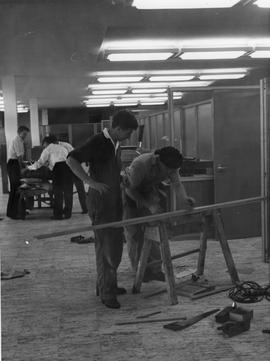
Several carpenters at work inside an office area.
Lower Domain Road at back of Royal Botanical Gardens
Parte dePhotographs of Edward Verrell
Black-and-white photograph of road crossing a pond on Lower Domain Road near Royal Botanical Gardens. Towers of Government House visible behind trees.
Parte dePhotographs of Edward Verrell
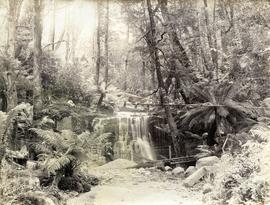
Black-and-white photograph shows path to near base of waterfall in foothills of Mount Wellington, two men standing near a barrel beside a metal mesh and barbed wire fence and a padlocked gate barring access to the stream
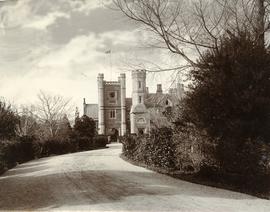
Western approach to Government House
Parte dePhotographs of Edward Verrell
Black-and-white photograph shows gravel road leading to western approach to Government House, Hobart, featuring clocktower with Union Jack hoisted and bas relief sculpture above doorway.
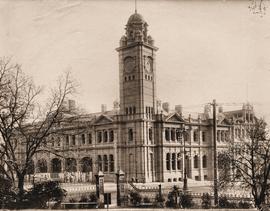
Hobart GPO before installation of clock in tower
Parte dePhotographs of Edward Verrell
Black-and-white photograph shows Hobart General Post Office viewed from Franklin Park before the installation of the clock in the clocktower.

Ruins of church at Port Arthur
Parte dePhotographs of Edward Verrell
Black-and-white photograph shows ruins of the church at Port Arthur, damaged by fire in 1884,with charred timber framework in the roof, remnant shingles on the roof and climbing plants covering the sandstone of the church walls. Handwritten words “Church at Port Arthur” in lower left corner of image.
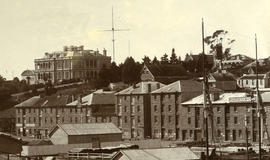
Parte dePhotographs of Edward Verrell
Black-and-white photograph shows stone buildings along Salamanca Place, timber stacked on New Wharf and masts of ships docked at the wharf; signs on buildings for “A.E. Lord Wool Merchant” and “W.D. Peacock and Co.”, historic home Lenna and eastern conservatory visible on hilltop behind towards Battery Point; maritime signal station with the Time Ball that was dropped automatically at 1pm, after a relayed telegraph signal from the Melbourne Observatory.
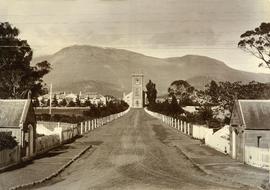
Parte dePhotographs of Edward Verrell
Black-and-white photograph looking up St John’s Avenue, towards St John’s Church, New Town
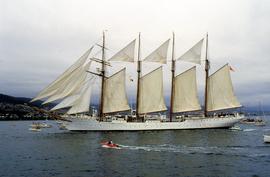
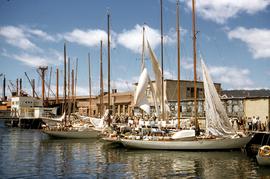
Spanish training ship Juan Sebastian de Elcano on Derwent
Parte deHal Wyatt Collection
Colour photograph of the Spanish Armada training ship Juan Sebastian de Elcano, a four-masted barque, sailing on the Derwent River during the Tall Ships event held in 1988
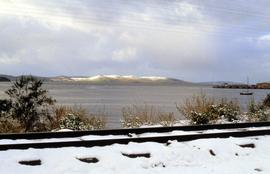
Snow on Hobart waterfront 1986
Parte deHal Wyatt Collection
Colour photograph of snow on railway tracks on shore of Derwent River 1986
Parte deArthur Knight Slides
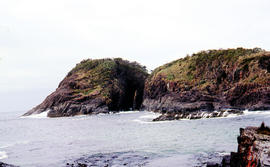
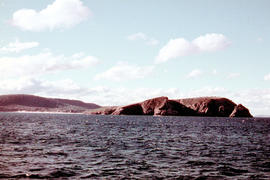
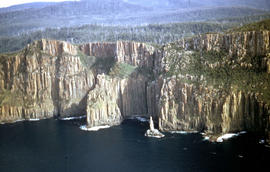
Arch island on Bruny Island
Arthur Knight
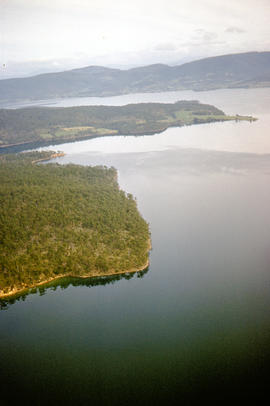
Aerial picture of Barnes Bay, 1950s
Parte deArthur Knight Slides
Aerial photograph of Barnes Bay on eastern side of Bruny Island.
Parte deArthur Knight Slides
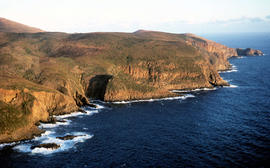
Colour photograph, taken at sea, looking towards Cape Queen Elizabeth, Bruny Island
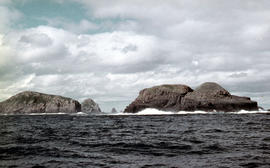
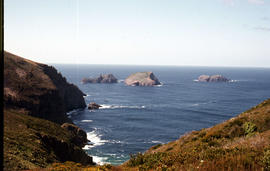
View of the Friars, off South Bruny Island
Parte deArthur Knight Slides
Colour photograph of Friars island group
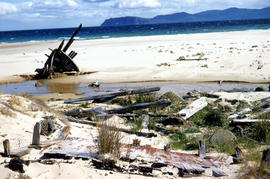
Wreck on beach near Mars Bluff
Parte deArthur Knight Slides
Colour photograph of rotting timbers from wreck of boat, half-buried in the sand near shallow creek on beach near Mars Bluff, Bruny Island, Photograph possibly taken 1963.
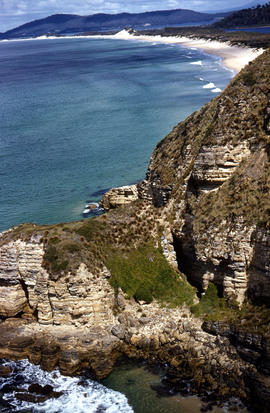
Adventure Bay near Cape Queen Elizabeth
Parte deArthur Knight Slides
View from headland of Adventure Bay near Cape Queen Elizabeth on Bruny Island.
Arthur Knight
View of Cape Connella from the air
Parte deArthur Knight Slides
Colour aerial photograph of cliffs of Cape Connella, viewed from the air.
Setting sun shines on headland east of Cloudy Bay
Parte deArthur Knight Slides
Colour photograph of headland east of Cloudy Bay, illuminated by low setting sun.
View of the Friars from shore near Pine Log Bight
Parte deArthur Knight Slides
Colour photograph of the Friars, a small group of islands, off southern shore of Bruny Island, taken from shore near Pine Log Bight.
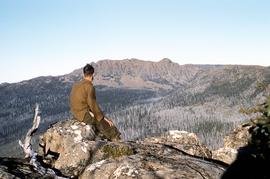
Parte deHal Wyatt Collection
Colour photograph shows man sitting on rock atop Mount Marian looking across valley to Collins Bonnet
Parte deHal Wyatt Collection
Colour photograph taken 1960 of Barnes Bay, Bruny Island, slightly out of focus, showing water and tree-covered headland
Hal Wyatt
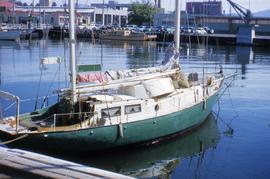
Sailing boat moored in Hobart, 1950s
Parte deHal Wyatt Collection
Colour photograph of small, two masted sailing boat, with green painted hull, and a sign Onrust, Holland, pinned to mast, Onrust also painted onto side of boat.
Hal Wyatt
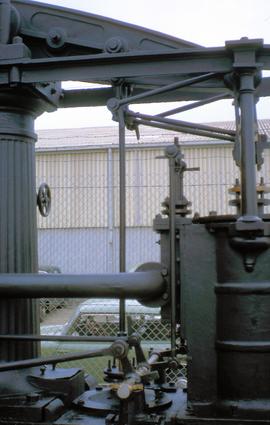
McNaught beam engine at works depot in Hobart 1967
Parte deHal Wyatt Collection
Colour photograph of beam engine in Hobart, purportedly the oldest McNaught Beam Engine in existence, originally built 1854 in Paisley Scotland, by A.W. Smith and used by Risby’s Sawmill in Hobart until 1955; photograph taken at Moonah public works depot 1967
Hal Wyatt
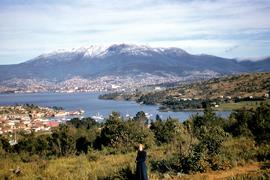
Snow cap on Mount Wellington taken from eastern shore
Parte deHal Wyatt Collection
Colour photograph of snow on Mount Wellington, taken from eastern shore of Derwent River, overlooking Bellerive and Rosny; woman in dark blue overcoat, standing on path in foreground
Hal Wyatt
Mount Wellington viewed from Bellerive fort
Parte deHal Wyatt Collection
Colour photograph of Mount Wellington, as viewed from Kangaroo Bluff Fort at Bellerive, eastern shore of River Derwent
Hal Wyatt
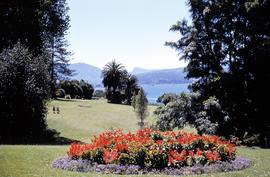
Flower bed at botanical gardens
Parte deHal Wyatt Collection
Colour photograph of Royal Tasmanian Botanical Gardens at Queens Domain, Hobart; depicts garden beds, lawns and Derwent River, looking towards Selfs Point Jetty and petroleum storage tanks at Selfs Point.
Hal Wyatt
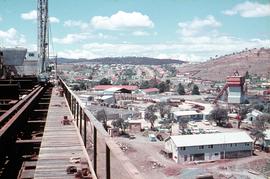
Construction depot and office of Tasman Bridge, 1964
Parte deHal Wyatt Collection
Colour photograph shows office and construction depot of Bridge Co on Derwent’s Eastern Shore, during construction of the Tasman Bridge across the Derwent River, 1964.
Hal Wyatt
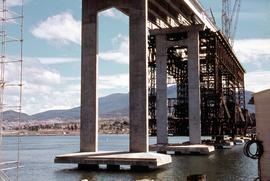
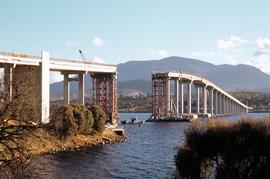
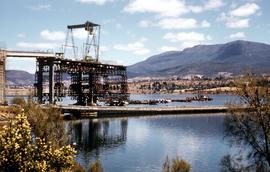
Tasman Bridge under construction from Eastern Shore
Parte deHal Wyatt Collection
Colour photograph shows pylons supporting Tasman Bridge, viewed from the Derwent’s Eastern Shore, during construction of the Tasman Bridge across the Derwent River, 1964.
Hal Wyatt
Parte deHal Wyatt Collection
Colour photograph shows site of repair work to Tasman Bridge, damaged by the crash of the ore carrier Lake Illawarra in January 1975.
Hal Wyatt
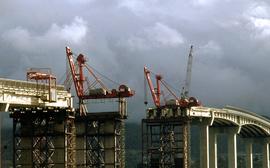
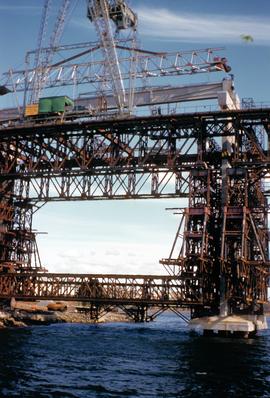
Cranes repairing Tasman Bridge
Parte deHal Wyatt Collection
Colour photograph shows cranes atop pylons at the site of repair work to Tasman Bridge, damaged by the crash of the ore carrier Lake Illawarra in January 1975; missing pylons being replaced.
Eastern approach to Tasman Bridge during construction
Parte deHal Wyatt Collection
Colour photograph of 30 MPH speed limit to motorists approaching the Hobart Bridge during construction of the downstream Tasman Bridge, from the eastern shore of the Derwent River.
Hal Wyatt
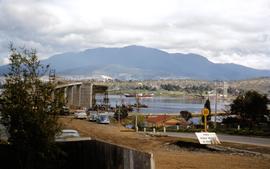
Hobart Bridge and Tasman Bridge
Parte deHal Wyatt Collection
Colour photograph taken from the western shore of the Derwent River, depicts vehicles travelling on the temporary, floating Hobart Bridge, while the nearly complete multi-lane Tasman Bridge to join the eastern and western shores of the river, is visible downstream.
Hal Wyatt
Parte deHal Wyatt Collection
Colour photograph shows construction of Tasman Bridge, with scaffolding, cranes and workers atop frame, photographed from the water, bridge built across the Derwent River, taken 1963.
Hal Wyatt
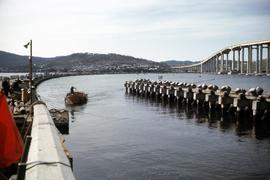
Building Tasman Bridge early 1960s
Parte deHal Wyatt Collection
Colour photograph shows construction of the Tasman Bridge, in early 1960s, as viewed from the eastern shore of the Derwent River; the floating Hobart Bridge is visible in foreground; Mount Wellington in distance, with dry grasslands in the foothills of the mountains, visible on western shore of river.
Hal Wyatt

Parte deHal Wyatt Collection
Colour photograph shows a child sailor at the rudder of a cadet dinghy on Derwent River sailing upstream, while another pleasure craft is travelling in opposite direction; both are sailing past the Royal Australian Navy ship, the Destroyer Escort, HMAS Torrens, (No. 53 emblazoned on the side) is berthed just off Port of Hobart.
Hal Wyatt
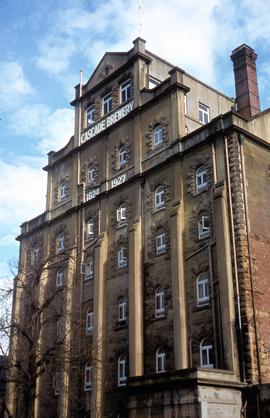
Parte deHal Wyatt Collection
Colour photograph shows facade of Cascade Brewery building.
Hal Wyatt
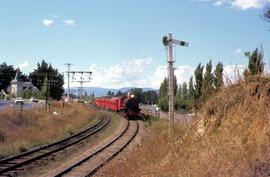
Steam train at Claremont, 1972
Parte deHal Wyatt Collection
Colour photograph of a steam train pulling old style carriage stock leaving Claremont and heading towards Chigwell station.
Hal Wyatt
Sailing boats moored at Constitution Dock
Parte deHal Wyatt Collection
Colour photograph of crowds gathered on docks looking at sailing boats moored at Constitution Dock, Hobart
Hal Wyatt

Reflections on water at Constitution Dock 1954
Parte deHal Wyatt Collection
Colour photograph shows reflections in the water, of masts and sailing boats moored at Constitution Dock, Hobart, with State Library of Tasmania and Hobart GPO clocktower in background.
Hal Wyatt
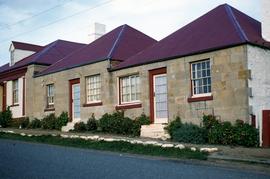
Parte deHal Wyatt Collection
Colour photograph shows sandstone cottages at Richmond, taken 1959.
Hal Wyatt
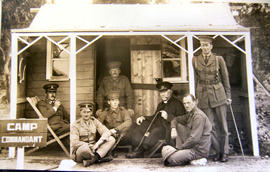
Men on verandah of Camp Commandant Cottage
Black and white photograph of Camp Commandant's hut with men in uniform seated outside, part of the Claremont military camp.
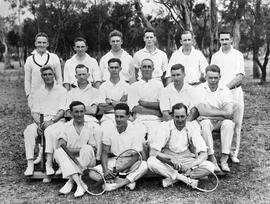
Group of men dressed in tennis whites, some holding rackets.
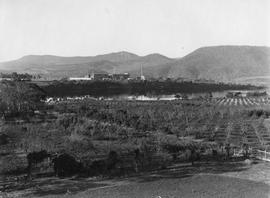
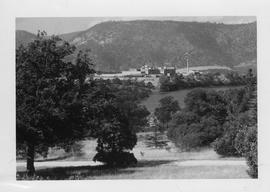
Cadbury Factory Under Construction
Looking across orchard to Cadbury buildings under construction.
View across water to partially completed Cadbury factory.
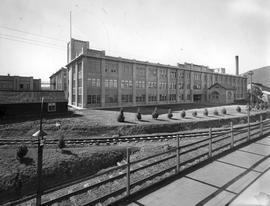
Cadbury Building and Train Tracks
Three story building forming part of the Cadbury factory. Railway lines visible in front.

Cadbury factory with train loaded with supplies in front of building.
Wooden Buildings, Cadbury Factory
Interlinking wooden buildings on Cadbury site, with Derwent River in background.
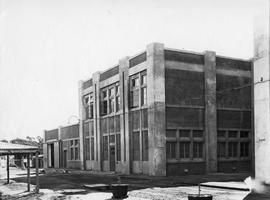
Multi-story buildings, Cadbury Factory
Courtyard and paths between multi-storied buildings, Cadbury factory.
Multi-storied building with lettering reading Westway on corner, forming part of Cadbury factory.
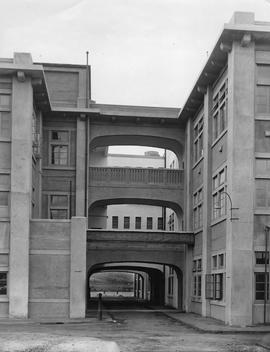
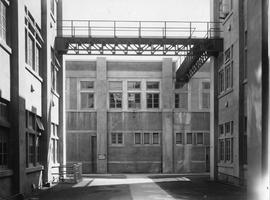
External Walkways, Cadbury Factory
Two multi-story buildings connected by walkways with road running through middle at ground level giving glimpse of water, forming part of the Cadbury factory.
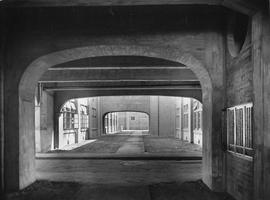
Internal Courtyard, Cadbury Factory
View of road through an internal courtyard linking factory buildings on Cadbury site.
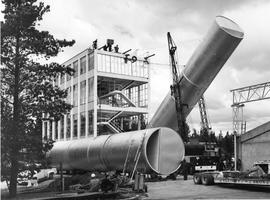
Raising Cylinders, Cadbury Factory
Construction of part of Cadbury factory showing large cylinders being erected. Elliot Brothers crane and truck in foreground.
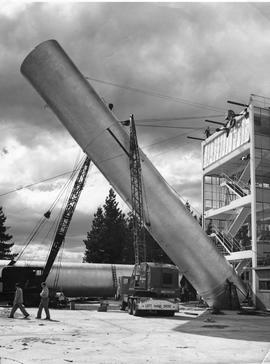
Cranes lifting cylinder, Cadbury Factory
Large cylinder being craned up into position at end of building, forming part of Cadbury factory. Crane marked as Johns & Waygood LTD.
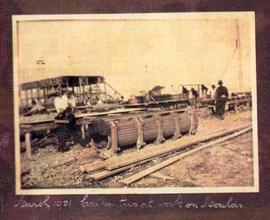
Carpenters working on constructing wooden moulds, part of Cadbury factory construction. Photograph annotated March 1921.
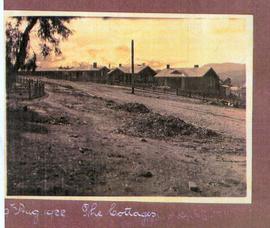
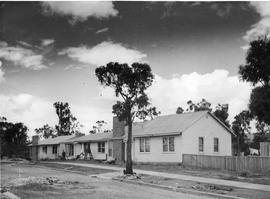
Row of cottages constructed on Cadbury estate. Photograph annotated 19th August 1922.
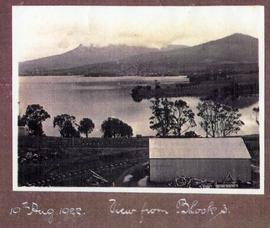
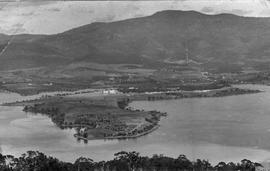
Mt Wellington from Cadbury Factory
View from Cadbury site across to orchard. Mt. Wellington in background. Photograph annotated View from block 3. 19th August 1922.
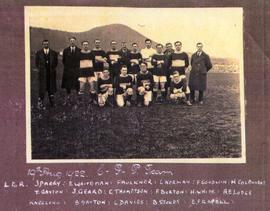
Group photograph of football team. Photograph annotated as 19th August 1922. C.F.P. Team. L to R: J Parry, E Whoteman, Faulkner, L Norman, F Goodwin, H Colbourne, T Gayton, J Geard, C Thomptson, F Burton, H White, A E Lodge. Kneeling: B Gayton, L Davies, B Stokes, E Frapell.
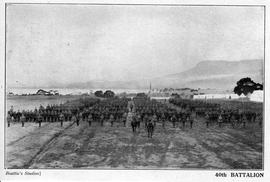
Soldiers and horsemen on parade ground with Mt. Wellington in background. Photograph annotated 40th Battalion. Photograph by Beattie's Studios.
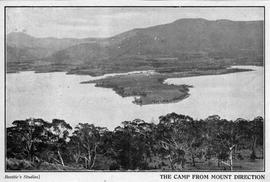
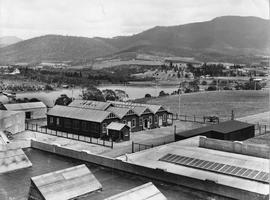
Claremont Military Camp from Mount Direction
Photograph of Claremont Military camp taken from high ground. Photograph annotated The Camp from Mount Direction. Photograph by Beattie's Studios.
Cadbury Military Camp from Mt. Direction.
Photograph from Mt. Direction showing Cadbury Military Camp and surrounding area.
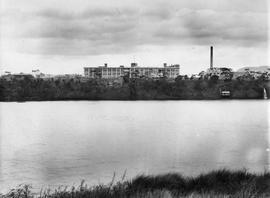
View across water to the Cadbury factory, horses grazing in foreground.

Four men playing golf. Back of photograph states The Origin of Claremont Golf Club 1926? (Lunch hour golf) Left to right: Wal Morrow (scorer), HV McKernan, Will Cooper, FB Richardson. Photo by JA Cooper (his clubs lying on green)
Cadbury Factory with Gum Trees
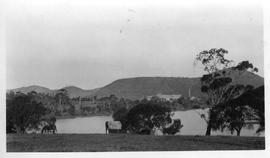
Cadbury factory as seen through stand of gum trees.
Cadbury Factory seen through stand of gum trees. Photograph taken from Windemere. Photograph by J J N Barnett.
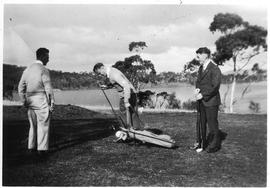
Three men playing golf, river in background.
Constructing footpath and nature strip, Cadbury Estate
Footpath and nature strip under construction, Cadbury Estate.
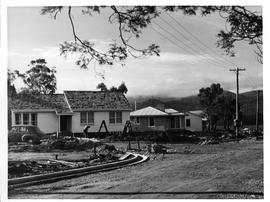
Houses on the Cadbury Estate, Claremont
Newly constructed wooden homes, Cadbury Village, Claremont.
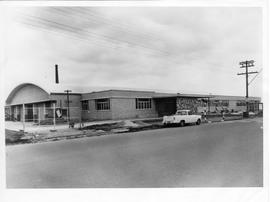
Brick building with curved roof
Brick building with curved roof, Holden ute parked in street.
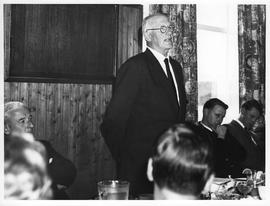
Mr Paul Cadbury speaks at farewell luncheon
Mr Paul Cadbury at farewell luncheon 20th October 1965 at Claremont Golf Clubhouse
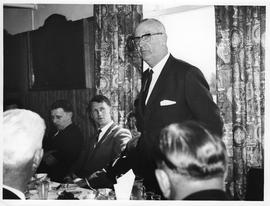
Mr Paul Cadbury speaking at farewell luncheon
Mr Paul Cadbury at farewell luncheon 20th October 1965 at Claremont Golf Clubhouse.
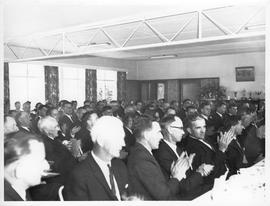
Farewell luncheon, Cadbury Factory
Farewell luncheon for Mr Paul Cadbury.
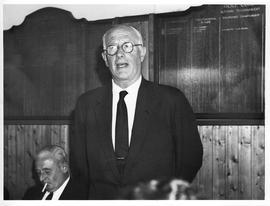
Mr HV McKernan at farewell luncheon for Mr Paul Cadbury
Mr HV McKernan at Mr Paul Cadburys farwell luncheon 20th October 1965 at Claremont Golf Clubhouse.
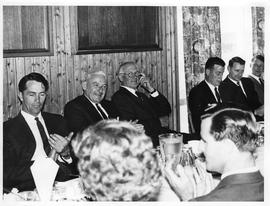
Farewell luncheon for Mr Paul Cadbury
Group of men at farewell luncheon.
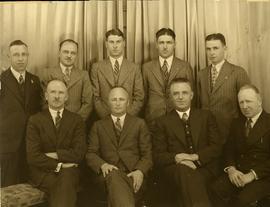
South Australian sales staff competition winners
South Australian sales staff – winners of moulded competition 1935. Left to right. Back: BC Johnston, WA Hopkins, MN Hopgood, AJ Phoenix, LK Packham, Front: S Smith, AH Seaton(Manager for South Australia), HL Cocks, E Laver. Photograph taken by WH Pridmore 93 Bathurst St Hobart.
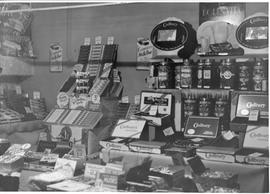
Shop stocked with various Cadbury chocolate bars, assorted boxed chocolates and jars of sweets.