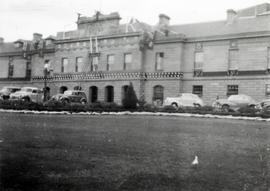
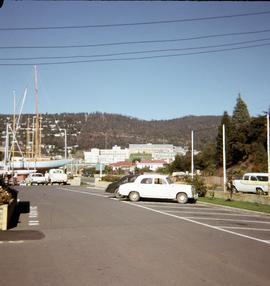
Cars in front of Parliament House
- AU TAS UTAS ITCCD 2017/19-10
- Stuk
- 1920-
Black and white photograph of Parliament House in Hobart, with cars parked in front of building. Ladders reaching up to second storey.
Graeme Raphael

Cars in front of Parliament House
Black and white photograph of Parliament House in Hobart, with cars parked in front of building. Ladders reaching up to second storey.
Graeme Raphael
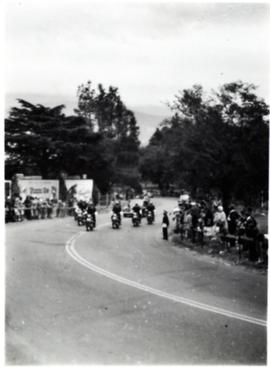
Escort for car near the Domain
Group of motor bikes escorting car up slope. Crowds lining either side of road.
Graeme Raphael
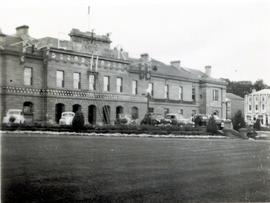
Decoration on Tasmanian Parliament House
Parliament House Hobart. Flags being placed on front of building as decoration.
Graeme Raphael
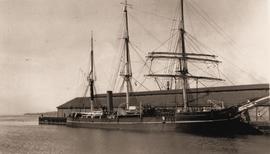
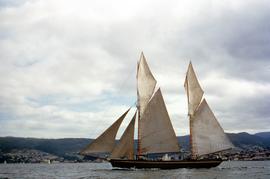
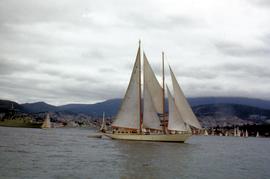
Sailing ship Discovery docked in Hobart
Discovery, a three-masted wooden ship docked at wharf in Hobart
Graeme Raphael
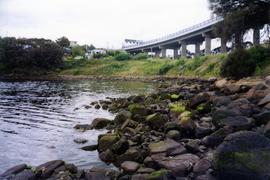
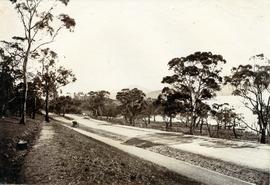
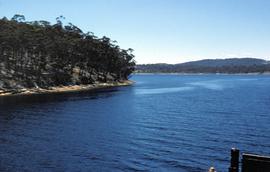
Eastern Shore near Tasman Bridge
View of portion of Hobart's Eastern Shore with water in foreground and the on/off ramp to bridge.
Graeme Raphael
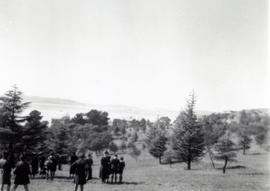
Inspecting the Soldiers Walk memorial
Group of people gathered at the Soldiers Memorial Avenue, Queens Domain in Hobart. Tasmania.
Graeme Raphael
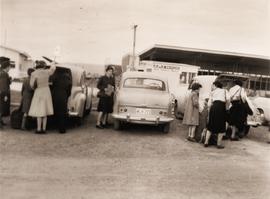
Loading luggage at Hobart Aerodrome
Group of people loading or unloading luggage from the rear boot of vehicles parked in the car park at Hobart Aerodrome. Building site and an aircraft parked on tarmac visible in background.
Graeme Raphael
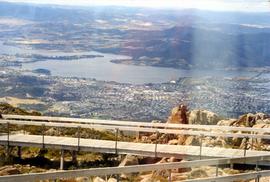
Glenorchy from Mount Wellington
View of Glenorchy and surrounds taken from Mt Wellington. Bowen Bridge visible. The photographic print features a lighter band visible on the scanned digital version.
Graeme Raphael
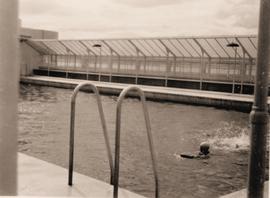
Swimming pool at Wrest Point Casino
Outdoor swimming pool with wall of glass providing windbreak.
Graeme Raphael
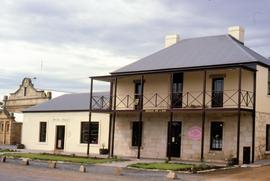
Colour photograph shows former Bridge Inn Richmond, a sandstone building at 50 Bridge Road, Richmond, with confectioner trading as Sweets and Treats.
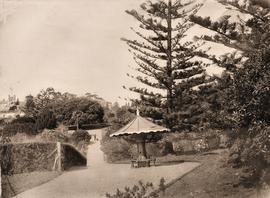
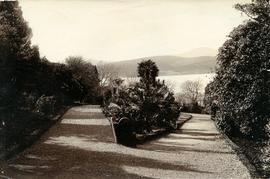
Decorative seat at Royal Botanical Gardens
Part of Photographs of Edward Verrell
Black-and-white photograph of Royal Botanical Gardens, showing a decorative undercover seat constructed around the stump and butt of a tree. Government House visible in background
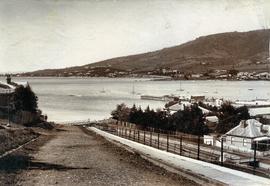
View from Bath Street, Battery Point
Part of Photographs of Edward Verrell
Black-and-white photograph of Bath Street, Battery Point, looking across Derwent River to Sandy Bay and St Helena Point.
Walking path in Royal Botanical Gardens
Part of Photographs of Edward Verrell
Black-and-white photograph shows gravel walking path in Royal Botanical Gardens
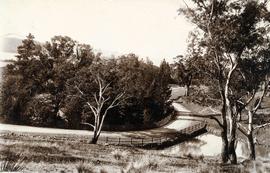
Lower Domain Road at back of Royal Botanical Gardens
Part of Photographs of Edward Verrell
Black-and-white photograph of road crossing a pond on Lower Domain Road near Royal Botanical Gardens. Towers of Government House visible behind trees.
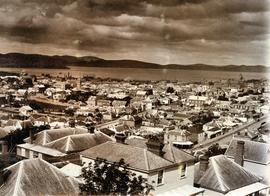
Rooftops of Hobart looking east
Part of Photographs of Edward Verrell
Black-and-white photograph shows view of Hobart rooftops looking east over central city streets including Harrington Street and Murray Street
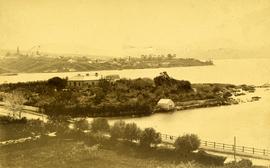
View of Dunkleys Point at Sandy Bay
Part of Photographs of Edward Verrell
Black-and-white photograph shows Sandy Bay Road in foreground, the grand home St Helena on what is known as Dunkleys Point, and Battery Point on the opposite shore of the bay
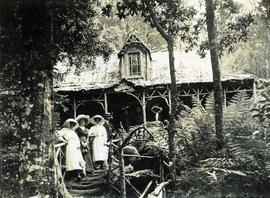
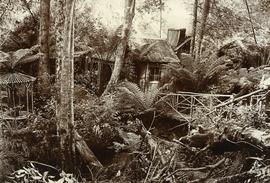
Visitors at Falls Hut, Mount Wellington
Part of Photographs of Edward Verrell
Black-and-white photograph shows visitors standing on front steps and veranda at Falls Hut, built 1897, at the Cascades, on road to Mount Wellington
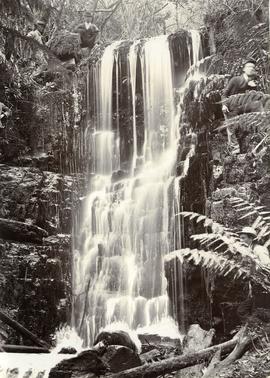
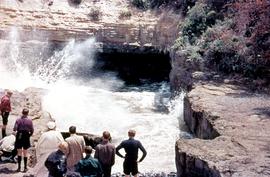
Men posing for camera at Silver Falls
Part of Photographs of Edward Verrell
Black-and-white vertical/portrait photograph of four men posing for the camera while standing or squatting above or beside a waterfall on Mount Wellington, believed to be Silver Falls
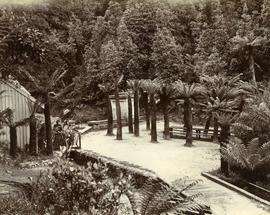
Part of Photographs of Edward Verrell
Black-and-white photograph shows walking path at Fern Tree Bower, Mount Wellington
Part of Photographs of Edward Verrell
Black-and-white photograph shows path to near base of waterfall in foothills of Mount Wellington, two men standing near a barrel beside a metal mesh and barbed wire fence and a padlocked gate barring access to the stream
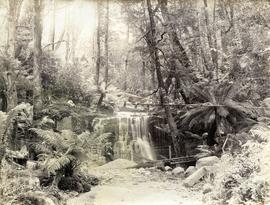
Part of Photographs of Edward Verrell
Black-and-white photograph of rustic hut built amid fern trees on walking track at Mount Wellington, two figures walking across timber bridge amid fern fronds
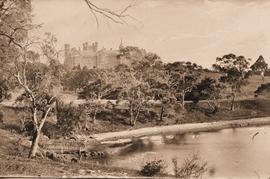
Government House in Hobart, viewed from the river, across Rose Bay
Part of Photographs of Edward Verrell
Black-and-white photograph shows waves lapping shoreline of Derwent River in foreground, with Government House on the hill, surrounded by mature trees, tall picket fence runs parallel with river, two wires strung between poles, visible through trees
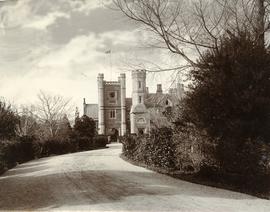
Western approach to Government House
Part of Photographs of Edward Verrell
Black-and-white photograph shows gravel road leading to western approach to Government House, Hobart, featuring clocktower with Union Jack hoisted and bas relief sculpture above doorway.
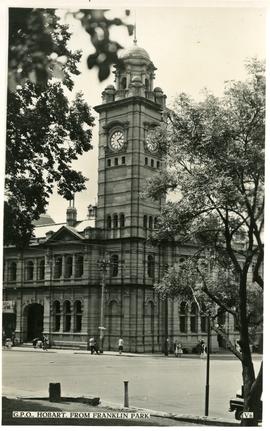
Hobart General Post Office from Franklin Park
Part of Photographs of Edward Verrell
Black-and-white photograph shows Hobart General Post Office viewed from Franklin Park. Words “G.P.O., HOBART, FROM FRANKLIN PARK” and “V6” are typewritten in black on white reverse panel at bottom of photograph
Hobart Railway Station, taken from university gardens
Part of Photographs of Edward Verrell
Black-and-white photograph shows Hobart Railway Station, viewed from gardens of the University of Tasmania, including the Tasmanian Government Railways workshops
View of snow on Mount Wellington from Huon Road
Part of Photographs of Edward Verrell
Black-and-white photograph shows snow on Mount Wellington viewed from the verge of the Huon Road, South Hobart, with post-and-rail fence alongside roadway.
View from Queens Domain looking north to Cornelian Bay and New Town Bay
Part of Photographs of Edward Verrell
Black-and-white photograph taken from elevated point on Queen’s Domain, looking north up Derwent River towards Cornelian Bay and New Town Bay; Risdon Park Racecourse (1880s-1926) at New Town in foreground, early burial plots in headland of Cornelian Bay Cemetery at right of picture.
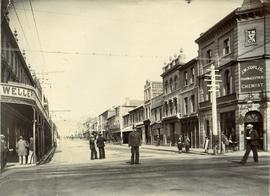
Miller’s Corner at Liverpool and Murray streets, Hobart
Part of Photographs of Edward Verrell
Black-and-white photograph depicts Miller’s Corner on the intersection of Liverpool Street and Murray streets, Hobart, looking towards waterfront down Murray Street. A.P. Miller, dispensing chemist, died 1904
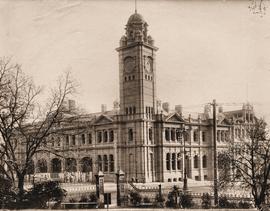
Hobart GPO before installation of clock in tower
Part of Photographs of Edward Verrell
Black-and-white photograph shows Hobart General Post Office viewed from Franklin Park before the installation of the clock in the clocktower.
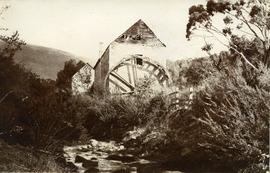
Water mill on New Town Rivulet
Part of Photographs of Edward Verrell
Black-and-white photograph shows water wheel on outside of mill on New Town Rivulet at Lenah Valley

Ruins of church at Port Arthur
Part of Photographs of Edward Verrell
Black-and-white photograph shows ruins of the church at Port Arthur, damaged by fire in 1884,with charred timber framework in the roof, remnant shingles on the roof and climbing plants covering the sandstone of the church walls. Handwritten words “Church at Port Arthur” in lower left corner of image.
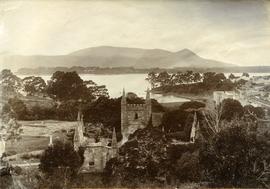
Elevated view of church ruins at Port Arthur
Part of Photographs of Edward Verrell
Black-and-white photograph shows elevated view of ruined church at Port Arthur, including charred timber roof framework; with view of waterfront and other buildings on Port Arthur site; cut hay is drying in paddock at front of church.
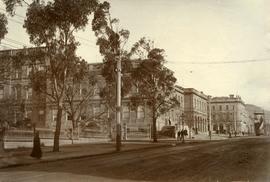
Public buildings near Franklin Square, Hobart
Part of Photographs of Edward Verrell
Black-and-white photograph shows public buildings near Franklin Square, Hobart
Road to Government House, on Gun Carriage Drive
Part of Photographs of Edward Verrell
Black-and-white photograph taken looking north along Gun Carriage Drive towards Government House, Hobart, with post-and-rail fences on Derwent River side; a horse harnessed to a four-wheel carriage, is on the left of the road; a small jetty extends from the shoreline and a boat is visible through the trees, anchored just off shore.
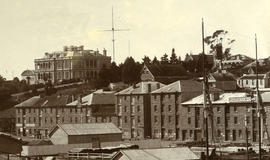
Part of Photographs of Edward Verrell
Black-and-white photograph shows stone buildings along Salamanca Place, timber stacked on New Wharf and masts of ships docked at the wharf; signs on buildings for “A.E. Lord Wool Merchant” and “W.D. Peacock and Co.”, historic home Lenna and eastern conservatory visible on hilltop behind towards Battery Point; maritime signal station with the Time Ball that was dropped automatically at 1pm, after a relayed telegraph signal from the Melbourne Observatory.

Ships docked at New Wharf, Hobart
Part of Photographs of Edward Verrell
Black-and-white photograph shows sailing ships moored at New Wharf, Hobart, in front of Salamanca Place, with milled timber stacked on edge of wharf

Sandy Bay Road looking towards Hobart
Part of Photographs of Edward Verrell
Black-and-white photograph shows Sandy Bay Road, with tram tracks on riverside of road, electric wires for Hobart Electric Tramway, carriage wheelmarks in the unpaved road surface, electricity transmission wires strung from poles mounted with porcelain insulators
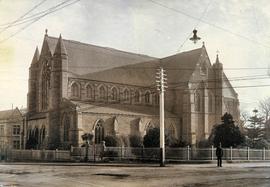
Part of Photographs of Edward Verrell
Black-and-white photograph of St David’s Cathedral, Hobart, including original fence of St David’s Church, which occupied the site until the 1860s
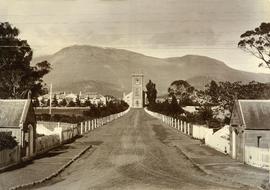
Part of Photographs of Edward Verrell
Black-and-white photograph looking up St John’s Avenue, towards St John’s Church, New Town
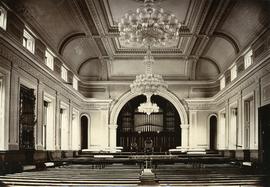
Part of Photographs of Edward Verrell
Black-and-white photograph shows interior of Hobart Town Hall, with low-hanging chandelier and pipe organ
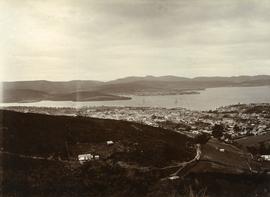
Elevated view of Hobart looking to upper end of Liverpool Street
Part of Photographs of Edward Verrell
Black-and-white photograph taken from foothills of Mount Wellington shows settlement of Hobart and upper end of Liverpool Street, now called Liverpool Crescent
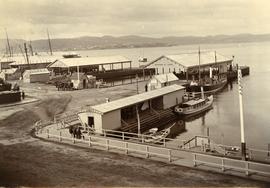
Franklin Pier, Brooke Street Pier and Watermen’s Wharf, Hobart
Part of Photographs of Edward Verrell
Black-and-white photograph shows three men sitting on a fence railing outside the entry to Watermen’s Wharf, with horse-drawn carriages pulled up near the Franklin Pier and Brooke Street Pier
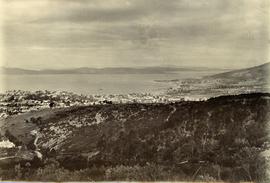
Elevated view of Goulburn Street, Hobart
Part of Photographs of Edward Verrell
Black-and-white photograph shows an elevated view of Goulburn Street, Hobart, looking south down Derwent River estuary past Sandy Bay
Part of Photographs of Edward Verrell
Black-and-white photograph depicts police officer standing in middle of Liverpool Street, Hobart, with YMCA and J.W. Toplis Pharmaceutical Chemist listed as tenants of the corner building.
Part of Hal Wyatt Collection
Colour photograph shows man sitting on rock atop Mount Marian looking across valley to Collins Bonnet
Snow on Hobart waterfront 1986
Part of Hal Wyatt Collection
Colour photograph of snow on railway tracks on shore of Derwent River 1986
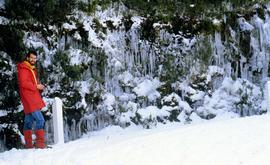
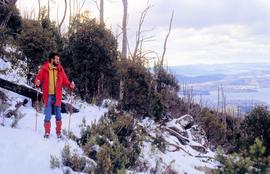
Part of Hal Wyatt Collection
Colour photograph taken near the Springs of man dressed in red beside road to Mount Wellington, with icicles dangling from the vegetation after a snowstorm
Part of Hal Wyatt Collection
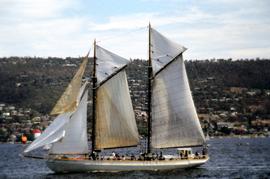
Colour photograph of SV May Queen, sailing on Derwent River in trading vessel race in 1954

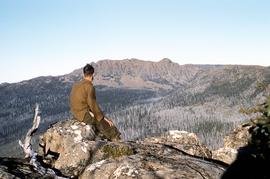
Man looking to Mount Marian from Mount Charles
Part of Hal Wyatt Collection
Colour photograph of man standing on ledge of Mount Charles looking towards Mount Marian. Man wearing brown felt hat, leather chaps and woollen shirt
Part of Hal Wyatt Collection
Colour photograph of man looking down Mount Wellington, with skis, from Milles Track
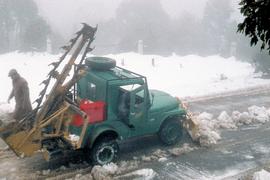
Snow plowing on road to Mount Wellington
Part of Hal Wyatt Collection
Colour photograph of Post Master General Department Jeep equipped with front-mounted and rear-mounted snowclearing implements moving snow and ice from road on Mount Wellington, 1960
Part of Hal Wyatt Collection
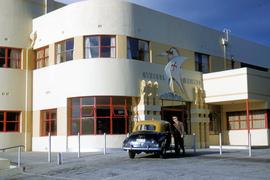
Photograph depicts forecourt of Wrest Point Hotel, Sandy Bay, showing front door with decorative masonry, with five dolphins, ship with St George Cross atop front door. Man in brown uniform standing alongside a Holden FX with dark body paintwork and a yellow painted roof, a taxi affiliated with Hobart's Yellow Cabs, Tasmanian licence plate WXG 772.
Hal Wyatt
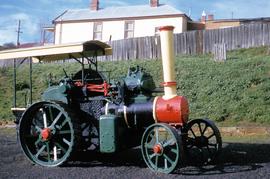
A & P Roller at West Hobart Park
Part of Hal Wyatt Collection
Colour photograph of Aveling & Porter Limited steam roller, green and red trim, with yellow painted canopy, at West Hobart park, 1962.
Hal Wyatt
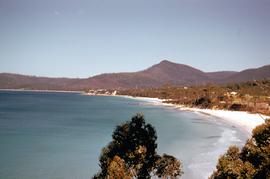
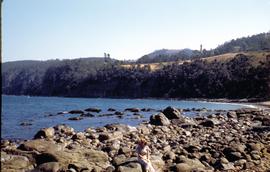
Adventure Bay from Coal Point 1960
Part of Hal Wyatt Collection
Colour photograph of Adventure Bay on Bruny Island, taken from Coal Point in 1960
Hal Wyatt
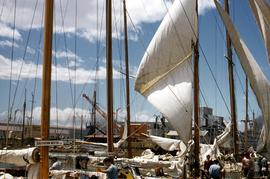
Part of Hal Wyatt Collection
Colour photograph of yachts moored at Hobart waterfront, after a yacht race, masts, rigging, sails being stored by crew on yachts, including Southern Myth and Defiance.
Hal Wyatt
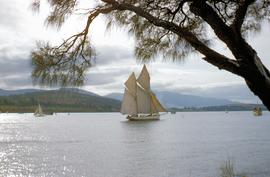
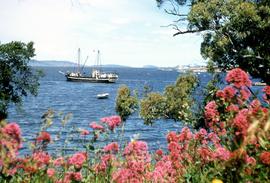
Auxiliary Ketch Lenna at Hobart Regatta 1957
Part of Hal Wyatt Collection
Colour photograph of the ketch Lenna, taken from shore of Derwent, at Hobart Regatta, 1957. Depicts two-masted ketch on Derwent River, with casuarina tree in foreground.
Hal Wyatt
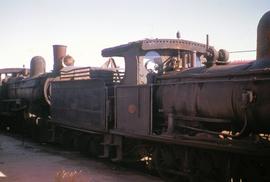
C Class steam locomotives in railyard
Part of Hal Wyatt Collection
Colour photograph of two steam locomotives, C Class locomotives, built for Tasmanian Government Railways
Auxiliary Ketch Argonaut off Powder Jetty 1957
Part of Hal Wyatt Collection
Colour photograph depicts Auxiliary Ketch Argonaut anchored near Powder Jetty, aka Gunpowder Jetty, near Howden, in 1957.
Hal Wyatt
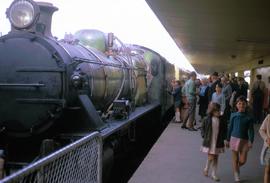
Steam train arrives at Hobart Station
Part of Hal Wyatt Collection
Colour photograph of steam locomotive, with green livery, pulled into platform at Hobart Station, with passengers on platform.
Hal Wyatt
Astor at finish line of Sydney-Hobart Yacht Race
Part of Hal Wyatt Collection
Colour photograph shows yacht with spinnaker hoisted, sailing on Derwent River, the Astor, purportedly in 1962 Sydney-Hobart Yacht Race, photograph quite possibly taken in 1961, 1963 or 1964 race when the craft took line honours.
Hal Wyatt
Part of Hal Wyatt Collection
Colour photograph shows yacht Astor, on Derwent River, with dinghy in tow; Mount Wellington shrouded in low cloud behind; other yachts under sail in background.
Hal Wyatt
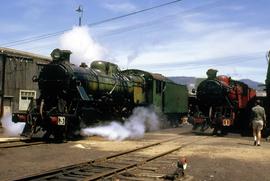
C Class steam locomotives at Hobart roundhouse
Part of Hal Wyatt Collection
Colour photograph depicts C Class steam locomotives, 3 and 1, at Hobart roundhouse
Hal Wyatt
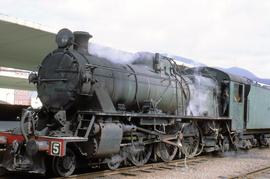
C Class locomotive idle at Hobart Station
Part of Hal Wyatt Collection
Colour photograph of C Class steam locomotive at Hobart Station, No 5, visible on front of locomotive
Hal Wyatt

C Class locomotive pulls passenger cars at Hobart Station
Part of Hal Wyatt Collection
Colour photograph of C Class steam locomotive pulling red and cream-painted passenger carriages into Hobart Station
Hal Wyatt

Part of Hal Wyatt Collection
Colour photograph shows red steam locomotives in yard at Hobart roundhouse
Hal Wyatt
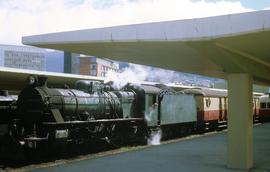
C class locomotive at Hobart Station platform
Part of Hal Wyatt Collection
Colour photograph shows C Class steam locomotive with green livery, pulling red and cream carriages, at Hobart Station. Child looking out driver/engineer cabin window.
Hal Wyatt
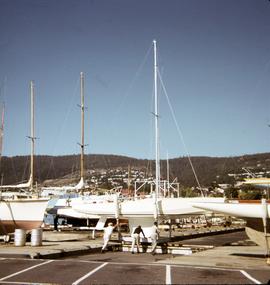
Yachts at the Royal Yacht Club of Tasmania
Part of Hal Wyatt Collection
Colour photograph shows three men pushing a yacht in dry dock at Royal Yacht Club of Tasmania.
Hal Wyatt
Part of Hal Wyatt Collection
Colour photograph shows yachts at Royal Yacht Club of Tasmania and cars parked beside waterfront
Hal Wyatt
Derwent Hunter sailing off Sandy Bay
Part of Hal Wyatt Collection
Colour photograph of Derwent Hunter, sailing in Derwent River, off Sandy Bay, with other yachts under spinnaker in background.
Hal Wyatt
Part of Hal Wyatt Collection
Colour photograph taken 1960 of Barnes Bay, Bruny Island, showing shoreline, road and culvert, paddocks with horses and cattle grazing
Part of Hal Wyatt Collection
Colour photograph taken 1960 of Barnes Bay, Bruny Island, slightly out of focus, showing water and tree-covered headland
Hal Wyatt
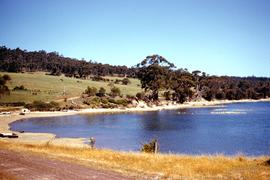
View of water across Barnes Bay 1960
Part of Hal Wyatt Collection
Colour photograph taken 1960 of Barnes Bay, Bruny Island, showing water and coastline, farmland across bay
Hal Wyatt
Dinghy on water in Barnes Bay 1960
Part of Hal Wyatt Collection
Colour photograph of three people in a dinghy, offshore at Barnes Bay, Bruny Island
Hal Wyatt
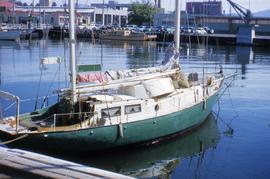
Sailing boat moored in Hobart, 1950s
Part of Hal Wyatt Collection
Colour photograph of small, two masted sailing boat, with green painted hull, and a sign Onrust, Holland, pinned to mast, Onrust also painted onto side of boat.
Hal Wyatt
Part of Hal Wyatt Collection
Colour photograph of rocky foreshore at Taroona, 1951, with woman sitting on rock in foreground; shot tower visible in hills in rear of picture
Hal Wyatt
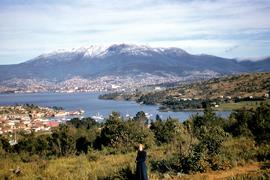
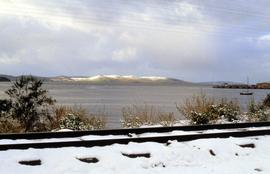
Snow cap on Mount Wellington taken from eastern shore
Part of Hal Wyatt Collection
Colour photograph of snow on Mount Wellington, taken from eastern shore of Derwent River, overlooking Bellerive and Rosny; woman in dark blue overcoat, standing on path in foreground
Hal Wyatt
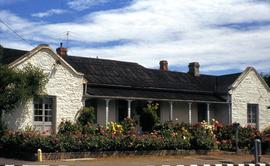
Rendered stone house with extensive floral garden
Part of Hal Wyatt Collection
Colour photograph of stone house, rendered white with flowers in bloom in front garden, in front of verandah, old tin roof, on corner block
Hal Wyatt
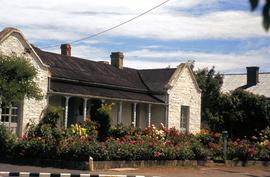
Rendered stone house at Bellerive with large floral garden
Part of Hal Wyatt Collection
Colour photograph of stone house at Bellerive, rendered or painted white, with flowers in bloom in front garden, in front of verandah, house old tin roof, on corner block, street pillar for PMG telephone cabling near letterbox
Hal Wyatt
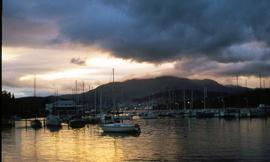
Part of Hal Wyatt Collection
Colour photograph taken at dusk, of Bellerive marina
Hal Wyatt
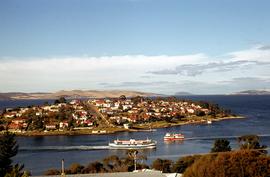
Part of Hal Wyatt Collection
Colour photograph shows two ferries travelling in opposite directions at Bellerive
Hal Wyatt
Part of Hal Wyatt Collection
Colour photograph of yachts racing on Derwent River with cargo ships berthed at Port of Hobart in background; foothills on land are dry
Hal Wyatt
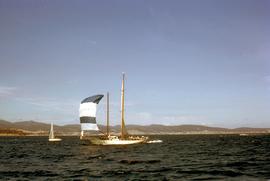
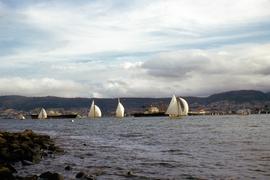
Yachts on river, one with black sail
Part of Hal Wyatt Collection
Colour photograph of three yachts under sail on Derwent River, one a ketch, has a black sail on the foremast.
Hal Wyatt
Sightseers at Eagle Hawk Neck blowhole
Part of Hal Wyatt Collection
Colour photograph of sightseers standing on rocks near blowhole at Eaglehawk Neck.
Hal Wyatt
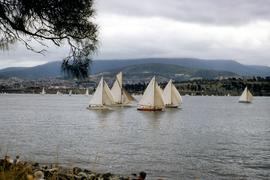
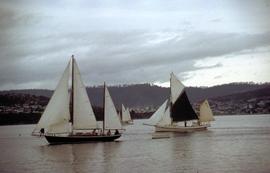
Boat race in Derwent River, 1954
Part of Hal Wyatt Collection
Colour photograph of single-masted yachts racing on Derwent River, 1954; people on rocky shore watching.
Hal Wyatt
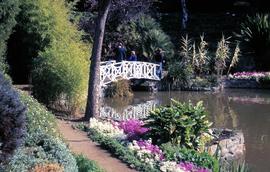
White bridge at botanical gardens
Part of Hal Wyatt Collection
Colour photograph shows people walking across white bridge, Royal Tasmanian Botanical Gardens, Queens Domain, Hobart.
Hal Wyatt
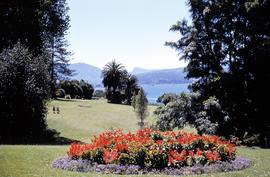
Flower bed at botanical gardens
Part of Hal Wyatt Collection
Colour photograph of Royal Tasmanian Botanical Gardens at Queens Domain, Hobart; depicts garden beds, lawns and Derwent River, looking towards Selfs Point Jetty and petroleum storage tanks at Selfs Point.
Hal Wyatt
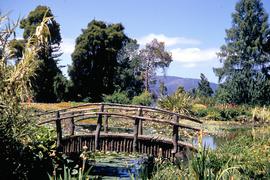
Timber bridge over pond at botanical gardens
Part of Hal Wyatt Collection
Colour photograph shows rustic timber bridge across a pond at Royal Tasmanian Botanical Gardens, Queens Domain, Hobart.
Hal Wyatt
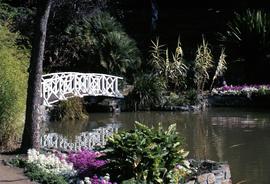
White bridge, reflected in water, at botanical gardens
Part of Hal Wyatt Collection
Colour photograph of white bridge at Royal Tasmanian Botanical Gardens, Queens Domain, Hobart.
Hal Wyatt
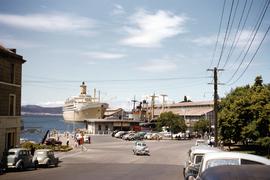
Murray Street ferry pier and ships docked in Hobart
Part of Hal Wyatt Collection
Colour photograph of ferry pier at bottom of Murray Street, Hobart, departure point for the Bellerive ferry; cargo and passenger ships docked at nearby Princes Wharf, including the steamer Orsova; sign advertising Cascade Ale on the Customs House Hotel.
Hal Wyatt
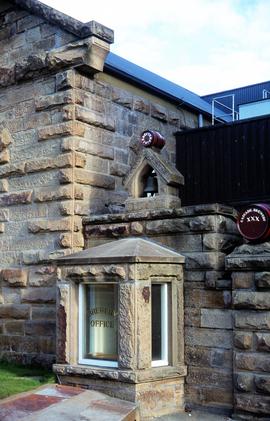
Office window at Cascade Brewery
Part of Hal Wyatt Collection
Colour photograph depicting facade of Cascade Brewery office, built in sandstone, with bell and decorative barrels mounted on roof, “Cascade Brewery XXX” and “Erected 1874”.
Hal Wyatt
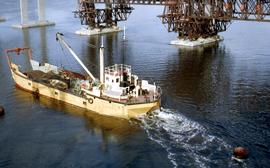
Barge working on Tasman Bridge construction
Part of Hal Wyatt Collection
Colour photograph shows a barge in the Derwent River, near partially constructed pylons of Tasman Bridge, 1964.
Hal Wyatt
Construction depot and office of Tasman Bridge, 1964
Part of Hal Wyatt Collection
Colour photograph shows office and construction depot of Bridge Co on Derwent’s Eastern Shore, during construction of the Tasman Bridge across the Derwent River, 1964.
Hal Wyatt
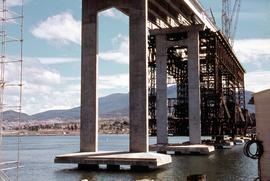
Tasman Bridge under construction from Eastern Shore
Part of Hal Wyatt Collection
Colour photograph shows pylons supporting Tasman Bridge, viewed from the Derwent’s Eastern Shore, during construction of the Tasman Bridge across the Derwent River, 1964.
Hal Wyatt
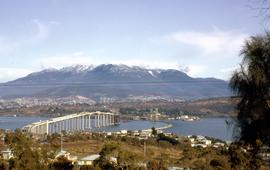
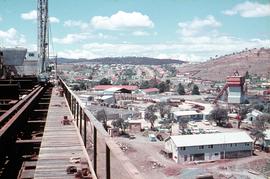
Tasman Bridge nears completion
Part of Hal Wyatt Collection
Colour photograph shows construction of Tasman Bridge, from Derwent River’s Eastern Shore. Shows spans of Tasman Bridge almost completed from Eastern Shore, temporary floating Hobart Bridge upstream of new multi-lane road bridge; snow on Mount Wellington in background. Printing or scanning error in photograph/slide shows coloured lines horizontally through. photograph.
Hal Wyatt
Part of Hal Wyatt Collection
Colour photograph shows site of repair work to Tasman Bridge, damaged by the crash of the ore carrier Lake Illawarra in January 1975.
Hal Wyatt
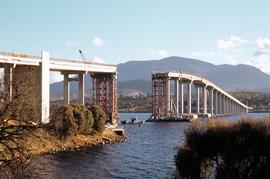
Repair work on Tasman Bridge from Eastern Shore
Part of Hal Wyatt Collection
Colour photograph shows site of repair work to Tasman Bridge, damaged by the crash of the ore carrier Lake Illawarra in January 1975. Photo taken from Eastern Shore of Derwent.
Hal Wyatt
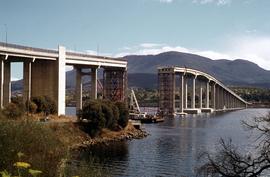
Repair work on Tasman Bridge continues
Part of Hal Wyatt Collection
Colour photograph shows site of repair work to Tasman Bridge, damaged by the crash of the ore carrier Lake Illawarra in January 1975; missing pylons being replaced
Hal Wyatt
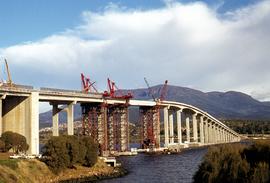
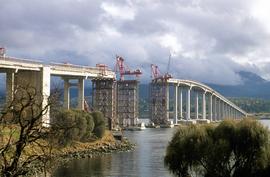
Repairs on Tasman Bridge roadspan
Part of Hal Wyatt Collection
Photograph in colour, taken from Eastern Shore of Derwent River, depicting repairs to roadway and pylons damaged in January 1975 crash of bulk ore carrier Lake Illawarra. Mount Wellington in background.
Hal Wyatt
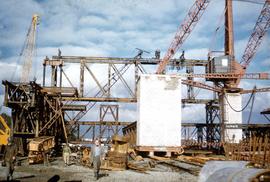
Part of Hal Wyatt Collection
Construction site on riverbank as work begins on Tasman Bridge; cranes, steel scaffolding and brickwork evident. Workers in hard hats; one man striding towards camera, wearing gumboots is poking his tongue out at the photographer.
Hal Wyatt
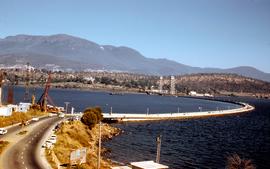
Beginning of construction of Tasman Bridge
Part of Hal Wyatt Collection
Colour photograph depicts vehicular traffic on the temporary, floating Hobart Bridge, as consctruction begins downstream on the multi-lane Tasman Bridge to join the eastern and western shores of the river.
Hal Wyatt