
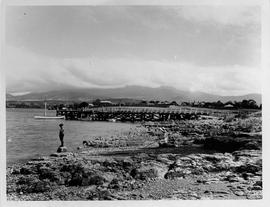
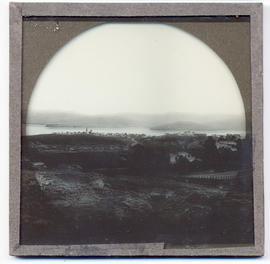
View over the Tamar River to the public baths from Kings Bridge
- AU TAS UTAS SPARC 2022/5-8-41
- Sub-item
- c1885-1931
Fait partie de Dennison Collection
View over the Tamar River, Launceston, from Kings Bridge. Showing the public swimming baths
View over the Tamar River to the public baths from Kings Bridge
Fait partie de Dennison Collection
View over the Tamar River, Launceston, from Kings Bridge. Showing the public swimming baths
Fait partie de Dennison Collection
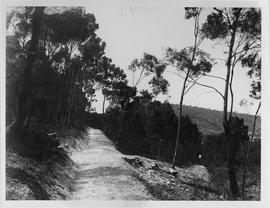
Photograph of a hillside track in the bush may be Shag Bay or Natone Hill Track
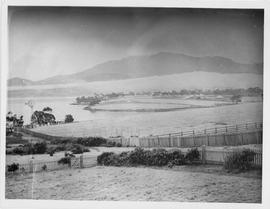
View over Lindisfarne paddocks in the snow
Fait partie de Dennison Collection
View over Lindisfarne paddocks in the snow showing an Aermotor wind-powered water pump
Fait partie de Dennison Collection
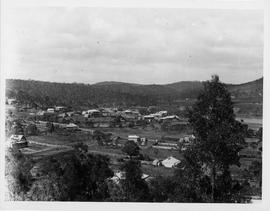
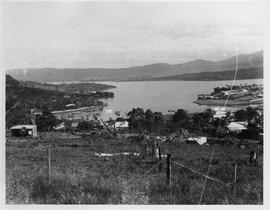
Photograph of houses at Lindisfarne or Geilston Bay taken from hill.
Fait partie de Dennison Collection
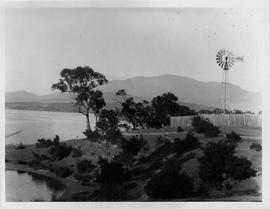
View of an Aermotor wind-powered water pump at Lindisfarne on the eastern shore of the Derwent River looking toward Mt. Wellington. James Martin & co. Sydney imported the Chicago-built windmills into Australia between 1895-1913
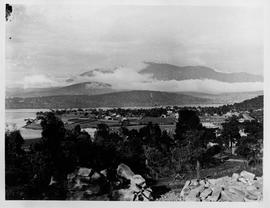
Lindisfarne with a view to the mountain
Fait partie de Dennison Collection
Photograph of Lindisfarne taken from hill behind showing quarried stone and a view to the mountain
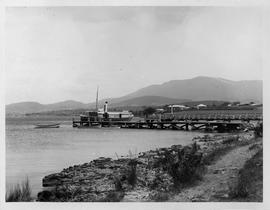
Ferry at the Lindisfarne Jetty
Fait partie de Dennison Collection
Photograph of a ferry approaching the Lindisfarne jetty.
Fait partie de Dennison Collection
Photograph of Lindisfarne taken from hill behind showing houses and jetties
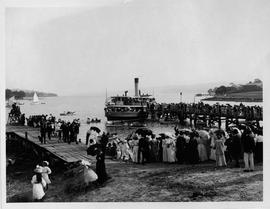
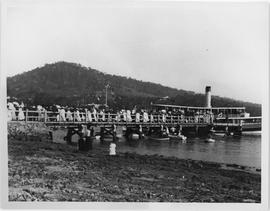
Crowd and ferry at the Lindisfarne Jetty
Fait partie de Dennison Collection
Photograph of a large crowd and a packed ferry at the Lindisfarne Jetty. Rowing boats and yachts on the water.
Fait partie de Dennison Collection
Photograph of Beltana or Lindisfarne jetty showing two young children playing in the foreground. Mt Wellington in the background.
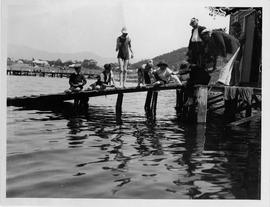
Children fishing from the jetty
Fait partie de Dennison Collection
Photograph of children fishing from the Lindisfarne Rowing Club jetty. Lindisfarne jetty in background.
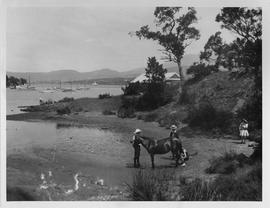
Children and pony on the beach
Fait partie de Dennison Collection
Photograph of children and pony on the beach at a small cove on the eastern shore of the Derwent River.
Fait partie de Dennison Collection
Photograph of children playing on the foreshore. Thought to be in the Lindisfarne area.
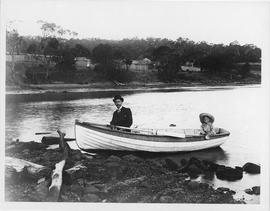
Man and small child in a rowboat
Fait partie de Dennison Collection
Photograph of man and small child in a rowboat. Thought to be taken at Beltana now Lindisfarne.
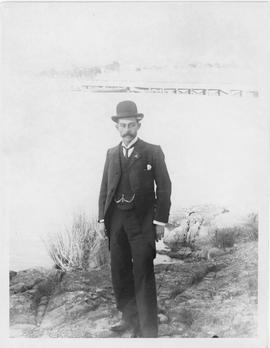
Fait partie de Dennison Collection
Photograph of a man in a bowler hat standing on the foreshore. Thought to be Beltana now Lindisfarne jetty in the background.
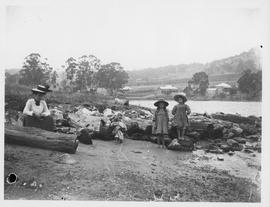
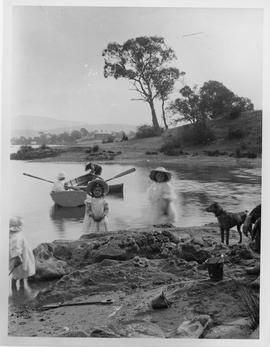
Woman and children on the foreshore
Fait partie de Dennison Collection
Photograph of a woman and three small barefooted girls on the foreshore with logs. Houses and orchards in the background. Thought to be Beltana now Lindisfarne.
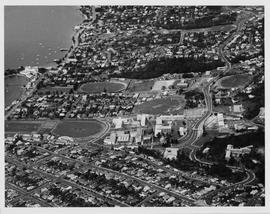
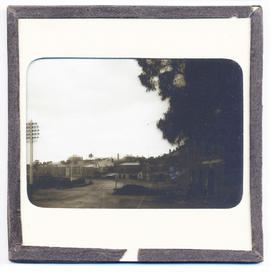
Aerial view of UTAS Sandy Bay Campus
Fait partie de Dennison Collection
Aerial view of the Sandy Bay Campus of the University of Tasmania. Showing sporting fields, Hutchins School, surrounding houses and Wrest Point Hotel prior to the construction of the casino
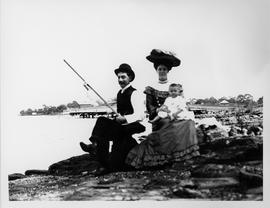
Photograph of family group fishing
Fait partie de Dennison Collection
Photograph of a man, woman and small child sitting on the rocks fishing. Thought to be Beltana now Lindisfarne with jetty in background.
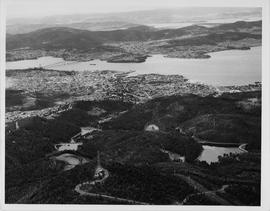
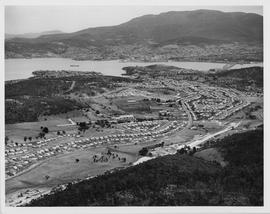
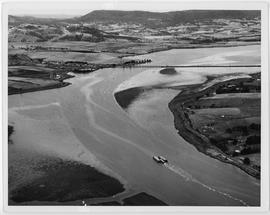
Aerial view of the Ridgeway Reservoir
Fait partie de Dennison Collection
Aerial view of the Ridgeway Reservoir and Waterworks Reserve looking to Hobart, the Tasman Bridge and beyond to the Eastern Shore, Seven Mile Beach and Dodges Ferry

Fait partie de Dennison Collection
Photograph of a group on the rocky foreshore. Two older women with young children and three young girls in pinafores holding hands in the background. Thought to be taken at Beltana now Lindisfarne.
Fait partie de Dennison Collection
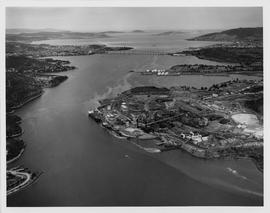
Aerial view of the Zinc Works at Derwent Park. Looking down the Derwent River toward the Tasman Bridge. Showing Self's Point and Cornelian Bay Cemetery
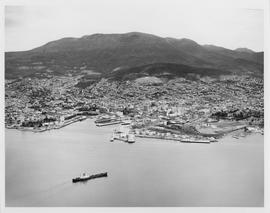
Aerial view of of the port of Hobart
Fait partie de Dennison Collection
Aerial view of of the port of Hobart showing Macquarie Point, the wharf area and Mount Wellington in the background
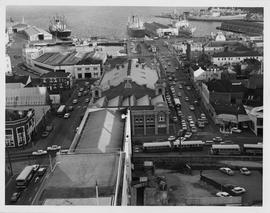
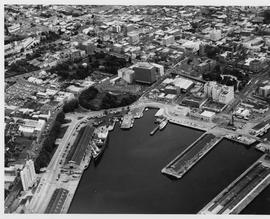
Aerial view of City Hall and port
Fait partie de Dennison Collection
Aerial view of City Hall, Museum and Art Gallery and the port of Hobart, Constitution and Victoria Docks and wharfs
Fait partie de Dennison Collection
Aerial view of the Hobart harbour showing Salamanca Place, Watermans dock, Parliamentary House , Hydro Building, Elizabeth Street pier, the Marine Board building under construction, Franklin Square and St, David's Park.
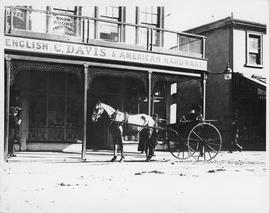
Photograph of carriage outside C Davis store
Fait partie de Dennison Collection
Photograph of man and woman in a carriage outside Charles Davis store. Importer of English and American goods.
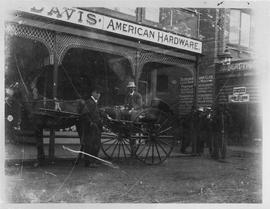
Photograph of carriage outside Charles Davis store, Hobart
Fait partie de Dennison Collection
Photograph of men and a horse drawn cart outside Charles Davis store Hobart. c1887
Aerial view of Mornington and Warrane
Fait partie de Dennison Collection
Aerial photograph of Mornington and Warrane c. 1970 looking toward the Tasman Bridge and Hobart
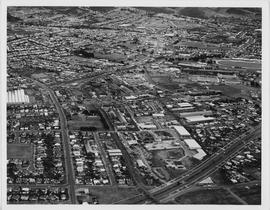
Aerial view of Brooker Highway
Fait partie de Dennison Collection
Aerial view of Brooker Highway, Hobart looking toward the show grounds and Derwent Park
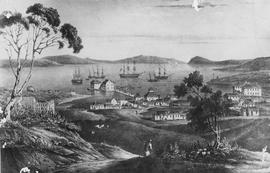
Photograph of a sketch of Old Hobart town
Fait partie de Dennison Collection
A view of Hobart Town by Irish born convict-artist Alan Carswell (1823), showing the colony establishing itself around the mouth of Sullivans Cove in the early 1820s.
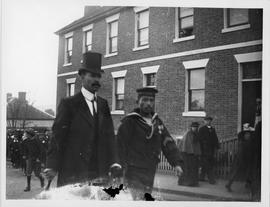
Photograph of Japanese sailors
Fait partie de Dennison Collection
Photograph of Japanese sailor and Japanese gentleman walking in front of Portsea Terrace, Montpelier Retreat, Battery Point.
Fait partie de Dennison Collection
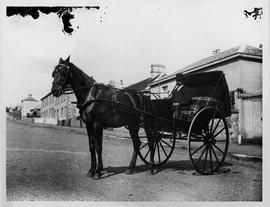
Photograph of a man in a bowler hat sitting in a two wheeled horse drawn gig in the street
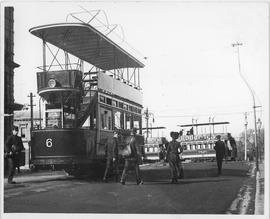
Photograph of double decker electric tram
Fait partie de Dennison Collection
Photograph of a double decker tram in Elizabeth Street Hobart. Other double decker trams in Macquarie Street c.1893

Fait partie de Dennison Collection
Aerial view of Eaglehawk Neck showing the Eaglehawk Neck hall which opened in 1928
Fait partie de Dennison Collection
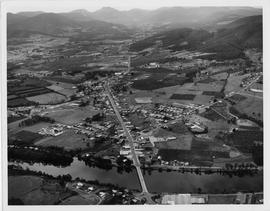
Aerial view of Huonville, Tasmania, looking toward Sleeping Beauty mountain range showing streets, bridge and Huon River
Fait partie de Dennison Collection
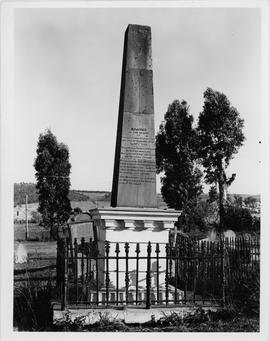
Photograph of the Rev. Robert Knopwood's grave at Rokeby, Clarence Plains, Tasmania. Knopwood died 18 September 1838. He was the first Chaplin of Van Diemen's Land

Fait partie de Dennison Collection
Photograph of Geilston Bay looking toward Mt Wellington showing jetty and breakwater
Fait partie de Dennison Collection
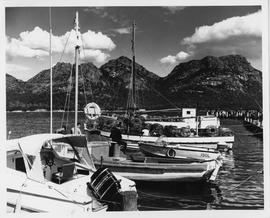
Photograph of pleasure craft and fishing boats at Coles Bay, Tasmania
Photograph of Lindisfarne regatta
Fait partie de Dennison Collection
Photograph of a ferry, people and row boats at Lindisfarne regatta
Fait partie de Dennison Collection
Aerial view of of the Derwent River at Bridgewater. Showing a paper mill barge on the river. Taken pre 1970s as the housing estate has not yet been built.
Waterfront buildings and Salamanca, Hobart, Tasmania
Fait partie de Walker Family Papers
Lantern slide from the collection of James Backhouse Walker of waterfront buildings and Salamanca, Hobart,Tasmania. Thought to have been prepared by J.W. Beattie (1859-1930) whose studio locations were in Elizabeth Street, Hobart from 1891-1920, Murray Street from 1921-40 and Cat and Fiddle Arcade, Hobart, until 1994.
John Watt Beattie
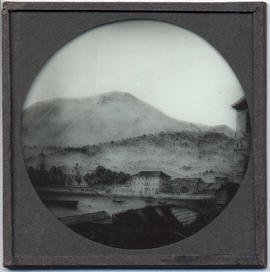
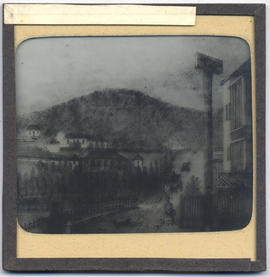
View of the Derwent River, Hobart, Tasmania
Fait partie de Walker Family Papers
Lantern slide of view of the Derwent River, Hobart. Prepared by J.W. Beattie (1859-1930) whose studio locations were Elizabeth Street, Hobart from 1891-1920, Murray Street from 1921-40 and Cat and Fiddle until 1994. 1994.
John Watt Beattie

Fait partie de Walker Family Papers
Lantern slide of Bishop Nixon Prepared by J.W. Beattie (1859-1930) whose studio locations were Elizabeth Street, Hobart from 1891-1920, Murray Street from 1921-40 and Cat and Fiddle until 1994.
John Watt Beattie
Fait partie de Walker Family Papers
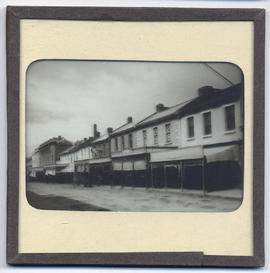
Lantern slide from the collection of James Backhouse Walker of a streetscape in Hobart, Tasmania. Thought to have been prepared by J.W. Beattie (1859-1930) whose studio locations were in Elizabeth Street, Hobart from 1891-1920, Murray Street from 1921-40 and Cat and Fiddle Arcade, Hobart, until 1994.
John Watt Beattie
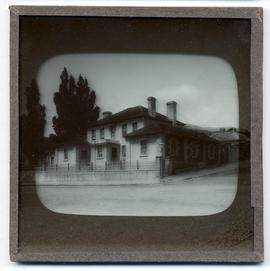
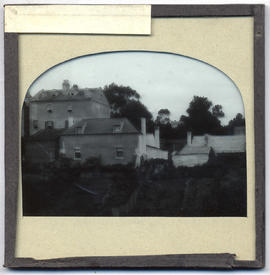
House, Hunter Street, Hobart, Van Diemen's Land
Fait partie de Walker Family Papers
Lantern slide of house in Hunter Street, Hobart. Prepared by J.W. Beattie (1859-1930) whose studio locations were Elizabeth Street, Hobart from 1891-1920, Murray Street from 1921-40 and Cat and Fiddle until 1994.
John Watt Beattie
Fait partie de Walker Family Papers
Lantern slide of house in Hobart. Prepared by J.W. Beattie (1859-1930) whose studio locations were Elizabeth Street, Hobart from 1891-1920, Murray Street from 1921-40 and Cat and Fiddle until 1994.
John Watt Beattie
Early Hobart Town, Van Diemen's Land
Fait partie de Walker Family Papers
Lantern slide from the collection of James Backhouse Walker of early Hobart Town, Van Diemen's Land from the harbour. Thought to have been prepared by J.W. Beattie (1859-1930) whose studio locations were in Elizabeth Street, Hobart from 1891-1920, Murray Street from 1921-40 and Cat and Fiddle Arcade, Hobart, until 1994. Quaker Collection.
John Watt Beattie
Buildings, early Hobart, Tasmania
Fait partie de Walker Family Papers
Lantern slide from the collection of James Backhouse Walker of buildings in early Hobart, Tasmania. Thought to have been prepared by J.W. Beattie (1859-1930) whose studio locations were in Elizabeth Street, Hobart from 1891-1920, Murray Street from 1921-40 and Cat and Fiddle Arcade, Hobart, until 1994.
John Watt Beattie
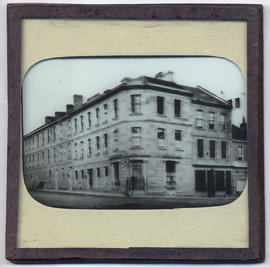
Buildings on the corner of Murray and Macquarie Street, Hobart ,Tasmania
Fait partie de Walker Family Papers
Lantern slide from the collection of James Backhouse Walker of buildings on the corner of Murray and Macquarie Street, Hobart, Tasmania. Thought to have been prepared by J.W. Beattie (1859-1930) whose studio locations were in Elizabeth Street, Hobart from 1891-1920, Murray Street from 1921-40 and Cat and Fiddle Arcade, Hobart, until 1994. Quaker Collection.
John Watt Beattie
Fait partie de Walker Family Papers
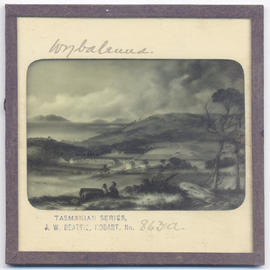
Lantern slide of Wybalena, Flinders Island. Prepared by J.W. Beattie (1859-1930) whose studio locations were Elizabeth Street, Hobart from 1891-1920, Murray Street from 1921-40 and Cat and Fiddle until 1994.
John Watt Beattie
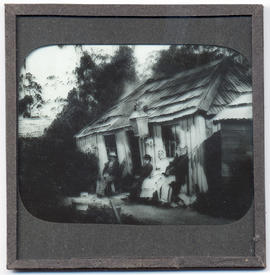
Wood's hut, the Springs, Mount Wellington, Hobart, Tasmania
Fait partie de Walker Family Papers
Lantern slide of Wood's hut, the Springs, Mount Wellington, Hobart. Prepared by J.W. Beattie (1859-1930) whose studio locations were Elizabeth Street, Hobart from 1891-1920, Murray Street from 1921-40 and Cat and Fiddle until 1994.
John Watt Beattie
Waterloo Hotel, corner Murray and Davey Streets, Hobart, Van Diemen's Land, 1832
Fait partie de Walker Family Papers
Lantern slide of Waterloo Hotel on the corner of Murray and Davey Streets, Hobart - from a painting dated 1832. Renamed Waterloo Tavern in 1842. Prepared by J.W. Beattie (1859-1930) whose studio locations were Elizabeth Street, Hobart from 1891-1920, Murray Street from 1921-40 and Cat and Fiddle until 1994.
John Watt Beattie
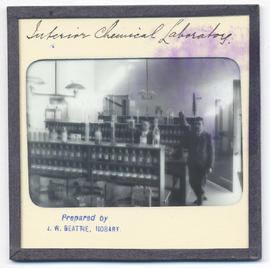
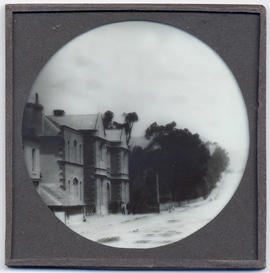
Fait partie de Walker Family Papers
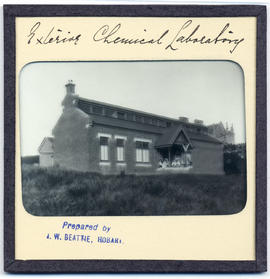
Lantern slides of the University of Tasmania, Queen's Domain, Hobart. Views of exterior and laboratories and library. Prepared by J.W. Beattie (1859-1930) whose studio locations were Elizabeth Street, Hobart from 1891-1920, Murray Street from 1921-40 and Cat and Fiddle until 1994 (Collection Pr.S.Uni/1-8)
John Watt Beattie
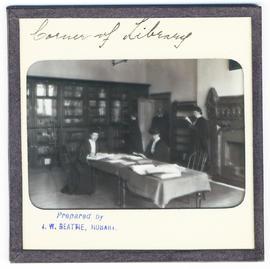
Corner of library, University of Tasmania, Queen's Domain, Hobart, late nineteenth century
Fait partie de Walker Family Papers
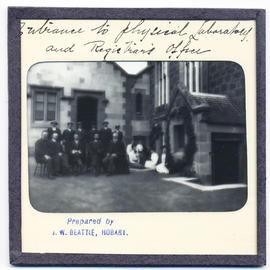
Lantern slides of the University of Tasmania, Queen's Domain, Hobart. Views of exterior and laboratories and library. Prepared by J.W. Beattie (1859-1930) whose studio locations were Elizabeth Street, Hobart from 1891-1920, Murray Street from 1921-40 and Cat and Fiddle until 1994 (Collection Pr.S.Uni/1-8)
John Watt Beattie
Fait partie de Walker Family Papers
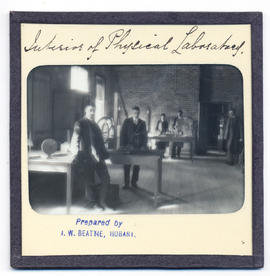
Lantern slides of the University of Tasmania, Queen's Domain, Hobart. Views of exterior and laboratories and library. Prepared by J.W. Beattie (1859-1930) whose studio locations were Elizabeth Street, Hobart from 1891-1920, Murray Street from 1921-40 and Cat and Fiddle until 1994 (Collection Pr.S.Uni/1-8)
John Watt Beattie
Fait partie de Walker Family Papers
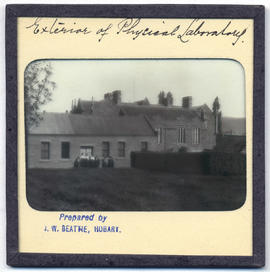
Lantern slides of the University of Tasmania, Queen's Domain, Hobart. Views of exterior and laboratories and library. Prepared by J.W. Beattie (1859-1930) whose studio locations were Elizabeth Street, Hobart from 1891-1920, Murray Street from 1921-40 and Cat and Fiddle until 1994 (Collection Pr.S.Uni/1-8)
John Watt Beattie
Fait partie de Walker Family Papers
Lantern slides of the University of Tasmania, Queen's Domain, Hobart. Views of exterior and laboratories and library. Prepared by J.W. Beattie (1859-1930) whose studio locations were Elizabeth Street, Hobart from 1891-1920, Murray Street from 1921-40 and Cat and Fiddle until 1994 (Collection Pr.S.Uni/1-8)
John Watt Beattie
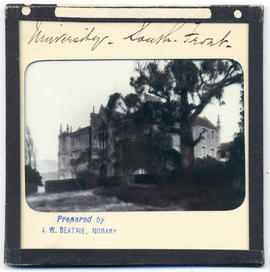
South front, University of Tasmania, Queen's Domain, Hobart, late nineteenth century
Fait partie de Walker Family Papers
Lantern slides of the University of Tasmania, Queen's Domain, Hobart. Views of exterior and laboratories and library. Prepared by J.W. Beattie (1859-1930) whose studio locations were Elizabeth Street, Hobart from 1891-1920, Murray Street from 1921-40 and Cat and Fiddle until 1994 (Collection Pr.S.Uni/1-8)
John Watt Beattie
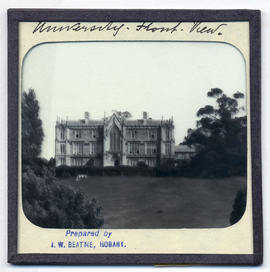
University of Tasmania, Queen's Domain, Hobart, late nineteenth century
Fait partie de Walker Family Papers
Lantern slides of the University of Tasmania, Queen's Domain, Hobart. Views of exterior and laboratories and library. Prepared by J.W. Beattie (1859-1930) whose studio locations were Elizabeth Street, Hobart from 1891-1920, Murray Street from 1921-40 and Cat and Fiddle until 1994 (Collection Pr.S.Uni/1-8)
John Watt Beattie
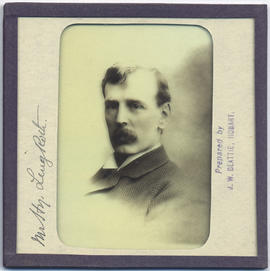
Henry Ling Roth (1855-1925) Tasmania
Fait partie de Walker Family Papers
Lantern slide photograph of Henry Ling Roth. Prepared by J.W. Beattie (1859-1930) whose studio locations were Elizabeth Street, Hobart from 1891-1920, Murray Street from 1921-40 and Cat and Fiddle until 1994.
John Watt Beattie
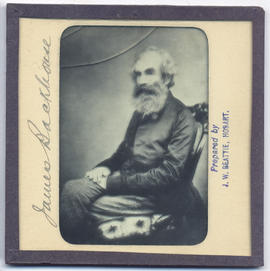
James Backhouse (1794-1869) Tasmania
Fait partie de Walker Family Papers
Lantern slide of James Backhouse. Prepared by J.W. Beattie (1859-1930) whose studio locations were Elizabeth Street, Hobart from 1891-1920, Murray Street from 1921-40 and Cat and Fiddle until 1994.
John Watt Beattie
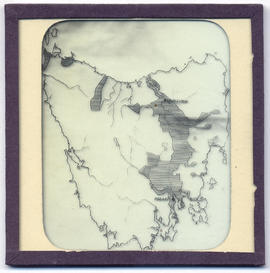
Fait partie de Walker Family Papers
Lantern slide of maps of Tasmania. Prepared by J.W. Beattie (1859-1930) whose studio locations were Elizabeth Street, Hobart from 1891-1920, Murray Street from 1921-40 and Cat and Fiddle until 1994.
John Watt Beattie
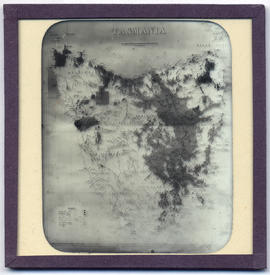
Fait partie de Walker Family Papers
Lantern slide of maps of Tasmania. Prepared by J.W. Beattie (1859-1930) whose studio locations were Elizabeth Street, Hobart from 1891-1920, Murray Street from 1921-40 and Cat and Fiddle until 1994.
John Watt Beattie
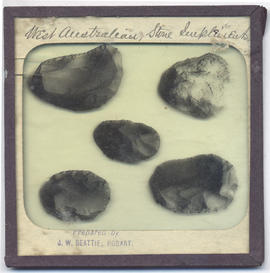
West Australian Aboriginal stone implements
Fait partie de Walker Family Papers
Lantern slide of West Australian aboriginal stone implements. Prepared by J.W. Beattie (1859-1930) whose studio locations were Elizabeth Street, Hobart from 1891-1920, Murray Street from 1921-40 and Cat and Fiddle until 1994.
John Watt Beattie
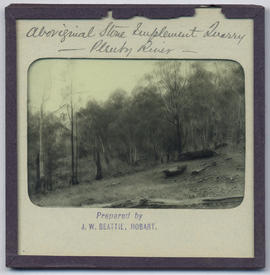
Plenty River, Van Diemen's Land, Tasmanian Aboriginal Stone Implement Quarry
Fait partie de Walker Family Papers
Lantern slides of Tasmanian aboriginal stone implement quarry, Plenty river. Prepared by J.W. Beattie (1859-1930) whose studio locations were Elizabeth Street, Hobart from 1891-1920, Murray Street from 1921-40 and Cat and Fiddle until 1994.
John Watt Beattie

Tasmanian Aboriginal Stone Implement Quarry, Plenty River, Van Diemen's Land
Fait partie de Walker Family Papers
Lantern slides of Tasmanian aboriginal stone implement quarry, Plenty river. Prepared by J.W. Beattie (1859-1930) whose studio locations were Elizabeth Street, Hobart from 1891-1920, Murray Street from 1921-40 and Cat and Fiddle until 1994.
John Watt Beattie
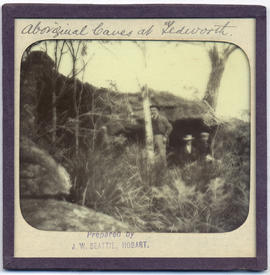
Fait partie de Walker Family Papers
Lantern slide of aboriginal caves at Tedworth. Prepared by J.W. Beattie (1859-1930) whose studio locations were Elizabeth Street, Hobart from 1891-1920, Murray Street from 1921-40 and Cat and Fiddle until 1994.
John Watt Beattie
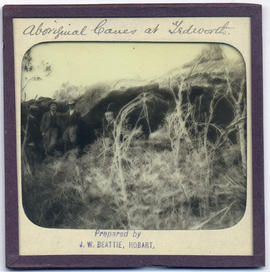
Fait partie de Walker Family Papers
Lantern slide of aboriginal caves at Tedworth. Prepared by J.W. Beattie (1859-1930) whose studio locations were Elizabeth Street, Hobart from 1891-1920, Murray Street from 1921-40 and Cat and Fiddle until 1994.
John Watt Beattie
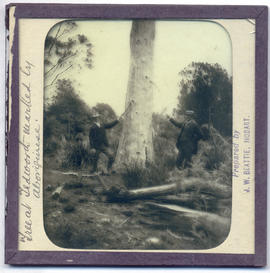
Tree marked by aborigines, Tedworth
Fait partie de Walker Family Papers
Lantern slide of a tree marked by aborigines at Tedworth. Prepared by J.W. Beattie (1859-1930) whose studio locations were Elizabeth Street, Hobart from 1891-1920, Murray Street from 1921-40 and Cat and Fiddle until 1994.
John Watt Beattie
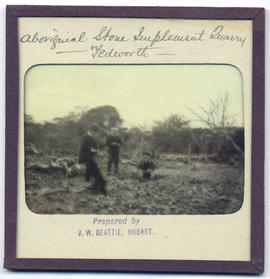
Fait partie de Walker Family Papers
Lantern slide of an aboriginal implement quarry at Tedworth. Prepared by J.W. Beattie (1859-1930) whose studio locations were Elizabeth Street, Hobart from 1891-1920, Murray Street from 1921-40 and Cat and Fiddle until 1994.
John Watt Beattie
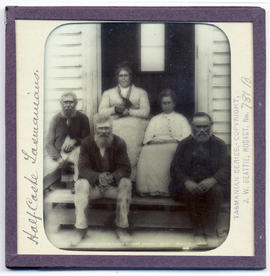
Fait partie de Walker Family Papers
Lantern slide of mixed race Tasmanian aborigines. Prepared by J.W. Beattie (1859-1930) whose studio locations were Elizabeth Street, Hobart from 1891-1920, Murray Street from 1921-40 and Cat and Fiddle until 1994. The fourth person from the left is believed to be Mary Everett and the fifth person is believed to be Bunny Brown.
John Watt Beattie
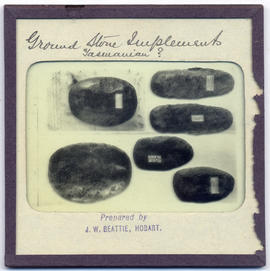
Ground stone Aboriginal implements
Fait partie de Walker Family Papers
Lantern slide of ground stone aboriginal implements. Prepared by J.W. Beattie (1859-1930) whose studio locations were Elizabeth Street, Hobart from 1891-1920, Murray Street from 1921-40 and Cat and Fiddle until 1994.
John Watt Beattie
Fait partie de Walker Family Papers
Lantern slide of a Tasmanian aboriginal woman. Prepared by J.W. Beattie (1859-1930) whose studio locations were Elizabeth Street, Hobart from 1891-1920, Murray Street from 1921-40 and Cat and Fiddle until 1994.
John Watt Beattie
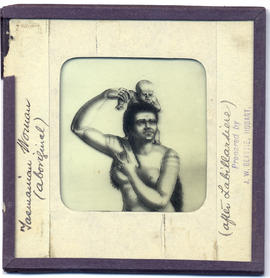
Tasmanian Aboriginal woman and child
Fait partie de Walker Family Papers
Lantern slide of Tasmanian aboriginal woman and child 'after Labillardiere'. Prepared by J.W. Beattie (1859-1930) whose studio locations were Elizabeth Street, Hobart from 1891-1920, Murray Street from 1921-40 and Cat and Fiddle until 1994
John Watt Beattie
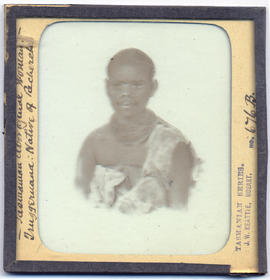
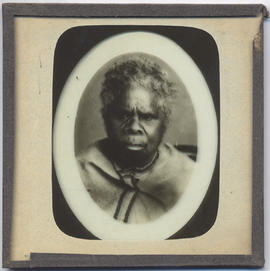
Tasmanian Aboriginal woman Truggeruana, native of Recherche, Van Diemen's Land
Fait partie de Walker Family Papers
Lantern slide of Tasmanian aboriginal woman Truggeruana, native of Recherche. Prepared by J.W. Beattie (1859-1930) whose studio locations were Elizabeth Street, Hobart from 1891-1920, Murray Street from 1921-40 and Cat and Fiddle until 1994
John Watt Beattie
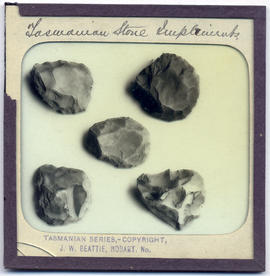
Tasmanian Aboriginal stone implements
Fait partie de Walker Family Papers
Lantern slide of Tasmanian aboriginal stone implements. Prepared by J.W. Beattie (1859-1930) whose studio locations were Elizabeth Street, Hobart from 1891-1920, Murray Street from 1921-40 and Cat and Fiddle until 1994.
John Watt Beattie
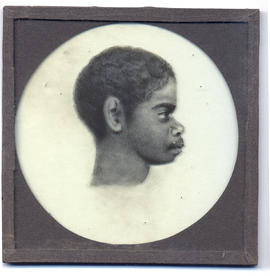
Fait partie de Walker Family Papers
Lantern slide of Tasmanian aboriginal profile. Prepared by J.W. Beattie (1859-1930) whose studio locations were Elizabeth Street, Hobart from 1891-1920, Murray Street from 1921-40 and Cat and Fiddle until 1994.
John Watt Beattie
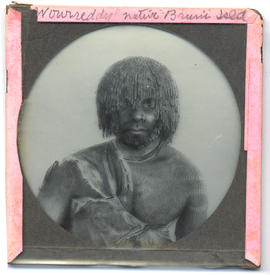
Tasmanian Aboriginal man Woureddy, native of Bruny Island, Van Diemen's Land
Fait partie de Walker Family Papers
Lantern slide of Tasmanian aboriginal man Woureddy, native of Bruni[Bruny]Island. Prepared by J.W. Beattie (1859-1930) whose studio locations were Elizabeth Street, Hobart from 1891-1920, Murray Street from 1921-40 and Cat and Fiddle until 1994.
John Watt Beattie

Tasmanian Aboriginal man Timmy, native of the East Coast, Van Diemen's Land
Fait partie de Walker Family Papers
Lantern slide of Tasmanian aboriginal man Timmy, native of the East Coast. Prepared by J.W. Beattie (1859-1930) whose studio locations were Elizabeth Street, Hobart from 1891-1920, Murray Street from 1921-40 and Cat and Fiddle until 1994.
John Watt Beattie
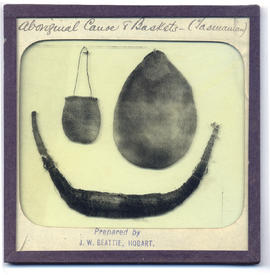
Tasmanian Aboriginal canoe and baskets
Fait partie de Walker Family Papers
Lantern slide of Tasmanian aboriginal canoe and baskets. Prepared by J.W. Beattie (1859-1930) whose studio locations were Elizabeth Street, Hobart from 1891-1920, Murray Street from 1921-40 and Cat and Fiddle until 1994.
John Watt Beattie
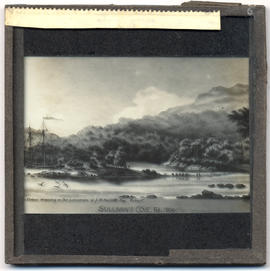
Sullivans Cove, Hobart Town, Van Diemen's Land in 1804
Fait partie de Walker Family Papers
Lantern slide of Sullivans Cove, Hobart Town, Van Diemen's Land, in February, 1804. Inscribed with the words 'Water colour drawing in the possession of J. B. Walker Esq., Hobart, 1891'.
John Watt Beattie
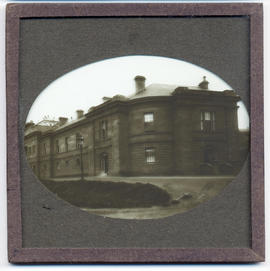
Stonemason's house, Hobart ,Tasmania
Fait partie de Walker Family Papers
Lantern slide from the collection of James Backhouse Walker of Stonemason's house, Hobart, Tasmania. Thought to have been prepared by J.W. Beattie (1859-1930) whose studio locations were in Elizabeth Street, Hobart from 1891-1920, Murray Street from 1921-40 and Cat and Fiddle Arcade, Hobart, until 1994.
John Watt Beattie
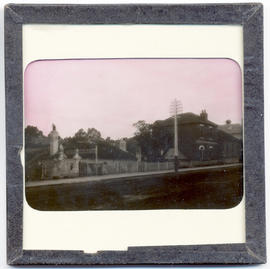
St. David's Park, Davey Street, Hobart, Tasmania
Fait partie de Walker Family Papers
Lantern slide from the collection of James Backhouse Walker of St. David's Park, Davey Street, Hobart, Tasmania. Thought to have been prepared by J.W. Beattie (1859-1930) whose studio locations were in Elizabeth Street, Hobart from 1891-1920, Murray Street from 1921-40 and Cat and Fiddle Arcade, Hobart, until 1994. Quaker Collection.
John Watt Beattie
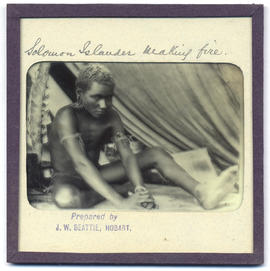
Fait partie de Walker Family Papers
Lantern slide of Solomon Islander making fire. Prepared by J.W. Beattie (1859-1930) whose studio locations were Elizabeth Street, Hobart from 1891-1920, Murray Street from 1921-40 and Cat and Fiddle until 1994.
John Watt Beattie
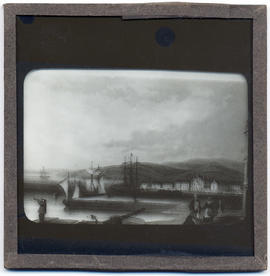
Salamanca from Wharf, Hobart Town, Van Diemen's Land
Fait partie de Walker Family Papers
Lantern slide from the collection of James Backhouse Walker of Salamanca from the Wharf, Hobart Town, Van Diemen's Land 1847. Prepared by J.W. Beattie (1859-1930) whose studio locations were in Elizabeth Street, Hobart from 1891-1920, Murray Street from 1921-40 and Cat and Fiddle Arcade, Hobart, until 1994. Quaker Collection.
John Watt Beattie
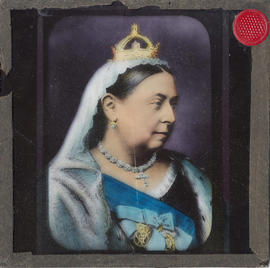
Fait partie de Walker Family Papers
Lantern Slide of Queen Victoria, England.
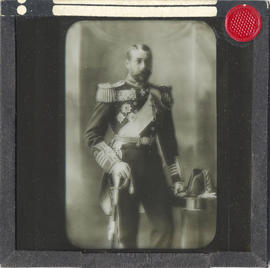
Fait partie de Walker Family Papers
Lantern Slide of Prince Albert, husband of Queen Victoria, England.
Parliament House, Hobart, Tasmania
Fait partie de Walker Family Papers
Lantern slide of Parliament House, Hobart. Prepared by J.W. Beattie (1859-1930) whose studio locations were Elizabeth Street, Hobart from 1891-1920, Murray Street from 1921-40 and Cat and Fiddle until 1994.
John Watt Beattie
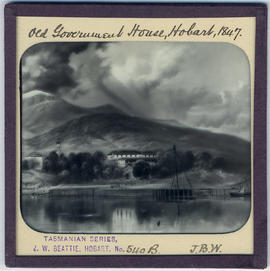
Old Government House, Hobart Town, Van Diemen's Land 1847
Fait partie de Walker Family Papers
Lantern slide of early print of Old Government House, Hobart Town, Van Diemen's Land in 1847. From the collection of James Backhouse Walker. Prepared by J.W. Beattie (1859-1930) whose studio locations were in Elizabeth Street, Hobart from 1891-1920, Murray Street from 1921-40 and Cat and Fiddle Arcade, Hobart, until 1994.
John Watt Beattie
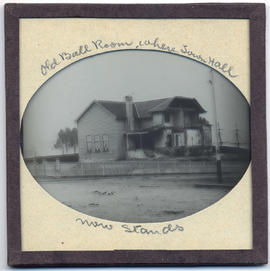
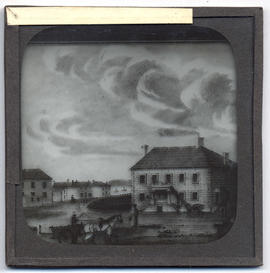
Old Ball Room where Town Hall now stands, Hobart
Fait partie de Walker Family Papers
Lantern slide from the collection of James Backhouse Walker of the demolition of the old ball room where the Town Hall now stands, Hobart, Tasmania. Thought to have been prepared by J.W. Beattie (1859-1930) whose studio locations were in Elizabeth Street, Hobart from 1891-1920, Murray Street from 1921-40 and Cat and Fiddle Arcade, Hobart, until 1994.
John Watt Beattie
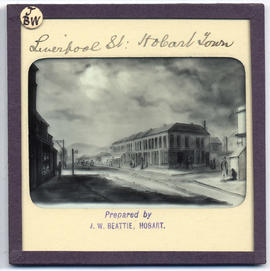
Fait partie de Walker Family Papers
Lantern slide of Liverpool Street, Hobart. Prepared by J.W. Beattie (1859-1930) whose studio locations were Elizabeth Street, Hobart from 1891-1920, Murray Street from 1921-40 and Cat and Fiddle until 1994.
John Watt Beattie
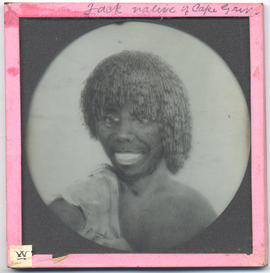
Fait partie de Walker Family Papers
Lantern slide of Jack, native of Cape Grim. Prepared by J.W. Beattie (1859-1930) whose studio locations were Elizabeth Street, Hobart from 1891-1920, Murray Street from 1921-40 and Cat and Fiddle until 1994.
John Watt Beattie
Fait partie de Walker Family Papers
Lantern slide of J. Walch and Sons, Macquarie Street, Hobart c1880. Prepared by J.W. Beattie (1859-1930) whose studio locations were Elizabeth Street, Hobart from 1891-1920, Murray Street from 1921-40 and Cat and Fiddle until 1994.
John Watt Beattie

Hobart Town, Van Diemen's Land, from Old Wharf in 1839
Fait partie de Walker Family Papers
Lantern slide of Hobart Town, Van Diemen's Land, from Old Wharf in 1839. From the collection of James Backhouse Walker. Prepared by J.W. Beattie (1859-1930) whose studio locations were in Elizabeth Street, Hobart from 1891-1920, Murray Street from 1921-40 and Cat and Fiddle Arcade, Hobart, until 1994.
John Watt Beattie
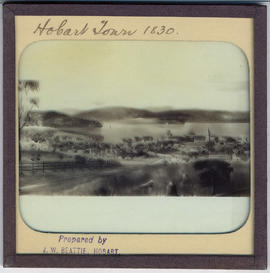
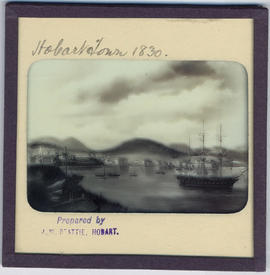
Hobart Town, Van Diemen's Land in 1830
Fait partie de Walker Family Papers
Lantern slide of early print of Hobart Town, Van Diemen's Land in 1830. From the collection of James Backhouse Walker. Prepared by J.W. Beattie (1859-1930) whose studio locations were in Elizabeth Street, Hobart from 1891-1920, Murray Street from 1921-40 and Cat and Fiddle Arcade, Hobart, until 1994.
John Watt Beattie
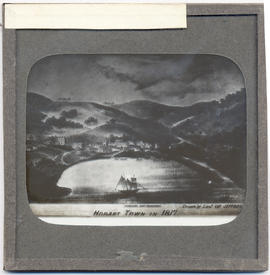
Hobart Town, Van Diemen's Land in 1817
Fait partie de Walker Family Papers
Lantern slide of Hobart Town, Van Diemen's Land, in February, 1817. Inscribed with the words 'Hobart Town in 1817. Drawn by Lieut. Charles Jeffreys' - also shows the Government schooner the Kangaroo , church, Government House and Fort.
Charles Jeffreys
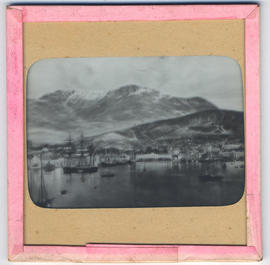
Hobart Town, Van Diemen's Land from the Harbour
Fait partie de Walker Family Papers
Lantern slide of an early print of Hobart Town, Van Diemen's Land from the harbour. From the collection of James Backhouse Walker. Thought to have been prepared by J.W. Beattie (1859-1930) whose studio locations were in Elizabeth Street, Hobart from 1891-1920, Murray Street from 1921-40 and Cat and Fiddle Arcade, Hobart, until 1994.
John Watt Beattie
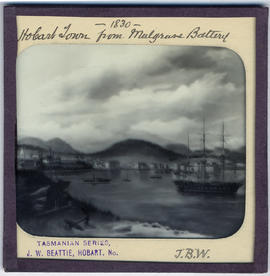
Hobart Town from Mulgrave Battery, Van Diemen's Land
Fait partie de Walker Family Papers
Lantern slide of Hobart Town from Mulgrave Battery, Van Diemen's Land, in 1830. From the collection of James Backhouse Walker. Prepared by J.W. Beattie (1859-1930) whose studio locations were in Elizabeth Street, Hobart from 1891-1920, Murray Street from 1921-40 and Cat and Fiddle Arcade, Hobart, until 1994.
John Watt Beattie
Hobart Town Harbour, Van Diemen's Land
Fait partie de Walker Family Papers
Lantern slide of Hobart Town Harbour, Van Diemen's Land, in 1830. Prepared by J.W. Beattie (1859-1930) whose studio locations were in Elizabeth Street, Hobart from 1891-1920, Murray Street from 1921-40 and Cat and Fiddle Arcade, Hobart, until 1994.
John Watt Beattie
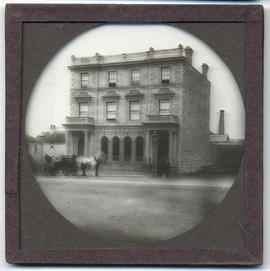
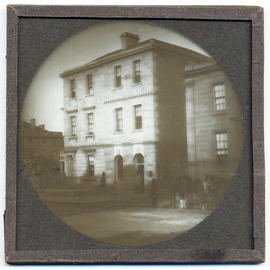
Fait partie de Walker Family Papers
Lantern slide of Hobart Savings Bank, Murray Street Hobart c1860. Prepared by J.W. Beattie (1859-1930) whose studio locations were Elizabeth Street, Hobart from 1891-1920, Murray Street from 1921-40 and Cat and Fiddle until 1994.
John Watt Beattie