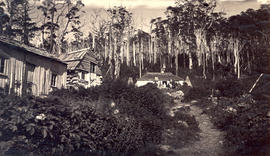
Group at Woods Huts, Mt Wellington
- AU TAS UTAS SPARC W9-Ph-136-15
- Sub-item
- c1870
Part of Walker Family Papers
Photograph of a group of people outside of Woods Hut, Mt Wellington.
James Backhouse Walker
Group at Woods Huts, Mt Wellington
Part of Walker Family Papers
Photograph of a group of people outside of Woods Hut, Mt Wellington.
James Backhouse Walker
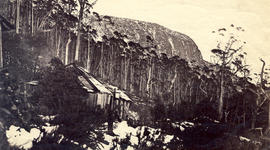
Woods Huts, Mt Wellington in the snow
Part of Walker Family Papers
Photograph of Woods Huts, Mt Wellington in the snow. Organ pipes in distance
James Backhouse Walker
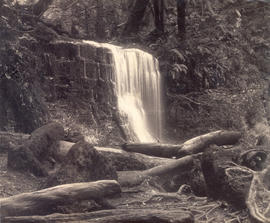
Fern Tree Bower and Silver Falls,
Part of Walker Family Papers
Photographs of Silver Falls, Fern Tree Bower, Mount Wellington c.1880 taken by Anson Brothers who had studios in Liverpool, Collins, and Elizabeth Streets between 1878 and 1891.
James Backhouse Walker
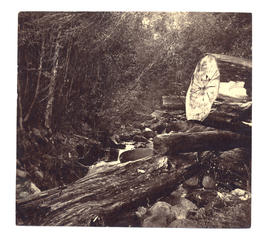
Part of Walker Family Papers
Photographs of Waterworks off Huon Road. Flowing stream and felled tree.
James Backhouse Walker
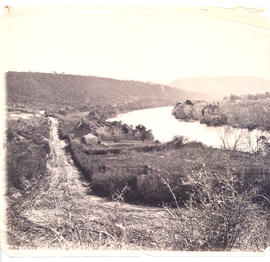
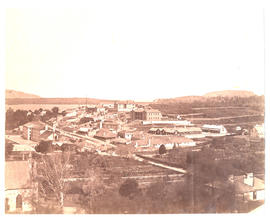
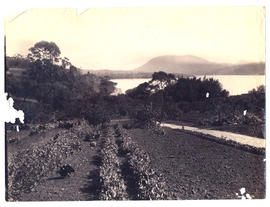
Derwent River above New Norfolk
Part of Walker Family Papers
Photograph of the Derwent River just above New Norfolk, Tasmania. Showing track, buildings, orchard and river.
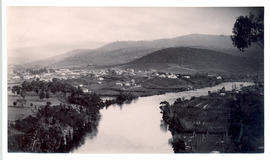
Part of Walker Family Papers
Photograph of New Norfolk, Tasmania from the opposite side of the river. Showing the town and bridge.
Henry Hall Baily
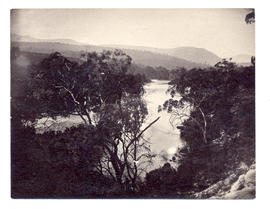
Derwent River above New Norfolk
Part of Walker Family Papers
Photograph of the Derwent River above New Norfolk, Tasmania. Looking down the river.
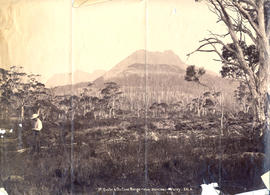
Part of Walker Family Papers
Photograph of Mt. Gould and the DuCane Range from Narcissus Valley, Lake St. Clair taken from camp on the left hand side of Narcissus Valley going up (according to notes on the reverse of the photograph).
Port Arthur from behind the church and doctor's house
Part of Walker Family Papers
Photograph of the settlement of Port Arthur from behind the church and Doctor's house c. 1880. View of vegetable gardens in foreground. The photographers are Anson Brothers., Portrait and Landscape Photographers, Hobart Town whose firm was located in Liverpool, Collins and Elizabeth Streets between 1878 and 1891.
Henry Hall Baily
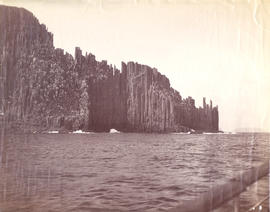
Part of Walker Family Papers
Photograph of Cape Pillar on the Tasman Peninsula.
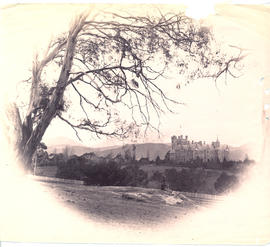
Government House from the Domain
Part of Walker Family Papers
Vignette photograph of Government House, Hobart, Tasmania taken from the Domain in about 1880. Showing gentleman in a bowler hat sitting on mound.
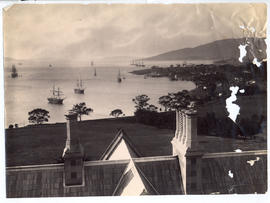
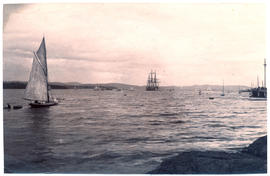
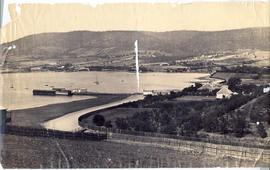
View from the roof of Government House
Part of Walker Family Papers
Photograph of ships on the Derwent River taken from the roof of Government House, Hobart, Tasmania in 1882. The photographer was Henry Hall Baily who had studios in Elizabeth and Liverpool Streets, Hobart from 1865 until 1918.
Henry Hall Baily

Government House from the Queen's Domain
Part of Walker Family Papers
Photograph of Government House, Hobart taken from the Queen's Domain, c. 1890s. A note on the reverse says 'after railway'. The photographer was Henry Hall Baily who had studios in Elizabeth and Liverpool Streets, Hobart from 1865 until 1918.
Henry Hall Baily
Part of Walker Family Papers
Photograph of view from Government House looking over a vegetable garden and orchard which could either be in the Government House or Botanical Gardens grounds with the River Derwent and Mt. Direction in the background.
Part of Walker Family Papers
Photograph of Sullivans Cove and Mount Wellington from the water with a three masted ship in foreground.
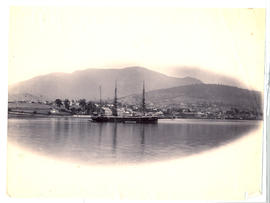
Boats and ships on the harbour
Part of Walker Family Papers
Photograph of boats and ships on the harbour in Hobart. c. 1880
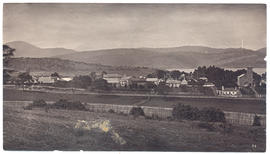
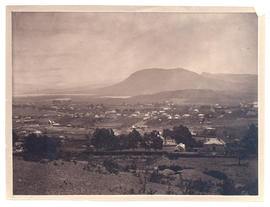
New Town from the Orphan School grounds
Part of Walker Family Papers
Photograph from the Orphan School grounds, New Town, Tasmania c.1870s. The photographer was Henry Hall Baily who had studios in Elizabeth and Liverpool Streets, Hobart from 1865 until 1918.
Henry Hall Baily
Part of Walker Family Papers
Photograph of New Town and Mt. Direction, Hobart, Tasmania from the hill above Beaulieu. The photographer was Alfred Winter who had studios in Bathurst, Elizabeth and Liverpool Streets from 1869 until 1891..
Alfred Winter
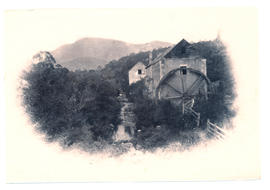
Part of Walker Family Papers
Photograph of Old Mill at New Town Creek showing creek, buildings and mill wheel. Mt Wellington in distance
James Backhouse Walker
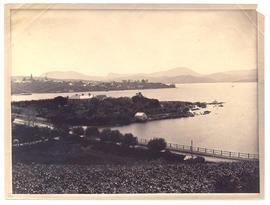
Marieville Esplanade, Sandy Bay
Part of Walker Family Papers
Photograph Marieville Esplanade, Sandy Bay looking toward lower Sandy Bay and Mt. Nelson
James Backhouse Walker
Part of Walker Family Papers
Photograph of Battery Point from Sandy Bay, Tasmania, with St. Helena, later Wrest Point, in foreground, St Georges Church in the distance, c.1881. The photographer was Alfred Winter who had studios in Bathurst, Elizabeth and Liverpool Streets from 1869 until 1891.
James Backhouse Walker
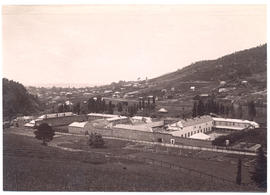
Cascades' Female Factory from the hill
Part of Walker Family Papers
Photograph of the Cascades' Female Factory looking down the South Hobart Valley toward the Derwent River. Showing yards and gardens. In 1828 a Female Factory opened on the outskirts of Hobart at Cascades. It became the colony's largest Factory, expanding by 1853 into five major courtyards accommodating 1000 women and 175 children. The photographer was J.W. Beattie (1859-1930) whose studios were in Elizabeth and Murray Streets between 1891 and 1940
John Watt Beattie
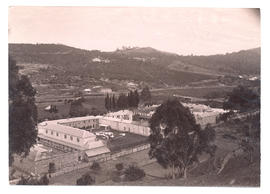
Cascades' Female Factory from the rear
Part of Walker Family Papers
Photograph of the Cascades' Female Factory from the rear showing yards with washing and horse. In 1828 a Female Factory opened on the outskirts of Hobart at Cascades. It became the colony's largest Factory, expanding by 1853 into five major courtyards accommodating 1000 women and 175 children. The photographer was J.W. Beattie (1859-1930) whose studios were in Elizabeth and Murray Streets between 1891 and 1940
John Watt Beattie

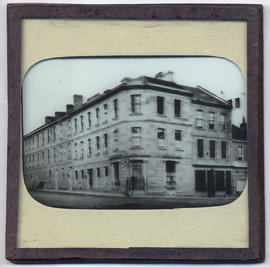
Part of Walker Family Papers
Lantern slide of Campbell and Minchin building, corner Elizabeth and Bathurst street, Hobart. Prepared by J.W. Beattie (1859-1930) whose studio locations were Elizabeth Street, Hobart from 1891-1920, Murray Street from 1921-40 and Cat and Fiddle until 1994.
John Watt Beattie
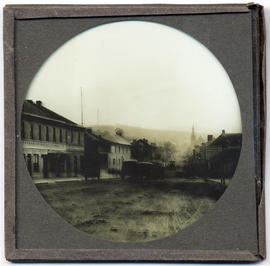
Part of Walker Family Papers
Lantern slide of Elizabeth Street, Hobart looking north. Prepared by J.W. Beattie (1859-1930) whose studio locations were Elizabeth Street, Hobart from 1891-1920, Murray Street from 1921-40 and Cat and Fiddle until 1994.
John Watt Beattie
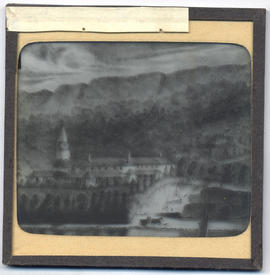
Government House and St David's Cathedral, Van Diemen's Land
Part of Walker Family Papers
Lantern slide of Government House and St David's Cathedral, Van Diemen's Land. Prepared by J.W. Beattie (1859-1930) whose studio locations were Elizabeth Street, Hobart from 1891-1920, Murray Street from 1921-40 and Cat and Fiddle until 1994. Lantern slide of detail from 'The Seat of His Excellency Lieut. Govr. Arthur / drawn from Nature and on Stone' by Charles Atkinson d.1837
John Watt Beattie
Part of Walker Family Papers
Lantern slide of Hobart Savings Bank, Murray Street Hobart c1860. Prepared by J.W. Beattie (1859-1930) whose studio locations were Elizabeth Street, Hobart from 1891-1920, Murray Street from 1921-40 and Cat and Fiddle until 1994.
John Watt Beattie
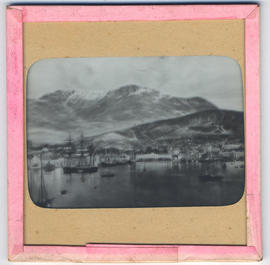
Hobart Town, Van Diemen's Land from the Harbour
Part of Walker Family Papers
Lantern slide of an early print of Hobart Town, Van Diemen's Land from the harbour. From the collection of James Backhouse Walker. Thought to have been prepared by J.W. Beattie (1859-1930) whose studio locations were in Elizabeth Street, Hobart from 1891-1920, Murray Street from 1921-40 and Cat and Fiddle Arcade, Hobart, until 1994.
John Watt Beattie
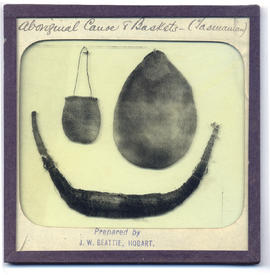
Tasmanian Aboriginal canoe and baskets
Part of Walker Family Papers
Lantern slide of Tasmanian aboriginal canoe and baskets. Prepared by J.W. Beattie (1859-1930) whose studio locations were Elizabeth Street, Hobart from 1891-1920, Murray Street from 1921-40 and Cat and Fiddle until 1994.
John Watt Beattie
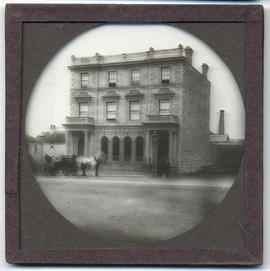
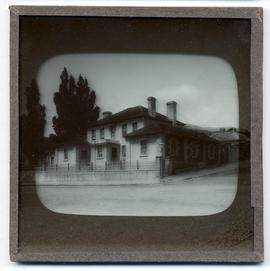
Buildings on the corner of Murray and Macquarie Street, Hobart ,Tasmania
Part of Walker Family Papers
Lantern slide from the collection of James Backhouse Walker of buildings on the corner of Murray and Macquarie Street, Hobart, Tasmania. Thought to have been prepared by J.W. Beattie (1859-1930) whose studio locations were in Elizabeth Street, Hobart from 1891-1920, Murray Street from 1921-40 and Cat and Fiddle Arcade, Hobart, until 1994. Quaker Collection.
John Watt Beattie
Part of Walker Family Papers
Lantern slide of house in Hobart. Prepared by J.W. Beattie (1859-1930) whose studio locations were Elizabeth Street, Hobart from 1891-1920, Murray Street from 1921-40 and Cat and Fiddle until 1994.
John Watt Beattie
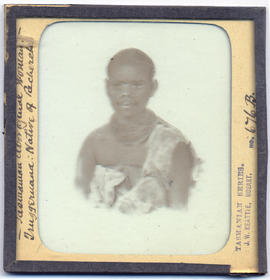
Tasmanian Aboriginal woman Truggeruana, native of Recherche, Van Diemen's Land
Part of Walker Family Papers
Lantern slide of Tasmanian aboriginal woman Truggeruana, native of Recherche. Prepared by J.W. Beattie (1859-1930) whose studio locations were Elizabeth Street, Hobart from 1891-1920, Murray Street from 1921-40 and Cat and Fiddle until 1994
John Watt Beattie

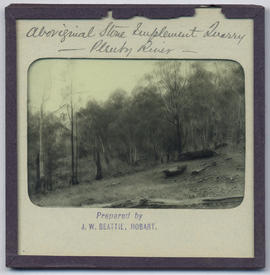
Tasmanian Aboriginal Stone Implement Quarry, Plenty River, Van Diemen's Land
Part of Walker Family Papers
Lantern slides of Tasmanian aboriginal stone implement quarry, Plenty river. Prepared by J.W. Beattie (1859-1930) whose studio locations were Elizabeth Street, Hobart from 1891-1920, Murray Street from 1921-40 and Cat and Fiddle until 1994.
John Watt Beattie
Plenty River, Van Diemen's Land, Tasmanian Aboriginal Stone Implement Quarry
Part of Walker Family Papers
Lantern slides of Tasmanian aboriginal stone implement quarry, Plenty river. Prepared by J.W. Beattie (1859-1930) whose studio locations were Elizabeth Street, Hobart from 1891-1920, Murray Street from 1921-40 and Cat and Fiddle until 1994.
John Watt Beattie
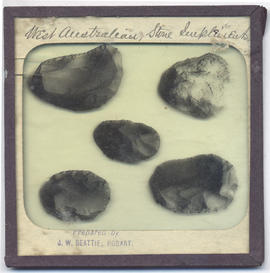
West Australian Aboriginal stone implements
Part of Walker Family Papers
Lantern slide of West Australian aboriginal stone implements. Prepared by J.W. Beattie (1859-1930) whose studio locations were Elizabeth Street, Hobart from 1891-1920, Murray Street from 1921-40 and Cat and Fiddle until 1994.
John Watt Beattie
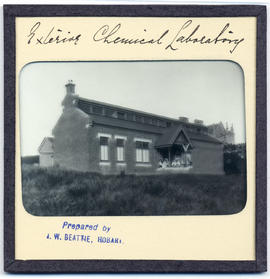
Part of Walker Family Papers
Lantern slides of the University of Tasmania, Queen's Domain, Hobart. Views of exterior and laboratories and library. Prepared by J.W. Beattie (1859-1930) whose studio locations were Elizabeth Street, Hobart from 1891-1920, Murray Street from 1921-40 and Cat and Fiddle until 1994 (Collection Pr.S.Uni/1-8)
John Watt Beattie
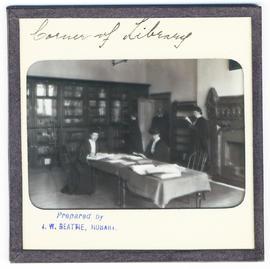
Corner of library, University of Tasmania, Queen's Domain, Hobart, late nineteenth century
Part of Walker Family Papers
Lantern slides of the University of Tasmania, Queen's Domain, Hobart. Views of exterior and laboratories and library. Prepared by J.W. Beattie (1859-1930) whose studio locations were Elizabeth Street, Hobart from 1891-1920, Murray Street from 1921-40 and Cat and Fiddle until 1994 (Collection Pr.S.Uni/1-8)
John Watt Beattie