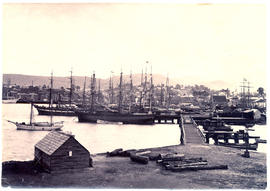
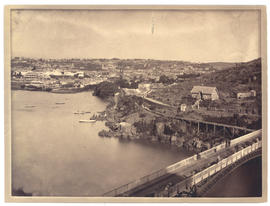
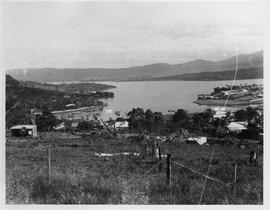
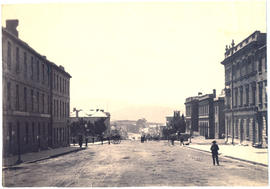
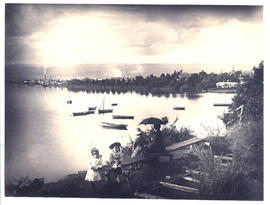
Hobart waterfront from Hunter Island
- AU TAS UTAS SPARC W9-Ph-142-4
- Sub-item
- n.d.
Part of Walker Family Papers
Photograph of the Hobart waterfront from Hunter Island looking towards Salamanca.
300 results with digital objects Show results with digital objects
Hobart waterfront from Hunter Island
Part of Walker Family Papers
Photograph of the Hobart waterfront from Hunter Island looking towards Salamanca.

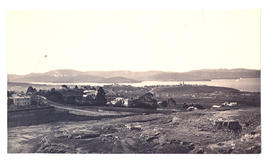
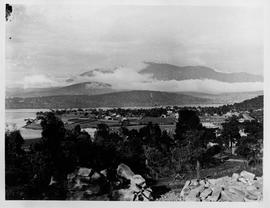
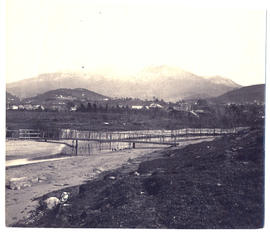
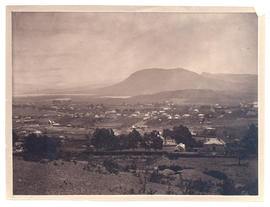
Hobart waterfront from the Queen's Domain
Part of Walker Family Papers
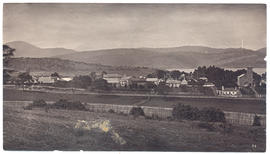
Photograph of the Hobart waterfront from the old quarry on the Queen's Domain taken in the 1870s before the railway.
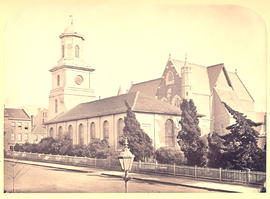
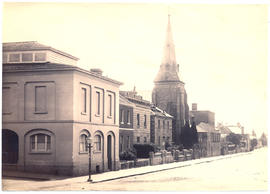
Hobart, looking towards St. George's Hill
Part of Walker Family Papers
Photograph from the collection of James Backhouse Walker of a view of Hobart, looking towards St. George's Hill, Battery Point. Showing St Georges Church and James Luckman's windmill probably taken in the 1870s.
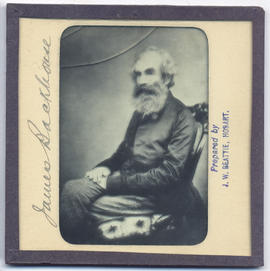
James Backhouse Walker
Part of Walker Family Papers
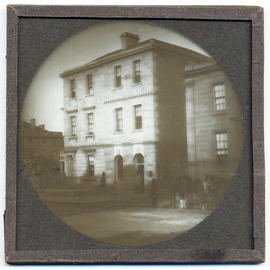
Lantern slide of house in Hobart. Prepared by J.W. Beattie (1859-1930) whose studio locations were Elizabeth Street, Hobart from 1891-1920, Murray Street from 1921-40 and Cat and Fiddle until 1994.
John Watt Beattie
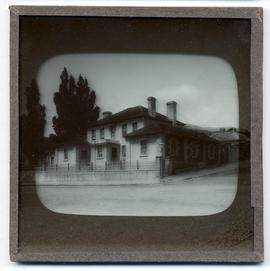
House, Hunter Street, Hobart, Van Diemen's Land
Part of Walker Family Papers
Lantern slide of house in Hunter Street, Hobart. Prepared by J.W. Beattie (1859-1930) whose studio locations were Elizabeth Street, Hobart from 1891-1920, Murray Street from 1921-40 and Cat and Fiddle until 1994.
John Watt Beattie

Huon Road with Mt Wellington in snow
Part of Walker Family Papers
Photograph of Huon Road with Mt Wellington in snow
James Backhouse Walker
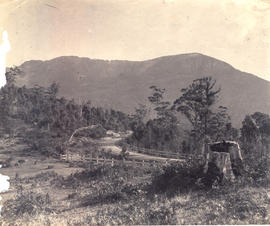
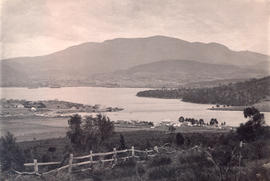
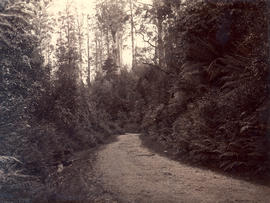
Huon Road with post and rail fence
Part of Walker Family Papers
Photograph of Huon Road with post and rail fence
James Backhouse Walker
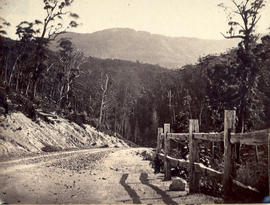
Huon Road with post and rail fence looking to Mt Wellington
Part of Walker Family Papers
Photograph of Huon Road with post and rail fence looking to Mt Wellington
James Backhouse Walker
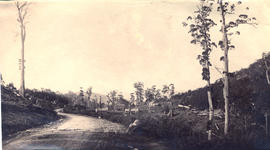
Part of Walker Family Papers
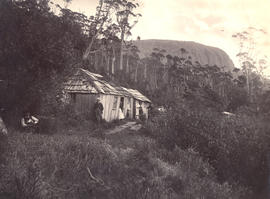
Photograph of Huon Road near Fern Tree Inn, Hobart, Tasmania, in about 1872 showing clearing and huts
James Backhouse Walker
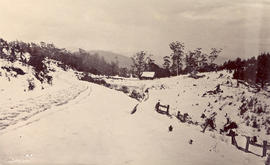
Part of Walker Family Papers
Photograph of Huon Road near Fern Tree Inn, Hobart, Tasmania, in about 1882 showing clearing and huts under snow
James Backhouse Walker
Part of Walker Family Papers
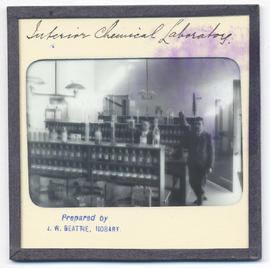
Lantern slides of the University of Tasmania, Queen's Domain, Hobart. Views of exterior and laboratories and library. Prepared by J.W. Beattie (1859-1930) whose studio locations were Elizabeth Street, Hobart from 1891-1920, Murray Street from 1921-40 and Cat and Fiddle until 1994 (Collection Pr.S.Uni/1-8)
John Watt Beattie
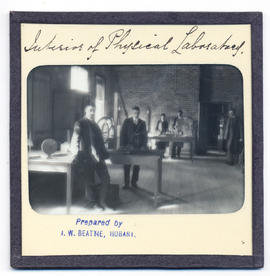
Part of Walker Family Papers
Lantern slides of the University of Tasmania, Queen's Domain, Hobart. Views of exterior and laboratories and library. Prepared by J.W. Beattie (1859-1930) whose studio locations were Elizabeth Street, Hobart from 1891-1920, Murray Street from 1921-40 and Cat and Fiddle until 1994 (Collection Pr.S.Uni/1-8)
John Watt Beattie
Part of Walker Family Papers
Lantern slide of J. Walch and Sons, Macquarie Street, Hobart c1880. Prepared by J.W. Beattie (1859-1930) whose studio locations were Elizabeth Street, Hobart from 1891-1920, Murray Street from 1921-40 and Cat and Fiddle until 1994.
John Watt Beattie
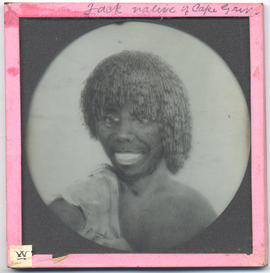
Part of Walker Family Papers
Lantern slide of Jack, native of Cape Grim. Prepared by J.W. Beattie (1859-1930) whose studio locations were Elizabeth Street, Hobart from 1891-1920, Murray Street from 1921-40 and Cat and Fiddle until 1994.
John Watt Beattie
James Backhouse (1794-1869) Tasmania
Part of Walker Family Papers
Lantern slide of James Backhouse. Prepared by J.W. Beattie (1859-1930) whose studio locations were Elizabeth Street, Hobart from 1891-1920, Murray Street from 1921-40 and Cat and Fiddle until 1994.
John Watt Beattie
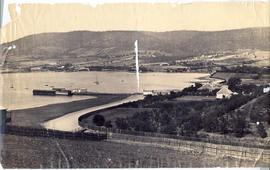
Part of Walker Family Papers
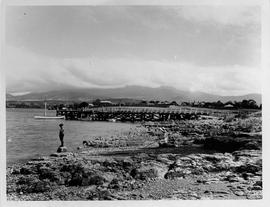
Photograph of Kangaroo Bay (Bellerive) on Hobart's Eastern Shore from hill showing wharf and houses c. 1882. The photographer was Henry Hall Baily who had studios in Elizabeth and Liverpool Streets, Hobart from 1865 until 1918.

Part of Walker Family Papers
Photograph of Kangaroo Point (Bellerive) Beach on Hobart's Eastern Shore looking toward settlement c. 1882. The photographer was Henry Hall Baily who had studios in Elizabeth and Liverpool Streets, Hobart from 1865 until 1918.

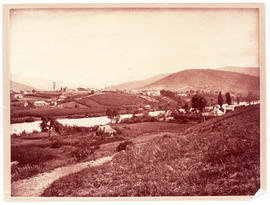
Launceston from beyond Cataract Bridge
Part of Walker Family Papers
Photograph of Launceston, Tasmania, from beyond the Cataract Bridge in about 1881. The photographer was Alfred Winter who had studios in Bathurst, Elizabeth and Liverpool Streets, Hobart, from 1869 until 1891.
Alfred Winter

Part of Walker Family Papers
Photograph of Launceston from Windmill Hill looking north taken in c1881. The photographer was Alfred Winter who had studios in Bathurst, Elizabeth and Liverpool Streets from 1869 until 1891.
Alfred Winter
Part of Walker Family Papers
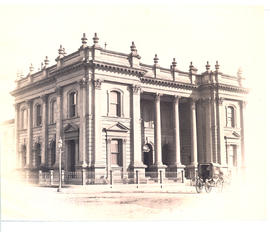
Photograph of the Town Hall in Launceston, Tasmania. The photographers were Anson Brothers who had studios in Liverpool, Collins and Elizabeth Streets, Hobart, between 1878 and 1891.
Anson Brothers
Part of Dennison Collection
Photograph of Lindisfarne taken from hill behind showing houses and jetties
Part of Dennison Collection
Photograph of Beltana or Lindisfarne jetty showing two young children playing in the foreground. Mt Wellington in the background.
Lindisfarne with a view to the mountain
Part of Dennison Collection
Photograph of Lindisfarne taken from hill behind showing quarried stone and a view to the mountain
Part of Walker Family Papers
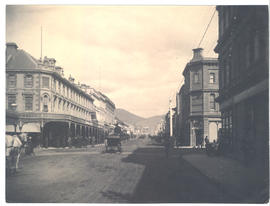
Photograph of Liverpool Street Hobart at the intersection of Elizabeth Street. Show gas lighting taken about 1870. The photographer is Alfred Winter who had studios in Bathurst, Elizabeth and Liverpool Streets from 1869 until 1891.
Alfred Winter
Part of Walker Family Papers
Photograph of Liverpool Street Hobart taken from just before the Elizabeth Street intersection around the turn of the century with horse drawn carriages in the foreground. The date is assumed from the presence of electric power poles which were introduced in 1898.
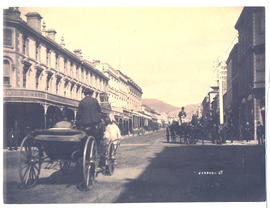
Liverpool Street Hobart with horse drawn carriages
Part of Walker Family Papers
Photograph of Liverpool Street Hobart taken around the turn of the century showing horse drawn carriages in the foreground. The date is assumed from the presence of electric power poles which were introduced in 1898.
Part of Walker Family Papers
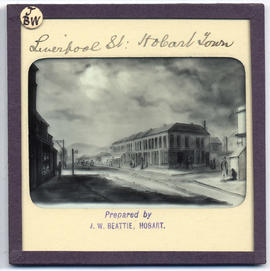
Lantern slide of Liverpool Street, Hobart. Prepared by J.W. Beattie (1859-1930) whose studio locations were Elizabeth Street, Hobart from 1891-1920, Murray Street from 1921-40 and Cat and Fiddle until 1994.
John Watt Beattie

Part of Walker Family Papers
Photograph of the lighthouse on Maatsuyker Island, Tasmania, taken on the day of the opening of the lighthouse in 1891
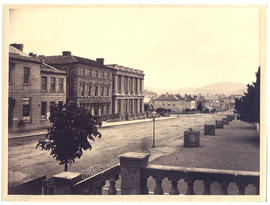
Macquarie Street, Hobart from Mercury Office
Part of Walker Family Papers
Photograph of north Macquarie Street from the Mercury office (with verandah) corner Macquarie and Argyle Street. Showing the Hobart Town Hall, Franklin Square and the Treasury buildings. Photographed byy Anson Brothers whose firm was located in Liverpool, Collins and Elizabeth Streets. Taken before September 25 1866, as this is the date of the grand opening of the Town Hall, shown on the left-hand side of the photograph
Anson Brothers
Macquarie Street, Hobart looking east
Part of Walker Family Papers
Photograph of Macquarie Street, Hobart looking east from the block above Murray Street in about 1870.
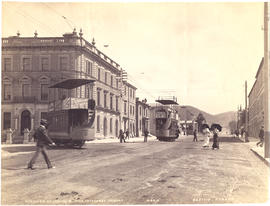
Macquarie Street, Hobart, Tasmania, looking south from St. David's Cathedral
Part of Walker Family Papers
Photograph of Macquarie Street looking south from St. David's Cathedral in about 1893 showing two electric trams. The photographer is J.W. Beattie whose studios were located in Elizabeth and Murray Streets from 1891 until 1994
John Watt Beattie
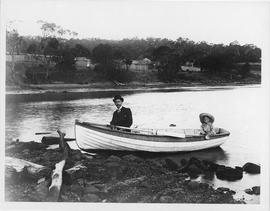
Man and small child in a rowboat
Part of Dennison Collection
Photograph of man and small child in a rowboat. Thought to be taken at Beltana now Lindisfarne.
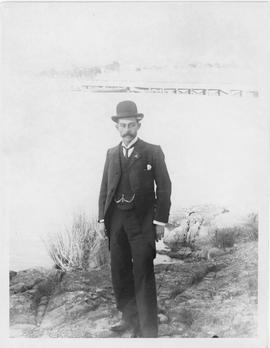
Part of Dennison Collection
Photograph of a man in a bowler hat standing on the foreshore. Thought to be Beltana now Lindisfarne jetty in the background.
Man with a gun on the road to Mt Wellington
Part of Walker Family Papers
Photograph of road to Mt Wellington showing man with a gun hunting. Taken in about 1870 by Alfred Winter, who had studios in Bathurst, Elizabeth and Liverpool Streets from 1869 until 1891.
James Backhouse Walker
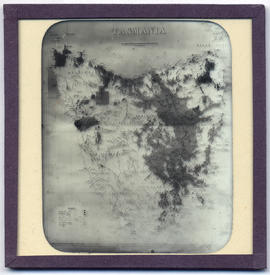
Part of Walker Family Papers
Lantern slide of maps of Tasmania. Prepared by J.W. Beattie (1859-1930) whose studio locations were Elizabeth Street, Hobart from 1891-1920, Murray Street from 1921-40 and Cat and Fiddle until 1994.
John Watt Beattie
Marieville Esplanade, Sandy Bay
Part of Walker Family Papers
Photograph Marieville Esplanade, Sandy Bay looking toward lower Sandy Bay and Mt. Nelson
James Backhouse Walker
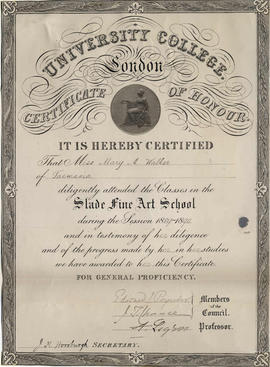
Mary Augusta Walker : certificate from the Slade Fine Art School, University College London
Part of Walker Family Papers 2007
Mary Augusta Walker's certificate from the Slade Fine Art School, University College London, where she studied from 1889-1890. From Walker Family Scrapbook compiled by Peter Benson Walker. Private collection. Page 45
Mary Augusta Walker
Men standing outside Woods Huts, Mt Wellington
Part of Walker Family Papers
Photograph of men standing outside Woods Huts, Mt Wellington, Organ pipes in distance
James Backhouse Walker
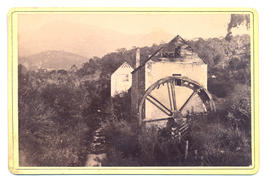
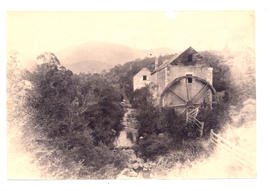
Part of Walker Family Papers
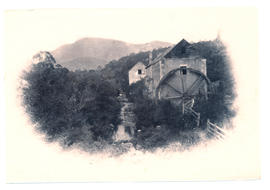
Photograph of Old Mill at New Town Creek showing creek, buildings and mill wheel. Mt Wellington in distance
James Backhouse Walker
Part of Walker Family Papers
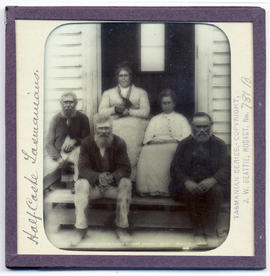
Lantern slide of mixed race Tasmanian aborigines. Prepared by J.W. Beattie (1859-1930) whose studio locations were Elizabeth Street, Hobart from 1891-1920, Murray Street from 1921-40 and Cat and Fiddle until 1994. The fourth person from the left is believed to be Mary Everett and the fifth person is believed to be Bunny Brown.
John Watt Beattie
Part of Walker Family Papers
Photograph of the Model Prison, Port Arthur, Tasmania.
Part of Walker Family Papers
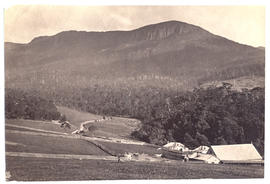
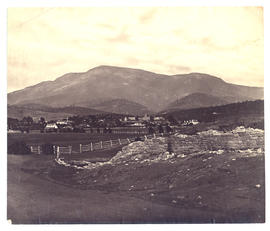
Photograph of Mount Wellington with farm buildings in the foreground in the vicinity of the Cascades Brewery, Hobart, Tasmania.
Anson Brothers
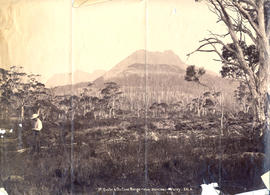
Part of Walker Family Papers
Photograph of Mt. Gould and the DuCane Range from Narcissus Valley, Lake St. Clair taken from camp on the left hand side of Narcissus Valley going up (according to notes on the reverse of the photograph).
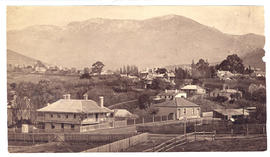
Mt. Wellington from St. George's Hill
Part of Walker Family Papers
Photograph from the collection of James Backhouse Walker of a view of Mt. Wellington from St. George's Hill with Hawthorn Cottage in the foreground and Bishopscourt - Garden Crescent and Davey Street Chapel in the background (according to notes on the reverse). The photographer was the Anson Brothers, whose firm was located in Liverpool, Collins and Elizabeth Streets between 1878 and 1891.
James Backhouse Walker
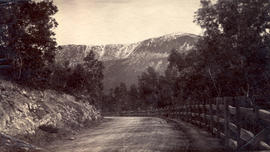
Part of Walker Family Papers
Photograph of snow capped Mt Wellington from Huon Road.
James Backhouse Walker
Mt. Wellington from the foot of St. George's Hill
Part of Walker Family Papers
Photograph from the collection of James Backhouse Walker of a view of Mt. Wellington from the foot of St. George's Hill in about 1870. The view is from the corner of Albeura St and Sandy Bay Rd. The photographer's name, Woolley, is recorded in a note on the reverse and presumably refers to Charles Alfred.
James Backhouse Walker
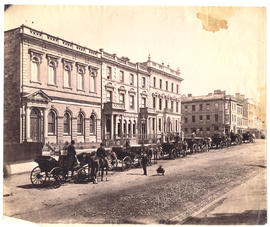
Murray Street with horse drawn carriages
Part of Walker Family Papers
Photograph of Murray Street, Hobart in 1881 with a row of horse drawn carriages outside the Hobart Savings Bank, Masonic Temple and the Derwent and Tamar Buildings with Webb's hotel (later Hadley's Orient Hotel) in the distance.

Murray Street, above Liverpool Street intersection
Part of Walker Family Papers
Photograph of Murray Street, taken from above the Liverpool Street intersection, Hobart, in about 1880. Webb's Hotel and Alexander McGregor's house, Lenna, are visible in the distance. Also shows Bishopsbourne Photographic studo; Ready & Mulcahy Drapers & Clothiers; Head and Plowman Baby Linen Warehouse Millinery & Underclothing ; Burgess & Barrett Provision merchants, Tea Dealers ; Bidencope Tailor & Hatter; J. Roberts Billiard & Coffee Saloon
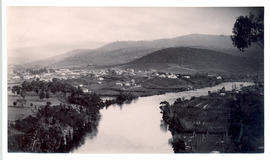
Part of Walker Family Papers
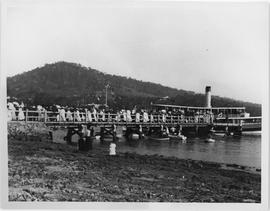
Photograph of New Norfolk, Tasmania from the opposite side of the river. Showing the town and bridge.
Henry Hall Baily
Part of Walker Family Papers
Photograph of New Norfolk, Tasmania, c. 1880 from the opposite side of the River Derwent. The photographer was Alfred Winter who had studios in Bathurst, Elizabeth and Liverpool Streets from 1869 until 1891.
Alfred Winter
Part of Walker Family Papers
Photograph of New Town and Mt. Direction, Hobart, Tasmania from the hill above Beaulieu. The photographer was Alfred Winter who had studios in Bathurst, Elizabeth and Liverpool Streets from 1869 until 1891..
Alfred Winter
Part of Walker Family Papers
Photograph of Old Mill at New Town Creek showing creek, buildings and mill wheel in disrepair. Mt Wellington in distance
James Backhouse Walker
New Town from New Town Invalid Asylum
Part of Walker Family Papers
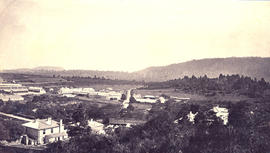
Photograph from New Town Invalid Asylum, Tasmania in about 1882. The photographer was Henry Hall Baily who had studios in Elizabeth and Liverpool Streets, Hobart from 1865 until 1918.
Henry Hall Baily
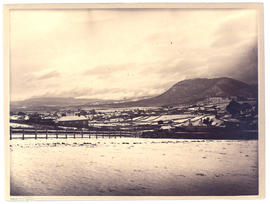
Part of Walker Family Papers
Photograph of New Town, Tasmania in the snow from Russell Young's Beaulieu (Swans Hill) taken on the morning of 16th June 1882. The photographer was Alfred Winter who had studios in Bathurst, Elizabeth and Liverpool Streets from 1869 until 1891.
Alfred Winter
New Town from the Orphan School grounds
Part of Walker Family Papers
Photograph from the Orphan School grounds, New Town, Tasmania c.1870s. The photographer was Henry Hall Baily who had studios in Elizabeth and Liverpool Streets, Hobart from 1865 until 1918.
Henry Hall Baily
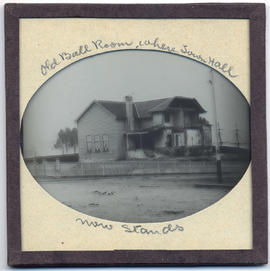
Old Ball Room where Town Hall now stands, Hobart
Part of Walker Family Papers
Lantern slide from the collection of James Backhouse Walker of the demolition of the old ball room where the Town Hall now stands, Hobart, Tasmania. Thought to have been prepared by J.W. Beattie (1859-1930) whose studio locations were in Elizabeth Street, Hobart from 1891-1920, Murray Street from 1921-40 and Cat and Fiddle Arcade, Hobart, until 1994.
John Watt Beattie
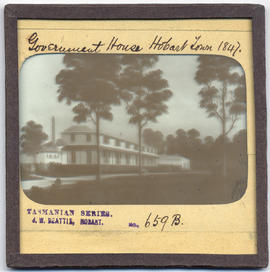
Part of Walker Family Papers
Lantern slide from the collection of James Backhouse Walker of old Government House, Hobart Town, Van Diemen's Land 1847. Prepared by J.W. Beattie (1859-1930) whose studio locations were in Elizabeth Street, Hobart from 1891-1920, Murray Street from 1921-40 and Cat and Fiddle Arcade, Hobart, until 1994.
John Watt Beattie
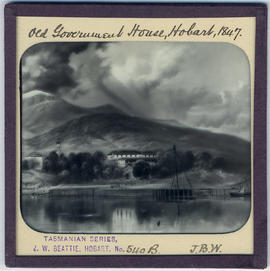
Old Government House, Hobart Town, Van Diemen's Land 1847
Part of Walker Family Papers
Lantern slide of early print of Old Government House, Hobart Town, Van Diemen's Land in 1847. From the collection of James Backhouse Walker. Prepared by J.W. Beattie (1859-1930) whose studio locations were in Elizabeth Street, Hobart from 1891-1920, Murray Street from 1921-40 and Cat and Fiddle Arcade, Hobart, until 1994.
John Watt Beattie
Part of Walker Family Papers
Photograph of Old Mill at New Town Creek showing creek, buildings and mill wheel. Mt Wellington in distance
James Backhouse Walker

Old Rifle Range sheds, Sandy Bay campus
Part of Lindsay Crawford Collection
Part of Walker Family Papers
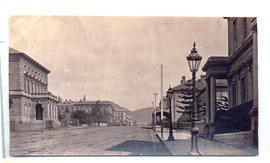
Photograph of Macquarie Street, Hobart looking east towards Elizabeth Street from the Civil Court in about 1880. The photographer was Alfred Winter who had studios in Bathurst, Elizabeth and Liverpool Streets from 1869 until 1880.
Alfred Winter
Part of Walker Family Papers
Photograph of old St. David's Cathedral on the corner of Macquarie and Murray Streets, Hobart c. 1870.
John Watt Beattie
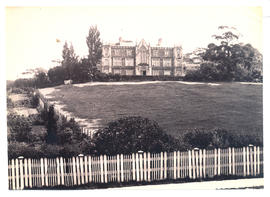
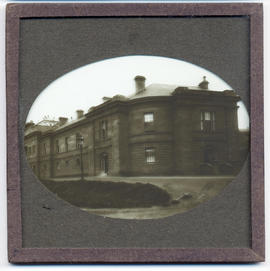
Part of Walker Family Papers
Photograph of the old University building (Domain House) on Queen's Domain, Hobart, Tasmania, c. 1890s.
On the banks of the Tamar River
Part of Walker Family Papers
Photograph of a family on the banks of the Tamar River, Launceston. The photographer was William Cawston who had studios in Paterson and St. John Streets, Launceston from 1863-1891.
William Cawston
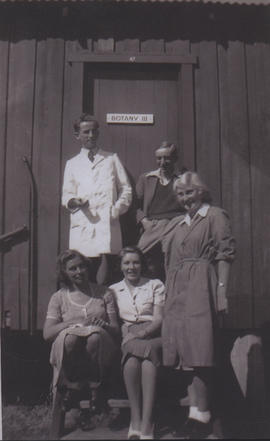
Part of Lindsay Crawford Collection
Photograph taken outside the Botany Shed. Lindsay Crawford back right, Pat Richardson right, Heather Gulline (?) left front)
Parliament House, Hobart, Tasmania
Part of Walker Family Papers
Lantern slide of Parliament House, Hobart. Prepared by J.W. Beattie (1859-1930) whose studio locations were Elizabeth Street, Hobart from 1891-1920, Murray Street from 1921-40 and Cat and Fiddle until 1994.
John Watt Beattie
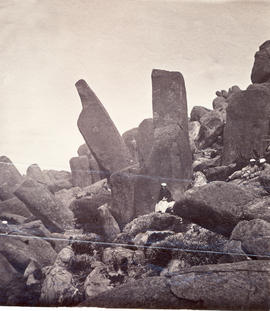
People among rocks at summit of Mt Wellington
Part of Walker Family Papers
Photograph of people sitting among large rocks at Mt Wellington summit
James Backhouse Walker
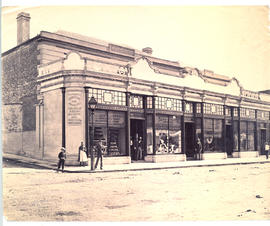
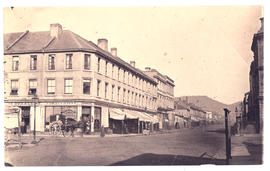
Perkins and Nephew Wholesale & Retail Drapers and Grocers
Part of Walker Family Papers
Photograph of the Emporium of Perkins and Nephew Wholesale & Retail Drapers and Grocers established in 1826, situated on the corner of Watchorn and Liverpool Street Hobart, taken in 1881. The photographers were Anson Brothers Portrait and Landscape Photographers Hobart Town whose firm was located in Liverpool, Collins and Elizabeth Streets between 1878 and 1891.
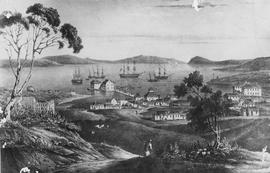
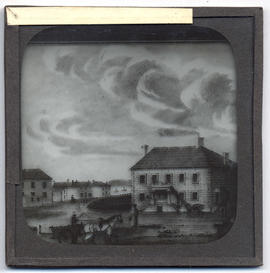
Photograph of a sketch of Old Hobart town
Part of Dennison Collection
A view of Hobart Town by Irish born convict-artist Alan Carswell (1823), showing the colony establishing itself around the mouth of Sullivans Cove in the early 1820s.
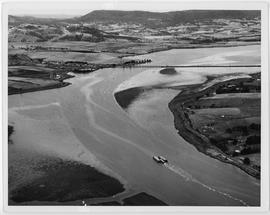
Part of Dennison Collection
Aerial view of of the Derwent River at Bridgewater. Showing a paper mill barge on the river. Taken pre 1970s as the housing estate has not yet been built.
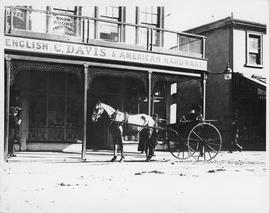
Photograph of carriage outside C Davis store
Part of Dennison Collection
Photograph of man and woman in a carriage outside Charles Davis store. Importer of English and American goods.
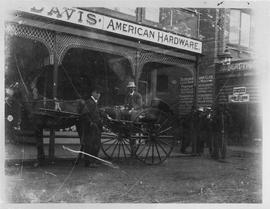
Photograph of carriage outside Charles Davis store, Hobart
Part of Dennison Collection
Photograph of men and a horse drawn cart outside Charles Davis store Hobart. c1887
Part of Dennison Collection
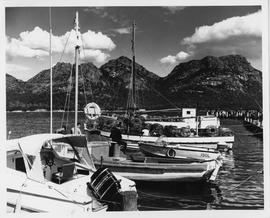
Photograph of pleasure craft and fishing boats at Coles Bay, Tasmania
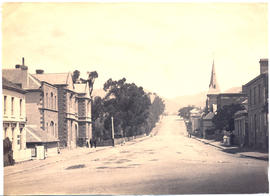
Photograph of Davey Street, Hobart, looking west
Part of Walker Family Papers
Photograph of Davey Street, Hobart, looking west, in about 1890, showing both sides of the street including St. David's Park.
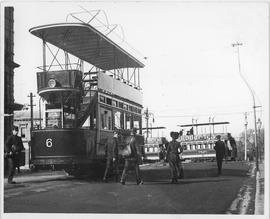
Photograph of double decker electric tram
Part of Dennison Collection
Photograph of a double decker tram in Elizabeth Street Hobart. Other double decker trams in Macquarie Street c.1893

Part of Dennison Collection
Aerial view of Eaglehawk Neck showing the Eaglehawk Neck hall which opened in 1928
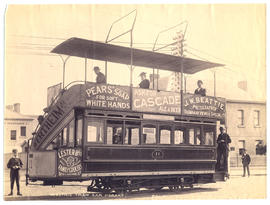
Photograph of electric tram car
Part of Walker Family Papers
Photograph of an electric tram car in Hobart, about 1893, thought to be travelling along Macquarie Street. Advertising Lester Brothers Family Grocers. Wertheim sewing machines, Pear's soap, Cascade ale & J.W. Beattie, Photographer.
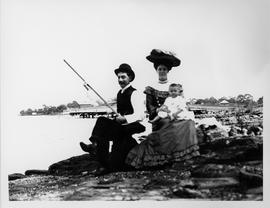
Photograph of family group fishing
Part of Dennison Collection
Photograph of a man, woman and small child sitting on the rocks fishing. Thought to be Beltana now Lindisfarne with jetty in background.

Part of Dennison Collection
Photograph of Geilston Bay looking toward Mt Wellington showing jetty and breakwater
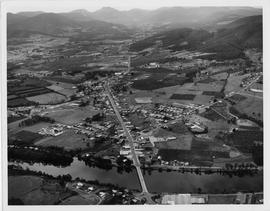
Part of Dennison Collection
Aerial view of Huonville, Tasmania, looking toward Sleeping Beauty mountain range showing streets, bridge and Huon River
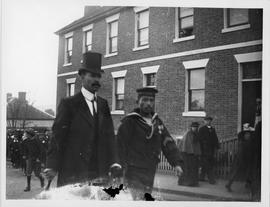
Photograph of Japanese sailors
Part of Dennison Collection
Photograph of Japanese sailor and Japanese gentleman walking in front of Portsea Terrace, Montpelier Retreat, Battery Point.
Part of Dennison Collection
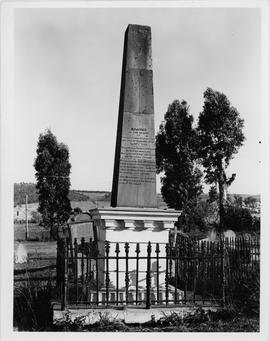
Photograph of the Rev. Robert Knopwood's grave at Rokeby, Clarence Plains, Tasmania. Knopwood died 18 September 1838. He was the first Chaplin of Van Diemen's Land
Photograph of Lindisfarne regatta
Part of Dennison Collection
Photograph of a ferry, people and row boats at Lindisfarne regatta
Part of Dennison Collection
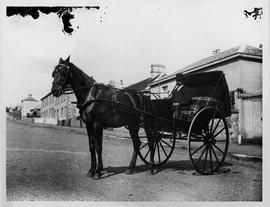
Photograph of a man in a bowler hat sitting in a two wheeled horse drawn gig in the street
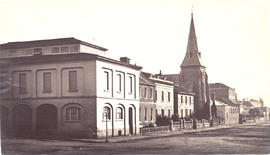
Photograph of the Oddfellows Hall
Part of Walker Family Papers
Photograph of Davey Street, Hobart, looking east, in about 1876. The photograph is taken from the intersection with Harrington Street and Oddfellows Hall is in the foreground. The photographer was Henry Hall Baily who had studios in Elizabeth and Liverpool Streets, Hobart from 1865 until 1918
Photograph of the Oddfellows Hall and Congregational Church
Part of Walker Family Papers
Photograph of Davey Street, Hobart, looking east, showing the Oddfellows hall and the Congregational church. Photograph taken from the Harrington Street intersection.
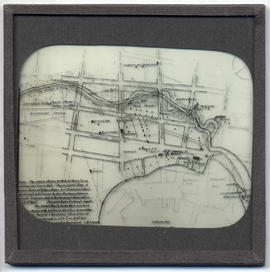
Part of Walker Family Papers
Lantern Slide of plan of early Hobart Town, from a survey done in 1804-1805, showing later alterations. The plan also appears in James Backhouse Walker's paper 'The Founding of Hobart, by Lieut.-Governor Collins' read to the Royal Society of Tasmania 14/10/1889. In this he describes the plan, "I am indebted to my friend Mr. Mault for a beautifully executed plan, which shows very clearly the original features of the ground, and the position of the first camp, and also indicates the alterations which have since taken place. It is taken from a survey made by Surveyor-General Harris in 1804-5. The original plan was discovered many years ago in the Lands Office at Sydney, and was presented by the New South Wales Government to our Lands Department. The Deputy- Commissioner of Crown Lands, Mr. Albert Reid, kindly presented me with a tracing of it."
Lantern slide thought to have been prepared by J.W. Beattie (1859-1930) whose studio locations were in Elizabeth Street, Hobart from 1891-1920, Murray Street from 1921-40 and Cat and Fiddle Arcade, Hobart, until 1994.
John Watt Beattie