Showing 300 results

Archival description
Sub-item Image With digital objects
Print preview View:

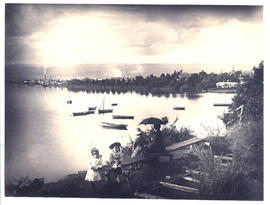
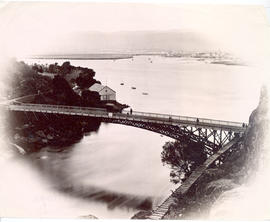
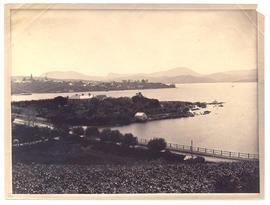
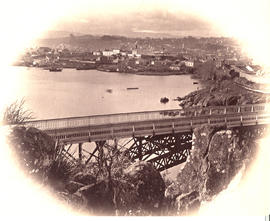
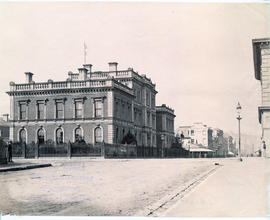
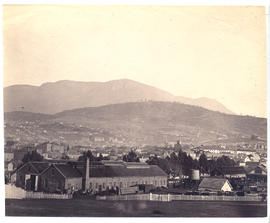
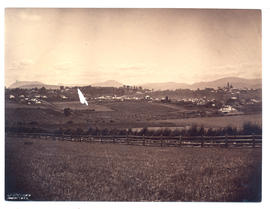
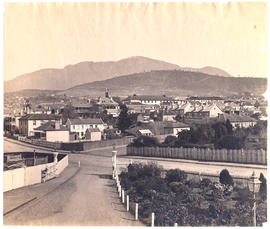
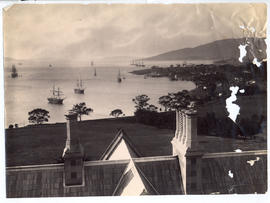
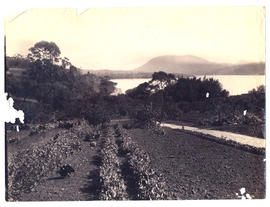
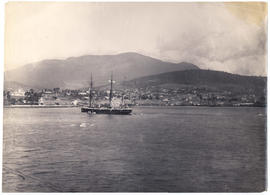
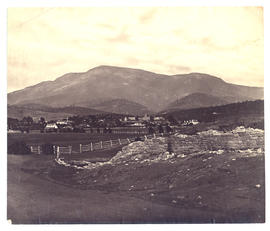
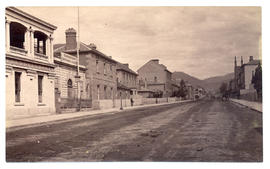
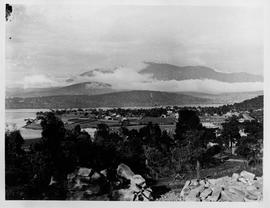
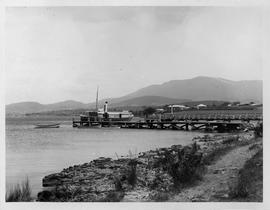
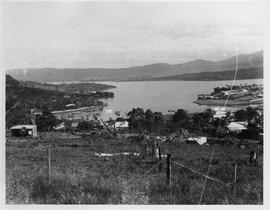
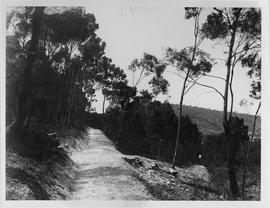
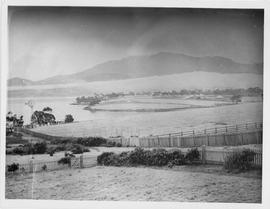
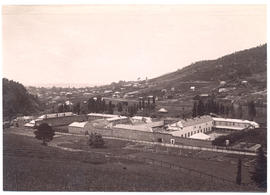
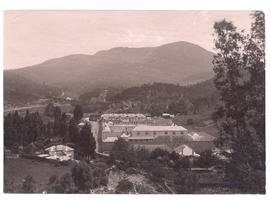
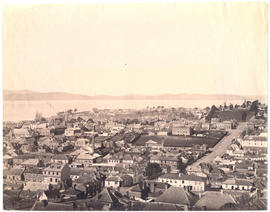
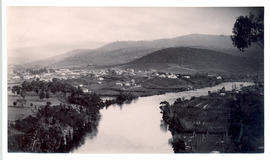
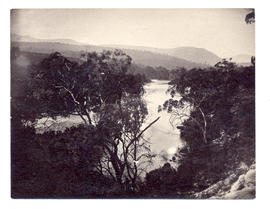
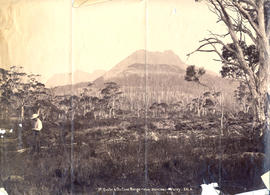
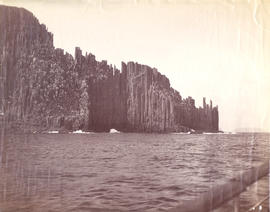
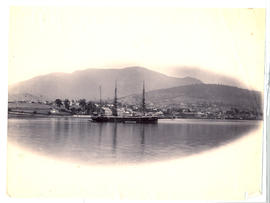
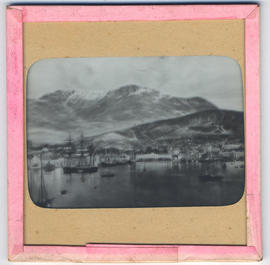
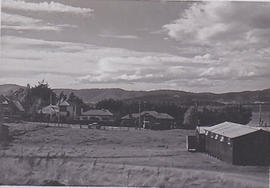
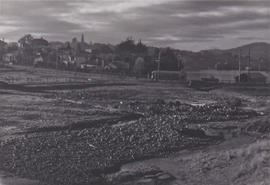
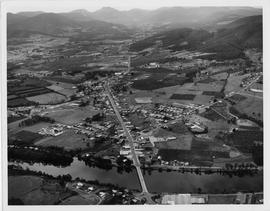
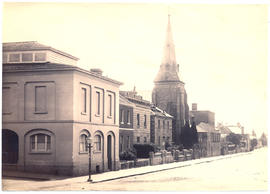
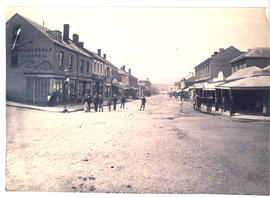
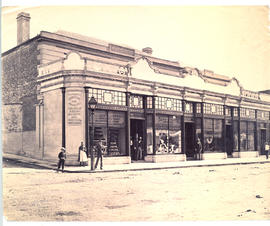
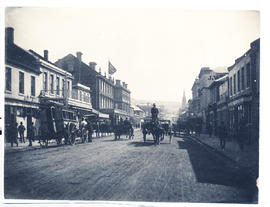
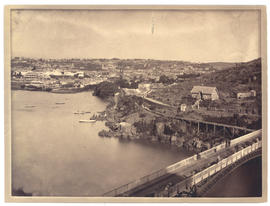
Launceston from beyond Cataract Bridge

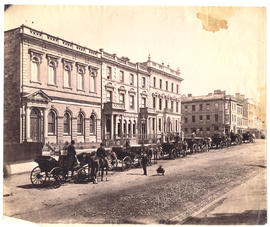
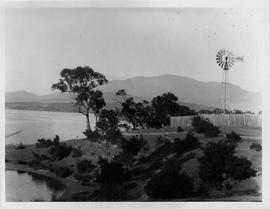
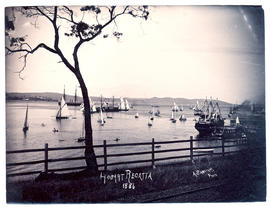
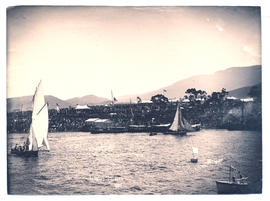
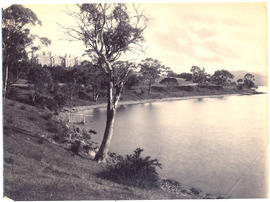
Photograph of Launceston, Tasmania, from beyond the Cataract Bridge in about 1881. The photographer was Alfred Winter who had studios in Bathurst, Elizabeth and Liverpool Streets, Hobart, from 1869 until 1891.

Alfred Winter

On the banks of the Tamar River

Photograph of a family on the banks of the Tamar River, Launceston. The photographer was William Cawston who had studios in Paterson and St. John Streets, Launceston from 1863-1891.

William Cawston

River Tamar from Cataract Hill

Photograph of the River Tamar in Launceston from Cataract Hill. The photographers were Anson Brothers who had studios in Liverpool, Collins and Elizabeth Streets, Hobart, between 1878 and 1891.

Anson Brothers

Battery Point from Sandy Bay

Photograph of Battery Point from Sandy Bay, Tasmania, with St. Helena, later Wrest Point, in foreground, St Georges Church in the distance, c.1881. The photographer was Alfred Winter who had studios in Bathurst, Elizabeth and Liverpool Streets from 1869 until 1891.

James Backhouse Walker

Murray Street with horse drawn carriages

Photograph of Murray Street, Hobart in 1881 with a row of horse drawn carriages outside the Hobart Savings Bank, Masonic Temple and the Derwent and Tamar Buildings with Webb's hotel (later Hadley's Orient Hotel) in the distance.

Cataract Bridge and Launceston

Photograph of Launceston, Tasmania from beyond the Cataract Bridge. The photographers were Anson Brothers who had studios in Liverpool, Collins and Elizabeth Streets, Hobart, between 1878 and 1891.

Anson Brothers

Public Buildings Launceston

Photograph of the Public Buildings in Launceston, Tasmania. The Criterion Hotel is in the background. The photographers were Anson Brothers who had studios in Liverpool, Collins and Elizabeth Streets, Hobart, between 1878 and 1891.

Anson Brothers

Hobart Railway Station

Photograph of Hobart from the Queen's Domain with the railway station in the foreground, c. 1881. The photographers were Anson Brothers who had studios in Liverpool, Collins and Elizabeth Streets between 1878 and 1891.

Anson Brothers

Queenborough, Sandy Bay

Photograph of Queenborough, Sandy Bay, Tasmania, c.1881. The photographer was Alfred Winter who had studios in Bathurst, Elizabeth and Liverpool Streets from 1869 until 1891.

James Backhouse Walker

Bush Hotel, New Norfolk

Photograph of the Bush Hotel, New Norfolk, Tasmania, 1881. Proprietor at the time was Captain Blockey. The photographer was Alfred Winter who had studios in Bathurst, Elizabeth and Liverpool Streets from 1869 until 1891.

Alfred Winter

Ship Inn

Photograph of the Ship Inn on the corner of Elizabeth and Collins Streets, Hobart. In 1881 the proprietor was Mr J. C. Hadley . The photographer is Alfred Winter who had studios in Bathurst, Elizabeth and Liverpool Streets from 1869 until 1891.

Alfred Winter

St. John's Street, Launceston

Photograph of St. John's Street, Launceston with St. John's Anglican Church and Chalmers Free Presbyterian Church on opposite sides of the street. The photographer was William Cawston who had studios in Paterson and St. John Streets, Launceston from 1863-1891.

William Cawston

Launceston Town Hall

Photograph of the Town Hall in Launceston, Tasmania. The photographers were Anson Brothers who had studios in Liverpool, Collins and Elizabeth Streets, Hobart, between 1878 and 1891.

Anson Brothers

Launceston from Windmill Hill

Photograph of Launceston from Windmill Hill looking north taken in c1881. The photographer was Alfred Winter who had studios in Bathurst, Elizabeth and Liverpool Streets from 1869 until 1891.

Alfred Winter

Derwentwater, Sandy Bay

Photograph of Derwentwater, Sandy Bay, Tasmania, home of Captain Langdon Swan, c.1881. The photographer was Alfred Winter who had studios in Bathurst, Elizabeth and Liverpool Streets from 1869 until 1891.

James Backhouse Walker

Huts on Huon Road under snow

Photograph of Huon Road near Fern Tree Inn, Hobart, Tasmania, in about 1882 showing clearing and huts under snow

James Backhouse Walker

View from the roof of Government House

Photograph of ships on the Derwent River taken from the roof of Government House, Hobart, Tasmania in 1882. The photographer was Henry Hall Baily who had studios in Elizabeth and Liverpool Streets, Hobart from 1865 until 1918.

Henry Hall Baily

View from Government House

Photograph of view from Government House looking over a vegetable garden and orchard which could either be in the Government House or Botanical Gardens grounds with the River Derwent and Mt. Direction in the background.

Sullivans Cove, taken from HMS Nelson

Photograph of a ship with Sullivans Cove and Mount Wellington in the background taken from HMS Nelson in 1882. The photographer is Henry Hall Baily who had studios in Elizabeth and Liverpool streets Hobart from 1865 until 1918.

Henry Hall Baily

New Town from New Town Invalid Asylum

Photograph from New Town Invalid Asylum, Tasmania in about 1882. The photographer was Henry Hall Baily who had studios in Elizabeth and Liverpool Streets, Hobart from 1865 until 1918.

Henry Hall Baily

Kangaroo Bay

Photograph of Kangaroo Point (Bellerive) Beach on Hobart's Eastern Shore looking toward settlement c. 1882. The photographer was Henry Hall Baily who had studios in Elizabeth and Liverpool Streets, Hobart from 1865 until 1918.

Photograph of electric tram car

Photograph of an electric tram car in Hobart, about 1893, thought to be travelling along Macquarie Street. Advertising Lester Brothers Family Grocers. Wertheim sewing machines, Pear's soap, Cascade ale & J.W. Beattie, Photographer.

View of track

Photograph of a hillside track in the bush may be Shag Bay or Natone Hill Track

View of houses

Photograph of houses at Lindisfarne or Geilston Bay taken from hill.

View of a Aermotor windmill

View of an Aermotor wind-powered water pump at Lindisfarne on the eastern shore of the Derwent River looking toward Mt. Wellington. James Martin & co. Sydney imported the Chicago-built windmills into Australia between 1895-1913

Hobart Regatta

Photograph of the Hobart Regatta taken in 1886. The photographer was Albert Sargeant who had studios in Macquarie Street, Hobart from 1886-1890 and George Street, Launceston from 1900-1913

Albert Sargeant

Hobart Regatta Grandstand from the water

Photograph of the Hobart Regatta grandstand taken from the water in 1886. The photographer was Albert Sargeant who had studios in Macquarie Street, Hobart, Tasmania from 1886-1890 and George Street, Launceston, Tasmania from 1900-1913.

Albert Sargeant

Government House from the Queen's Domain

Photograph of Government House, Hobart taken from the Queen's Domain, c. 1890s. A note on the reverse says 'after railway'. The photographer was Henry Hall Baily who had studios in Elizabeth and Liverpool Streets, Hobart from 1865 until 1918.

Henry Hall Baily

Government House from the bay

Photograph of Government House Hobart taken from the bay below the Queen's Domain, c.1890s. The photographer was Henry Hall Baily who had studios in Elizabeth and Liverpool Streets, Hobart from 1865 until 1918.

Henry Hall Baily

Old University building

Photograph of the old University building (Domain House) on Queen's Domain, Hobart, Tasmania, c. 1890s.

Cascades' Female Factory from the hill

Photograph of the Cascades' Female Factory looking down the South Hobart Valley toward the Derwent River. Showing yards and gardens. In 1828 a Female Factory opened on the outskirts of Hobart at Cascades. It became the colony's largest Factory, expanding by 1853 into five major courtyards accommodating 1000 women and 175 children. The photographer was J.W. Beattie (1859-1930) whose studios were in Elizabeth and Murray Streets between 1891 and 1940

John Watt Beattie

Cascades' Female Factory from the rear

Photograph of the Cascades' Female Factory from the rear showing yards with washing and horse. In 1828 a Female Factory opened on the outskirts of Hobart at Cascades. It became the colony's largest Factory, expanding by 1853 into five major courtyards accommodating 1000 women and 175 children. The photographer was J.W. Beattie (1859-1930) whose studios were in Elizabeth and Murray Streets between 1891 and 1940

John Watt Beattie

Cascades' Female Factory

Photograph of the Cascades' Female Factory looking toward Mt Wellington with the Cascade Brewery in the distance. In 1828 a Female Factory opened on the outskirts of Hobart at Cascades. It became the colony's largest Factory, expanding by 1853 into five major courtyards accommodating 1000 women and 175 children. The photographer was J.W. Beattie (1859-1930) whose studios were in Elizabeth and Murray Streets between 1891 and 1940

John Watt Beattie

Liverpool Street Hobart with horse drawn carriages

Photograph of Liverpool Street Hobart taken around the turn of the century showing horse drawn carriages in the foreground. The date is assumed from the presence of electric power poles which were introduced in 1898.

Cherry's Carlton Club Hotel

Photograph of Liverpool Street Hobart at the intersection of Argyle Street looking towards West Hobart, taken around the turn of the century showing Cherry's Carlton Club Hotel in the foreground. Also J. Whiteside & Son Furnishing Warehouse and Canes Iron mongers. The date is assumed from the presence of electric power poles which were introduced in 1898.

Liverpool Street Hobart

Photograph of Liverpool Street Hobart taken from just before the Elizabeth Street intersection around the turn of the century with horse drawn carriages in the foreground. The date is assumed from the presence of electric power poles which were introduced in 1898.

Aerial view of UTAS Sandy Bay Campus

Aerial view of the Sandy Bay Campus of the University of Tasmania. Showing sporting fields, Hutchins School, surrounding houses and Wrest Point Hotel prior to the construction of the casino

Aerial view of Watermans Dock

Aerial view of the Hobart harbour showing Salamanca Place, Watermans dock, Parliamentary House , Hydro Building, Elizabeth Street pier, the Marine Board building under construction, Franklin Square and St, David's Park.

Aerial view of the Ridgeway Reservoir

Aerial view of the Ridgeway Reservoir and Waterworks Reserve looking to Hobart, the Tasman Bridge and beyond to the Eastern Shore, Seven Mile Beach and Dodges Ferry

Hobart looking south

Photograph from the collection of James Backhouse Walker of a view of Hobart looking south along Barrack Street toward St Georges Hill, Battery Point

James Backhouse Walker

All Saints Church Macquarie Street

Photograph of All Saints Church, Macquarie Street, Hobart c. 1880 by Anson Brothers, Portrait and Landscape Photographers, Hobart Town, whose firm was located in Liverpool, Collins and Elizabeth Streets between 1878 and 1891.

Anson Brothers

New Norfolk

Photograph of New Norfolk, Tasmania from the opposite side of the river. Showing the town and bridge.

Henry Hall Baily

Mt. Gould & Du Cane Range

Photograph of Mt. Gould and the DuCane Range from Narcissus Valley, Lake St. Clair taken from camp on the left hand side of Narcissus Valley going up (according to notes on the reverse of the photograph).

Campbell & Minchin building

Lantern slide of Campbell and Minchin building, corner Elizabeth and Bathurst street, Hobart. Prepared by J.W. Beattie (1859-1930) whose studio locations were Elizabeth Street, Hobart from 1891-1920, Murray Street from 1921-40 and Cat and Fiddle until 1994.

John Watt Beattie

Elizabeth Street Hobart

Lantern slide of Elizabeth Street, Hobart looking north. Prepared by J.W. Beattie (1859-1930) whose studio locations were Elizabeth Street, Hobart from 1891-1920, Murray Street from 1921-40 and Cat and Fiddle until 1994.

John Watt Beattie

Government House and St David's Cathedral, Van Diemen's Land

Lantern slide of Government House and St David's Cathedral, Van Diemen's Land. Prepared by J.W. Beattie (1859-1930) whose studio locations were Elizabeth Street, Hobart from 1891-1920, Murray Street from 1921-40 and Cat and Fiddle until 1994. Lantern slide of detail from 'The Seat of His Excellency Lieut. Govr. Arthur / drawn from Nature and on Stone' by Charles Atkinson d.1837

John Watt Beattie

Hobart Savings Bank

Lantern slide of Hobart Savings Bank, Murray Street Hobart c1860. Prepared by J.W. Beattie (1859-1930) whose studio locations were Elizabeth Street, Hobart from 1891-1920, Murray Street from 1921-40 and Cat and Fiddle until 1994.

John Watt Beattie

Hobart Town, Van Diemen's Land from the Harbour

Lantern slide of an early print of Hobart Town, Van Diemen's Land from the harbour. From the collection of James Backhouse Walker. Thought to have been prepared by J.W. Beattie (1859-1930) whose studio locations were in Elizabeth Street, Hobart from 1891-1920, Murray Street from 1921-40 and Cat and Fiddle Arcade, Hobart, until 1994.

John Watt Beattie

Tasmanian Aboriginal canoe and baskets

Lantern slide of Tasmanian aboriginal canoe and baskets. Prepared by J.W. Beattie (1859-1930) whose studio locations were Elizabeth Street, Hobart from 1891-1920, Murray Street from 1921-40 and Cat and Fiddle until 1994.

John Watt Beattie

Buildings on the corner of Murray and Macquarie Street, Hobart ,Tasmania

Lantern slide from the collection of James Backhouse Walker of buildings on the corner of Murray and Macquarie Street, Hobart, Tasmania. Thought to have been prepared by J.W. Beattie (1859-1930) whose studio locations were in Elizabeth Street, Hobart from 1891-1920, Murray Street from 1921-40 and Cat and Fiddle Arcade, Hobart, until 1994. Quaker Collection.

John Watt Beattie

House in Hobart, Tasmania

Lantern slide of house in Hobart. Prepared by J.W. Beattie (1859-1930) whose studio locations were Elizabeth Street, Hobart from 1891-1920, Murray Street from 1921-40 and Cat and Fiddle until 1994.

John Watt Beattie

Two students

Photograph of two students believed to be Heather Gulline and Pat Richardson outside the Botany Shed

West Australian Aboriginal stone implements

Lantern slide of West Australian aboriginal stone implements. Prepared by J.W. Beattie (1859-1930) whose studio locations were Elizabeth Street, Hobart from 1891-1920, Murray Street from 1921-40 and Cat and Fiddle until 1994.

John Watt Beattie

Exterior of chemical laboratory, University of Tasmania, Queen's Domain, Hobart, late nineteenth century

Lantern slides of the University of Tasmania, Queen's Domain, Hobart. Views of exterior and laboratories and library. Prepared by J.W. Beattie (1859-1930) whose studio locations were Elizabeth Street, Hobart from 1891-1920, Murray Street from 1921-40 and Cat and Fiddle until 1994 (Collection Pr.S.Uni/1-8)

John Watt Beattie

Corner of library, University of Tasmania, Queen's Domain, Hobart, late nineteenth century

Lantern slides of the University of Tasmania, Queen's Domain, Hobart. Views of exterior and laboratories and library. Prepared by J.W. Beattie (1859-1930) whose studio locations were Elizabeth Street, Hobart from 1891-1920, Murray Street from 1921-40 and Cat and Fiddle until 1994 (Collection Pr.S.Uni/1-8)

John Watt Beattie

Photograph of Huonville

Aerial view of Huonville, Tasmania, looking toward Sleeping Beauty mountain range showing streets, bridge and Huon River

Photograph of Knopwoods Grave

Photograph of the Rev. Robert Knopwood's grave at Rokeby, Clarence Plains, Tasmania. Knopwood died 18 September 1838. He was the first Chaplin of Van Diemen's Land

Aerial view of the Zinc Works

Aerial view of the Zinc Works at Derwent Park. Looking down the Derwent River toward the Tasman Bridge. Showing Self's Point and Cornelian Bay Cemetery

St. John's Church Goulburn Street

Photograph of St. John's Church Goulburn Street, Hobart taken c1880 the photographers were Anson brothers whose firm was located in Liverpool, Collins and Elizabeth Streets between 1878 and 1891

Anson Brothers

Perkins and Nephew Wholesale & Retail Drapers and Grocers

Photograph of the Emporium of Perkins and Nephew Wholesale & Retail Drapers and Grocers established in 1826, situated on the corner of Watchorn and Liverpool Street Hobart, taken in 1881. The photographers were Anson Brothers Portrait and Landscape Photographers Hobart Town whose firm was located in Liverpool, Collins and Elizabeth Streets between 1878 and 1891.

Rocks on Mount Wellington

Photograph rocks on Mount Wellington. The photographer was Albert Sargeant who had studios in Macquarie Street, Hobart and George Street, Launceston between 1886 and 1913.

Albert Sargeant

Derwent River above New Norfolk

Photograph of the Derwent River above New Norfolk, Tasmania, 1882. The photographer was Henry Hall Baily who had studios in Elizabeth and Liverpool Streets, Hobart from 1865 until 1918.

Henry Hall Baily

Results 101 to 200 of 300