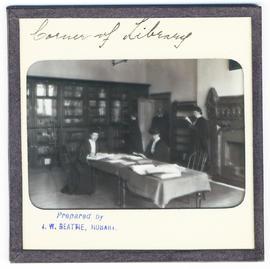
Lantern slides of the University of Tasmania, Queen's Domain, Hobart. Views of exterior and laboratories and library. Prepared by J.W. Beattie (1859-1930) whose studio locations were Elizabeth Street, Hobart from 1891-1920, Murray Street from 1921-40 and Cat and Fiddle until 1994 (Collection Pr.S.Uni/1-8)
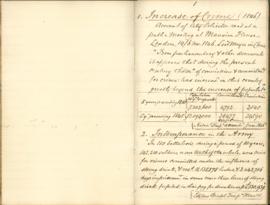
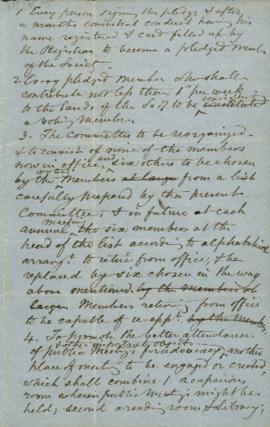
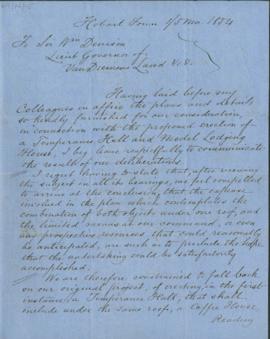
Bound notebook containing handwritten notes regarding facts and figures on expenditure on hard liquor, intemperance in the Army, loss of life & property a sea, etc.
Sarah Benson Walker's reminiscences of her life in Hobart Town as recorded by her son James Backhouse Walker. It includes narrative of the voyage out, and descriptions of Hobart in the very early period, information about Hobart personalities as well as the story of Sarah Benson Walker's life
Unidentified daguerreotype in a plain leather and velvet case of a man, seated, young to middle age, with side whiskers. Head lightly coloured, shirt front painted white, plain background, 1 pillar
Ambrotype in case of a man seated, youngish, straight, short hair, moustache and beard, leaning on elbow on side table with books and lace cloth, plain background, slightly tinted.
Ambrotypes in case of two unidentified portraits. Woman in left side of case and on right side man, seated, thin face, side -burns, white shirt. Background of drapery and mountain view. Head lightly tinted, shirt front painted white. two portraits in oval frames in one case.
Ambrotypes in cases of little girls. Both seated, wearing black and white Pierrette type white dresses. One child has ringlets. Cases: tooled imitation leather, lined red velvet, frames oval top.
Photograph of Hobart harbor and mountain (snow topped) from river, showing sailing ships, steam ferries. Glossy print, on "cabinet" mount, T. Crawford, Hobart.
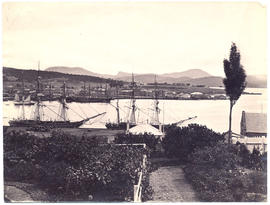
Photograph from the collection of James Backhouse Walker of a view of Hobart looking towards the Eastern Shore. The panorama has been taken from Mr. Roberts' garden with various shrubs and a Norfolk Island pine in the foreground. Henry Hall Baily is the photographer. He had studios in Elizabeth and Liverpool Streets Hobart from 1865 until 1918.
Photograph from the collection of James Backhouse Walker of a view of Hobart, looking towards St. George's Hill, Battery Point. Showing St Georges Church and James Luckman's windmill probably taken in the 1870s.
Photograph from the collection of James Backhouse Walker of a view of Mt. Wellington from St. George's Hill with Hawthorn Cottage in the foreground and Bishopscourt - Garden Crescent and Davey Street Chapel in the background (according to notes on the reverse). The photographer was the Anson Brothers, whose firm was located in Liverpool, Collins and Elizabeth Streets between 1878 and 1891.
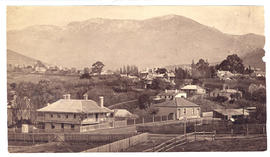
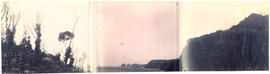
Photograph from the collection of James Backhouse Walker of a view of Hobart from Huon Road looking east in about 1879, according to notes on the reverse.
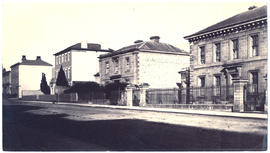
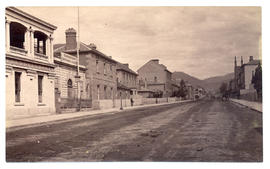
Photograph of Davey Street, Hobart, looking east, showing the Oddfellows hall and the Congregational church. Photograph taken from the Harrington Street intersection.
Various photographs of Harrington Street - St. Marys Cathedral, Wilmot Terrace; Pressland House (formerly J P Cowles School); Goulburn St. ; St John the Baptist Church. Photographs by Winter Baily and Anson Bros.
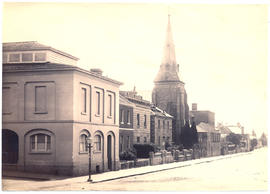
Photograph of St. John's Church Goulburn Street, Hobart taken c1880 the photographers were Anson brothers whose firm was located in Liverpool, Collins and Elizabeth Streets between 1878 and 1891
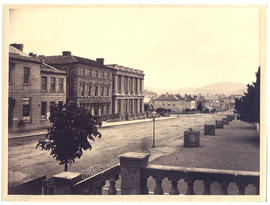
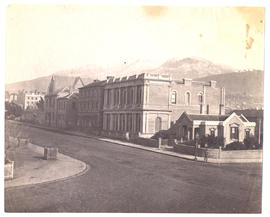
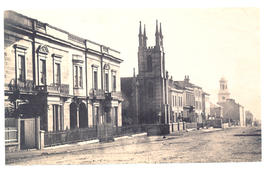
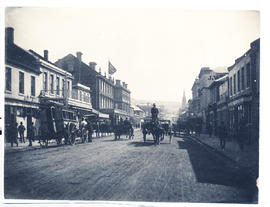
Photograph of Macquarie Street, Hobart looking east towards Elizabeth Street from the Civil Court in about 1880. The photographer was Alfred Winter who had studios in Bathurst, Elizabeth and Liverpool Streets from 1869 until 1880.
Photograph of Macquarie Street, Hobart looking south in about 1870. The Bank of Australasia and Macquarie House are two of the buildings featured. The photographer is Henry Hall Baily who had studios in Elizabeth and Liverpool Streets between 1865 and 1918.
Photograph of Macquarie Street, Hobart looking south from the corner of Elizabeth Street c. 1870. Some of Franklin Square on left Commercial Bank on right. The photographers were Anson Brothers whose firm was located in Liverpool, Collins and Elizabeth Streets between 1878 and 1891.
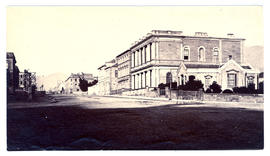
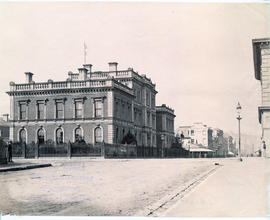
Photograph of the Commercial Bank, Macquarie Street, Hobart looking south from the corner of Elizabeth Street in c1877 after old St. Davids Cathedral was pulled down. The photograph is attributed to Henry Hall Baily who had studios in Elizabeth and Liverpool Streets Hobart from 1865 until 1918.
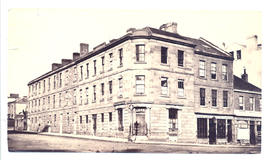
Photograph of buildings on corner of Macquarie and Murray Streets, Hobart c. 1877. Photographed by Henry Hall Baily who had studios in Elizabeth and Liverpool Streets, Hobart from 1865 until 1918.
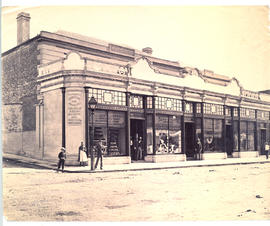
Photograph of the Emporium of Perkins and Nephew Wholesale & Retail Drapers and Grocers established in 1826, situated on the corner of Watchorn and Liverpool Street Hobart, taken in 1881. The photographers were Anson Brothers Portrait and Landscape Photographers Hobart Town whose firm was located in Liverpool, Collins and Elizabeth Streets between 1878 and 1891.
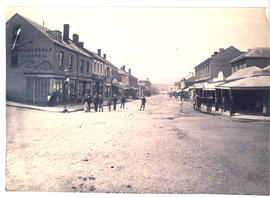
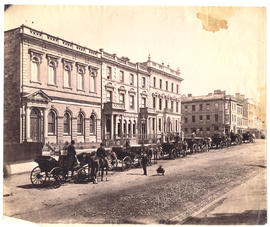
Photograph of Murray Street, Hobart in 1881 with a row of horse drawn carriages outside the Hobart Savings Bank, Masonic Temple and the Derwent and Tamar Buildings with Webb's hotel (later Hadley's Orient Hotel) in the distance.
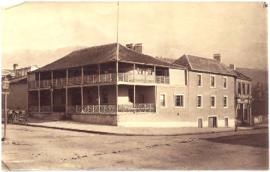
Photograph of Waterloo House Private Boarding Establishment on the corner of Murray and Davey Streets, Hobart c.1893 with an electric tram in the background.
Photograph of Webb's Hotel, later Hadley's, Murray Street, Hobart, Tasmania, in about 1880. The photographer was Alfred Winter who had studios in Bathurst, Elizabeth and Liverpool Streets from 1869 until 1891.
Photograph of the Ship Inn on the corner of Elizabeth and Collins Streets, Hobart in about 1881. The photographer is Alfred Winter who had studios in Bathurst, Elizabeth and Liverpool Streets from 1869 until 1891.
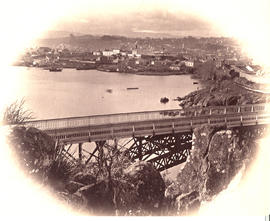
Photograph of Launceston, Tasmania from beyond the Cataract Bridge. The photographers were Anson Brothers who had studios in Liverpool, Collins and Elizabeth Streets, Hobart, between 1878 and 1891.
Photograph of the Public Buildings in Launceston, Tasmania. The Criterion Hotel is in the background. The photographers were Anson Brothers who had studios in Liverpool, Collins and Elizabeth Streets, Hobart, between 1878 and 1891.
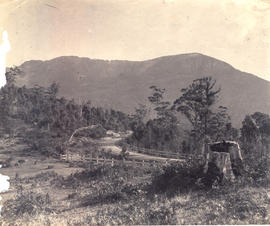
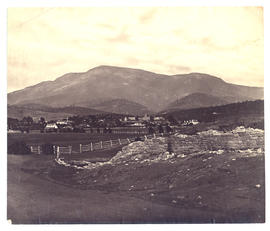
Photograph of Mount Wellington from hillside. The photographers were Anson Brothers who had studios in Liverpool, Collins, and Elizabeth Streets between 1878 and 1891.
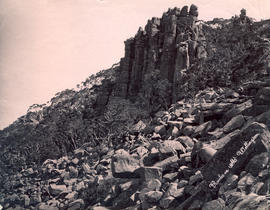
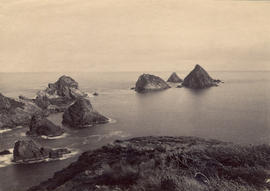
Photograph rocks on Mount Wellington. The photographer was Albert Sargeant who had studios in Macquarie Street, Hobart and George Street, Launceston between 1886 and 1913.
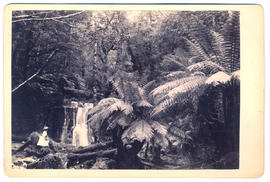
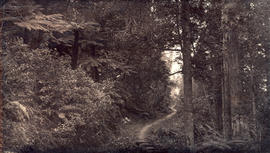
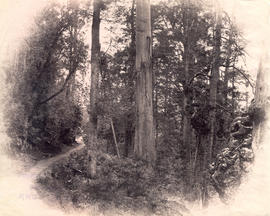
Photograph of the track to Fern Tree Bower, Mount Wellington before taken prior to 1879 by Anson Brothers who had studios in Liverpool, Collins, and Elizabeth Streets between 1878 and 1891.
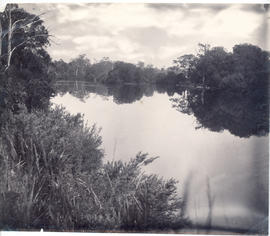
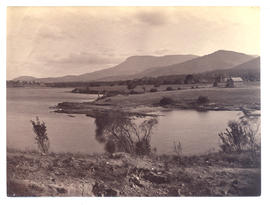
Photograph of the Derwent River above New Norfolk, Tasmania, 1882. The photographer was Henry Hall Baily who had studios in Elizabeth and Liverpool Streets, Hobart from 1865 until 1918.
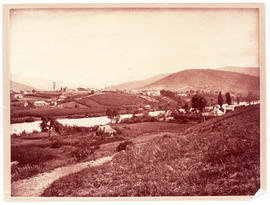
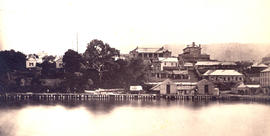
Photograph of New Norfolk, Tasmania, c. 1880 from the opposite side of the River Derwent. The photographer was Alfred Winter who had studios in Bathurst, Elizabeth and Liverpool Streets from 1869 until 1891.
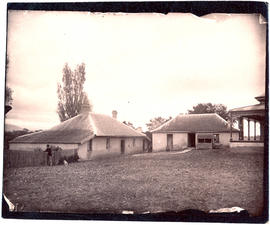
Photograph of the commandant's house and jetties, Port Arthur c. 1880. The photographers are Anson Brothers., Portrait and Landscape Photographers, Hobart Town whose firm was located in Liverpool, Collins and Elizabeth Streets between 1878 and 1891.
Photograph of Government House, Hobart, Tasmania in about 1870. Showing the shipyard in the foreground and Mount Direction behind.. The photographer was Henry Hall Baily who had studios in Elizabeth and Liverpool Streets, Hobart from 1865 until 1918.
Photograph of Government House Hobart taken from the bay below the Queen's Domain, c.1890s. The photographer was Henry Hall Baily who had studios in Elizabeth and Liverpool Streets, Hobart from 1865 until 1918.
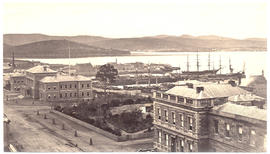
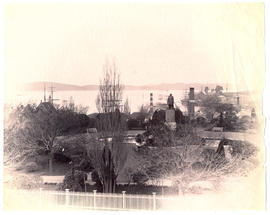
Photograph from the collection of James Backhouse Walker of Franklin Square and the Hobart waterfront taken in about 1870 possibly from St. David's Cathedral according to a note on the reverse. The photographer is Henry Hall Baily who had studios in Elizabeth and Liverpool Streets Hobart from 1865 until 1918.
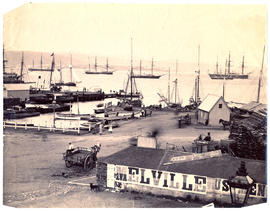
Photograph of Sullivans Cove and Hunter Island taken from the eastern end of Salamanca with garden in the foreground and two ships alongside the wharf. c.1880
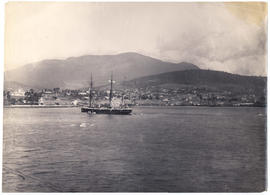
Photograph of a ship with Sullivans Cove and Mount Wellington in the background taken from HMS Nelson in 1882. The photographer is Henry Hall Baily who had studios in Elizabeth and Liverpool streets Hobart from 1865 until 1918.
Photograph of Franklin Square Hobart was taken by the Anson Brothers photographers, whose firm was located in Liverpool, Collins and Elizabeth Streets between 1878 and 1891.
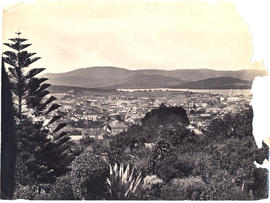
Photograph of Hobart Town, Tasmania, from the Queen's Domain, looking down Macquarie Street in the 1850s. This photograph appears on page 27 of Allan Sierp's 'Colonial Life in Tasmania: Fifty Years of Photography 1855-1905' (Rigby, 1976)
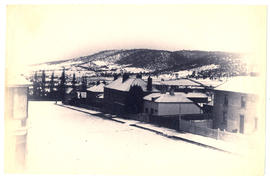
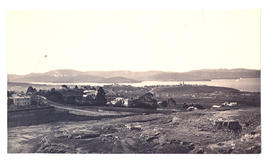
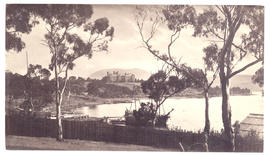
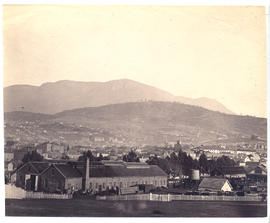
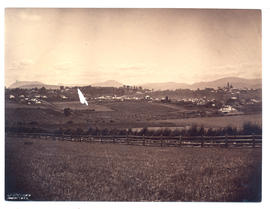
Photograph of Hobart from the Queen's Domain with the railway station in the foreground, c. 1881. The photographers were Anson Brothers who had studios in Liverpool, Collins and Elizabeth Streets between 1878 and 1891.
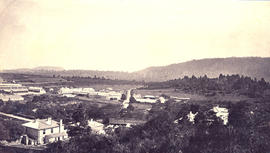
Photograph from New Town Invalid Asylum, Tasmania in about 1882. The photographer was Henry Hall Baily who had studios in Elizabeth and Liverpool Streets, Hobart from 1865 until 1918.
Photograph of Austins Ferry, Hobart, Tasmania, with Austin's old Inn to the right. The photographer was Alfred Winter who had studios in Bathurst, Elizabeth and Liverpool Streets from 1869 until 1891.
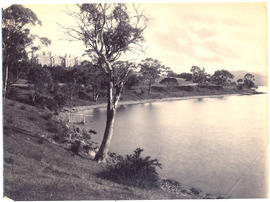
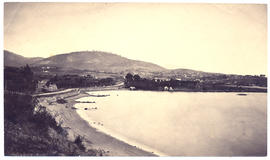
Photograph of Queenborough, Sandy Bay, Tasmania, c.1881. The photographer was Alfred Winter who had studios in Bathurst, Elizabeth and Liverpool Streets from 1869 until 1891.
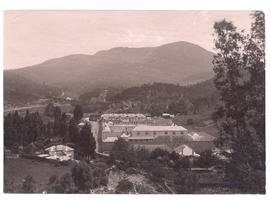
Photograph of the Cascades' Female Factory looking toward Mt Wellington with the Cascade Brewery in the distance. In 1828 a Female Factory opened on the outskirts of Hobart at Cascades. It became the colony's largest Factory, expanding by 1853 into five major courtyards accommodating 1000 women and 175 children. The photographer was J.W. Beattie (1859-1930) whose studios were in Elizabeth and Murray Streets between 1891 and 1940
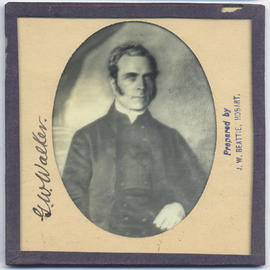
Lantern slide of George Washington Walker (1800-1859). Prepared by J.W. Beattie (1859-1930) whose studio locations were Elizabeth Street, Hobart from 1891-1920, Murray Street from 1921-40 and Cat and Fiddle until 1994.
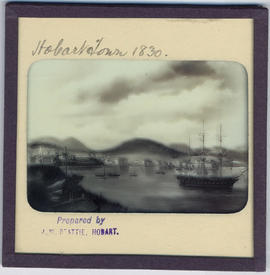
Lantern slide of Hobart Town Harbour, Van Diemen's Land, in 1830. Prepared by J.W. Beattie (1859-1930) whose studio locations were in Elizabeth Street, Hobart from 1891-1920, Murray Street from 1921-40 and Cat and Fiddle Arcade, Hobart, until 1994.
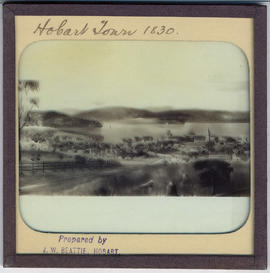
Lantern slide of early print of Hobart Town, Van Diemen's Land in 1830. From the collection of James Backhouse Walker. Prepared by J.W. Beattie (1859-1930) whose studio locations were in Elizabeth Street, Hobart from 1891-1920, Murray Street from 1921-40 and Cat and Fiddle Arcade, Hobart, until 1994.
Lantern slide of Hobart Town, Van Diemen's Land, from Old Wharf in 1839. From the collection of James Backhouse Walker. Prepared by J.W. Beattie (1859-1930) whose studio locations were in Elizabeth Street, Hobart from 1891-1920, Murray Street from 1921-40 and Cat and Fiddle Arcade, Hobart, until 1994.