
Headrace at Tarraleah Power Station
- AU TAS UTAS ITCCD 2017/14-65
- Item
- 1970-1980
Parte de Greg Dickens Photographic Collection
Colour photograph looking downhill to Tarraleah Power Station

1482 resultados com objetos digitais Mostrar resultados com objetos digitais
Headrace at Tarraleah Power Station
Parte de Greg Dickens Photographic Collection
Colour photograph looking downhill to Tarraleah Power Station
Parte de Greg Dickens Photographic Collection
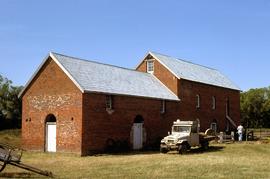
Colour photograph shows Toyota Landcruiser parked outside Thorpe Water Mill at Bothwell
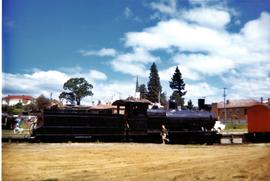
Children playing on black steam locomotive
Black steam locomotive uncoupled from carriages, with several children climbing and playing on engine.
Graeme Raphael
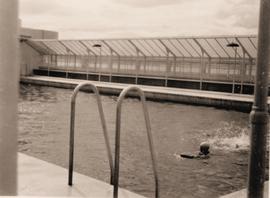
Swimming pool at Wrest Point Casino
Outdoor swimming pool with wall of glass providing windbreak.
Graeme Raphael
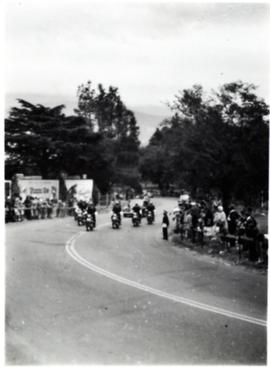
Escort for car near the Domain
Group of motor bikes escorting car up slope. Crowds lining either side of road.
Graeme Raphael
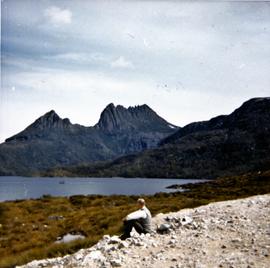
Man sitting on gravel near Cradle Mountain
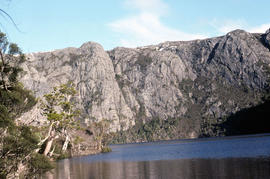
Colour photograph of Cradle Mountain with man seated on rocks in foreground. Dove Lake.
Graeme Raphael

Water flows through dam spillway
Black and white photograph of water flowing through spill way on dam, with snow capped mountain in distance.
Graeme Raphael
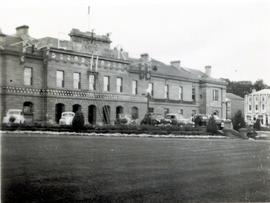
Decoration on Tasmanian Parliament House
Parliament House Hobart. Flags being placed on front of building as decoration.
Graeme Raphael
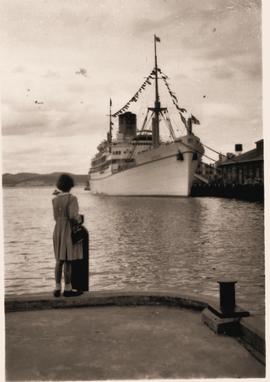
Passenger liner Gothic at Princess Wharf, Hobart
Graeme Raphael
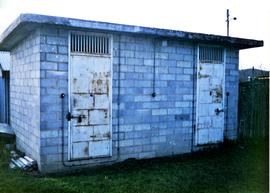
Small cement block building with two padlocked doors with grilles above.
Graeme Raphael
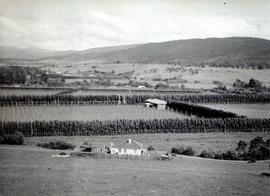
Photograph of several hop fields bordered by windbreak trees, possibly poplars
Graeme Raphael
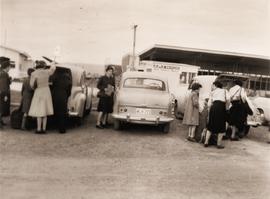
Loading luggage at Hobart Aerodrome
Group of people loading or unloading luggage from the rear boot of vehicles parked in the car park at Hobart Aerodrome. Building site and an aircraft parked on tarmac visible in background.
Graeme Raphael
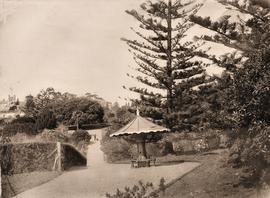
Decorative seat at Royal Botanical Gardens
Parte de Photographs of Edward Verrell
Black-and-white photograph of Royal Botanical Gardens, showing a decorative undercover seat constructed around the stump and butt of a tree. Government House visible in background
Parte de Photographs of Edward Verrell
Black-and-white photograph looking south at Cornelian Bay on the Derwent River, with one boatshed on far shore
View of Dunkleys Point at Sandy Bay
Parte de Photographs of Edward Verrell
Black-and-white photograph shows Sandy Bay Road in foreground, the grand home St Helena on what is known as Dunkleys Point, and Battery Point on the opposite shore of the bay
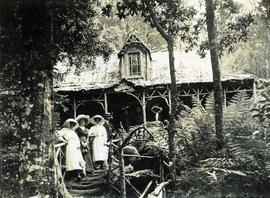
Visitors at Falls Hut, Mount Wellington
Parte de Photographs of Edward Verrell
Black-and-white photograph shows visitors standing on front steps and veranda at Falls Hut, built 1897, at the Cascades, on road to Mount Wellington
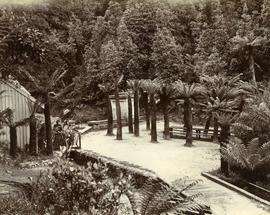
Parte de Photographs of Edward Verrell
Black-and-white photograph shows walking path at Fern Tree Bower, Mount Wellington
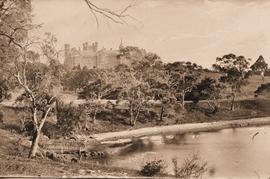
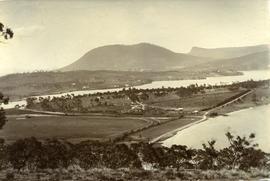
Government House in Hobart, viewed from the river, across Rose Bay
Parte de Photographs of Edward Verrell
Black-and-white photograph shows waves lapping shoreline of Derwent River in foreground, with Government House on the hill, surrounded by mature trees, tall picket fence runs parallel with river, two wires strung between poles, visible through trees
Parte de Photographs of Edward Verrell
Black-and-white photograph shows dwellings, fences and farmland at Lindisfarne Bay, looking across Derwent River to Hobart
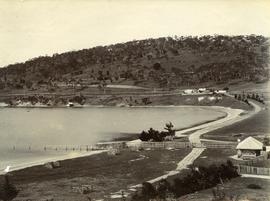
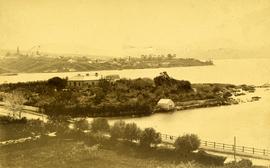
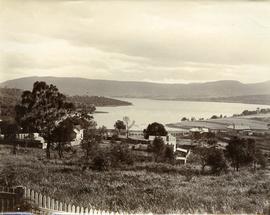
View from Queens Domain looking north to Cornelian Bay and New Town Bay
Parte de Photographs of Edward Verrell
Black-and-white photograph taken from elevated point on Queen’s Domain, looking north up Derwent River towards Cornelian Bay and New Town Bay; Risdon Park Racecourse (1880s-1926) at New Town in foreground, early burial plots in headland of Cornelian Bay Cemetery at right of picture.
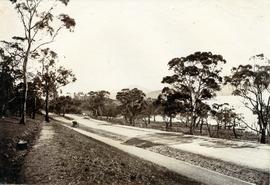
Road to Government House, on Gun Carriage Drive
Parte de Photographs of Edward Verrell
Black-and-white photograph taken looking north along Gun Carriage Drive towards Government House, Hobart, with post-and-rail fences on Derwent River side; a horse harnessed to a four-wheel carriage, is on the left of the road; a small jetty extends from the shoreline and a boat is visible through the trees, anchored just off shore.

Ships docked at New Wharf, Hobart
Parte de Photographs of Edward Verrell
Black-and-white photograph shows sailing ships moored at New Wharf, Hobart, in front of Salamanca Place, with milled timber stacked on edge of wharf
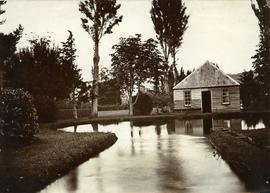
Parte de Photographs of Edward Verrell
Photograph showing the first hatchery building built in 1870 at the Salmon Ponds at Plenty surrounded by landscaped grounds filled with exotic trees.

View of the Post Office, Queenstown, Tasmania
Parte de Images of West Coast Tasmania
Image contains text identifying the subject. Possibly originally a post card.
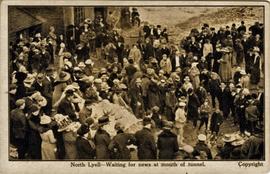
North Lyell - waiting for news at the mouth of the tunnel
Parte de Images of West Coast Tasmania
Image contains text identifying the subject and also 'copyright'. Originally taken from a postcard published in the weeks following the 1912 North Mount Lyell mine disaster. Image shows people milling around outside of unidentified building.
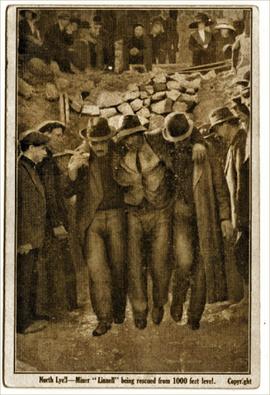
North Lyell - Miner 'Linnell' being rescued from 1000 feet level
Parte de Images of West Coast Tasmania
Image contains text identifying the subject and also 'copyright'. Originally taken from a postcard published in the weeks following the 1912 North Mount Lyell mine disaster. Image shows people supporting Linnell as he moves towards the photographer, possibly with the mine entrance at the rear.
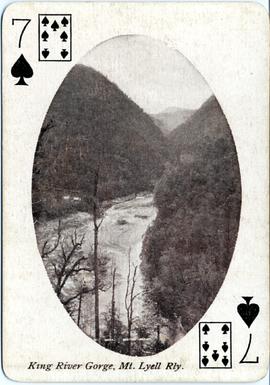
King River Gorge, Mt Lyell Railway
Parte de Images of West Coast Tasmania
The image appears on a printed playing card (7 of Spades) with legend in text at the bottom. The cards were part of a tourism promotion campaign by the Northern Tasmanian Tourist Association, printed and distributed just after the Great War (World War I).
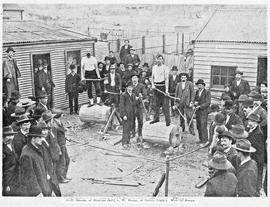
View of woodchoppers Burge and Garcie preparing for competition, Queenstown Tasmania
Parte de Images of West Coast Tasmania
Image likely taken from a newspaper and has a partial printed legend at the bottom: 6 T. Garcie, of Strahan (left) v W . Burge, of Crotty (right). Won by Burge.
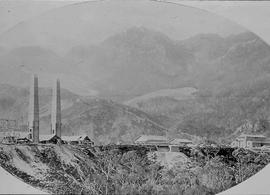
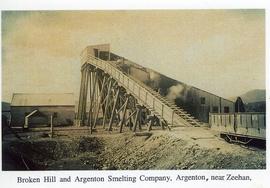
View across the smelters towards the hills at Crotty, Tasmania.
Parte de Images of West Coast Tasmania
Image clearly shows the smelters in the foreground. Image is oval and slightly cropped.

View of steam train on trestle bridge likely at the smelting works, Crotty, Tasmania.
Parte de Images of West Coast Tasmania
Image likely sourced from a newspaper or publication as it contains printed legend with hand written amendment at the bottom: Smelter site showing works in course of construction and method of disposing of slag. Mount Jukes in the background. Crotty 1898.
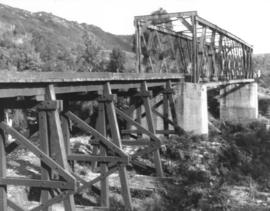
View of steel railway bridge with adjacent timber trestle extension, Crotty, Tasmania
Parte de Images of West Coast Tasmania
Image shows the bridge in good condition making the dating difficult. Image quality tends to suggest a later date.
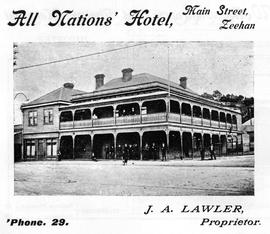
View of the All Nations Hotel, Zeehan, Tasmania
Parte de Images of West Coast Tasmania
Image is an advertisement with the Hotel in the centre and text above and below providing the name, address, proprietor and telephone number.
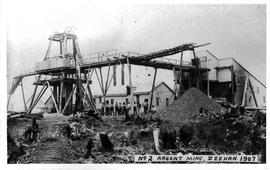
View of the Argent Mine Number 2, Zeehan, Tasmania
Parte de Images of West Coast Tasmania
Image has hand printed label giving title and date in bottom right.
Parte de Images of West Coast Tasmania
Image likely sourced from a newspaper or publication as it has a printed legend at the bottom.
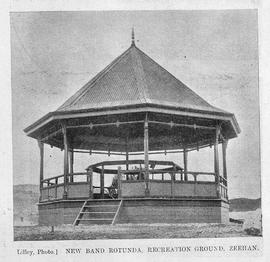
View of the Band Rotunda, Zeehan, Tasmania
Parte de Images of West Coast Tasmania
Image has hand printed label giving title and date in bottom.
Lilley
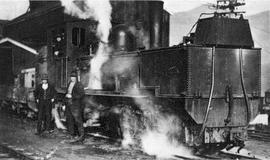
View of the Beyer Peacock Steam engine at Silver Bell, near Zeehan, Tasmania
Parte de Images of West Coast Tasmania
Image has the engine dominant with two male figures to the left. Image is grainy.
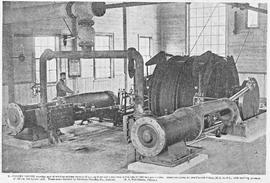
Parte de Images of West Coast Tasmania
Image is likely sourced from a newspaper or publication as it shows legend at the bottom identifying the scene and providing technical information.
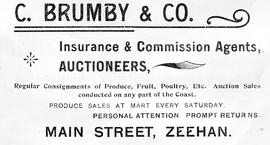
Advertising flyer for C Brumby & Co, auctioneers and insurance agents, Zeehan, Tasmania
Parte de Images of West Coast Tasmania
Image does not provide a view of any buildings however provides details of the Company and its services.

View of Central Main street, Zeehan, Tasmania
Parte de Images of West Coast Tasmania
Image has printed label at the bottom and is possibly a post card.
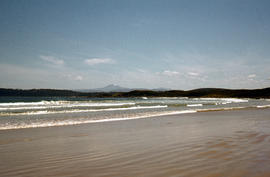
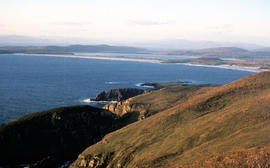
Parte de Arthur Knight Slides
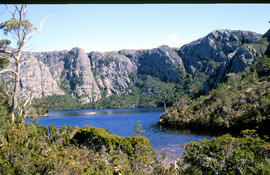
Colour photograph taken from beach at Cloudy Bay on Bruny Island, looking west to Adamsons Peak on Tasmanian mainland
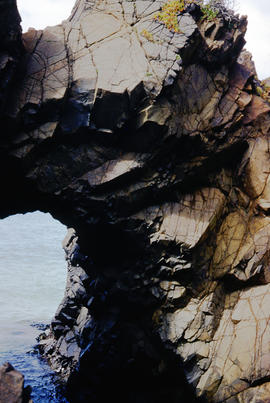
Cape Elizabeth arch on North Bruny Island
Parte de Arthur Knight Slides
Colour photograph of archway at Cape Elizabeth on shoreline at North Bruny Island
Arthur Knight
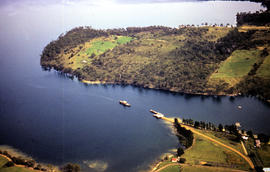
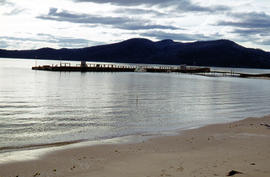
Aerial picture of boat in Barnes Bay
Parte de Arthur Knight Slides
Colour photograph from the air showing a boat in Barnes Bay approaching or leaving jetty.
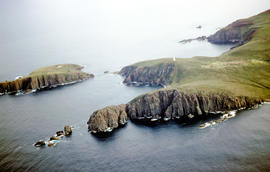
Aerial view of Cape Bruny from south-east
Parte de Arthur Knight Slides
Colour photograph of Cape Bruny taken from the air. Photograph depicts coastline of South Bruny Island including lighthouse, Courts Island, Lighthouse Bay
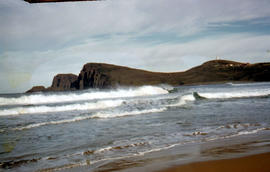
View of Cape Bruny and lighthouse from Lighthouse Bay
Parte de Arthur Knight Slides
Colour photograph of waves breaking in Lighthouse Bay, with cliffs and headland of Cape Bruny and Bruny Island Lighthouse in background. Discolouration in scanned image from original slide.

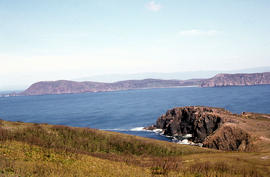
View of Cape Bruny and lighthouse from Lighthouse Bay
Parte de Arthur Knight Slides
Colour photograph of cliffs of Cape Connella, South Bruny Island
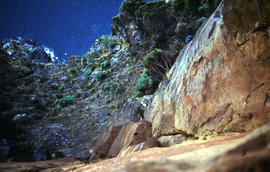
View of shoreline at base of Cape Connella, looking down cliff face
Parte de Arthur Knight Slides
Colour photograph of shoreline at base of Cape Connella, South Bruny Island, looking down the cliff face.
View of Cloudy Bay and West Cloudy Bay
Parte de Arthur Knight Slides
Colour photograph of Cloudy Bay and West Cloudy Bay, Bruny Island.
View of Cloudy Bay from East Cloudy Head
Parte de Arthur Knight Slides
Colour photograph of Cloudy Bay from East Cloudy Head
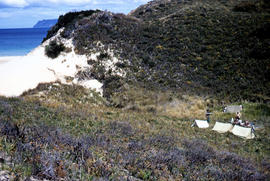
View of Bruny Island campsite of Hobart Walking Club 1955
Parte de Arthur Knight Slides
Colour photograph of heath and sand dunes, site of Hobart Walking Club campsite near Cape Queen Elizabeth on Bruny Island,1955
Section of old bridge at Alonnah
Parte de Arthur Knight Slides
Colour photograph of old Hobart Bridge section tethered offshore at Alonnah
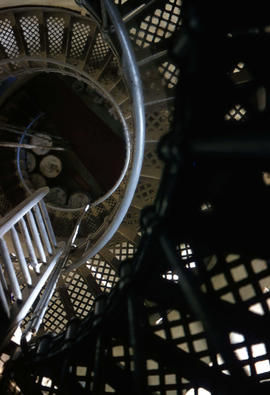
Staircase in Bruny Island Lighthouse
Parte de Arthur Knight Slides
Colour photograph taken inside Bruny Island Lighthouse showing metal staircase

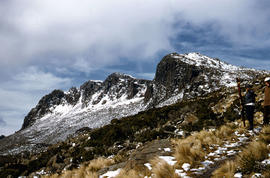
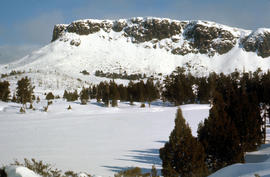
Aftermath of blizzard on Ben Lomond
Parte de Arthur Knight Slides
Colour photograph shows snow on the upper slopes of Ben Lomond after a blizzard
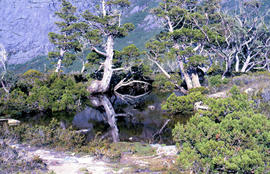
Trees reflected in Artists Pool
Parte de Arthur Knight Slides
Colour photograph of Artists Pool, a waterhole near Cradle Mountain, with reflections of alpine plants on the water's surface
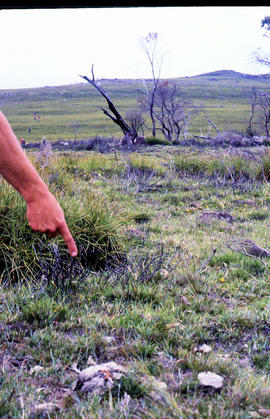
Parte de Arthur Knight Slides
Colour photograph shows a person pointing at a dead bird on the ground near Bare Mountain, with new undergrowth shooting after a recent bushfire and several bushwalkers visible in the distance
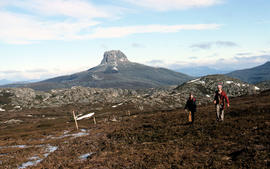
Parte de Arthur Knight Slides
Colour photograph of two walkers trying to avoid slippery pathway with flecks of snow on ground and Barn Bluff in background
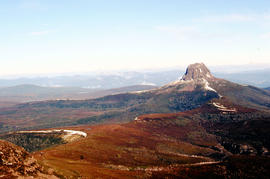
Barn Bluff as viewed from Cradle Mountain
Parte de Arthur Knight Slides
Colour photograph of Barn Bluff as viewed form Cradle Mountain with some snow remaining on the ridgelines of the cirque
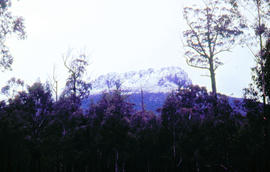
Parte de Arthur Knight Slides
Colour photograph shows snow on Ben Lomond
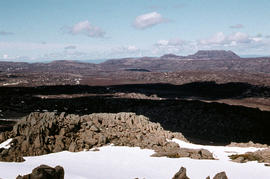
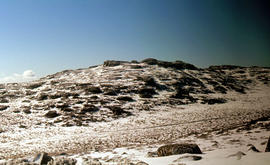
Parte de Arthur Knight Slides
Colour photograph shows Ben Lomond plateau with partial snow cover and blackened ground
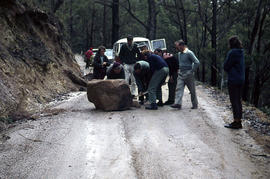
Boulder blocks Storeys Creek Rd 1964
Parte de Arthur Knight Slides
Colour photographs shows motorists trying to clear a boulder from Storeys Creek Road after a rock fall
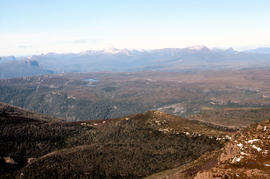
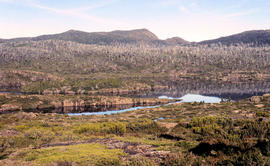
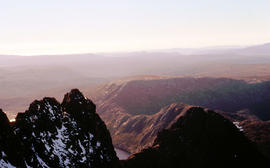
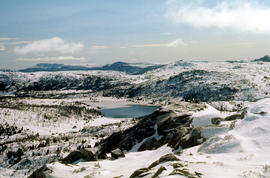
Central Highlands from Cradle Mountain
Parte de Arthur Knight Slides
Colour photograph shows mountains of Central Highlands as viewed from Cradle Mountain
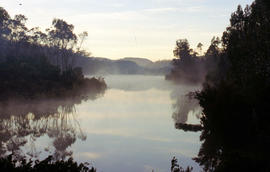
Misty morning at Cloister Lagoon
Parte de Arthur Knight Slides
Colour photograph shows mist above the surface of Cloister Lagoon just before daybreak
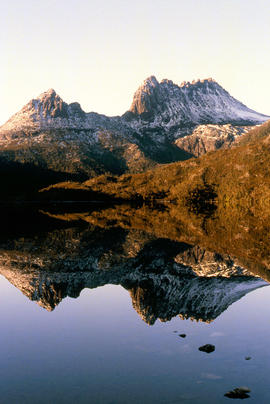
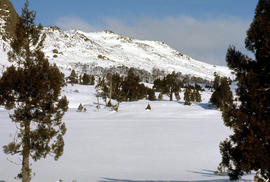
Cradle Mountain from Dove Lake
Parte de Arthur Knight Slides
Colour photograph shows light dusting of snow on Cradle Mountain from Dove Lake
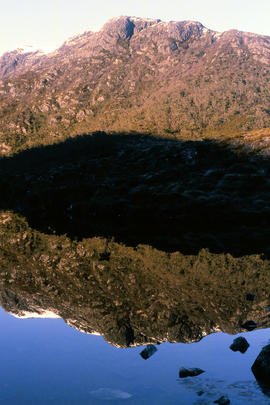
Parte de Arthur Knight Slides
Colour photograph shows ridge of rock from Dove Lake
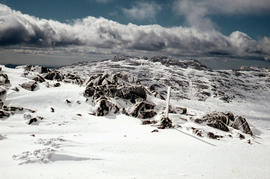
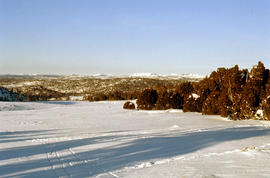
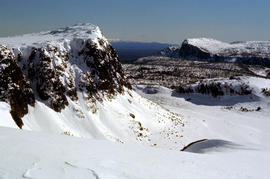
Snow cover on Ben Lomond Plateau
Parte de Arthur Knight Slides
Colour photograph shows snow cover on Ben Lomond Plateau
Pencil Pines on shore of Crater Lake
Parte de Arthur Knight Slides
Colour photograph shows Crater Lake, with remnants of snow on rock ledge
Parte de Arthur Knight Slides
Colour photograph shows Crater Lake
Parte de Arthur Knight Slides
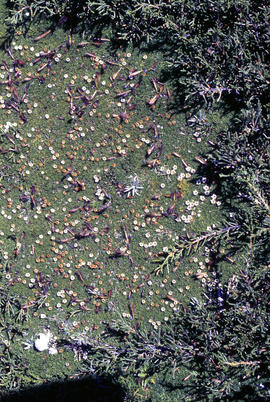
Colour photograph shows bed of green cushion plants
Parte de Arthur Knight Slides
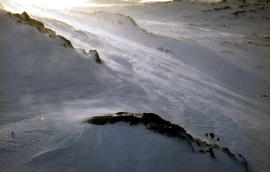
Colour photograph shows wind moving snow in drift at sunset on Ben Lomond 1962

Snowdrift against rocks at Ben Lomond
Parte de Arthur Knight Slides
Colour photograph shows snowdrift against rocks on Ben Lomond 1962
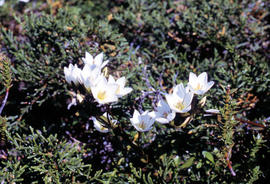
Wildflowers on Cathedral Mountain
Parte de Arthur Knight Slides
Colour photograph of wildflower in alpine environment
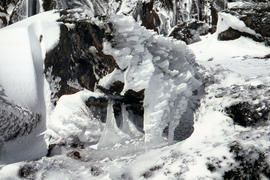
Ice formation on rocks at Ben Lomond 1962
Parte de Arthur Knight Slides
Colour photograph shows ice formation on rocks atop Ben Lomond 1962
Snowfall at Jaffa Vale and Mount Olympus
Parte de Arthur Knight Slides
Colour photograph shows tracks of snow skiers at Jaffa Vale and Mount Olympus
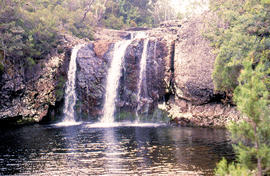
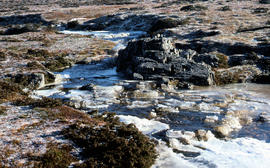
Parte de Arthur Knight Slides
Colour photograph of limited water flow across Knyvet Falls 1984 GIS: Latitude -4159 Longitude 14593 Gazetteer Australia Record_ID TAS06008
Shoreline of Lake Chalice 1979
Parte de Arthur Knight Slides
Colour photograph shows the rocky shoreline of Chalice Lake GIS: Latitude -4188 Longitude 14615 Gazetteer Australia Record_ID TAS02044
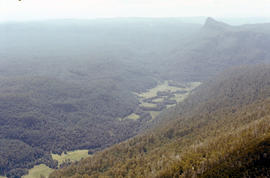
Lees Paddock and Mount Pillinger
Parte de Arthur Knight Slides
Colour photograph shows the cleared land of Lees Paddocks in the upper Mersey Valley, surrounded by bush with Mount Pillinger in the background

Portrait format photograph of Leven Canyon
Parte de Arthur Knight Slides
Colour portrait format photograph shows Leven River spilling in to narrow gorge in the part of the river known as Leven Canyon
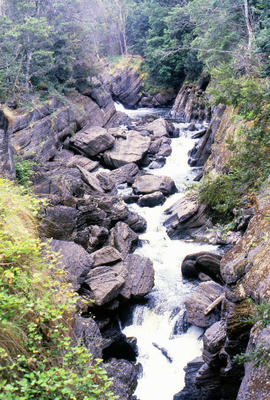
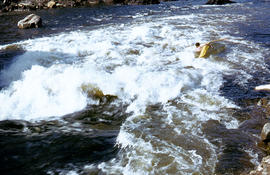
Parte de Arthur Knight Slides
Colour photograph shows whitewater in narrow section of Leven Canyon
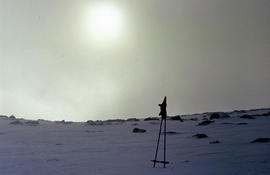
Morning mist on Ben Lomond 1962
Parte de Arthur Knight Slides
Colour photograph shows pair of gloves on a set of ski poles pitched into snow atop Ben Lomond, with mist covering the sun
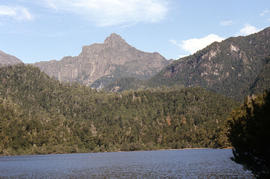
Cliffs of Mount Anne above Lake Timk
Parte de Arthur Knight Slides
Colour photograph shows the cliffs of Mount Anne above Lake Timk

Parte de Arthur Knight Slides
Colour photograph shows Lake Timk and Mount Anne in distance GIS: Latitude -4293 Longitude 14646 Gazetteer Australia Record_ID TAS16882
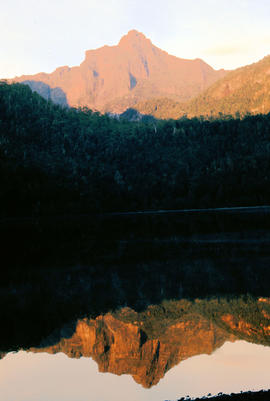
Reflection of Mount Anne on surface of Lake Timk
Parte de Arthur Knight Slides
Colour portrait format photograph shows reflection of Mount Anne on the surface of Lake Timk

Mount Ossa and Cathedral Mountain
Parte de Arthur Knight Slides
Colour photograph shows rocky peak of Mount Rogoona, with alpine plain in foreground
Parte de Arthur Knight Slides
Colour photograph shows Mount Rogoona with Lake Myrtle obscured by light alpine forest vegetation on ridge
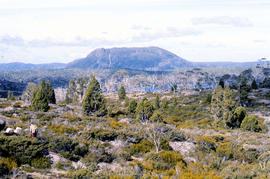
Panoramic view of Mount Rogoona
Parte de Arthur Knight Slides
Colour photograph shows farmland in the Kentish area with Mount Roland in background
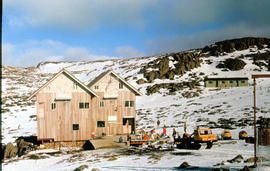
View across Cradle Mountain ridges to the north
Parte de Arthur Knight Slides
Colour photograph shows people standing outside Northern Tasmanian Alpine Club hut at Ben Lomond, one holding snow skis and poles
Piesse Vale on Ben Lomond plateau
Parte de Arthur Knight Slides
Colour photograph shows plateau near Cradle Mountain
Creek on plateau above Cradle Mountain
Parte de Arthur Knight Slides
Colour photograph shows plateau near summit of Ben Lomond
Pool of Siloam & The Temple 1978
Parte de Arthur Knight Slides
Colour photograph shows snow covering Pool of Siloam near the West Wall of Mount Jerusalem
Pool of Siloam and the West Wall of Mount Jerusalem
Parte de Arthur Knight Slides
Colour photograph shows dolerite peak of Ragged Jack, near Ben Lomond, viewed across from lightly timbered farmland
Parte de Arthur Knight Slides
Colour photograph shows ski runs near summit of Ben Lomond 1960
Parte de Arthur Knight Slides
Colour photograph of Strickland Valley near Ben Lomond, with partial snow cover, 1960
Parte de Arthur Knight Slides
Colour photograph shows heavy snow cover on forest at West Wall near Mount Jerusalem
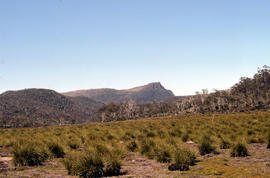
Western Bluff & Lake Thor 1978
Parte de Arthur Knight Slides
Colour photograph shows view west from Back Mountain 1983
Parte de Arthur Knight Slides
Colour photograph shows a kayaker falling into the Derwent River, below the site of the Repulse Dam, in 1964
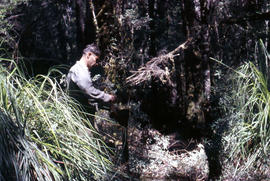
Parte de Arthur Knight Slides
Colour photograph shows man repairing boots in shade of forest
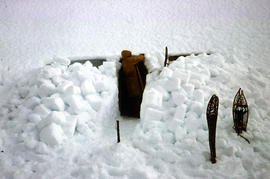
Parte de Arthur Knight Slides
Colour photograph shows a snow cave excavation
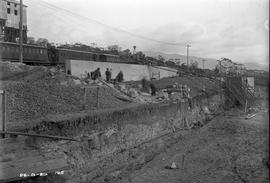
Excavation and construction below railway line at Risdon
Black-and-white photograph shows excavation and construction of retaining walls at E.Z. Co. Zinc Works at Risdon below the level of the railway line
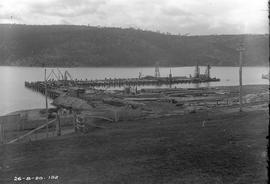
Construction of new Risdon wharf
Black-and-white photograph shows construction of wharf at E.Z. Co. Zinc Works at Risdon
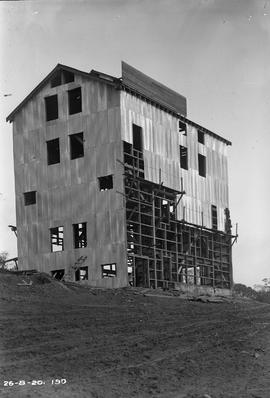
Cladding a building at E.Z. zinc works
Black-and-white photograph depicts workers fixing corrugated iron sheets to exterior wall of a new building at E.Z. Co. Zinc Works at Risdon
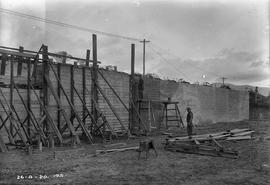
Construction of retaining wall at E.Z. Co Zinc Works
Black-and-white photograph depicts workers building a retaining wall at E.Z. Co. Zinc Works at Risdon