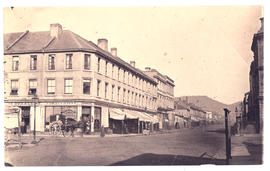
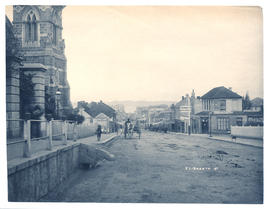
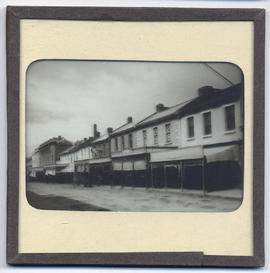
Photograph of Liverpool Street Hobart at the intersection of Argyle Street looking towards West Hobart, taken around the turn of the century showing Cherry's Carlton Club Hotel in the foreground. Also J. Whiteside & Son Furnishing Warehouse and Canes Iron mongers. The date is assumed from the presence of electric power poles which were introduced in 1898.
Photograph of Liverpool Street Hobart at the intersection of Elizabeth Street. Show gas lighting taken about 1870. The photographer is Alfred Winter who had studios in Bathurst, Elizabeth and Liverpool Streets from 1869 until 1891.
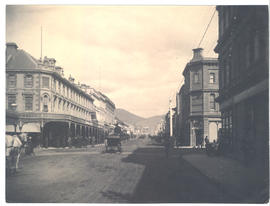
Photograph of Liverpool Street Hobart taken from just before the Elizabeth Street intersection around the turn of the century with horse drawn carriages in the foreground. The date is assumed from the presence of electric power poles which were introduced in 1898.
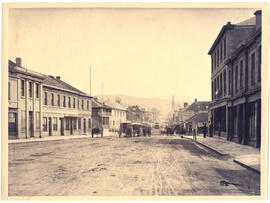
Photograph of Elizabeth Street Hobart looking north in about 1879. Legrands old shop is on the right and the old post offfice and Ship hotel are also visible according to notes on the reverse of the photo. Also shown is the Tasmanian pale ales store and the All Nations hotelThe photographer is Alfred Winter who had studios in Bathurst, Elizabeth and Liverpool Streets from 1869 until 1891.
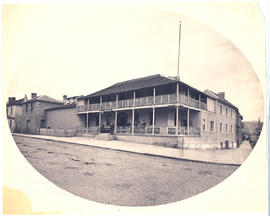
Photograph of the Ship Inn on the corner of Elizabeth and Collins Streets, Hobart. In 1881 the proprietor was Mr J. C. Hadley . The photographer is Alfred Winter who had studios in Bathurst, Elizabeth and Liverpool Streets from 1869 until 1891.
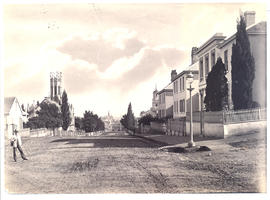
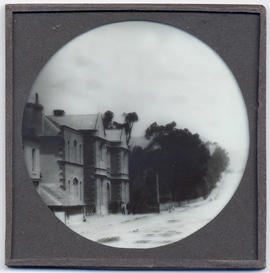
Photograph of St. John's Street, Launceston with St. John's Anglican Church and Chalmers Free Presbyterian Church on opposite sides of the street. The photographer was William Cawston who had studios in Paterson and St. John Streets, Launceston from 1863-1891.
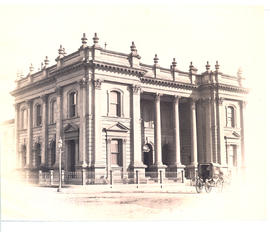
Photograph of the Town Hall in Launceston, Tasmania. The photographers were Anson Brothers who had studios in Liverpool, Collins and Elizabeth Streets, Hobart, between 1878 and 1891.
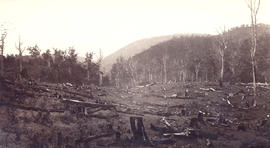
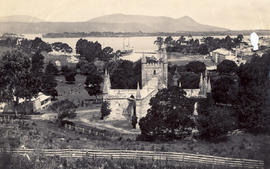
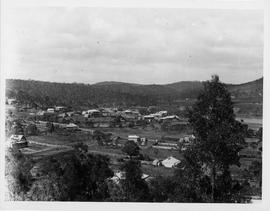
Photograph of Launceston from Windmill Hill looking north taken in c1881. The photographer was Alfred Winter who had studios in Bathurst, Elizabeth and Liverpool Streets from 1869 until 1891.
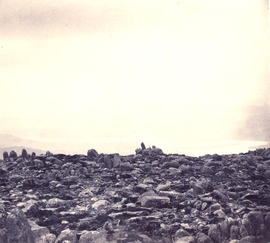
Photographs of Cook's Monument, Fern Tree Bower, Mount Wellington. Memorial stones commemorate Mayor Henry Cook and the Hobart Town Corporation Waterworks erected in 1861.
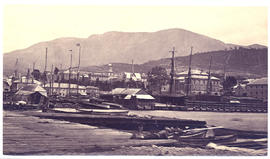
Photograph of Port Arthur from behind the church with ship in the harbour, taken by Henry Hall Baily who had studios in Elizabeth and Liverpool Streets, Hobart from 1865 until 1918.
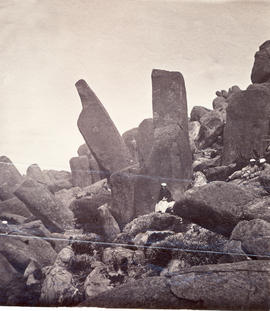
Photograph of Fluted Cape, Adventure Bay, Bruny Island, Tasmania. The photographer was Henry Hall Baily who had studios in Elizabeth and Liverpool Streets, Hobart from 1865 until 1918
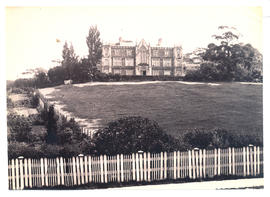
Portrait photograph of Government House, Hobart, Tasmania. The photographer was Henry Hall Baily who had studios in Elizabeth and Liverpool Streets, Hobart from 1865 until 1918
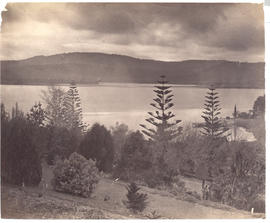
Photograph of view from the Botanical Gardens, Hobart, Tasmania in about 1880. Three Norfolk Island pines dominate the foreground and the view looks out to the River Derwent and Eastern Shore. The photographers were Anson Brothers, whose firm was located in Liverpool, Collins and Elizabeth Streets between 1878 and 1891.
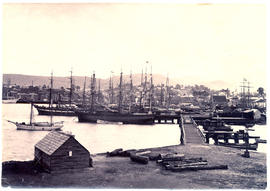
Photograph from the collection of James Backhouse Walker of Sullivan's Cove in about 1870 according to a note on the reverse. Taken from around Victoria Dock, Old St David's cathedral in background. The photographer is Henry Hall Baily who had studios in Elizabeth and Liverpool Streets Hobart from 1865 until 1918.
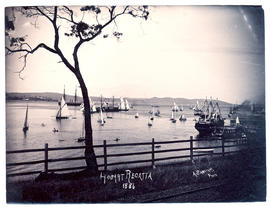
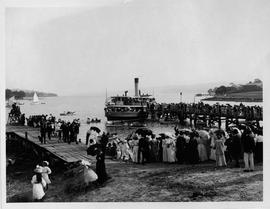
Photograph of the Hobart Regatta taken in 1886. The photographer was Albert Sargeant who had studios in Macquarie Street, Hobart from 1886-1890 and George Street, Launceston from 1900-1913
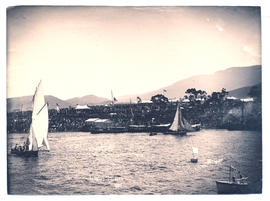
Photograph of the Hobart Regatta grandstand taken from the water in 1886. The photographer was Albert Sargeant who had studios in Macquarie Street, Hobart, Tasmania from 1886-1890 and George Street, Launceston, Tasmania from 1900-1913.
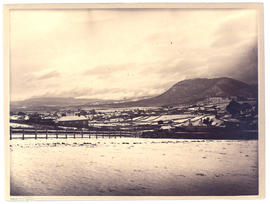
Photograph of New Town, Tasmania in the snow from Russell Young's Beaulieu (Swans Hill) taken on the morning of 16th June 1882. The photographer was Alfred Winter who had studios in Bathurst, Elizabeth and Liverpool Streets from 1869 until 1891.
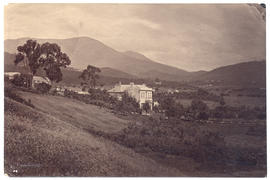
Photograph of Derwentwater, Sandy Bay, Tasmania, home of Captain Langdon Swan, c.1881. The photographer was Alfred Winter who had studios in Bathurst, Elizabeth and Liverpool Streets from 1869 until 1891.
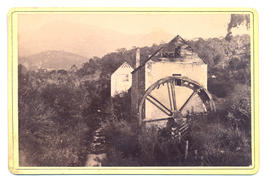
Photograph of the Cascade Brewery buildings from behind, Hobart, Tasmania. The photographers were Anson Brothers whose studios were located in Liverpool, Collins and Elizabeth Streets between 1878 and 1891.
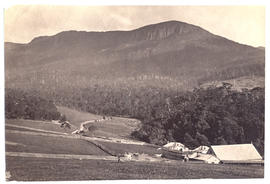
Photograph of Kangaroo Bay (Bellerive) on Hobart's Eastern Shore from hill showing wharf and houses c. 1882. The photographer was Henry Hall Baily who had studios in Elizabeth and Liverpool Streets, Hobart from 1865 until 1918.
Photograph of Kangaroo Point (Bellerive) Beach on Hobart's Eastern Shore looking toward settlement c. 1882. The photographer was Henry Hall Baily who had studios in Elizabeth and Liverpool Streets, Hobart from 1865 until 1918.
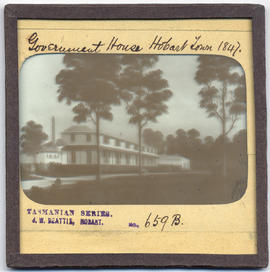
Lantern slide from the collection of James Backhouse Walker of old Government House, Hobart Town, Van Diemen's Land 1847. Prepared by J.W. Beattie (1859-1930) whose studio locations were in Elizabeth Street, Hobart from 1891-1920, Murray Street from 1921-40 and Cat and Fiddle Arcade, Hobart, until 1994.
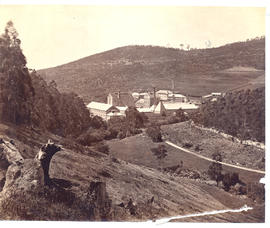
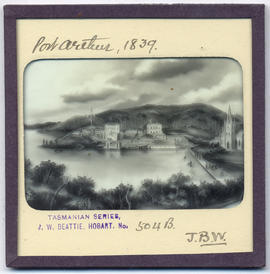
Lantern slide of Port Arthur 1839. Prepared by J.W. Beattie (1859-1930) whose studio locations were Elizabeth Street, Hobart from 1891-1920, Murray Street from 1921-40 and Cat and Fiddle until 1994.
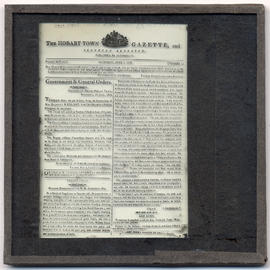
Lantern slide of front page of the Hobart Town Gazette, June 1816. Prepared by J.W. Beattie (1859-1930) whose studio locations were Elizabeth Street, Hobart from 1891-1920, Murray Street from 1921-40 and Cat and Fiddle until 1994.
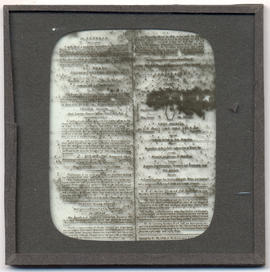
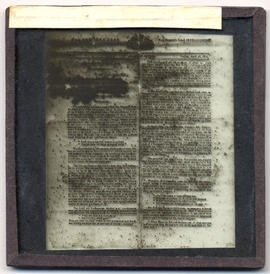
Lantern slide of funeral notice of Lieutenant Governor David Collins, 1810. From The Derwent Star, and Van Diemen’s Land Intelligencer no. 7, Tuesday April 3rd 1810. Prepared by J.W. Beattie (1859-1930) whose studio locations were Elizabeth Street, Hobart from 1891-1920, Murray Street from 1921-40 and Cat and Fiddle until 1994.
Lantern slide of the death of Lieutenant Governor David Collins, 1810. From The Derwent Star, and Van Diemen’s Land Intelligencer no. 7, Tuesday April 3rd 1810. Prepared by J.W. Beattie (1859-1930) whose studio locations were Elizabeth Street, Hobart from 1891-1920, Murray Street from 1921-40 and Cat and Fiddle until 1994.
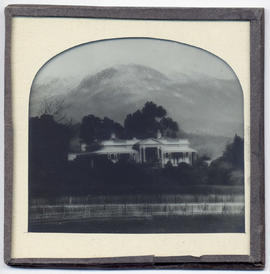
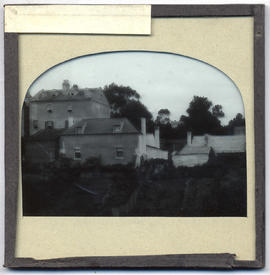
Lantern slide from the collection of James Backhouse Walker of Runnymede, Hobart Town, Van Diemen's Land. Thought to have been prepared by J.W. Beattie (1859-1930) whose studio locations were in Elizabeth Street, Hobart from 1891-1920, Murray Street from 1921-40 and Cat and Fiddle Arcade, Hobart, until 1994
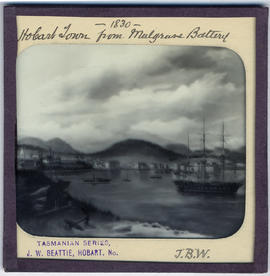
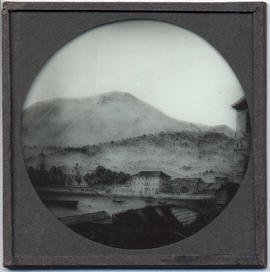
Lantern slide of Hobart Town from Mulgrave Battery, Van Diemen's Land, in 1830. From the collection of James Backhouse Walker. Prepared by J.W. Beattie (1859-1930) whose studio locations were in Elizabeth Street, Hobart from 1891-1920, Murray Street from 1921-40 and Cat and Fiddle Arcade, Hobart, until 1994.
Lantern slide of J. Walch and Sons, Macquarie Street, Hobart c1880. Prepared by J.W. Beattie (1859-1930) whose studio locations were Elizabeth Street, Hobart from 1891-1920, Murray Street from 1921-40 and Cat and Fiddle until 1994.
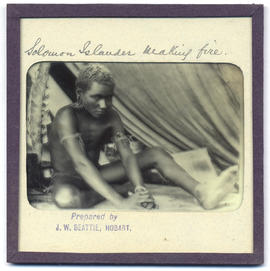
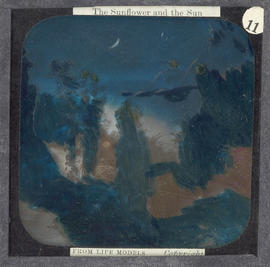
Lantern slide of Solomon Islander making fire. Prepared by J.W. Beattie (1859-1930) whose studio locations were Elizabeth Street, Hobart from 1891-1920, Murray Street from 1921-40 and Cat and Fiddle until 1994.
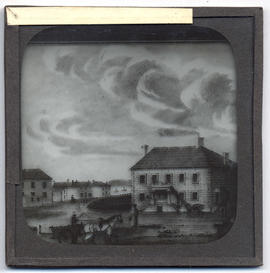
Lantern slide from the collection of James Backhouse Walker of St. David's Park, Davey Street, Hobart, Tasmania. Thought to have been prepared by J.W. Beattie (1859-1930) whose studio locations were in Elizabeth Street, Hobart from 1891-1920, Murray Street from 1921-40 and Cat and Fiddle Arcade, Hobart, until 1994. Quaker Collection.
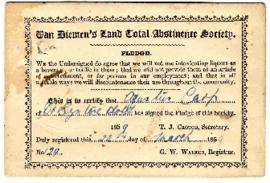
Pledge of total abstinence signed by Augustus Carp of the Dr. Syntax Hotel. The pledge is authorised by the Van Diemen's Land Total Abstinence Society of which George Washington Walker is the registrar.
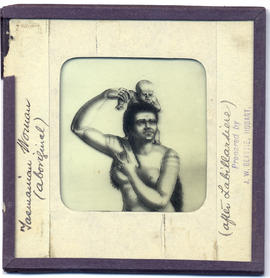
Lantern slide of Tasmanian aboriginal woman and child 'after Labillardiere'. Prepared by J.W. Beattie (1859-1930) whose studio locations were Elizabeth Street, Hobart from 1891-1920, Murray Street from 1921-40 and Cat and Fiddle until 1994
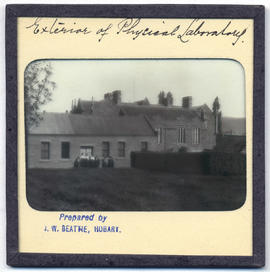
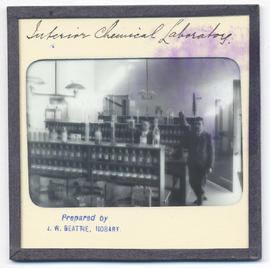
Lantern slides of the University of Tasmania, Queen's Domain, Hobart. Views of exterior and laboratories and library. Prepared by J.W. Beattie (1859-1930) whose studio locations were Elizabeth Street, Hobart from 1891-1920, Murray Street from 1921-40 and Cat and Fiddle until 1994 (Collection Pr.S.Uni/1-8)
Lantern slides of the University of Tasmania, Queen's Domain, Hobart. Views of exterior and laboratories and library. Prepared by J.W. Beattie (1859-1930) whose studio locations were Elizabeth Street, Hobart from 1891-1920, Murray Street from 1921-40 and Cat and Fiddle until 1994 (Collection Pr.S.Uni/1-8)
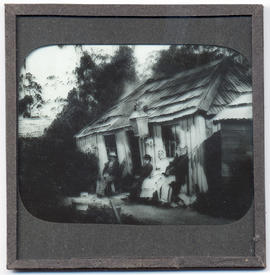
Lantern slide of Wood's hut, the Springs, Mount Wellington, Hobart. Prepared by J.W. Beattie (1859-1930) whose studio locations were Elizabeth Street, Hobart from 1891-1920, Murray Street from 1921-40 and Cat and Fiddle until 1994.
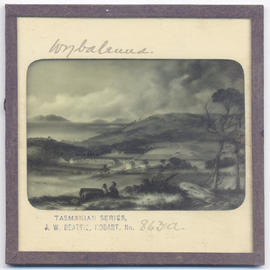
Lantern slide of Wybalena, Flinders Island. Prepared by J.W. Beattie (1859-1930) whose studio locations were Elizabeth Street, Hobart from 1891-1920, Murray Street from 1921-40 and Cat and Fiddle until 1994.
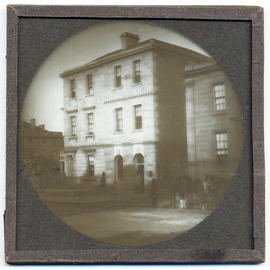
Lantern slide from the collection of James Backhouse Walker of buildings in early Hobart, Tasmania. Thought to have been prepared by J.W. Beattie (1859-1930) whose studio locations were in Elizabeth Street, Hobart from 1891-1920, Murray Street from 1921-40 and Cat and Fiddle Arcade, Hobart, until 1994.
Lantern slide from the collection of James Backhouse Walker of early Hobart Town, Van Diemen's Land from the harbour. Thought to have been prepared by J.W. Beattie (1859-1930) whose studio locations were in Elizabeth Street, Hobart from 1891-1920, Murray Street from 1921-40 and Cat and Fiddle Arcade, Hobart, until 1994. Quaker Collection.
Lantern slide of house in Hunter Street, Hobart. Prepared by J.W. Beattie (1859-1930) whose studio locations were Elizabeth Street, Hobart from 1891-1920, Murray Street from 1921-40 and Cat and Fiddle until 1994.
Lantern slide from the collection of James Backhouse Walker of a streetscape in Hobart, Tasmania. Thought to have been prepared by J.W. Beattie (1859-1930) whose studio locations were in Elizabeth Street, Hobart from 1891-1920, Murray Street from 1921-40 and Cat and Fiddle Arcade, Hobart, until 1994.
Extracts from the personal diaries of R. S. Sanderson, Burnie. Entries refer to events that occurred on the North West coast of Tasmania between 1884 and 1928. Also notes on ships in Emu Bay
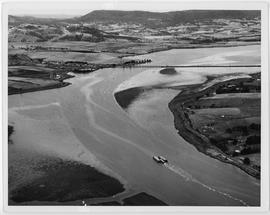
Aerial view of of the Derwent River at Bridgewater. Showing a paper mill barge on the river. Taken pre 1970s as the housing estate has not yet been built.
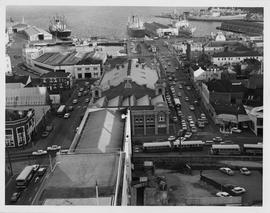
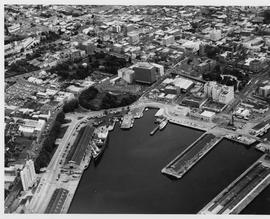
Aerial view of the Hobart harbour showing Salamanca Place, Watermans dock, Parliamentary House , Hydro Building, Elizabeth Street pier, the Marine Board building under construction, Franklin Square and St, David's Park.
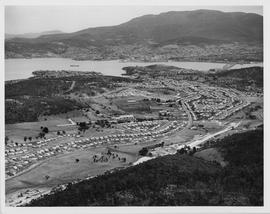
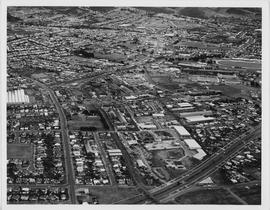
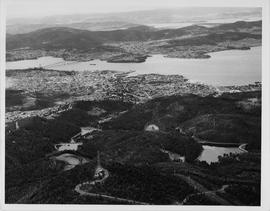
Aerial view of the Ridgeway Reservoir and Waterworks Reserve looking to Hobart, the Tasman Bridge and beyond to the Eastern Shore, Seven Mile Beach and Dodges Ferry
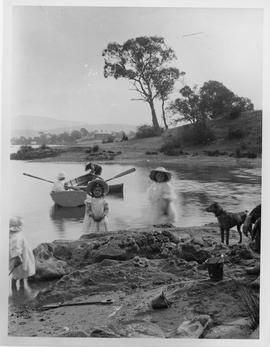
Photograph of a group on the rocky foreshore. Two older women with young children and three young girls in pinafores holding hands in the background. Thought to be taken at Beltana now Lindisfarne.
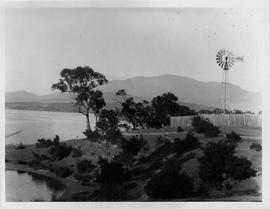
View of an Aermotor wind-powered water pump at Lindisfarne on the eastern shore of the Derwent River looking toward Mt. Wellington. James Martin & co. Sydney imported the Chicago-built windmills into Australia between 1895-1913