
- AU TAS UTAS SPARC P1-35-78
- Pièce
- n.d.
Fait partie de George Musgrave Parker : Correspondence and research records
(Mrs Mitchell). See also book chap. 9 (P1/35 (26-)
George Musgrave Parker

1142 résultats avec objets numériques Afficher les résultats avec des objets numériques
Fait partie de George Musgrave Parker : Correspondence and research records
(Mrs Mitchell). See also book chap. 9 (P1/35 (26-)
George Musgrave Parker
Fait partie de George Musgrave Parker : Correspondence and research records
George Musgrave Parker
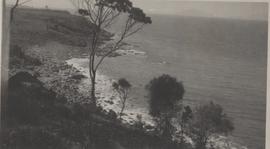
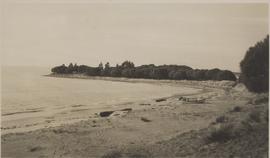
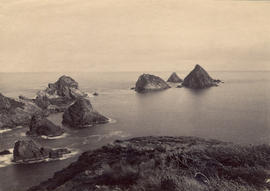
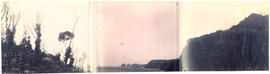
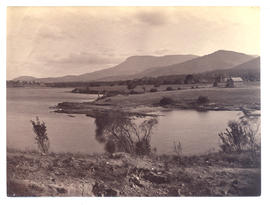
Coast view: East Coast Rocky Hills
Fait partie de George Musgrave Parker : Correspondence and research records
Thought to be Rocky Hills
George Musgrave Parker
Fait partie de George Musgrave Parker : Correspondence and research records
B. Sheppard photo
George Musgrave Parker
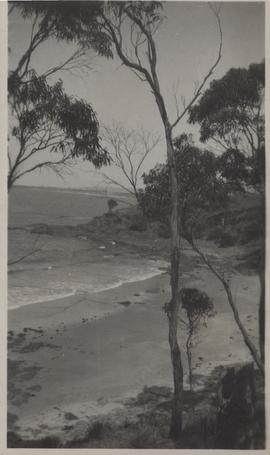
East Coast, view from Rocky Hills looking north
Fait partie de George Musgrave Parker : Correspondence and research records
near present Kabuki Restaurant
George Musgrave Parker
Fait partie de George Musgrave Parker : Correspondence and research records
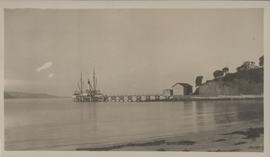
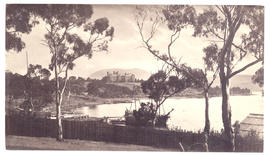
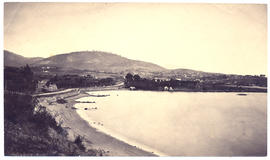
Photograph of Swansea Beach with Freycinet in distance
George Musgrave Parker
Fait partie de George Musgrave Parker : Correspondence and research records
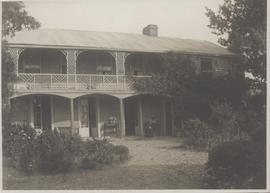
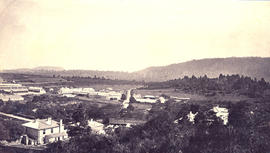
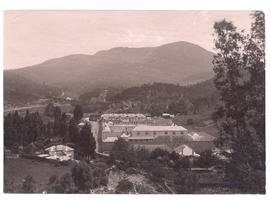
Photograph of Kelvedon taken by George Musgrave Parker
George Musgrave Parker
Fait partie de George Musgrave Parker : Correspondence and research records
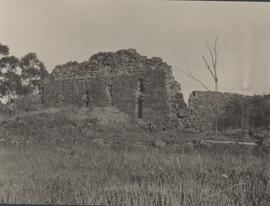
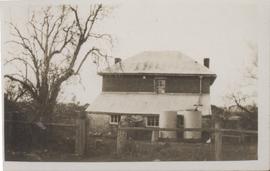
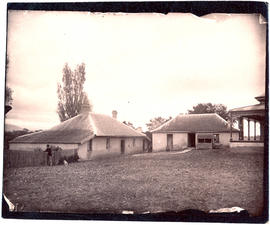
1 photograph of Apsley House c1920's. Originally a single storey sandstone Georgian house built in the 1840's on land granted to John Lyne who was MHA for Glamorgan in the period 1843-1865.
George Musgrave Parker
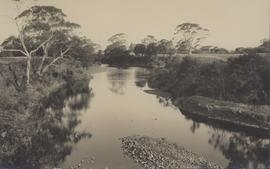
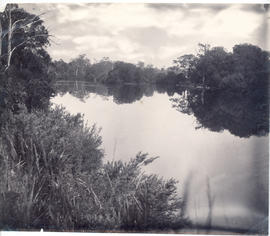
Meredith River, looking upstream to Cambria
Fait partie de George Musgrave Parker : Correspondence and research records
Photograph of the Meredith River at Swansea, Tasmania looking up the river to Cambria, built by George Meredith (1777-1856) in c1836. Beattie postcard
George Musgrave Parker
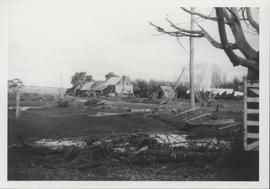
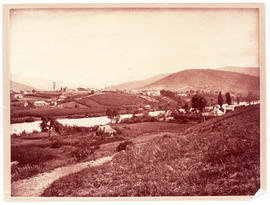
Floods in the Cranbrook district
Fait partie de George Musgrave Parker : Correspondence and research records
Photograph taken in 1923 of flooding of roadway and houses at what is thought to be Quinns Corner at Cranbrook, Tasmania. Photograph taken by George Musgrave Parker
George Musgrave Parker
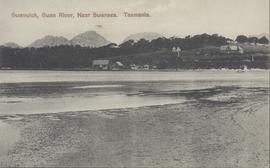
Fait partie de George Musgrave Parker : Correspondence and research records
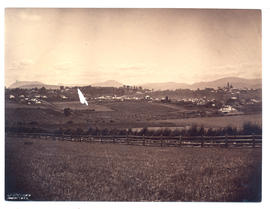
Post card of Swanwick, on the Swan River near Swansea, Tasmania. Depicts beach in foreground and farm in background. Spurling postcard.
George Musgrave Parker
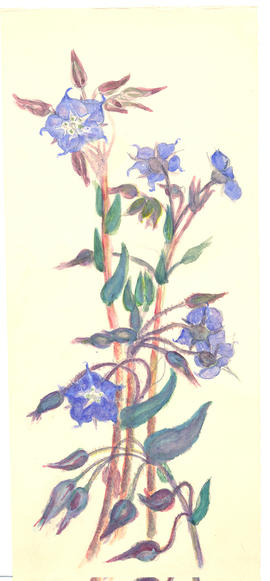
Fait partie de Olive Pink Collection
Watercolour on card sketched by Olive Pink, (date and location unknown) Thought to be Trichodesma zeylanicum
Olive Pink
Fait partie de Olive Pink Collection
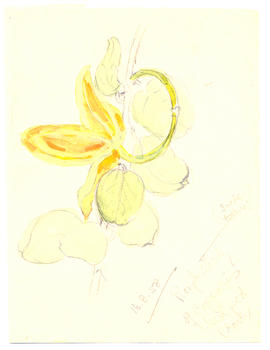
Watercolour on card sketched by Olive Pink, (date and location unknown)
Olive Pink
Fait partie de Olive Pink Collection
Coloured pencil on brown card sketched by Olive Pink, (date and location unknown)
Olive Pink

Fait partie de Olive Pink Collection
Pencil on card sketched by Olive Pink, (date and location unknown)
Olive Pink
Fait partie de Olive Pink Collection
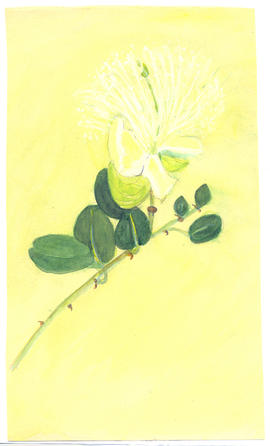
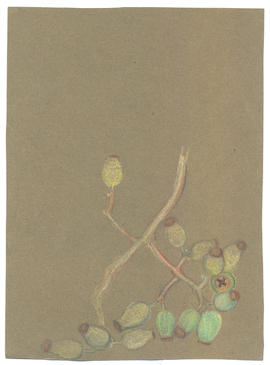
Water colour and pencil on card sketched by Olive Pink 16/8/58 (location unknown). Identified by Olive Pink as rough sketch of Capparis seedpod (back) "suede texture!"
Olive Pink
Fait partie de Olive Pink Collection
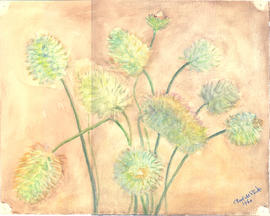
Watercolour on card sketched by Olive Pink, (location unknown), 1960. Described by Olive Pink as " popular name Pussy Tails" (ugly?)
Olive Pink
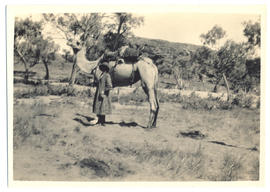
Photograph of Olive Pink and the the camel Quart-pot
Fait partie de Olive Pink Collection
Black and white photograph of Olive Muriel Pink standing next to a camel, 'Quart-Pot', in Central Australia, 1934, with inscription on the back by Olive Pink, '"Quart-pot" and Olivia - (ready for anything!)' Photographs sent with a letter to her friend Joan Walker in Hobart, Tasmania.
Olive Pink
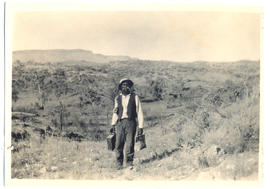
Fait partie de Olive Pink Collection
Black and white photograph taken by Olive Muriel Pink of her aboriginal guide, near Alice Springs, Central Australia, 1934, with inscription on the back by Olive Pink, 'My native (guide, factotum and friend!) a full-blooded Arunda on our way to Mt Gillen (in distance) He is carrying my waterbag and kit'. Photographs sent with a letter to her friend Joan Walker in Hobart, Tasmania.
Olive Pink
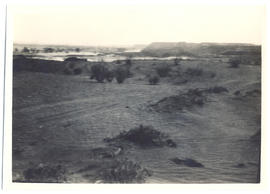
Fait partie de Olive Pink Collection
Black and white photograph by Olive Pink of the Finke River in Central Australia, 1934, with inscription on the back by Olive Pink, 'The Finke River ("bed" - it was sand not water - when I saw it!) Mt ? in distance. (At Horseshoe Bend) Central Australia.' Photographs sent with a letter to her friend Joan Walker in Hobart, Tasmania.
Olive Pink
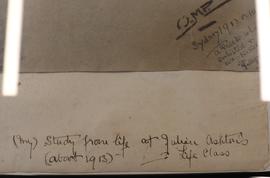
Fait partie de Olive Pink Collection
note on backing paper - (My) Study from life at Julien Asheton's' (about 1913) - Life Class
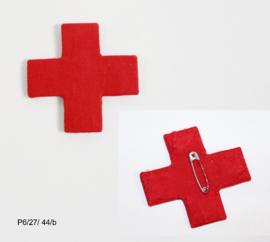
Fait partie de Olive Pink Collection
Fabric Red Cross Badge with safety pin sewn on back
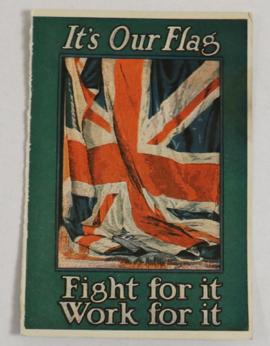
Postcard : ‘It’s our flag Fight for it Work for it
Fait partie de Olive Pink Collection
1 postcard ‘ - It’s our flag Fight for it Work for it
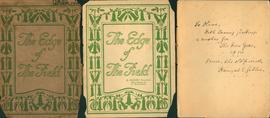
The Edge of the Field by Hookey, M
Fait partie de Olive Pink Collection
Booklet : Hookey, M, The Edge of the Field with decorations by L. Dechaineux, Australia, Bookfellow, 1913.
Inscribed “To Olive with loving greetings and wishes for the New Year 1914 from the old friend Hannah G Giblin.
‘OM Pink 1914’ written on front cover.
Olive Pink
Fait partie de Olive Pink Collection
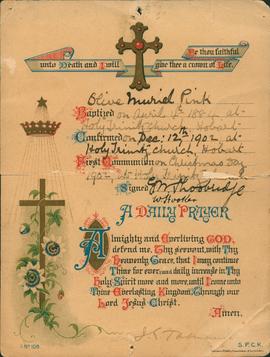
Confirmation certificate for Olive Muriel Pink issued by Holy Trinity Church Hobart dated 12.12.1902
Olive Pink
Fait partie de Olive Pink Collection
Postcard from Harold Southern to Olive Pink’s mother Evaline Fanny Pink dated 14.2.1915
Olive Pink
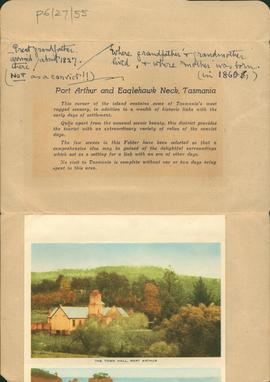
Souvenir of Beautiful Port Arthur and Eaglehawk Neck
Fait partie de Olive Pink Collection
Concertina postcards of Port Arthur with annotations by Olive Pink dated 1938
Olive Pink

Fait partie de Olive Pink Collection
Linocut of swan by Olive Pink – (lino block –not print)
Olive Pink
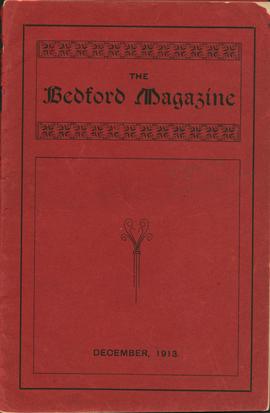
Bedford College, Strathfield Sydney
Fait partie de Olive Pink Collection
Copy of The Bedford Magazine–dated December 1913-Magazine of Bedford College, Strathfield, Sydney -girls school where Olive Pink taught art. On page 11 reference to Miss Pink taking a party of girls to the Art Gallery and on page 17 an article ‘Western Australian Flowers’ by Olive Pink
Olive Pink
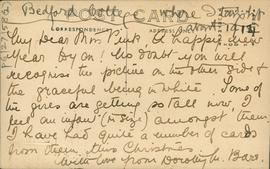
Postcard of Bedford College - verso
Fait partie de Olive Pink Collection
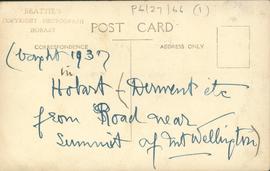
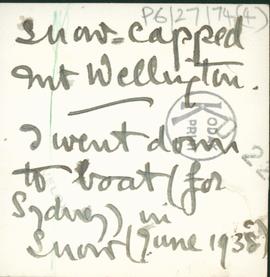
Postcard of view from Mount Wellington - verso
Fait partie de Olive Pink Collection
Fait partie de Olive Pink Collection
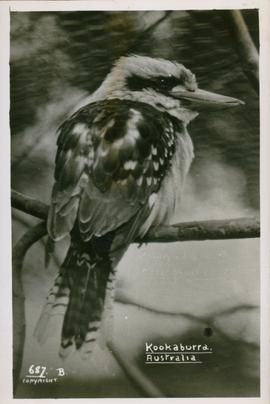
Black and white postcard inscribed Kookaburra, Australia , 687B. Mowbray Series, Scenic and Historic views on verso.

Fait partie de Olive Pink Collection
Black and white postcard of the Russell Falls, a tiered–cascade waterfall on the Russell Falls Creek, located in the Central Highlands region of Tasmania

Postcard of hop fields near New Norfolk
Fait partie de Olive Pink Collection
Black and white postcard of hop fields near New Norfolk, southern Tasmania marked 691
Fait partie de Olive Pink Collection
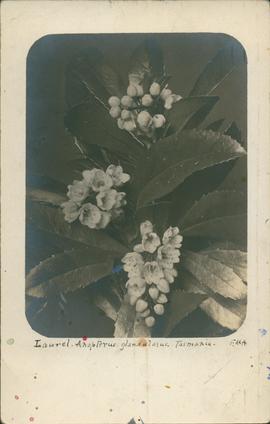
Black and white postcard of Laurel - Anopterus glandulosus. With initials E.M.A. Written to My Dear Violet and dated 28/3/19
Postcard of Olive Pink’s aboriginal gardener - verso
Fait partie de Olive Pink Collection
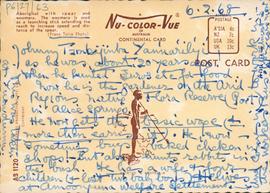
Postcard of Hotel Victoria, Darwin - verso
Fait partie de Olive Pink Collection
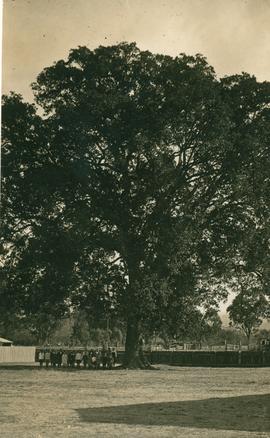
Postcard of photograph of large tree, Cobbity, NSW
Fait partie de Olive Pink Collection
Postcard photograph of large tree, Cobbity, NSW
.
Olive Pink
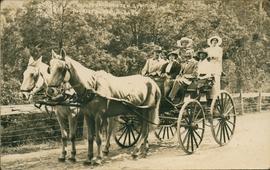
Horse drawn carriage with passengers
Fait partie de Olive Pink Collection
On front Webster-Rometch Ltd - Tourist Bureau Hobart. Taking passengers to the Huon.
Photograph of Home Hut - verso
Fait partie de Olive Pink Collection
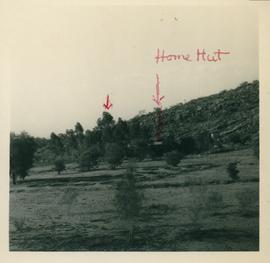
Arid Regions Native Flora Reserve - photograph
Fait partie de Olive Pink Collection
One of eight annotated black and white photographs of the site of the Arid Regions Native Flora Reserve. Noting the location of Home Hut.
Olive Pink
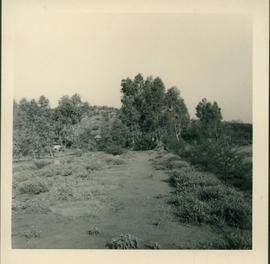
Arid Regions Native Flora Reserve - photograph
Fait partie de Olive Pink Collection
One of eight annotated black and white photographs of the site of the Arid Regions Native Flora Reserve
Olive Pink
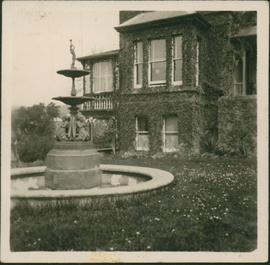
Fait partie de Olive Pink Collection
Black and white photograph of Olive Pinks lower room flat in Hobart. Once Dot Millers home, a girl with whom Olive went to school. Noting field of daisies around the fountain
Olive Pink
Fait partie de Olive Pink Collection
Andrew Inglis Clark Collection
Papers of A.I. Clark sr. include letters received from friends and colleagues, including American lawyers, a few papers relating to his legal practice, letters of appointment to political offices, papers relating to Australian federation and the Australian constitution and drafts of essays, speeches or articles on law, politics, philosophy and religion. Papers of A.I. Clark jr. include correspondence while serving in the army 1915 - 1919, correspondence with family and friends and family photographs, correspondence relating to his law practice and notes and articles on law, and notes on Tasmanian statutes and minutes of the editorial board on reprinting the Tasmanian Statutes (1935).
Andrew Inglis Clark
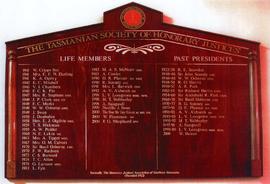
Tasmanian Society of Honorary Justices : Honour Board
Three photographs of the Honour Board of Tasmanian Society of Honorary Justices, located in hallway (Elizabeth Street entrance) Hobart Town Hall. Honour Board presented to Society by Mr F. G. Shepherd, QPM, JP. Historical notes : 1922 - 1994 dates/names confirmed by joint Society and University of Tasmania (History Department) research of available public records.
Photo credit. Mr. P. Baker. 12 December, 2000.
Tasmanian Society of Honorary Justices
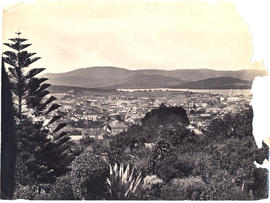
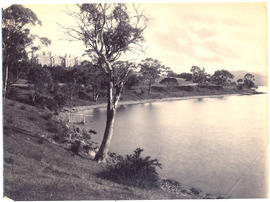
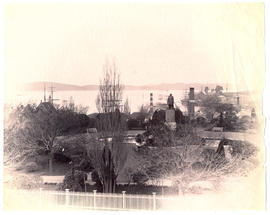
View from Mr. Robert's garden, West Hobart
Fait partie de Walker Family Papers
Photograph from the collection of James Backhouse Walker of a view of Hobart looking towards the Eastern Shore. The panorama has been taken from Mr. Roberts' garden with various shrubs and a Norfolk Island pine in the foreground. Henry Hall Baily is the photographer. He had studios in Elizabeth and Liverpool Streets Hobart from 1865 until 1918.
James Backhouse Walker
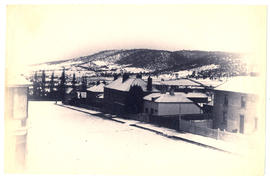
Fait partie de Walker Family Papers
Photograph from the collection of James Backhouse Walker of a Hobart streetscape in snow - looking towards Mt Nelson and Sandy Bay.
James Backhouse Walker
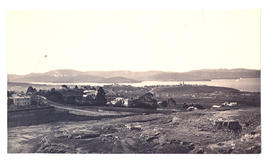
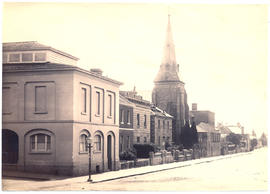
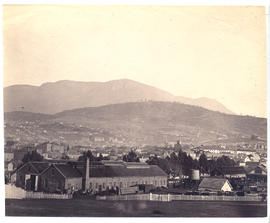
Hobart, looking towards St. George's Hill
Fait partie de Walker Family Papers
Photograph from the collection of James Backhouse Walker of a view of Hobart, looking towards St. George's Hill, Battery Point. Showing St Georges Church and James Luckman's windmill probably taken in the 1870s.
James Backhouse Walker
Mt. Wellington from St. George's Hill
Fait partie de Walker Family Papers
Photograph from the collection of James Backhouse Walker of a view of Mt. Wellington from St. George's Hill with Hawthorn Cottage in the foreground and Bishopscourt - Garden Crescent and Davey Street Chapel in the background (according to notes on the reverse). The photographer was the Anson Brothers, whose firm was located in Liverpool, Collins and Elizabeth Streets between 1878 and 1891.
James Backhouse Walker

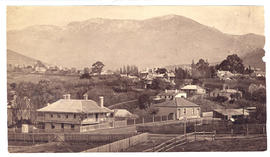
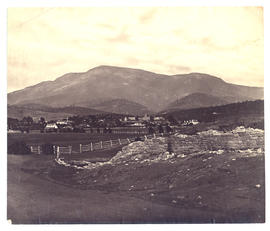
Hobart from Huon Road looking east
Fait partie de Walker Family Papers
Photograph from the collection of James Backhouse Walker of a view of Hobart from Huon Road looking east in about 1879, according to notes on the reverse.
James Backhouse Walker
Photograph of the Oddfellows Hall and Congregational Church
Fait partie de Walker Family Papers
Photograph of Davey Street, Hobart, looking east, showing the Oddfellows hall and the Congregational church. Photograph taken from the Harrington Street intersection.

St. John's Church Goulburn Street
Fait partie de Walker Family Papers
Photograph of St. John's Church Goulburn Street, Hobart taken c1880 the photographers were Anson brothers whose firm was located in Liverpool, Collins and Elizabeth Streets between 1878 and 1891
Anson Brothers
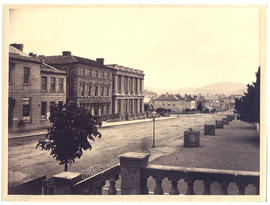
Fait partie de Walker Family Papers
Photograph of Macquarie Street, Hobart looking east towards Elizabeth Street from the Civil Court in about 1880. The photographer was Alfred Winter who had studios in Bathurst, Elizabeth and Liverpool Streets from 1869 until 1880.
Alfred Winter
Bank of Australasia and Macquarie House
Fait partie de Walker Family Papers
Photograph of Macquarie Street, Hobart looking south in about 1870. The Bank of Australasia and Macquarie House are two of the buildings featured. The photographer is Henry Hall Baily who had studios in Elizabeth and Liverpool Streets between 1865 and 1918.
Henry Hall Baily
Fait partie de Walker Family Papers
Photograph of Macquarie Street, Hobart looking south from the corner of Elizabeth Street c. 1870. Some of Franklin Square on left Commercial Bank on right. The photographers were Anson Brothers whose firm was located in Liverpool, Collins and Elizabeth Streets between 1878 and 1891.
Anson Brothers
Fait partie de Walker Family Papers
Photograph of the Commercial Bank, Macquarie Street, Hobart looking south from the corner of Elizabeth Street in c1877 after old St. Davids Cathedral was pulled down. The photograph is attributed to Henry Hall Baily who had studios in Elizabeth and Liverpool Streets Hobart from 1865 until 1918.
Henry Hall Baily
Fait partie de Walker Family Papers
Photograph of the first Tasmanian Temperance Alliance building, Macquarie Street Hobart
Henry Hall Baily
St. Joseph's Catholic Church and old St. David's Cathedral
Fait partie de Walker Family Papers
Photograph of St. Joseph's Catholic Church, Macquarie Street, with old St. David's Cathedral in the background, Macquarie Street, Hobart c. 1870.
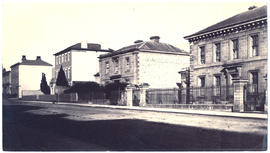
Buildings on the corner of Macquarie and Murray Streets
Fait partie de Walker Family Papers
Photograph of buildings on corner of Macquarie and Murray Streets, Hobart c. 1877. Photographed by Henry Hall Baily who had studios in Elizabeth and Liverpool Streets, Hobart from 1865 until 1918.
Henry Hall Baily
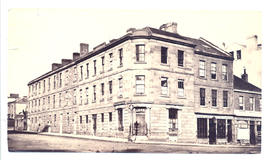
Wholesale & Retail Drapery Warehouse
Fait partie de Walker Family Papers
Photograph of Liverpool Street Hobart with Wholesale & Retail Drapery Warehouse in foreground.
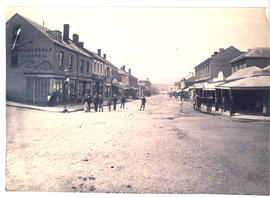
Perkins and Nephew Wholesale & Retail Drapers and Grocers
Fait partie de Walker Family Papers
Photograph of the Emporium of Perkins and Nephew Wholesale & Retail Drapers and Grocers established in 1826, situated on the corner of Watchorn and Liverpool Street Hobart, taken in 1881. The photographers were Anson Brothers Portrait and Landscape Photographers Hobart Town whose firm was located in Liverpool, Collins and Elizabeth Streets between 1878 and 1891.
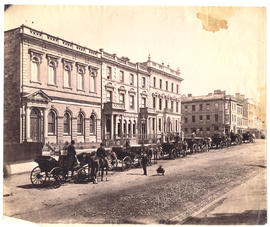
Murray Street with horse drawn carriages
Fait partie de Walker Family Papers
Photograph of Murray Street, Hobart in 1881 with a row of horse drawn carriages outside the Hobart Savings Bank, Masonic Temple and the Derwent and Tamar Buildings with Webb's hotel (later Hadley's Orient Hotel) in the distance.
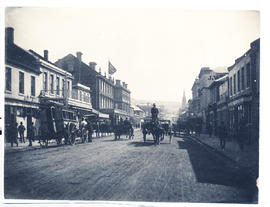
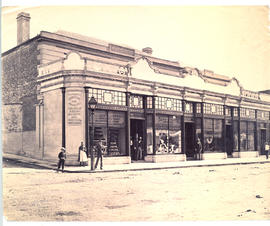
Elizabeth Street outside C. Davis Importer of English and American Hardware
Fait partie de Walker Family Papers
Photograph of Elizabeth Street looking north, outside C. Davis Importer of English and American Hardware. Showing horse drawn carts and coach.
Alfred Winter
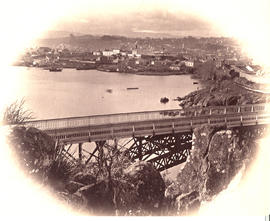
Cataract Bridge and Launceston
Fait partie de Walker Family Papers
Photograph of Launceston, Tasmania from beyond the Cataract Bridge. The photographers were Anson Brothers who had studios in Liverpool, Collins and Elizabeth Streets, Hobart, between 1878 and 1891.
Anson Brothers
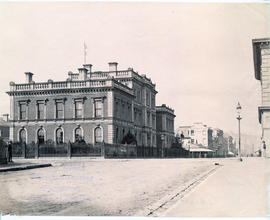
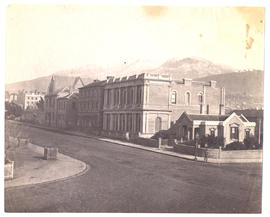
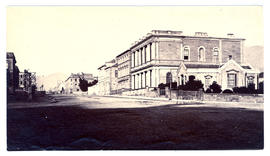
Fait partie de Walker Family Papers
Photograph of the Public Buildings in Launceston, Tasmania. The Criterion Hotel is in the background. The photographers were Anson Brothers who had studios in Liverpool, Collins and Elizabeth Streets, Hobart, between 1878 and 1891.
Anson Brothers
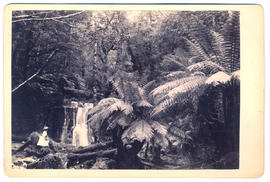
Young lady at Silver Falls, Fern Tree Bower
Fait partie de Walker Family Papers
Photographs of Silver Falls, Fern Tree Bower, Mount Wellington showing young lady with a basket
James Backhouse Walker
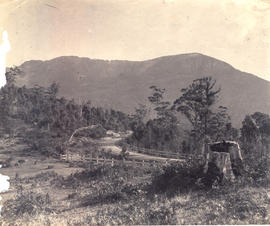
Huon Road with post and rail fence looking to Mt Wellington
Fait partie de Walker Family Papers
Photograph of Huon Road with post and rail fence looking to Mt Wellington
James Backhouse Walker
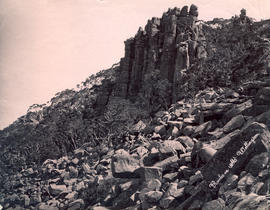
Fait partie de Walker Family Papers
Photograph rocks on Mount Wellington. The photographer was Albert Sargeant who had studios in Macquarie Street, Hobart and George Street, Launceston between 1886 and 1913.
Albert Sargeant
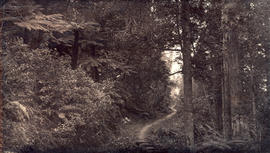
Fait partie de Walker Family Papers
Photograph of the track to Fern Tree Bower, Mount Wellington before taken prior to 1870
James Backhouse Walker
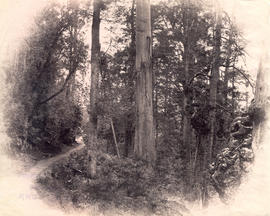
Track to Fern Tree Bower, Mt Wellington
Fait partie de Walker Family Papers
Photograph of the track to Fern Tree Bower, Mount Wellington before taken prior to 1879 by Anson Brothers who had studios in Liverpool, Collins, and Elizabeth Streets between 1878 and 1891.
James Backhouse Walker
Derwent River above New Norfolk
Fait partie de Walker Family Papers
Photograph of the Derwent River above New Norfolk, Tasmania, 1882. The photographer was Henry Hall Baily who had studios in Elizabeth and Liverpool Streets, Hobart from 1865 until 1918.
Henry Hall Baily
Fait partie de Walker Family Papers
Photograph of New Norfolk, Tasmania, c. 1880 from the opposite side of the River Derwent. The photographer was Alfred Winter who had studios in Bathurst, Elizabeth and Liverpool Streets from 1869 until 1891.
Alfred Winter

Fait partie de Walker Family Papers
Photograph of the lighthouse on Maatsuyker Island, Tasmania, taken on the day of the opening of the lighthouse in 1891
Big Witch from Maatsuyker Island
Fait partie de Walker Family Papers
Photograph of Big Witch from Maatsuyker Island, taken on the day of the opening of the lighthouse in 1891
Commandant's house and jetties at Port Arthur
Fait partie de Walker Family Papers
Photograph of the commandant's house and jetties, Port Arthur c. 1880. The photographers are Anson Brothers., Portrait and Landscape Photographers, Hobart Town whose firm was located in Liverpool, Collins and Elizabeth Streets between 1878 and 1891.
Anson Brothers
Fait partie de Walker Family Papers
Photograph of the Model Prison, Port Arthur, Tasmania.
Fait partie de Walker Family Papers
Thought to be a photograph of dwellings at Port Arthur
Fait partie de Walker Family Papers
Panorama from Waterfall Bay to Cape Huay on the Tasman Peninsula. The photographer is John Watt Beattie.
John Watt Beattie
Government House from the shipyards
Fait partie de Walker Family Papers
Photograph of Government House, Hobart, Tasmania in about 1870. Showing the shipyard in the foreground and Mount Direction behind.. The photographer was Henry Hall Baily who had studios in Elizabeth and Liverpool Streets, Hobart from 1865 until 1918.
Henry Hall Baily
Fait partie de Walker Family Papers
Photograph of Government House Hobart taken from the bay below the Queen's Domain, c.1890s. The photographer was Henry Hall Baily who had studios in Elizabeth and Liverpool Streets, Hobart from 1865 until 1918.
Henry Hall Baily
Franklin Square and Hobart waterfront
Fait partie de Walker Family Papers
Photograph from the collection of James Backhouse Walker of Franklin Square and the Hobart waterfront taken in about 1870 possibly from St. David's Cathedral according to a note on the reverse. The photographer is Henry Hall Baily who had studios in Elizabeth and Liverpool Streets Hobart from 1865 until 1918.
Henry Hall Baily
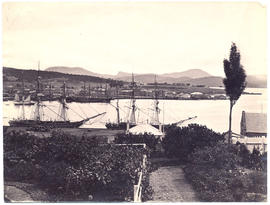
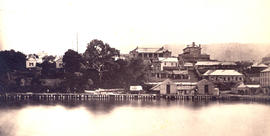
Sullivans Cove and Hunter Island
Fait partie de Walker Family Papers
Photograph of Sullivans Cove and Hunter Island taken from the eastern end of Salamanca with garden in the foreground and two ships alongside the wharf. c.1880
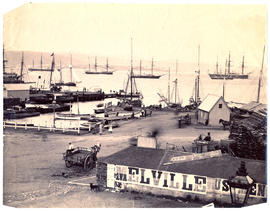
Fait partie de Walker Family Papers
View of Hobart waterfront c.1880 showing docks, carts, ships at anchor and woodyard
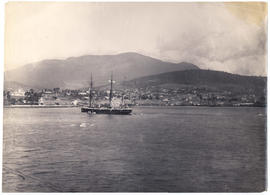
Sullivans Cove, taken from HMS Nelson
Fait partie de Walker Family Papers
Photograph of a ship with Sullivans Cove and Mount Wellington in the background taken from HMS Nelson in 1882. The photographer is Henry Hall Baily who had studios in Elizabeth and Liverpool streets Hobart from 1865 until 1918.
Henry Hall Baily
Fait partie de Walker Family Papers
Photograph of Franklin Square Hobart was taken by the Anson Brothers photographers, whose firm was located in Liverpool, Collins and Elizabeth Streets between 1878 and 1891.
Anson Brothers

Fait partie de Walker Family Papers
Photograph of Sir John Franklin's statue in the fountain, Franklin Square, Hobart.

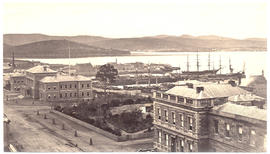
Hobart Town from the Queen's Domain
Fait partie de Walker Family Papers
Photograph of Hobart Town, Tasmania, from the Queen's Domain, looking down Macquarie Street in the 1850s. This photograph appears on page 27 of Allan Sierp's 'Colonial Life in Tasmania: Fifty Years of Photography 1855-1905' (Rigby, 1976)
Fait partie de Walker Family Papers
Photograph of Hobart from the Queen's Domain with the railway station in the foreground, c. 1881. The photographers were Anson Brothers who had studios in Liverpool, Collins and Elizabeth Streets between 1878 and 1891.
Anson Brothers
New Town from New Town Invalid Asylum
Fait partie de Walker Family Papers
Photograph from New Town Invalid Asylum, Tasmania in about 1882. The photographer was Henry Hall Baily who had studios in Elizabeth and Liverpool Streets, Hobart from 1865 until 1918.
Henry Hall Baily
Fait partie de Walker Family Papers
Photograph of Austins Ferry, Hobart, Tasmania, with Austin's old Inn to the right. The photographer was Alfred Winter who had studios in Bathurst, Elizabeth and Liverpool Streets from 1869 until 1891.
James Backhouse Walker
Fait partie de Walker Family Papers
Photograph of Sandy Bay Road, with St. Helena , later Wrest Point, on the left.
James Backhouse Walker
Fait partie de Walker Family Papers
Photograph of Queenborough, Sandy Bay, Tasmania, c.1881. The photographer was Alfred Winter who had studios in Bathurst, Elizabeth and Liverpool Streets from 1869 until 1891.
James Backhouse Walker
Fait partie de Walker Family Papers
Photograph of the Cascades' Female Factory looking toward Mt Wellington with the Cascade Brewery in the distance. In 1828 a Female Factory opened on the outskirts of Hobart at Cascades. It became the colony's largest Factory, expanding by 1853 into five major courtyards accommodating 1000 women and 175 children. The photographer was J.W. Beattie (1859-1930) whose studios were in Elizabeth and Murray Streets between 1891 and 1940
John Watt Beattie
Fait partie de Walker Family Papers
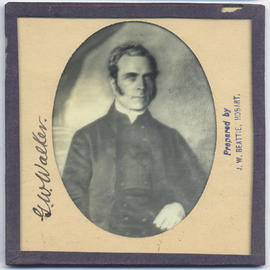
Lantern slide of George Washington Walker (1800-1859). Prepared by J.W. Beattie (1859-1930) whose studio locations were Elizabeth Street, Hobart from 1891-1920, Murray Street from 1921-40 and Cat and Fiddle until 1994.
John Watt Beattie
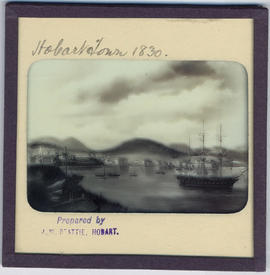
Hobart Town Harbour, Van Diemen's Land
Fait partie de Walker Family Papers
Lantern slide of Hobart Town Harbour, Van Diemen's Land, in 1830. Prepared by J.W. Beattie (1859-1930) whose studio locations were in Elizabeth Street, Hobart from 1891-1920, Murray Street from 1921-40 and Cat and Fiddle Arcade, Hobart, until 1994.
John Watt Beattie
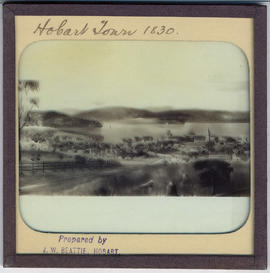
Hobart Town, Van Diemen's Land in 1830
Fait partie de Walker Family Papers
Lantern slide of early print of Hobart Town, Van Diemen's Land in 1830. From the collection of James Backhouse Walker. Prepared by J.W. Beattie (1859-1930) whose studio locations were in Elizabeth Street, Hobart from 1891-1920, Murray Street from 1921-40 and Cat and Fiddle Arcade, Hobart, until 1994.
John Watt Beattie

Hobart Town, Van Diemen's Land, from Old Wharf in 1839
Fait partie de Walker Family Papers
Lantern slide of Hobart Town, Van Diemen's Land, from Old Wharf in 1839. From the collection of James Backhouse Walker. Prepared by J.W. Beattie (1859-1930) whose studio locations were in Elizabeth Street, Hobart from 1891-1920, Murray Street from 1921-40 and Cat and Fiddle Arcade, Hobart, until 1994.
John Watt Beattie
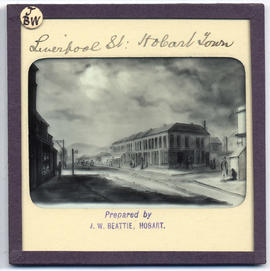
Fait partie de Walker Family Papers
Lantern slide of Liverpool Street, Hobart. Prepared by J.W. Beattie (1859-1930) whose studio locations were Elizabeth Street, Hobart from 1891-1920, Murray Street from 1921-40 and Cat and Fiddle until 1994.
John Watt Beattie
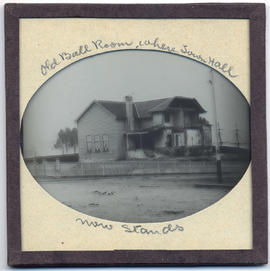
Old Ball Room where Town Hall now stands, Hobart
Fait partie de Walker Family Papers
Lantern slide from the collection of James Backhouse Walker of the demolition of the old ball room where the Town Hall now stands, Hobart, Tasmania. Thought to have been prepared by J.W. Beattie (1859-1930) whose studio locations were in Elizabeth Street, Hobart from 1891-1920, Murray Street from 1921-40 and Cat and Fiddle Arcade, Hobart, until 1994.
John Watt Beattie