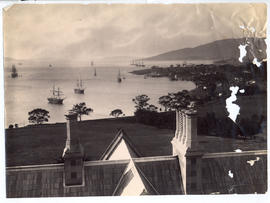
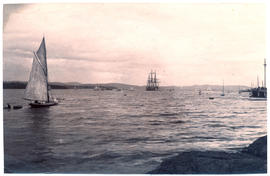
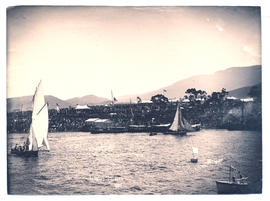
Photograph of ships on the Derwent River taken from the roof of Government House, Hobart, Tasmania in 1882. The photographer was Henry Hall Baily who had studios in Elizabeth and Liverpool Streets, Hobart from 1865 until 1918.
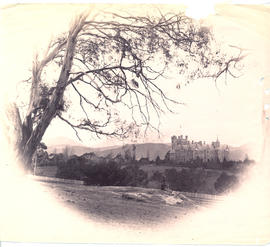
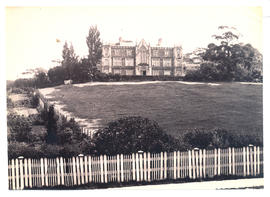
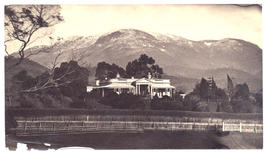
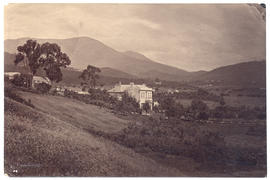
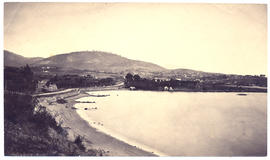
Photograph of Government House, Hobart taken from the Queen's Domain, c. 1890s. A note on the reverse says 'after railway'. The photographer was Henry Hall Baily who had studios in Elizabeth and Liverpool Streets, Hobart from 1865 until 1918.
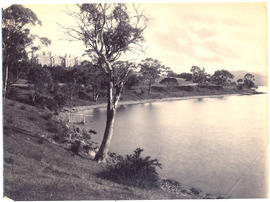
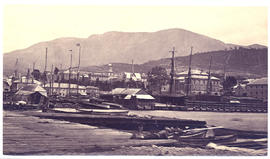
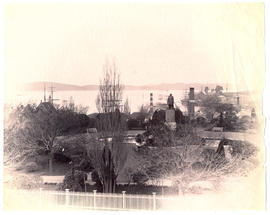
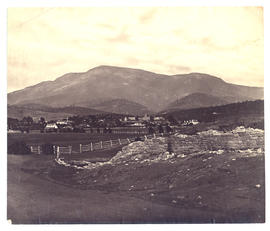
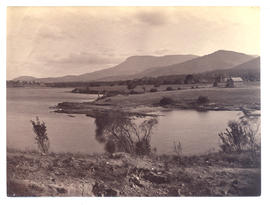
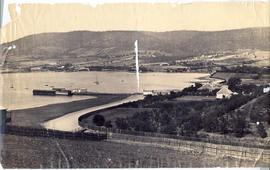
Photograph of Government House Hobart taken from the bay below the Queen's Domain, c.1890s. The photographer was Henry Hall Baily who had studios in Elizabeth and Liverpool Streets, Hobart from 1865 until 1918.
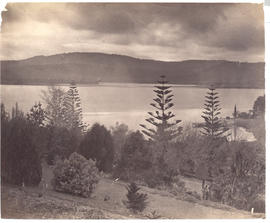
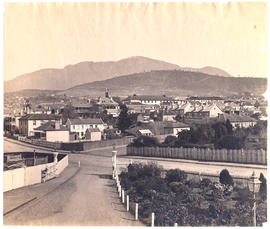
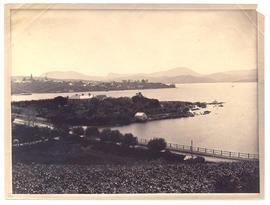
Photograph of view from the Botanical Gardens, Hobart, Tasmania in about 1880. Three Norfolk Island pines dominate the foreground and the view looks out to the River Derwent and Eastern Shore. The photographers were Anson Brothers, whose firm was located in Liverpool, Collins and Elizabeth Streets between 1878 and 1891.
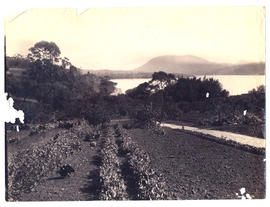
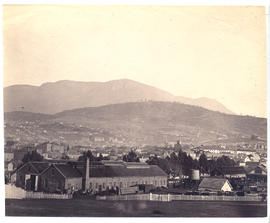
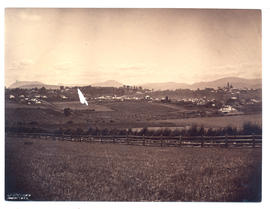
Photograph of view from Government House looking over a vegetable garden and orchard which could either be in the Government House or Botanical Gardens grounds with the River Derwent and Mt. Direction in the background.
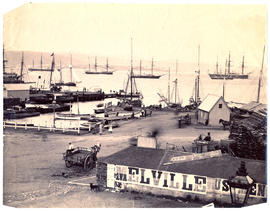
Photograph from the collection of James Backhouse Walker of Sullivan's Cove in about 1870 according to a note on the reverse. Taken from around Victoria Dock, Old St David's cathedral in background. The photographer is Henry Hall Baily who had studios in Elizabeth and Liverpool Streets Hobart from 1865 until 1918.
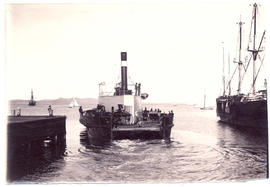
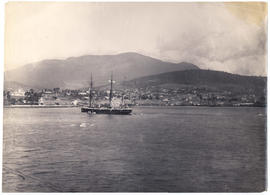
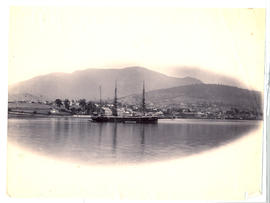
Photograph of a ship with Sullivans Cove and Mount Wellington in the background taken from HMS Nelson in 1882. The photographer is Henry Hall Baily who had studios in Elizabeth and Liverpool streets Hobart from 1865 until 1918.
Photograph of Franklin Square Hobart was taken by the Anson Brothers photographers, whose firm was located in Liverpool, Collins and Elizabeth Streets between 1878 and 1891.
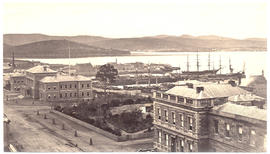
Photograph from the collection of James Backhouse Walker of Franklin Square and the Hobart waterfront taken in about 1870 possibly from St. David's Cathedral according to a note on the reverse. The photographer is Henry Hall Baily who had studios in Elizabeth and Liverpool Streets Hobart from 1865 until 1918.
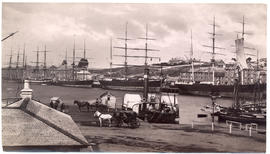
Photograph from the collection of James Backhouse Walker of the Hobart waterfront taken in about 1870 with a view of ships moored next to the Salamanca warehouses. The photographer is Henry Hall Baily who had studios in Elizabeth and Liverpool Streets, Hobart, from 1865 until 1918.
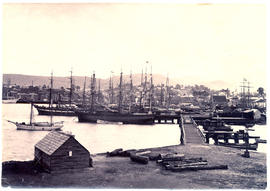
Photograph of Hobart waterfront - Salamanca looking towards Customs House. Could be around 1870. Photograph appears to have been taken in front of the warehouses near the wharf with ships alongside and a shingle roofed wooden building in the foreground.
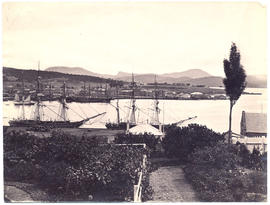
Photograph of Sullivans Cove and Hunter Island taken from the eastern end of Salamanca with garden in the foreground and two ships alongside the wharf. c.1880
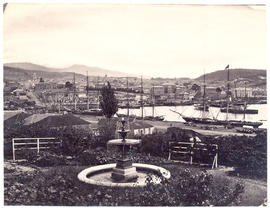
Photograph taken from Battery Point of Sullivans Cove. Taken from a garden with fountain in the foreground. Dated about 1876 and taken by photographer Henry Hall Baily who had studios in Elizabeth and Liverpool Streets, Hobart from 1865 until 1918.
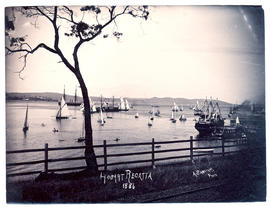
Photograph of the Hobart Regatta taken in 1886. The photographer was Albert Sargeant who had studios in Macquarie Street, Hobart from 1886-1890 and George Street, Launceston from 1900-1913
Photograph of Hobart Town, Tasmania, from the Queen's Domain, looking down Macquarie Street in the 1850s. This photograph appears on page 27 of Allan Sierp's 'Colonial Life in Tasmania: Fifty Years of Photography 1855-1905' (Rigby, 1976)
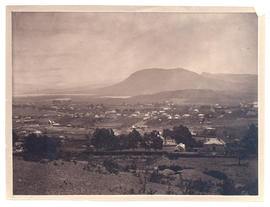
Photograph of Hobart from the Queen's Domain with the railway station in the foreground, c. 1881. The photographers were Anson Brothers who had studios in Liverpool, Collins and Elizabeth Streets between 1878 and 1891.
Photograph of the Hobart Regatta grandstand taken from the water in 1886. The photographer was Albert Sargeant who had studios in Macquarie Street, Hobart, Tasmania from 1886-1890 and George Street, Launceston, Tasmania from 1900-1913.
Two photographs of Sunnyside, New Town, Tasmania, home of Thomas Daniel Chapman 1815-1884, Politician. Mt Wellington in distance. The photographer was Henry Hall Baily who had studios in Elizabeth and Liverpool Streets, Hobart from 1865 until 1918.
Photograph from New Town Invalid Asylum, Tasmania in about 1882. The photographer was Henry Hall Baily who had studios in Elizabeth and Liverpool Streets, Hobart from 1865 until 1918.
Photograph from the Orphan School grounds, New Town, Tasmania c.1870s. The photographer was Henry Hall Baily who had studios in Elizabeth and Liverpool Streets, Hobart from 1865 until 1918.
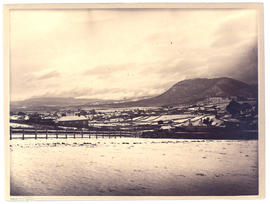
Photograph of New Town, Tasmania in the snow from Russell Young's Beaulieu (Swans Hill) taken on the morning of 16th June 1882. The photographer was Alfred Winter who had studios in Bathurst, Elizabeth and Liverpool Streets from 1869 until 1891.
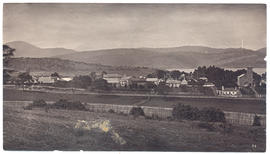
Photograph of New Town and Mt. Direction, Hobart, Tasmania from the hill above Beaulieu. The photographer was Alfred Winter who had studios in Bathurst, Elizabeth and Liverpool Streets from 1869 until 1891..
Photograph of Austins Ferry, Hobart, Tasmania, with Austin's old Inn to the right. The photographer was Alfred Winter who had studios in Bathurst, Elizabeth and Liverpool Streets from 1869 until 1891.
Photograph of Derwentwater, Sandy Bay, Tasmania, home of Captain Langdon Swan, c.1881. The photographer was Alfred Winter who had studios in Bathurst, Elizabeth and Liverpool Streets from 1869 until 1891.
Photograph of Battery Point from Sandy Bay, Tasmania, with St. Helena, later Wrest Point, in foreground, St Georges Church in the distance, c.1881. The photographer was Alfred Winter who had studios in Bathurst, Elizabeth and Liverpool Streets from 1869 until 1891.
Photograph of Queenborough, Sandy Bay, Tasmania, c.1881. The photographer was Alfred Winter who had studios in Bathurst, Elizabeth and Liverpool Streets from 1869 until 1891.
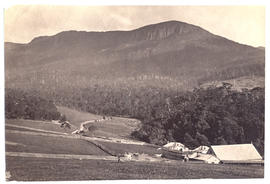
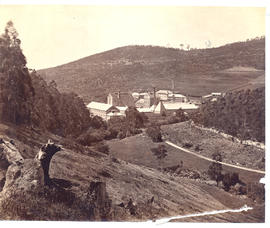
Photograph of the Cascades' Female Factory looking toward Mt Wellington with the Cascade Brewery in the distance. In 1828 a Female Factory opened on the outskirts of Hobart at Cascades. It became the colony's largest Factory, expanding by 1853 into five major courtyards accommodating 1000 women and 175 children. The photographer was J.W. Beattie (1859-1930) whose studios were in Elizabeth and Murray Streets between 1891 and 1940
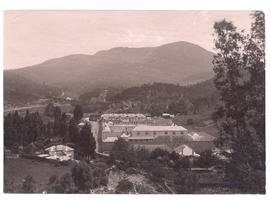
Photograph of the Cascades' Female Factory looking down the South Hobart Valley toward the Derwent River. Showing yards and gardens. In 1828 a Female Factory opened on the outskirts of Hobart at Cascades. It became the colony's largest Factory, expanding by 1853 into five major courtyards accommodating 1000 women and 175 children. The photographer was J.W. Beattie (1859-1930) whose studios were in Elizabeth and Murray Streets between 1891 and 1940
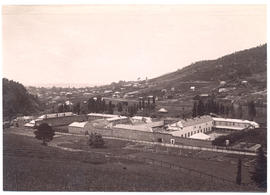
Photograph of the Cascades' Female Factory from the rear showing yards with washing and horse. In 1828 a Female Factory opened on the outskirts of Hobart at Cascades. It became the colony's largest Factory, expanding by 1853 into five major courtyards accommodating 1000 women and 175 children. The photographer was J.W. Beattie (1859-1930) whose studios were in Elizabeth and Murray Streets between 1891 and 1940
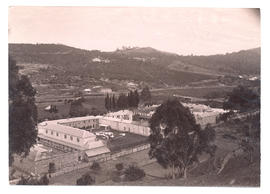
Photograph of the Cascade Brewery buildings from behind, Hobart, Tasmania. The photographers were Anson Brothers whose studios were located in Liverpool, Collins and Elizabeth Streets between 1878 and 1891.
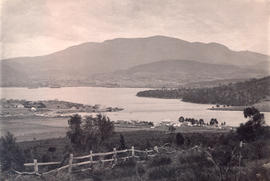
Photograph of Kangaroo Bay (Bellerive) on Hobart's Eastern Shore from hill showing wharf and houses c. 1882. The photographer was Henry Hall Baily who had studios in Elizabeth and Liverpool Streets, Hobart from 1865 until 1918.
Photograph of Kangaroo Point (Bellerive) Beach on Hobart's Eastern Shore looking toward settlement c. 1882. The photographer was Henry Hall Baily who had studios in Elizabeth and Liverpool Streets, Hobart from 1865 until 1918.
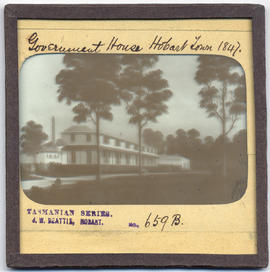
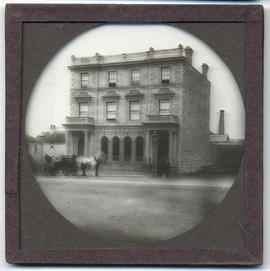
Lantern slide from the collection of James Backhouse Walker of old Government House, Hobart Town, Van Diemen's Land 1847. Prepared by J.W. Beattie (1859-1930) whose studio locations were in Elizabeth Street, Hobart from 1891-1920, Murray Street from 1921-40 and Cat and Fiddle Arcade, Hobart, until 1994.
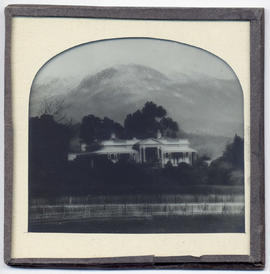
Lantern slide from the collection of James Backhouse Walker of Runnymede, Hobart Town, Van Diemen's Land. Thought to have been prepared by J.W. Beattie (1859-1930) whose studio locations were in Elizabeth Street, Hobart from 1891-1920, Murray Street from 1921-40 and Cat and Fiddle Arcade, Hobart, until 1994
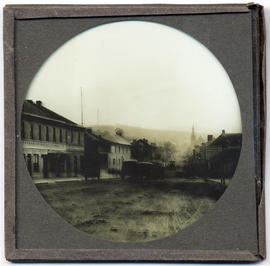
Lantern slide of Elizabeth Street, Hobart looking north. Prepared by J.W. Beattie (1859-1930) whose studio locations were Elizabeth Street, Hobart from 1891-1920, Murray Street from 1921-40 and Cat and Fiddle until 1994.
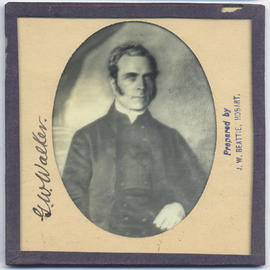
Lantern slide of George Washington Walker (1800-1859). Prepared by J.W. Beattie (1859-1930) whose studio locations were Elizabeth Street, Hobart from 1891-1920, Murray Street from 1921-40 and Cat and Fiddle until 1994.
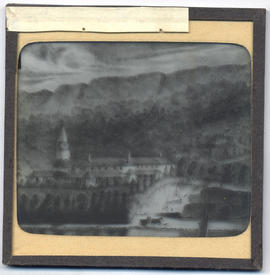
Lantern slide of Government House and St David's Cathedral, Van Diemen's Land. Prepared by J.W. Beattie (1859-1930) whose studio locations were Elizabeth Street, Hobart from 1891-1920, Murray Street from 1921-40 and Cat and Fiddle until 1994. Lantern slide of detail from 'The Seat of His Excellency Lieut. Govr. Arthur / drawn from Nature and on Stone' by Charles Atkinson d.1837
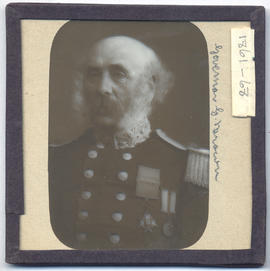
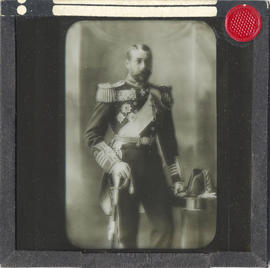
Lantern slide of Governor Sir Thomas Gore Browne. Governor of Tasmania from 1861-1868. Prepared by J.W. Beattie (1859-1930) whose studio locations were Elizabeth Street, Hobart from 1891-1920, Murray Street from 1921-40 and Cat and Fiddle until 1994.
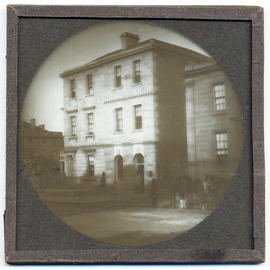
Lantern slide of Hobart Savings Bank, Murray Street Hobart c1860. Prepared by J.W. Beattie (1859-1930) whose studio locations were Elizabeth Street, Hobart from 1891-1920, Murray Street from 1921-40 and Cat and Fiddle until 1994.
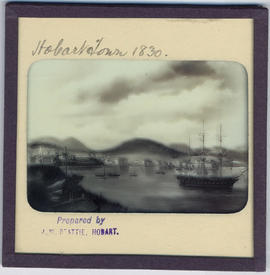
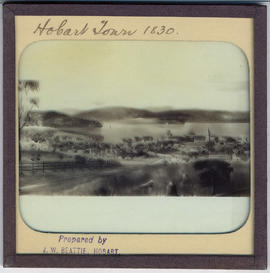
Lantern slide of Hobart Town Harbour, Van Diemen's Land, in 1830. Prepared by J.W. Beattie (1859-1930) whose studio locations were in Elizabeth Street, Hobart from 1891-1920, Murray Street from 1921-40 and Cat and Fiddle Arcade, Hobart, until 1994.
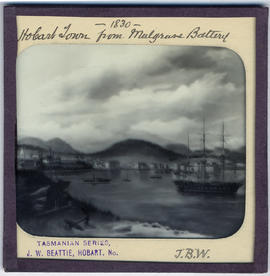
Lantern slide of Hobart Town from Mulgrave Battery, Van Diemen's Land, in 1830. From the collection of James Backhouse Walker. Prepared by J.W. Beattie (1859-1930) whose studio locations were in Elizabeth Street, Hobart from 1891-1920, Murray Street from 1921-40 and Cat and Fiddle Arcade, Hobart, until 1994.
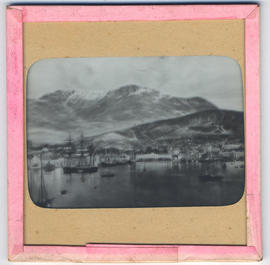
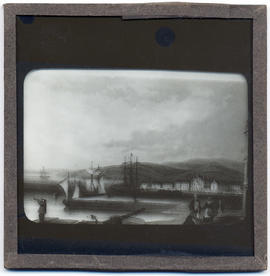
Lantern slide of an early print of Hobart Town, Van Diemen's Land from the harbour. From the collection of James Backhouse Walker. Thought to have been prepared by J.W. Beattie (1859-1930) whose studio locations were in Elizabeth Street, Hobart from 1891-1920, Murray Street from 1921-40 and Cat and Fiddle Arcade, Hobart, until 1994.
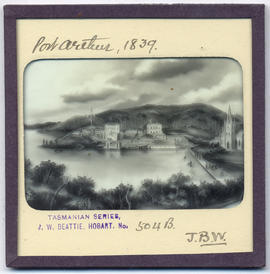
Lantern slide of Port Arthur 1839. Prepared by J.W. Beattie (1859-1930) whose studio locations were Elizabeth Street, Hobart from 1891-1920, Murray Street from 1921-40 and Cat and Fiddle until 1994.
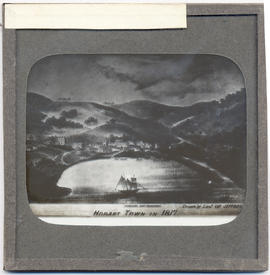
Lantern slide of Hobart Town, Van Diemen's Land, in February, 1817. Inscribed with the words 'Hobart Town in 1817. Drawn by Lieut. Charles Jeffreys' - also shows the Government schooner the Kangaroo , church, Government House and Fort.
Lantern slide of early print of Hobart Town, Van Diemen's Land in 1830. From the collection of James Backhouse Walker. Prepared by J.W. Beattie (1859-1930) whose studio locations were in Elizabeth Street, Hobart from 1891-1920, Murray Street from 1921-40 and Cat and Fiddle Arcade, Hobart, until 1994.
Lantern slide of Hobart Town, Van Diemen's Land, from Old Wharf in 1839. From the collection of James Backhouse Walker. Prepared by J.W. Beattie (1859-1930) whose studio locations were in Elizabeth Street, Hobart from 1891-1920, Murray Street from 1921-40 and Cat and Fiddle Arcade, Hobart, until 1994.
Lantern slide of J. Walch and Sons, Macquarie Street, Hobart c1880. Prepared by J.W. Beattie (1859-1930) whose studio locations were Elizabeth Street, Hobart from 1891-1920, Murray Street from 1921-40 and Cat and Fiddle until 1994.
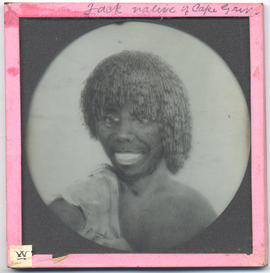
Lantern slide of Jack, native of Cape Grim. Prepared by J.W. Beattie (1859-1930) whose studio locations were Elizabeth Street, Hobart from 1891-1920, Murray Street from 1921-40 and Cat and Fiddle until 1994.
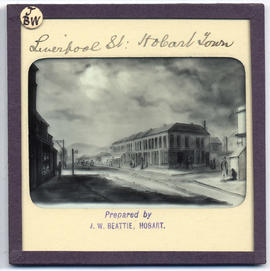
Lantern slide of Liverpool Street, Hobart. Prepared by J.W. Beattie (1859-1930) whose studio locations were Elizabeth Street, Hobart from 1891-1920, Murray Street from 1921-40 and Cat and Fiddle until 1994.
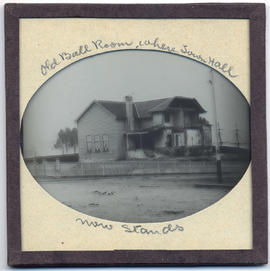
Lantern slide from the collection of James Backhouse Walker of the demolition of the old ball room where the Town Hall now stands, Hobart, Tasmania. Thought to have been prepared by J.W. Beattie (1859-1930) whose studio locations were in Elizabeth Street, Hobart from 1891-1920, Murray Street from 1921-40 and Cat and Fiddle Arcade, Hobart, until 1994.
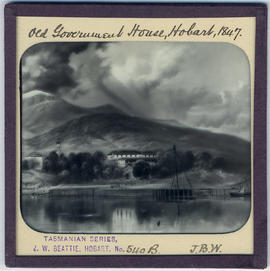
Lantern slide of early print of Old Government House, Hobart Town, Van Diemen's Land in 1847. From the collection of James Backhouse Walker. Prepared by J.W. Beattie (1859-1930) whose studio locations were in Elizabeth Street, Hobart from 1891-1920, Murray Street from 1921-40 and Cat and Fiddle Arcade, Hobart, until 1994.
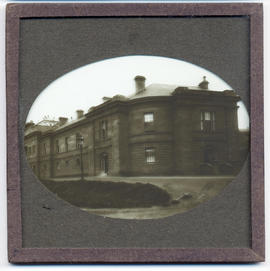
Lantern slide of Parliament House, Hobart. Prepared by J.W. Beattie (1859-1930) whose studio locations were Elizabeth Street, Hobart from 1891-1920, Murray Street from 1921-40 and Cat and Fiddle until 1994.
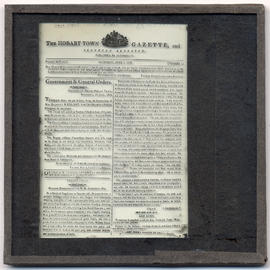
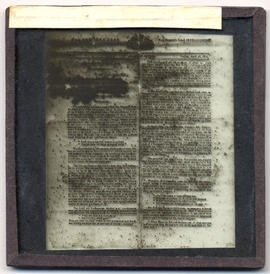
Lantern slide of front page of the Hobart Town Gazette, June 1816. Prepared by J.W. Beattie (1859-1930) whose studio locations were Elizabeth Street, Hobart from 1891-1920, Murray Street from 1921-40 and Cat and Fiddle until 1994.
Lantern slide from the collection of James Backhouse Walker of Salamanca from the Wharf, Hobart Town, Van Diemen's Land 1847. Prepared by J.W. Beattie (1859-1930) whose studio locations were in Elizabeth Street, Hobart from 1891-1920, Murray Street from 1921-40 and Cat and Fiddle Arcade, Hobart, until 1994. Quaker Collection.
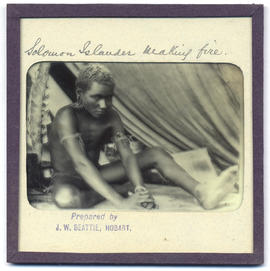
Lantern slide of Solomon Islander making fire. Prepared by J.W. Beattie (1859-1930) whose studio locations were Elizabeth Street, Hobart from 1891-1920, Murray Street from 1921-40 and Cat and Fiddle until 1994.
Lantern slide from the collection of James Backhouse Walker of St. David's Park, Davey Street, Hobart, Tasmania. Thought to have been prepared by J.W. Beattie (1859-1930) whose studio locations were in Elizabeth Street, Hobart from 1891-1920, Murray Street from 1921-40 and Cat and Fiddle Arcade, Hobart, until 1994. Quaker Collection.
Lantern slide from the collection of James Backhouse Walker of Stonemason's house, Hobart, Tasmania. Thought to have been prepared by J.W. Beattie (1859-1930) whose studio locations were in Elizabeth Street, Hobart from 1891-1920, Murray Street from 1921-40 and Cat and Fiddle Arcade, Hobart, until 1994.
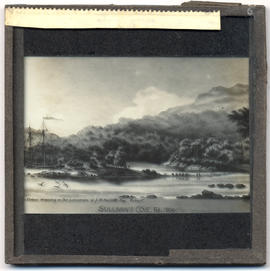
Lantern slide of Sullivans Cove, Hobart Town, Van Diemen's Land, in February, 1804. Inscribed with the words 'Water colour drawing in the possession of J. B. Walker Esq., Hobart, 1891'.
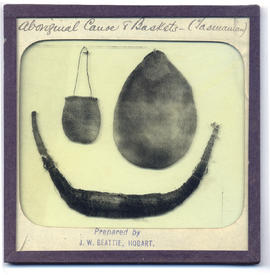
Lantern slide of Tasmanian aboriginal canoe and baskets. Prepared by J.W. Beattie (1859-1930) whose studio locations were Elizabeth Street, Hobart from 1891-1920, Murray Street from 1921-40 and Cat and Fiddle until 1994.
Lantern slide of Tasmanian aboriginal man Timmy, native of the East Coast. Prepared by J.W. Beattie (1859-1930) whose studio locations were Elizabeth Street, Hobart from 1891-1920, Murray Street from 1921-40 and Cat and Fiddle until 1994.
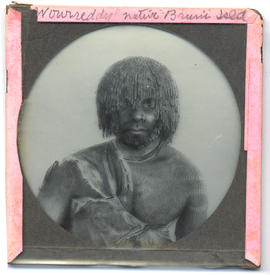
Lantern slide of Tasmanian aboriginal man Woureddy, native of Bruni[Bruny]Island. Prepared by J.W. Beattie (1859-1930) whose studio locations were Elizabeth Street, Hobart from 1891-1920, Murray Street from 1921-40 and Cat and Fiddle until 1994.
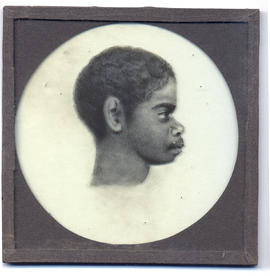
Lantern slide of Tasmanian aboriginal profile. Prepared by J.W. Beattie (1859-1930) whose studio locations were Elizabeth Street, Hobart from 1891-1920, Murray Street from 1921-40 and Cat and Fiddle until 1994.
Lantern slide of funeral notice of Lieutenant Governor David Collins, 1810. From The Derwent Star, and Van Diemen’s Land Intelligencer no. 7, Tuesday April 3rd 1810. Prepared by J.W. Beattie (1859-1930) whose studio locations were Elizabeth Street, Hobart from 1891-1920, Murray Street from 1921-40 and Cat and Fiddle until 1994.
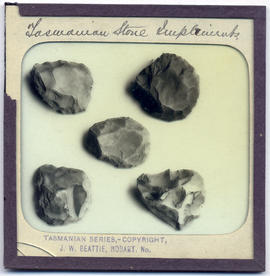
Lantern slide of Tasmanian aboriginal stone implements. Prepared by J.W. Beattie (1859-1930) whose studio locations were Elizabeth Street, Hobart from 1891-1920, Murray Street from 1921-40 and Cat and Fiddle until 1994.
Lantern slide of Tasmanian aboriginal woman Truggeruana, native of Recherche. Prepared by J.W. Beattie (1859-1930) whose studio locations were Elizabeth Street, Hobart from 1891-1920, Murray Street from 1921-40 and Cat and Fiddle until 1994
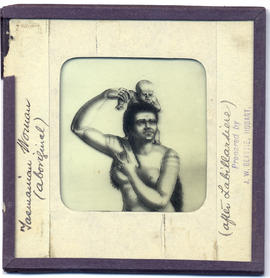
Lantern slide of Tasmanian aboriginal woman and child 'after Labillardiere'. Prepared by J.W. Beattie (1859-1930) whose studio locations were Elizabeth Street, Hobart from 1891-1920, Murray Street from 1921-40 and Cat and Fiddle until 1994
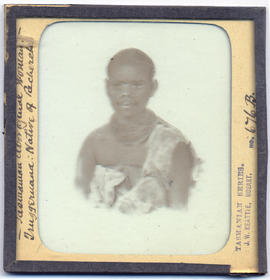
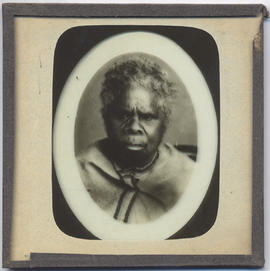
Lantern slide of a Tasmanian aboriginal woman. Prepared by J.W. Beattie (1859-1930) whose studio locations were Elizabeth Street, Hobart from 1891-1920, Murray Street from 1921-40 and Cat and Fiddle until 1994.
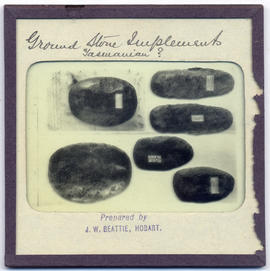
Lantern slide of ground stone aboriginal implements. Prepared by J.W. Beattie (1859-1930) whose studio locations were Elizabeth Street, Hobart from 1891-1920, Murray Street from 1921-40 and Cat and Fiddle until 1994.
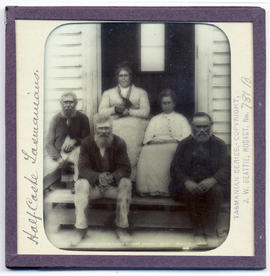
Lantern slide of mixed race Tasmanian aborigines. Prepared by J.W. Beattie (1859-1930) whose studio locations were Elizabeth Street, Hobart from 1891-1920, Murray Street from 1921-40 and Cat and Fiddle until 1994. The fourth person from the left is believed to be Mary Everett and the fifth person is believed to be Bunny Brown.
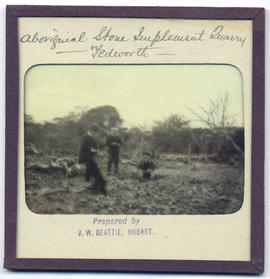
Lantern slide of an aboriginal implement quarry at Tedworth. Prepared by J.W. Beattie (1859-1930) whose studio locations were Elizabeth Street, Hobart from 1891-1920, Murray Street from 1921-40 and Cat and Fiddle until 1994.
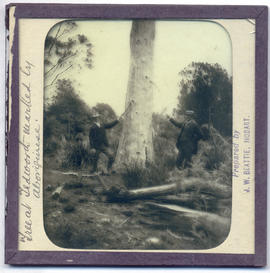
Lantern slide of a tree marked by aborigines at Tedworth. Prepared by J.W. Beattie (1859-1930) whose studio locations were Elizabeth Street, Hobart from 1891-1920, Murray Street from 1921-40 and Cat and Fiddle until 1994.
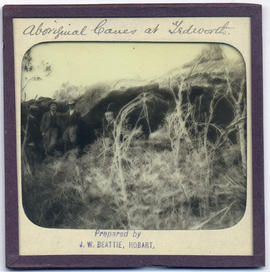
Lantern slide of aboriginal caves at Tedworth. Prepared by J.W. Beattie (1859-1930) whose studio locations were Elizabeth Street, Hobart from 1891-1920, Murray Street from 1921-40 and Cat and Fiddle until 1994.
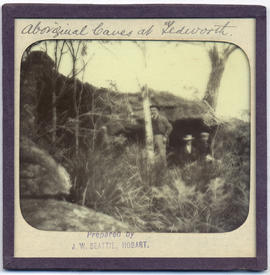
Lantern slide of aboriginal caves at Tedworth. Prepared by J.W. Beattie (1859-1930) whose studio locations were Elizabeth Street, Hobart from 1891-1920, Murray Street from 1921-40 and Cat and Fiddle until 1994.
Lantern slide of the death of Lieutenant Governor David Collins, 1810. From The Derwent Star, and Van Diemen’s Land Intelligencer no. 7, Tuesday April 3rd 1810. Prepared by J.W. Beattie (1859-1930) whose studio locations were Elizabeth Street, Hobart from 1891-1920, Murray Street from 1921-40 and Cat and Fiddle until 1994.
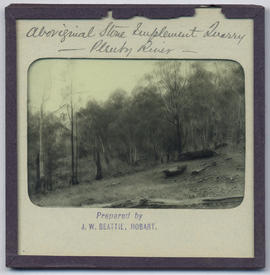
Lantern slides of Tasmanian aboriginal stone implement quarry, Plenty river. Prepared by J.W. Beattie (1859-1930) whose studio locations were Elizabeth Street, Hobart from 1891-1920, Murray Street from 1921-40 and Cat and Fiddle until 1994.
Lantern slides of Tasmanian aboriginal stone implement quarry, Plenty river. Prepared by J.W. Beattie (1859-1930) whose studio locations were Elizabeth Street, Hobart from 1891-1920, Murray Street from 1921-40 and Cat and Fiddle until 1994.
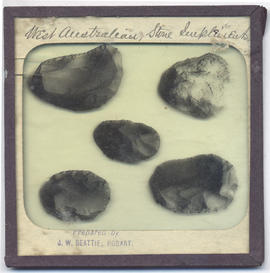
Lantern slide of West Australian aboriginal stone implements. Prepared by J.W. Beattie (1859-1930) whose studio locations were Elizabeth Street, Hobart from 1891-1920, Murray Street from 1921-40 and Cat and Fiddle until 1994.
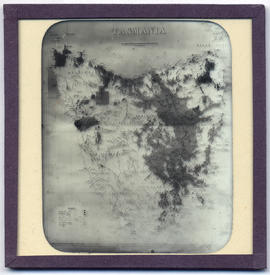
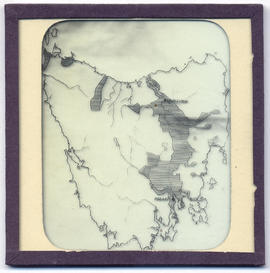
Lantern slide of maps of Tasmania. Prepared by J.W. Beattie (1859-1930) whose studio locations were Elizabeth Street, Hobart from 1891-1920, Murray Street from 1921-40 and Cat and Fiddle until 1994.
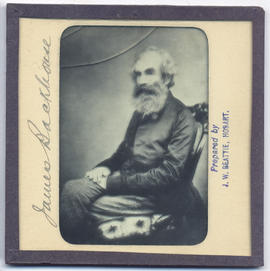
Lantern slide of James Backhouse. Prepared by J.W. Beattie (1859-1930) whose studio locations were Elizabeth Street, Hobart from 1891-1920, Murray Street from 1921-40 and Cat and Fiddle until 1994.
Lantern slide of maps of Tasmania. Prepared by J.W. Beattie (1859-1930) whose studio locations were Elizabeth Street, Hobart from 1891-1920, Murray Street from 1921-40 and Cat and Fiddle until 1994.
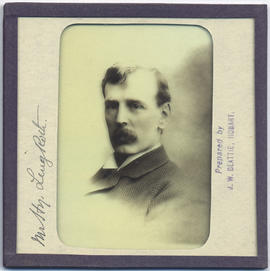
Lantern slide photograph of Henry Ling Roth. Prepared by J.W. Beattie (1859-1930) whose studio locations were Elizabeth Street, Hobart from 1891-1920, Murray Street from 1921-40 and Cat and Fiddle until 1994.
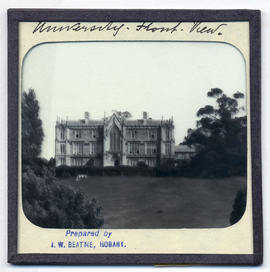
Lantern slides of the University of Tasmania, Queen's Domain, Hobart. Views of exterior and laboratories and library. Prepared by J.W. Beattie (1859-1930) whose studio locations were Elizabeth Street, Hobart from 1891-1920, Murray Street from 1921-40 and Cat and Fiddle until 1994 (Collection Pr.S.Uni/1-8)