Mostrar 423 resultados

Descrição arquivística
Sub-item Com objeto digital
Previsualizar a impressão Ver:

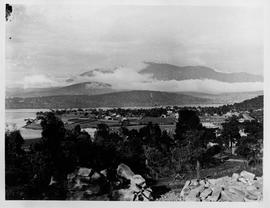
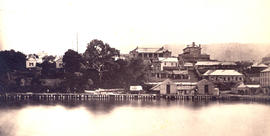
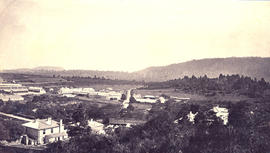
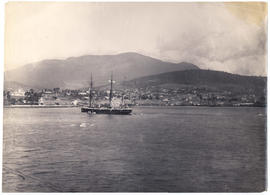
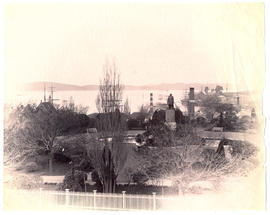
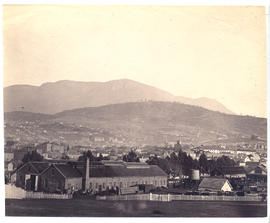
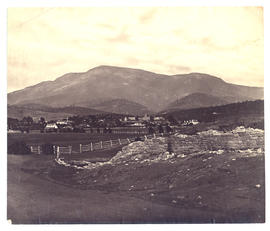
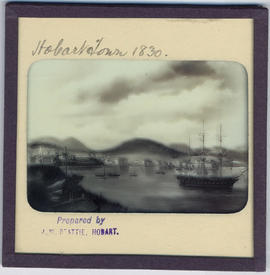
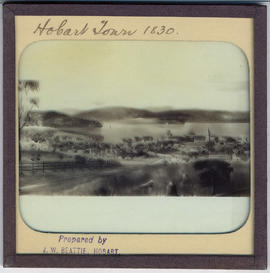
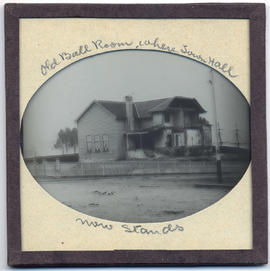
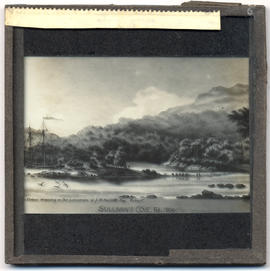
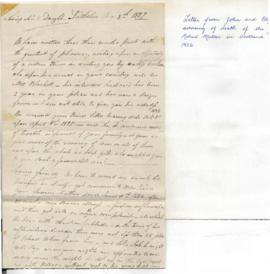
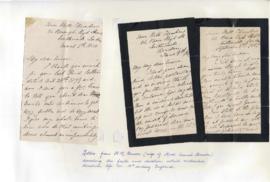
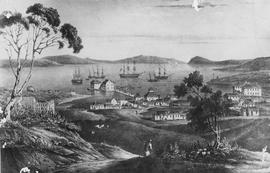
Photograph of a sketch of Old Hobart town

A view of Hobart Town by Irish born convict-artist Alan Carswell (1823), showing the colony establishing itself around the mouth of Sullivans Cove in the early 1820s.

Aerial view of the Zinc Works

Aerial view of the Zinc Works at Derwent Park. Looking down the Derwent River toward the Tasman Bridge. Showing Self's Point and Cornelian Bay Cemetery

Lindisfarne Jetty

Photograph of Beltana or Lindisfarne jetty showing two young children playing in the foreground. Mt Wellington in the background.

Diaries of Jorgen Jorgensen

  • AU TAS UTAS SPARC M11-3-2
  • Sub-item
  • 1826-1827
  • Parte de Meston Papers

Copies of diaries of Jorgen Jorgensen, including Journey to Ouse Plateau, Repat of Jorgensen to V.D.L. Co. on route between Hobart and Circular Head, and Journal kept while exploring from Circular Head to the Pieman River, 1826-7.

Archibald Lawrence Meston

View from Mr. Robert's garden, West Hobart

Photograph from the collection of James Backhouse Walker of a view of Hobart looking towards the Eastern Shore. The panorama has been taken from Mr. Roberts' garden with various shrubs and a Norfolk Island pine in the foreground. Henry Hall Baily is the photographer. He had studios in Elizabeth and Liverpool Streets Hobart from 1865 until 1918.

James Backhouse Walker

Hobart streetscape in snow

Photograph from the collection of James Backhouse Walker of a Hobart streetscape in snow - looking towards Mt Nelson and Sandy Bay.

James Backhouse Walker

Hobart, looking towards St. George's Hill

Photograph from the collection of James Backhouse Walker of a view of Hobart, looking towards St. George's Hill, Battery Point. Showing St Georges Church and James Luckman's windmill probably taken in the 1870s.

James Backhouse Walker

Mt. Wellington from St. George's Hill

Photograph from the collection of James Backhouse Walker of a view of Mt. Wellington from St. George's Hill with Hawthorn Cottage in the foreground and Bishopscourt - Garden Crescent and Davey Street Chapel in the background (according to notes on the reverse). The photographer was the Anson Brothers, whose firm was located in Liverpool, Collins and Elizabeth Streets between 1878 and 1891.

James Backhouse Walker

Hobart from Huon Road looking east

Photograph from the collection of James Backhouse Walker of a view of Hobart from Huon Road looking east in about 1879, according to notes on the reverse.

James Backhouse Walker

St. John's Church Goulburn Street

Photograph of St. John's Church Goulburn Street, Hobart taken c1880 the photographers were Anson brothers whose firm was located in Liverpool, Collins and Elizabeth Streets between 1878 and 1891

Anson Brothers

Old St. David's Cathedral

Photograph of Macquarie Street, Hobart looking east towards Elizabeth Street from the Civil Court in about 1880. The photographer was Alfred Winter who had studios in Bathurst, Elizabeth and Liverpool Streets from 1869 until 1880.

Alfred Winter

Bank of Australasia and Macquarie House

Photograph of Macquarie Street, Hobart looking south in about 1870. The Bank of Australasia and Macquarie House are two of the buildings featured. The photographer is Henry Hall Baily who had studios in Elizabeth and Liverpool Streets between 1865 and 1918.

Henry Hall Baily

Commercial Bank

Photograph of Macquarie Street, Hobart looking south from the corner of Elizabeth Street c. 1870. Some of Franklin Square on left Commercial Bank on right. The photographers were Anson Brothers whose firm was located in Liverpool, Collins and Elizabeth Streets between 1878 and 1891.

Anson Brothers

Commercial Bank

Photograph of the Commercial Bank, Macquarie Street, Hobart looking south from the corner of Elizabeth Street in c1877 after old St. Davids Cathedral was pulled down. The photograph is attributed to Henry Hall Baily who had studios in Elizabeth and Liverpool Streets Hobart from 1865 until 1918.

Henry Hall Baily

Tasmanian Temperance Alliance

Photograph of the first Tasmanian Temperance Alliance building, Macquarie Street Hobart

Henry Hall Baily

Buildings on the corner of Macquarie and Murray Streets

Photograph of buildings on corner of Macquarie and Murray Streets, Hobart c. 1877. Photographed by Henry Hall Baily who had studios in Elizabeth and Liverpool Streets, Hobart from 1865 until 1918.

Henry Hall Baily

Perkins and Nephew Wholesale & Retail Drapers and Grocers

Photograph of the Emporium of Perkins and Nephew Wholesale & Retail Drapers and Grocers established in 1826, situated on the corner of Watchorn and Liverpool Street Hobart, taken in 1881. The photographers were Anson Brothers Portrait and Landscape Photographers Hobart Town whose firm was located in Liverpool, Collins and Elizabeth Streets between 1878 and 1891.

Murray Street with horse drawn carriages

Photograph of Murray Street, Hobart in 1881 with a row of horse drawn carriages outside the Hobart Savings Bank, Masonic Temple and the Derwent and Tamar Buildings with Webb's hotel (later Hadley's Orient Hotel) in the distance.

Ship Inn

Photograph of the Ship Inn on the corner of Elizabeth and Collins Streets, Hobart in about 1881. The photographer is Alfred Winter who had studios in Bathurst, Elizabeth and Liverpool Streets from 1869 until 1891.

Cataract Bridge and Launceston

Photograph of Launceston, Tasmania from beyond the Cataract Bridge. The photographers were Anson Brothers who had studios in Liverpool, Collins and Elizabeth Streets, Hobart, between 1878 and 1891.

Anson Brothers

Public Buildings Launceston

Photograph of the Public Buildings in Launceston, Tasmania. The Criterion Hotel is in the background. The photographers were Anson Brothers who had studios in Liverpool, Collins and Elizabeth Streets, Hobart, between 1878 and 1891.

Anson Brothers

Rocks on Mount Wellington

Photograph rocks on Mount Wellington. The photographer was Albert Sargeant who had studios in Macquarie Street, Hobart and George Street, Launceston between 1886 and 1913.

Albert Sargeant

Track to Fern Tree Bower

Photograph of the track to Fern Tree Bower, Mount Wellington before taken prior to 1870

James Backhouse Walker

Track to Fern Tree Bower, Mt Wellington

Photograph of the track to Fern Tree Bower, Mount Wellington before taken prior to 1879 by Anson Brothers who had studios in Liverpool, Collins, and Elizabeth Streets between 1878 and 1891.

James Backhouse Walker

Derwent River above New Norfolk

Photograph of the Derwent River above New Norfolk, Tasmania, 1882. The photographer was Henry Hall Baily who had studios in Elizabeth and Liverpool Streets, Hobart from 1865 until 1918.

Henry Hall Baily

New Norfolk

Photograph of New Norfolk, Tasmania, c. 1880 from the opposite side of the River Derwent. The photographer was Alfred Winter who had studios in Bathurst, Elizabeth and Liverpool Streets from 1869 until 1891.

Alfred Winter

Maatsuyker Lighthouse

Photograph of the lighthouse on Maatsuyker Island, Tasmania, taken on the day of the opening of the lighthouse in 1891

Commandant's house and jetties at Port Arthur

Photograph of the commandant's house and jetties, Port Arthur c. 1880. The photographers are Anson Brothers., Portrait and Landscape Photographers, Hobart Town whose firm was located in Liverpool, Collins and Elizabeth Streets between 1878 and 1891.

Anson Brothers

Port Arthur

Thought to be a photograph of dwellings at Port Arthur

Waterfall Bay to Cape Huay

Panorama from Waterfall Bay to Cape Huay on the Tasman Peninsula. The photographer is John Watt Beattie.

John Watt Beattie

Government House from the shipyards

Photograph of Government House, Hobart, Tasmania in about 1870. Showing the shipyard in the foreground and Mount Direction behind.. The photographer was Henry Hall Baily who had studios in Elizabeth and Liverpool Streets, Hobart from 1865 until 1918.

Henry Hall Baily

Government House from the bay

Photograph of Government House Hobart taken from the bay below the Queen's Domain, c.1890s. The photographer was Henry Hall Baily who had studios in Elizabeth and Liverpool Streets, Hobart from 1865 until 1918.

Henry Hall Baily

Franklin Square and Hobart waterfront

Photograph from the collection of James Backhouse Walker of Franklin Square and the Hobart waterfront taken in about 1870 possibly from St. David's Cathedral according to a note on the reverse. The photographer is Henry Hall Baily who had studios in Elizabeth and Liverpool Streets Hobart from 1865 until 1918.

Henry Hall Baily

Sullivans Cove and Hunter Island

Photograph of Sullivans Cove and Hunter Island taken from the eastern end of Salamanca with garden in the foreground and two ships alongside the wharf. c.1880

Hobart waterfront

View of Hobart waterfront c.1880 showing docks, carts, ships at anchor and woodyard

Sullivans Cove, taken from HMS Nelson

Photograph of a ship with Sullivans Cove and Mount Wellington in the background taken from HMS Nelson in 1882. The photographer is Henry Hall Baily who had studios in Elizabeth and Liverpool streets Hobart from 1865 until 1918.

Henry Hall Baily

Franklin Square

Photograph of Franklin Square Hobart was taken by the Anson Brothers photographers, whose firm was located in Liverpool, Collins and Elizabeth Streets between 1878 and 1891.

Anson Brothers

Hobart Town from the Queen's Domain

Photograph of Hobart Town, Tasmania, from the Queen's Domain, looking down Macquarie Street in the 1850s. This photograph appears on page 27 of Allan Sierp's 'Colonial Life in Tasmania: Fifty Years of Photography 1855-1905' (Rigby, 1976)

Hobart Railway Station

Photograph of Hobart from the Queen's Domain with the railway station in the foreground, c. 1881. The photographers were Anson Brothers who had studios in Liverpool, Collins and Elizabeth Streets between 1878 and 1891.

Anson Brothers

New Town from New Town Invalid Asylum

Photograph from New Town Invalid Asylum, Tasmania in about 1882. The photographer was Henry Hall Baily who had studios in Elizabeth and Liverpool Streets, Hobart from 1865 until 1918.

Henry Hall Baily

Austin's Old Inn

Photograph of Austins Ferry, Hobart, Tasmania, with Austin's old Inn to the right. The photographer was Alfred Winter who had studios in Bathurst, Elizabeth and Liverpool Streets from 1869 until 1891.

James Backhouse Walker

Sandy Bay Road

Photograph of Sandy Bay Road, with St. Helena , later Wrest Point, on the left.

James Backhouse Walker

Queenborough, Sandy Bay

Photograph of Queenborough, Sandy Bay, Tasmania, c.1881. The photographer was Alfred Winter who had studios in Bathurst, Elizabeth and Liverpool Streets from 1869 until 1891.

James Backhouse Walker

Cascades' Female Factory

Photograph of the Cascades' Female Factory looking toward Mt Wellington with the Cascade Brewery in the distance. In 1828 a Female Factory opened on the outskirts of Hobart at Cascades. It became the colony's largest Factory, expanding by 1853 into five major courtyards accommodating 1000 women and 175 children. The photographer was J.W. Beattie (1859-1930) whose studios were in Elizabeth and Murray Streets between 1891 and 1940

John Watt Beattie

George Washington Walker

Lantern slide of George Washington Walker (1800-1859). Prepared by J.W. Beattie (1859-1930) whose studio locations were Elizabeth Street, Hobart from 1891-1920, Murray Street from 1921-40 and Cat and Fiddle until 1994.

John Watt Beattie

Hobart Town Harbour, Van Diemen's Land

Lantern slide of Hobart Town Harbour, Van Diemen's Land, in 1830. Prepared by J.W. Beattie (1859-1930) whose studio locations were in Elizabeth Street, Hobart from 1891-1920, Murray Street from 1921-40 and Cat and Fiddle Arcade, Hobart, until 1994.

John Watt Beattie

Hobart Town, Van Diemen's Land in 1830

Lantern slide of early print of Hobart Town, Van Diemen's Land in 1830. From the collection of James Backhouse Walker. Prepared by J.W. Beattie (1859-1930) whose studio locations were in Elizabeth Street, Hobart from 1891-1920, Murray Street from 1921-40 and Cat and Fiddle Arcade, Hobart, until 1994.

John Watt Beattie

Hobart Town, Van Diemen's Land, from Old Wharf in 1839

Lantern slide of Hobart Town, Van Diemen's Land, from Old Wharf in 1839. From the collection of James Backhouse Walker. Prepared by J.W. Beattie (1859-1930) whose studio locations were in Elizabeth Street, Hobart from 1891-1920, Murray Street from 1921-40 and Cat and Fiddle Arcade, Hobart, until 1994.

John Watt Beattie

Liverpool Street, Hobart

Lantern slide of Liverpool Street, Hobart. Prepared by J.W. Beattie (1859-1930) whose studio locations were Elizabeth Street, Hobart from 1891-1920, Murray Street from 1921-40 and Cat and Fiddle until 1994.

John Watt Beattie

Old Ball Room where Town Hall now stands, Hobart

Lantern slide from the collection of James Backhouse Walker of the demolition of the old ball room where the Town Hall now stands, Hobart, Tasmania. Thought to have been prepared by J.W. Beattie (1859-1930) whose studio locations were in Elizabeth Street, Hobart from 1891-1920, Murray Street from 1921-40 and Cat and Fiddle Arcade, Hobart, until 1994.

John Watt Beattie

Letters to James Backhouse Walker from his mother Sarah Benson Walker and grandmother Esther Mathers

Letters to James Backhouse Walker from his mother Sarah Benson Walker and grandmother Esther Mather congratulating him on attaining his majority on his twenty first birthday in 1862. From Walker Family Scrapbook compiled by Peter Benson Walker. Private collection. Page 36 b&c

James Backhouse Walker

Photograph of Mrs. Sarah Hammond

Photograph of Mrs. Sarah Hammond, youngest daughter of the Reverend Joseph Benson and sister of Ann Benson, aged 62.
From Walker Family Scrapbook compiled by Peter Benson Walker. Private collection. Page 10

Sarah Hammond

Establishment of the Hobart Town Savings Bank

Meeting held on 15th January 1845 to establish a savings bank in Hobart Town, Van Diemen's Land. It was unanimously resolved that it be called " The Hobart Town Savings Bank" Includes a list of trustees. From Walker Family Scrapbook compiled by Peter Benson Walker. Private collection. Page 26a

George Washington Walker

Letter from Sarah Benson to her sister Ann Mather

Letter from Sarah Benson to her sister Ann Mather, London, July 1817 describing in detail the confinement of her sister Isabella Phytall. From Walker Family Scrapbook compiled by Peter Benson Walker. Private collection. Page 7

Ann Mather

Letter from John and Elspeth Arneil

Letter from John and Elspeth Arneil advising of the death of Robert Mather's father Andrew in Scotland on June 11th 1826. From Walker Family Scrapbook compiled by Peter Benson Walker. Private collection. Page 20

John Arneil

Letters from H.M. Benson

Letters from H.M. Benson, wife of the Reverend Samuel Benson, to her niece, revealing the faith and devotion which motivated christian life in 19th century England. From Walker Family Scrapbook compiled by Peter Benson Walker. Private collection. Page 11

H.M. Benson

William Allen : death of cows

Extract of a letter , from Francis Cotton on the subject of the death of his cows in Australia. Poisoned by a noxious plant that grows in damp marshy places. Suspected a small fungus that makes the mucus membranes of the stomach peel off.

Tasmanian Aboriginal stone implements

Lantern slide of Tasmanian aboriginal stone implements. Prepared by J.W. Beattie (1859-1930) whose studio locations were Elizabeth Street, Hobart from 1891-1920, Murray Street from 1921-40 and Cat and Fiddle until 1994.

John Watt Beattie

Tasmanian Aboriginal woman

Lantern slide of a Tasmanian aboriginal woman. Prepared by J.W. Beattie (1859-1930) whose studio locations were Elizabeth Street, Hobart from 1891-1920, Murray Street from 1921-40 and Cat and Fiddle until 1994.

John Watt Beattie

Aboriginal implement quarry

Lantern slide of an aboriginal implement quarry at Tedworth. Prepared by J.W. Beattie (1859-1930) whose studio locations were Elizabeth Street, Hobart from 1891-1920, Murray Street from 1921-40 and Cat and Fiddle until 1994.

John Watt Beattie

Resultados 101 a 200 de 423